ComfyUI Workflows
Browse real AI workflows from Flux, SDXL, Pony, ControlNet, video generation and commercial AI creators.

Flux Kontext + PuLID + Detail Daemon — Character LoRA Dataset Generator (164+ images)
Running Kontext ReferenceLatent conditioning through standard PuLID throws an error aboutunexpected conditioning format. Fix: patch pulidflux.py to add timestep_zero_index kwargsupport and generation-token-only injection mode. Full patch instructions in the linked Article.━━━ HARDWARE REQUIREMENTS ━━━• Minimum: 16GB VRAM (will be slow, may need to reduce steps/resolution)• Recommended: 24GB+ VRAM (RTX 3090/4090)• Ideal: 48–96GB VRAM (A100, H100, RTX 6000 Ada)• RAM: 32GB+ system RAM• Storage: ~22GB for all models + 5–10GB per batch run output━━━ REQUIRED MODELS ━━━Place in the specified ComfyUI subdirectory:• models/unet/ — flux1-dev-kontext_fp8_scaled.safetensors (~17GB) [HuggingFace: black-forest-labs]• models/vae/ — ae.safetensors (~335MB) [HuggingFace: black-forest-labs/FLUX.1-dev]• models/clip/ — clip_l.safetensors (~246MB) + t5xxl_fp8_e4m3fn_scaled.safetensors (~4.7GB)• models/loras/ — flux_realism_lora.safetensors (XLabs — CivitAI)• models/loras/ — fluxRealSkin_v2.safetensors (CivitAI)• models/pulid/ — pulid_flux_v0.9.0.safetensorsInsightFace weights download automatically on first run (internet required for first execution only).━━━ REQUIRED CUSTOM NODES ━━━• ComfyUI-PuLID-Flux (with pulidflux.py patch — see Article)• ComfyUI-Detail-Daemon• ComfyUI-Kontext (ReferenceLatent + FluxKontextImageScale — built into recent ComfyUI)━━━ TO USE ━━━1. Place 3 reference images in ComfyUI/input/: — Node 4: full/3-quarter body reference — Node 30: head+shoulders face reference — Node 20: tight face crop for PuLID (face fills 70%+ of frame, near-frontal angle)2. Edit CLIPTextEncode (Node 7) with your character description3. Run a single image first to verify setup, then queue the full batch━━━ KEY PARAMETERS ━━━PuLID — Node 24: weight 0.73 (0.35–0.75 useful range) — higher = stronger identity, lower = more variation start_at 0.05 — leave at 0.05; lets structure form before identity locks end_at 0.72 — lower if skin looks plastic; releases final texture passes from PuLID constraintDetail Daemon — Node 50: detail_amount 0.40 (0.20–0.55 range) — sweet spot; 0.50+ = over-sharpened start 0.25 / end 0.80 — active across mid-sampling where detail resolvesLoRA strengths: XLabs Realism (Node 40): 0.60 (0.35–0.75 useful range) FluxRealSkin v2 (Node 41): 0.45 (0.25–0.55 useful range) Note: these two compound — if you raise one, slightly lower the otherSampling: 25 steps, euler_ancestral, simple scheduler, guidance 2.5━━━ FILES INCLUDED ━━━• workflow_ui_format.json — import directly into ComfyUI Generates 164 photorealistic identity-consistent images from 3 reference photos. Built for high-quality synthetic training datasets for Wan 2.2 / HunyuanVideo character LoRAs — but outputs are also great standalone character content. Developed across 16 test iterations for maximum photorealism, identity consistency, and anatomical accuracy. ━━━ WHAT IT DOES ━━━ Combines three techniques that individually exist in the community but haven't been documented together in a single production-ready batch pipeline: • Flux Kontext DUAL reference chain — body ref + face ref simultaneously, stronger than single ref • PuLID Flux face identity injection — biometric-level face locking via InsightFace embeddings • Detail Daemon sampler augmentation — forces skin pores, hair strands, iris texture to resolve • XLabs Flux Realism LoRA + FluxRealSkin v2 stacked for photographic skin rendering ━━━ OUTPUT ━━━82 prompts × 2 seeds = 164 images:• 10 extreme close-ups (frontal, 90° profile left/right, dutch tilt, high angle, low angle, head down)• 15 portraits head+shoulders (laughing, looking away, over-shoulder, near-profile, editorial, candid)• 15 medium waist-up shots• 12 full body — 768×1152 PORTRAIT canvas so subjects look tall, not short• 12 revealing/fashion outfits• 12 lifestyle/candid• 6 lighting moods (golden hour, dramatic shadow, neon night, overcast, backlit, morning window)━━━ KEY TECHNICAL FINDINGS ━━━1. PuLID must be applied AFTER LoRAs — LoRAs define rendering style first, PuLID locks face into it2. Detail Daemon wraps the SAMPLER output of KSamplerSelect, NOT the sigmas — wrong wiring = 400 error3. SamplerCustomAdvanced + BasicGuider is REQUIRED when using PuLID (standard KSampler won't work)4. 768×1152 portrait canvas for full body — square 1024×1024 makes subjects look short/wide━━━ COMPATIBILITY WARNING — READ BEFORE INSTALLING ━━━The standard ComfyUI-PuLID-Flux node is NOT compatible with Flux Kontext out of the box.Running Kontext ReferenceLatent conditioning through standard PuLID throws an error aboutunexpected conditioning format. Fix: patch pulidflux.py to add timestep_zero_index kwargsupport and generation-token-only injection mode. Full patch instructions in the linked Article.━━━ HARDWARE REQUIREMENTS ━━━• Minimum: 16GB VRAM (will be slow, may need to reduce steps/resolution)• Recommended: 24GB+ VRAM (RTX 3090/4090)• Ideal: 48–96GB VRAM (A100, H100, RTX 6000 Ada)• RAM: 32GB+ system RAM• Storage: ~22GB for all models + 5–10GB per batch run output━━━ REQUIRED MODELS ━━━Place in the specified ComfyUI subdirectory:• models/unet/ — flux1-dev-kontext_fp8_scaled.safetensors (~17GB) [HuggingFace: black-forest-labs]• models/vae/ — ae.safetensors (~335MB) [HuggingFace: black-forest-labs/FLUX.1-dev]• models/clip/ — clip_l.safetensors (~246MB) + t5xxl_fp8_e4m3fn_scaled.safetensors (~4.7GB)• models/loras/ — flux_realism_lora.safetensors (XLabs — CivitAI)• models/loras/ — fluxRealSkin_v2.safetensors (CivitAI)• models/pulid/ — pulid_flux_v0.9.0.safetensorsInsightFace weights download automatically on first run (internet required for first execution only).━━━ REQUIRED CUSTOM NODES ━━━• ComfyUI-PuLID-Flux (with pulidflux.py patch — see Article)• ComfyUI-Detail-Daemon• ComfyUI-Kontext (ReferenceLatent + FluxKontextImageScale — built into recent ComfyUI)━━━ TO USE ━━━1. Place 3 reference images in ComfyUI/input/: — Node 4: full/3-quarter body reference — Node 30: head+shoulders face reference — Node 20: tight face crop for PuLID (face fills 70%+ of frame, near-frontal angle)2. Edit CLIPTextEncode (Node 7) with your character description3. Run a single image first to verify setup, then queue the full batch━━━ KEY PARAMETERS ━━━PuLID — Node 24: weight 0.73 (0.35–0.75 useful range) — higher = stronger identity, lower = more variation start_at 0.05 — leave at 0.05; lets structure form before identity locks end_at 0.72 — lower if skin looks plastic; releases final texture passes from PuLID constraintDetail Daemon — Node 50: detail_amount 0.40 (0.20–0.55 range) — sweet spot; 0.50+ = over-sharpened start 0.25 / end 0.80 — active across mid-sampling where detail resolvesLoRA strengths: XLabs Realism (Node 40): 0.60 (0.35–0.75 useful range) FluxRealSkin v2 (Node 41): 0.45 (0.25–0.55 useful range) Note: these two compound — if you raise one, slightly lower the otherSampling: 25 steps, euler_ancestral, simple scheduler, guidance 2.5━━━ FILES INCLUDED ━━━• workflow_ui_format.json — import directly into ComfyUI

【FLUX】KONTEXT
✨ FLUX — Kontext Image Edit — Simple WorkflowA clean, all-in-one FLUX Kontext Image Edit workflow built entirely with the UmeAiRT Toolkit for ComfyUI.Only 8 nodes. No spaghetti wires. Just load your model, write your prompt, and hit generate.⚠️ IMPORTANT — Nodes 2.0 RequiredThis workflow is built for the Nodes 2.0 (Vue) interface of ComfyUI. If you don't enable it, the workflow may have display problems.How to activate Nodes 2.0:Open ComfyUIGo to Settings (⚙️ icon, bottom-left)Find "Use Nodes V2 (Vue)" and toggle it ONRefresh the pageLoad the workflowIf you prefer the classic interface, check out my Legacy version of this workflow instead (link).🎯 FeaturesImage-to-Image generationAutomatic download of models in auto versionBuilt-in SeedVR2 upscaler — high-quality tiled upscaling (toggleable on/off) Slower than a classic upscaler, but significantly better qualityFull metadata embedding — your images are saved with all generation parameters, ready for online publishing and remixing3 LoRA slots — with individual on/off toggles and strength control and you can connect as many other lora modules to each other for as many LoRA as you want.📦 Custom Node RequiredOnly one custom node to install:👉 ComfyUI-UmeAiRT-ToolkitInstall via ComfyUI Manager (search "UmeAiRT") or use the UmeAiRT Auto-Installer.The Toolkit packages everything internally — upscaler, face detailer, metadata saver. No other custom nodes needed.📂 Files you need (in manual version)Files for "base" version :Model : flux1-kontext-dev-fp8-e4m3fn.safetensorsin ComfyUI\models\diffusion_modelsCLIP : t5xxl_fp8_e4m3fn_scaled.safetensors and clip_l.safetensorsin ComfyUI\models\clipFiles for GGUF version :Recommendation :GGUF_Model : G8, G5, G4in ComfyUI\models\unetCLIP : Q8, Q6, Q5, Q4, Q3in ComfyUI\models\clipText encoder : ViT-L-14-TEXT-detail-improved-hiT-GmP-TE-only-HF.safetensorsin ComfyUI\models\clipVAE : ae.safetensorsin ComfyUI\models\vae

2X Faster Flux.1 Kontext! Generate High-Quality Images in 8 Steps

Manga Coloring with Flux.1 Kontext Workflow

Anime \ Manga Image to Realistic Style workflow using Flux.1 Kontext

FLUX.1 KONTEXT CLOTH SWAP! (EASY CatVTon Alternative)
How to use workflow refer to the video

Convert Photos to Anime, Ghibli, or Retro Comic with Flux.1 Kontext
Watch the video for how to use the workflow
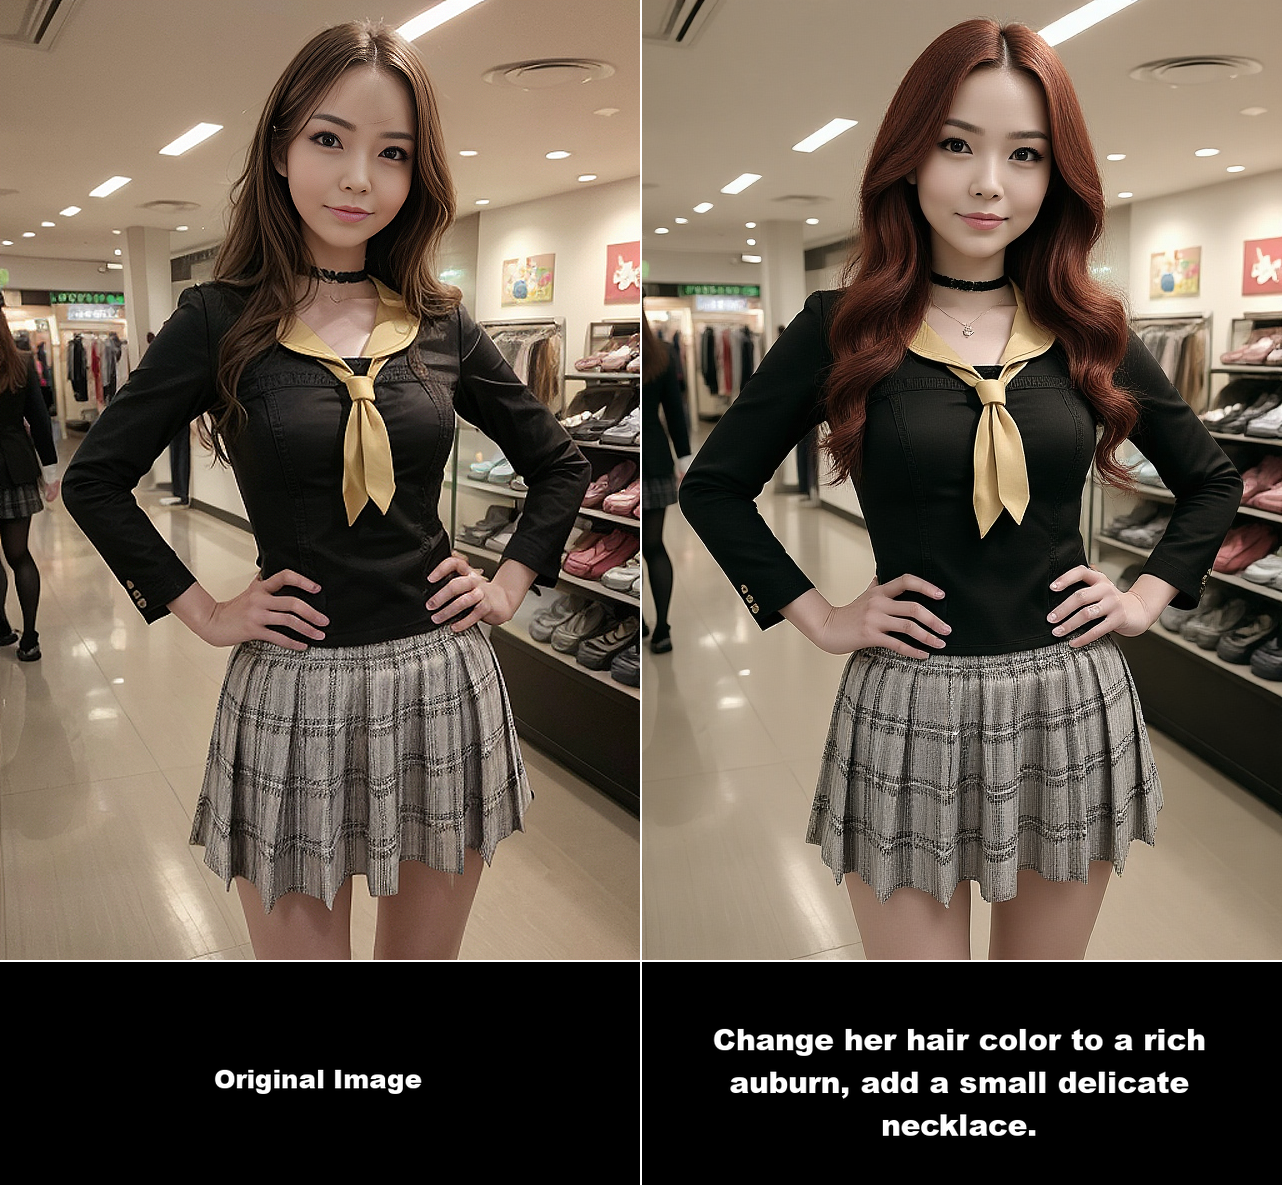
FLUX.1 Kontext workflow: DEMAND Any Change From Your Images (For Beginner)
Watch the video to understand how to use the workflow

FLUX.1 Kontext Generation Workflow for Beginner
Watch the video for how to use the workfkow

ComfyUI - Lossless Edit
Remove/edit any object with lossless quality - Flux Kontext Dev & Flow Assistor (ComfyUI)Instead of editing the whole image at once, which reduces output quality and size and loses details, use a unique workflow to edit a specially selected area of the image; do not touch other parts of the image. Change colors, remove watermarks and logos, fix artifacts, remove text, fill broken parts, etc.Early access on Patreon (support): https://www.patreon.com/mm744
Slightly blurred image high-definition magnification【6K】
This is a workflow for upscaling slightly blurred images to 6K pixels in high definition1. Simply upload the imageUsageNote: Suitable for slightly blurred images, not suitable for very blurry imagesYou can click on 【Test Effect】, and if you are satisfied with the result, you can download the workflow to deploy locally!

Image stitching and fusion (Kontext & Laoyang LoRA)
🎥 YouTube Video TutorialWant to know what this workflow actually does and how to start fast? This video explains what the tool is, how to launch the workflow instantly, and shares my core design logic — no local setup, no complicated environment. Everything starts directly on RunningHub, so you can experience it in action first.👉 YouTube Tutorial: https://youtu.be/lUsv2Klu-hoBefore you begin, I recommend watching the video thoroughly — getting the full context helps you understand the tool faster and avoid common detours.⚙️ RunningHub WorkflowTry the workflow online right now — no installation required.👉 Workflow: https://www.runninghub.ai/post/1966072844314734593/?inviteCode=rh-v1111If the results meet your expectations, you can later deploy it locally for customization.🎁 Fan Benefits: Register to get 1000 points + daily login 100 points — enjoy 4090 performance and 48 GB super power!📺 Bilibili Updates (Mainland China & Asia-Pacific)If you’re in the Asia-Pacific region, you can watch the video below to see the workflow demonstration and creative breakdown.📺 Bilibili Video: https://www.bilibili.com/video/BV1vEHizaE7L/☕ Support Me on Ko-fiIf you find my content helpful and want to support future creations, you can buy me a coffee ☕. Every bit of support helps me keep creating — just like a spark that can ignite a blazing flame.👉 Ko-fi: https://ko-fi.com/aiksk💼 Business ContactFor collaboration or inquiries, please contact aiksk95 on WeChat.🎥 YouTube 视频教程📝 主题:超绝 LoRA,Kontext 图像融合增强工作流更新,光影完美,开源免费方案媲美 NanoBanana想了解这个工作流到底是怎样的工具,以及如何快速启动? 视频主要介绍 工具定位、快速启动方法 和 我的构筑思路。 我们会直接在 RunningHub 上进行演示,让你第一时间看到实际效果。👉 YouTube 教程: https://youtu.be/lUsv2Klu-ho开始前建议尽量完整地观看视频 —— 把握整体思路会更快上手,也能少走常见弯路。⚙️ 在线体验工作流现在就可以在线体验,无需安装。👉 工作流: https://www.runninghub.ai/post/1966072844314734593/?inviteCode=rh-v1111打开上方链接即可直接运行该工作流,实时查看生成效果。 如果觉得效果理想,你也可以在本地进行自定义部署。🎁 粉丝福利: 注册即送 1000 累积分,每日登录 100 累积分,畅玩 4090 体验 48 G 超级性能!📺 Bilibili 更新(中国大陆及南亚太地区)如果你在中国大陆或南亚太地区,可以通过下方视频查看该工作流的实测效果与构思讲解。📺 B站视频: https://www.bilibili.com/video/BV1vEHizaE7L/我会在 夸克网盘 持续更新模型资源:👉 https://pan.quark.cn/s/20c6f6f8d87b这些资源主要面向本地用户,方便进行创作与学习。

Kontext-Inpainting
🎥 YouTube Video TutorialWant to know what this workflow actually does and how to start fast?This video explains what the tool is, how to launch the workflow instantly, and shares my core design logic — no local setup, no complicated environment.Everything starts directly on RunningHub, so you can experience it in action first.👉 YouTube Tutorial: https://youtu.be/D7zVIe-HgzkBefore you begin, I recommend watching the video thoroughly — getting the full context helps you understand the tool faster and avoid common detours.⚙️ RunningHub WorkflowTry the workflow online right now — no installation required.👉 Workflow: https://www.runninghub.ai/post/1945406215578951682/?inviteCode=rh-v1111If the results meet your expectations, you can later deploy it locally for customization.🎁 Fan Benefits:Register to get 1000 points + daily login 100 points — enjoy 4090 performance and 48 GB super power!📺 Bilibili Updates (Mainland China & Asia-Pacific)If you’re in the Asia-Pacific region, you can watch the video below to see the workflow demonstration and creative breakdown.📺 Bilibili Video: https://www.bilibili.com/video/BV1xxubzhE4h/☕ Support Me on Ko-fiIf you find my content helpful and want to support future creations, you can buy me a coffee ☕.Every bit of support helps me keep creating — just like a spark that can ignite a blazing flame.👉 Ko-fi: https://ko-fi.com/aiksk💼 Business ContactFor collaboration or inquiries, please contact aiksk95 on WeChat.🎥 YouTube 视频教程想了解这个工作流到底是怎样的工具,以及如何快速启动?视频主要介绍 工具定位、快速启动方法 和 我的构筑思路。我们会直接在 RunningHub 上进行演示,让你第一时间看到实际效果。👉 YouTube 教程: https://youtu.be/D7zVIe-Hgzk开始前建议尽量完整地观看视频 —— 把握整体思路会更快上手,也能少走常见弯路。⚙️ 在线体验工作流现在就可以在线体验,无需安装。👉 工作流: https://www.runninghub.ai/post/1945406215578951682/?inviteCode=rh-v1111打开上方链接即可直接运行该工作流,实时查看生成效果。如果觉得效果理想,你也可以在本地进行自定义部署。🎁 粉丝福利:注册即送 1000 积分,每日登录 100 积分,畅玩 4090 体验 48 G 超级性能!📺 Bilibili 更新(中国大陆及南亚太地区)如果你在中国大陆或南亚太地区,可以通过下方视频查看该工作流的实测效果与构思讲解。📺 B站视频: https://www.bilibili.com/video/BV1xxubzhE4h/我会在 夸克网盘 持续更新模型资源:👉 https://pan.quark.cn/s/20c6f6f8d87b这些资源主要面向本地用户,方便进行创作与学习。
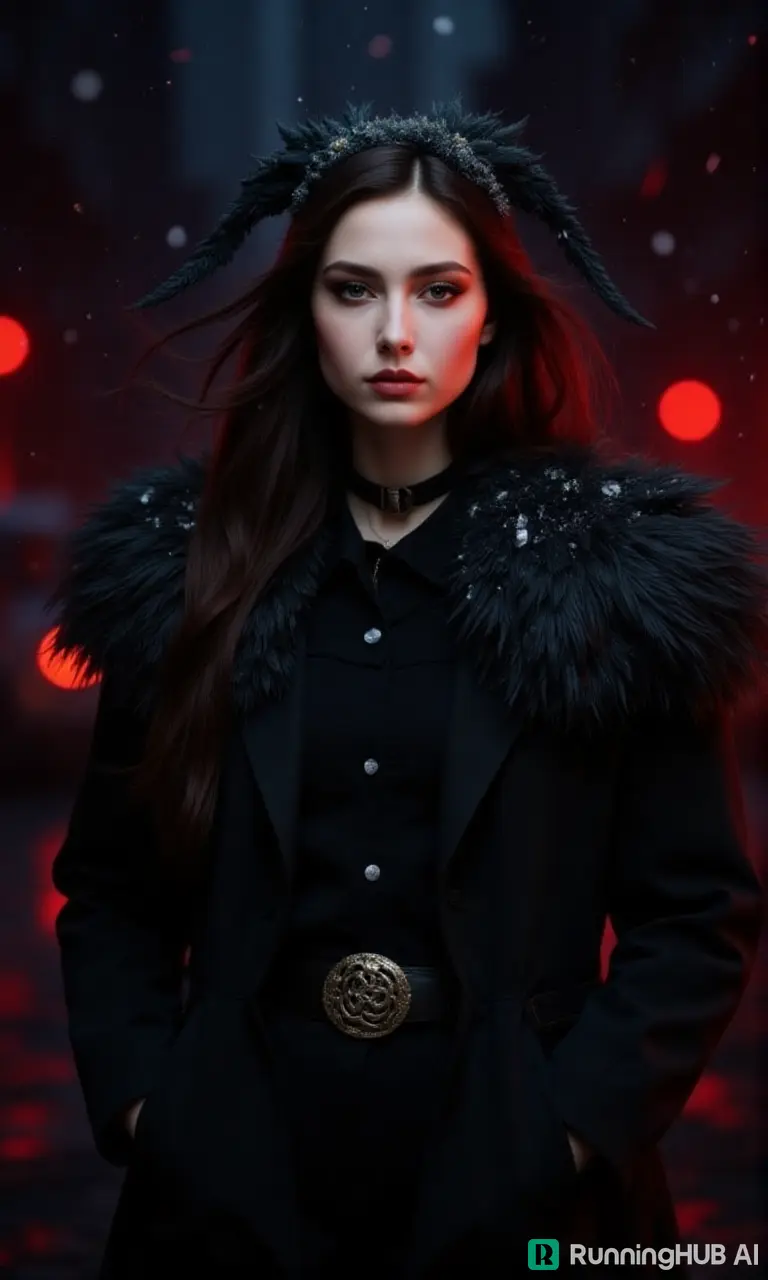
nunchaku Kontext 3× Acceleration
🎥 YouTube Video TutorialWant to know what this workflow actually does and how to start fast?This video explains what the tool is, how to launch the workflow instantly, and shares my core design logic — no local setup, no complicated environment.Everything starts directly on RunningHub, so you can experience it in action first.👉 YouTube Tutorial: https://youtu.be/J8GegswA4EEBefore you begin, I recommend watching the video thoroughly — getting the full context helps you understand the tool faster and avoid common detours.⚙️ RunningHub WorkflowTry the workflow online right now — no installation required.👉 Workflow: https://www.runninghub.ai/post/1940681407448641538/?inviteCode=rh-v1111If the results meet your expectations, you can later deploy it locally for customization.🎁 Fan Benefits:Register to get 1000 points + daily login 100 points — enjoy 4090 performance and 48 GB super power!📺 Bilibili Updates (Mainland China & Asia-Pacific)If you’re in the Asia-Pacific region, you can watch the video below to see the workflow demonstration and creative breakdown.📺 Bilibili Video: https://www.bilibili.com/video/BV18e37zVEsk/☕ Support Me on Ko-fiIf you find my content helpful and want to support future creations, you can buy me a coffee ☕.Every bit of support helps me keep creating — just like a spark that can ignite a blazing flame.👉 Ko-fi: https://ko-fi.com/aiksk💼 Business ContactFor collaboration or inquiries, please contact aiksk95 on WeChat.🎥 YouTube 视频教程想了解这个工作流到底是怎样的工具,以及如何快速启动?视频主要介绍 工具定位、快速启动方法 和 我的构筑思路。我们会直接在 RunningHub 上进行演示,让你第一时间看到实际效果。👉 YouTube 教程: https://youtu.be/J8GegswA4EE开始前建议尽量完整地观看视频 —— 把握整体思路会更快上手,也能少走常见弯路。⚙️ 在线体验工作流现在就可以在线体验,无需安装。👉 工作流: https://www.runninghub.ai/post/1940681407448641538/?inviteCode=rh-v1111打开上方链接即可直接运行该工作流,实时查看生成效果。如果觉得效果理想,你也可以在本地进行自定义部署。🎁 粉丝福利:注册即送 1000 积分,每日登录 100 积分,畅玩 4090 体验 48 G 超级性能!📺 Bilibili 更新(中国大陆及南亚太地区)如果你在中国大陆或南亚太地区,可以通过下方视频查看该工作流的实测效果与构思讲解。📺 B站视频: https://www.bilibili.com/video/BV18e37zVEsk/我会在 夸克网盘 持续更新模型资源:👉 https://pan.quark.cn/s/20c6f6f8d87b这些资源主要面向本地用户,方便进行创作与学习。

Image Fusion - Kontext & ACE++
🎥 YouTube Video TutorialWant to know what this workflow actually does and how to start fast?This video explains what the tool is, how to launch the workflow instantly, and shares my core design logic — no local setup, no complicated environment.Everything starts directly on RunningHub, so you can experience it in action first.👉 YouTube Tutorial: https://youtu.be/ZMYV7yAHsT0Before you begin, I recommend watching the video thoroughly — getting the full context helps you understand the tool faster and avoid common detours.⚙️ RunningHub WorkflowTry the workflow online right now — no installation required.👉 Workflow: https://www.runninghub.ai/post/1940386465027174401/?inviteCode=rh-v1111If the results meet your expectations, you can later deploy it locally for customization.🎁 Fan Benefits:Register to get 1000 points + daily login 100 points — enjoy 4090 performance and 48 GB super power!📺 Bilibili Updates (Mainland China & Asia-Pacific)If you’re in the Asia-Pacific region, you can watch the video below to see the workflow demonstration and creative breakdown.📺 Bilibili Video: https://www.bilibili.com/video/BV1uL3tzTEwk/☕ Support Me on Ko-fiIf you find my content helpful and want to support future creations, you can buy me a coffee ☕.Every bit of support helps me keep creating — just like a spark that can ignite a blazing flame.👉 Ko-fi: https://ko-fi.com/aiksk💼 Business ContactFor collaboration or inquiries, please contact aiksk95 on WeChat.🎥 YouTube 视频教程想了解这个工作流到底是怎样的工具,以及如何快速启动?视频主要介绍 工具定位、快速启动方法 和 我的构筑思路。我们会直接在 RunningHub 上进行演示,让你第一时间看到实际效果。👉 YouTube 教程: https://youtu.be/ZMYV7yAHsT0开始前建议尽量完整地观看视频 —— 把握整体思路会更快上手,也能少走常见弯路。⚙️ 在线体验工作流现在就可以在线体验,无需安装。👉 工作流: https://www.runninghub.ai/post/1940386465027174401/?inviteCode=rh-v1111打开上方链接即可直接运行该工作流,实时查看生成效果。如果觉得效果理想,你也可以在本地进行自定义部署。🎁 粉丝福利:注册即送 1000 积分,每日登录 100 积分,畅玩 4090 体验 48 G 超级性能!📺 Bilibili 更新(中国大陆及南亚太地区)如果你在中国大陆或南亚太地区,可以通过下方视频查看该工作流的实测效果与构思讲解。📺 B站视频: https://www.bilibili.com/video/BV1uL3tzTEwk/我会在 夸克网盘 持续更新模型资源:👉 https://pan.quark.cn/s/20c6f6f8d87b这些资源主要面向本地用户,方便进行创作与学习。

Kontext&Lora
🎥 YouTube Video TutorialWant to know what this workflow actually does and how to start fast?This video explains what the tool is, how to launch the workflow instantly, and shares my core design logic — no local setup, no complicated environment.Everything starts directly on RunningHub, so you can experience it in action first.👉 YouTube Tutorial: https://youtu.be/ZMYV7yAHsT0Before you begin, I recommend watching the video thoroughly — getting the full context helps you understand the tool faster and avoid common detours.⚙️ RunningHub WorkflowTry the workflow online right now — no installation required.👉 Workflow: https://www.runninghub.ai/post/1940383341097152513/?inviteCode=rh-v1111If the results meet your expectations, you can later deploy it locally for customization.🎁 Fan Benefits:Register to get 1000 points + daily login 100 points — enjoy 4090 performance and 48 GB super power!📺 Bilibili Updates (Mainland China & Asia-Pacific)If you’re in the Asia-Pacific region, you can watch the video below to see the workflow demonstration and creative breakdown.📺 Bilibili Video: https://www.bilibili.com/video/BV1uL3tzTEwk/☕ Support Me on Ko-fiIf you find my content helpful and want to support future creations, you can buy me a coffee ☕.Every bit of support helps me keep creating — just like a spark that can ignite a blazing flame.👉 Ko-fi: https://ko-fi.com/aiksk💼 Business ContactFor collaboration or inquiries, please contact aiksk95 on WeChat.🎥 YouTube 视频教程想了解这个工作流到底是怎样的工具,以及如何快速启动?视频主要介绍 工具定位、快速启动方法 和 我的构筑思路。我们会直接在 RunningHub 上进行演示,让你第一时间看到实际效果。👉 YouTube 教程: https://youtu.be/ZMYV7yAHsT0开始前建议尽量完整地观看视频 —— 把握整体思路会更快上手,也能少走常见弯路。⚙️ 在线体验工作流现在就可以在线体验,无需安装。👉 工作流: https://www.runninghub.ai/post/1940383341097152513/?inviteCode=rh-v1111打开上方链接即可直接运行该工作流,实时查看生成效果。如果觉得效果理想,你也可以在本地进行自定义部署。🎁 粉丝福利:注册即送 1000 积分,每日登录 100 积分,畅玩 4090 体验 48 G 超级性能!📺 Bilibili 更新(中国大陆及南亚太地区)如果你在中国大陆或南亚太地区,可以通过下方视频查看该工作流的实测效果与构思讲解。📺 B站视频: https://www.bilibili.com/video/BV1uL3tzTEwk/我会在 夸克网盘 持续更新模型资源:👉 https://pan.quark.cn/s/20c6f6f8d87b这些资源主要面向本地用户,方便进行创作与学习。

Image Stitching and Fusion (Kontext & enricos-nodes)
🎥 YouTube Video TutorialWant to know what this workflow actually does and how to start fast?This video explains what the tool is, how to launch the workflow instantly, and shares my core design logic — no local setup, no complicated environment.Everything starts directly on RunningHub, so you can experience it in action first.👉 YouTube Tutorial: https://youtu.be/IqHIoa1iOG8Before you begin, I recommend watching the video thoroughly — getting the full context helps you understand the tool faster and avoid common detours.⚙️ RunningHub WorkflowTry the workflow online right now — no installation required.👉 Workflow: https://www.runninghub.ai/post/1939667632876654594/?inviteCode=rh-v1111If the results meet your expectations, you can later deploy it locally for customization.🎁 Fan Benefits:Register to get 1000 points + daily login 100 points — enjoy 4090 performance and 48 GB super power!📺 Bilibili Updates (Mainland China & Asia-Pacific)If you’re in the Asia-Pacific region, you can watch the video below to see the workflow demonstration and creative breakdown.📺 Bilibili Video: https://www.bilibili.com/video/BV1oVgXzSEtt/☕ Support Me on Ko-fiIf you find my content helpful and want to support future creations, you can buy me a coffee ☕.Every bit of support helps me keep creating — just like a spark that can ignite a blazing flame.👉 Ko-fi: https://ko-fi.com/aiksk💼 Business ContactFor collaboration or inquiries, please contact aiksk95 on WeChat.🎥 YouTube 视频教程想了解这个工作流到底是怎样的工具,以及如何快速启动?视频主要介绍 工具定位、快速启动方法 和 我的构筑思路。我们会直接在 RunningHub 上进行演示,让你第一时间看到实际效果。👉 YouTube 教程: https://youtu.be/IqHIoa1iOG8开始前建议尽量完整地观看视频 —— 把握整体思路会更快上手,也能少走常见弯路。⚙️ 在线体验工作流现在就可以在线体验,无需安装。👉 工作流: https://www.runninghub.ai/post/1939667632876654594/?inviteCode=rh-v1111打开上方链接即可直接运行该工作流,实时查看生成效果。如果觉得效果理想,你也可以在本地进行自定义部署。🎁 粉丝福利:注册即送 1000 积分,每日登录 100 积分,畅玩 4090 体验 48 G 超级性能!📺 Bilibili 更新(中国大陆及南亚太地区)如果你在中国大陆或南亚太地区,可以通过下方视频查看该工作流的实测效果与构思讲解。📺 B站视频: https://www.bilibili.com/video/BV1oVgXzSEtt/我会在 夸克网盘 持续更新模型资源:👉 https://pan.quark.cn/s/20c6f6f8d87b这些资源主要面向本地用户,方便进行创作与学习。

AUTOMATED Flux-Kontext LoRA Training: My "Reverse Engineering" Workflow for Perfect Datasets
Hey everyone, I wanted to share a workflow I've been using to get incredibly precise results with Flux-Kontext LoRA training. This method is a game-changer for anyone struggling with dataset preparation.The Core Idea: Work Backwards and Automate EverythingThe standard approach to Flux-Kontext is to find a "before" image and then somehow create the "after" image (e.g., add an object, remove clothing). This is often the hardest part, especially if the AI is inconsistent in generating the specific change you want. Then you have to manually write all the sidecar text files.My method is to reverse the process and automate the entire pipeline.The Step-by-Step WorkflowLet's say you want to train a LoRA to remove a specific type of hat.Create Your "After" Folder (The Dataset): First, gather or create a set of images where the subject is wearing the hat you want to target. This is your starting point and will become your Dataset folder.Generate Your "Before" Folder (The Control Set) AND the Prompts: Now, take all the images from your Dataset folder and run them through a Flux-Kontext batch process. Your goal here is to undo the change. You would prompt it to "remove the hat," "give the person a clean hairstyle," etc. The clean, hatless images that come out are your Control images. The best part? The workflow automatically creates the necessary sidecar text file for every image pair as it goes.The Benefit of "Cleaning": A huge advantage of this method is that you're training the model to go from a potentially flawed "after" image to a perfect "before" image. This often teaches the LoRA to remove AI artifacts and imperfections, resulting in a much cleaner final output.Finalize and Train: You now have a perfectly paired set of Control and Dataset images, with all the sidecar text files written for you. Just add a few sample images, and you're ready to start training. The resulting LoRA will be highly specialized in performing that one specific task.Making This Workflow EasierManaging the Control images, Dataset images, and their corresponding text files can be a headache. You have to constantly click back and forth to make sure image_a.jpg matches with image_b.jpg and prompt_a.txt.To solve this, I developed a custom desktop application that lets you see all three at once in a single window. It’s a huge time-saver and completely removes the risk of mismatched files ruining a training run.If you're interested in streamlining this workflow, this tool and my more in-depth tutorials are available for my supporters on Patreon. You can check it out at Patreon.com/LoboForgeAI.Here is the video demo: https://vimeo.com/manage/videos/1134804036?fl=pl&fe=vlAlso, if you would like the "Takeitoff" LoRA to remove clothing its also available on my patreon.Give this workflow a try and let me know what kind of creative LoRAs you build with it

E-commerce- Kontext- Basic product integration diagram
Youtube:https://www.youtube.com/watch?v=UAnMcw_U-zcYou can click on the link below to try it out directly. If the effect is good, you can deploy it locallyoverseas: https://www.runninghub.ai/post/1982360512455426049/?inviteCode=sdhs0trbRegister through the above link to receive 1000RH coins, log in daily and receive an additional 100 coins for free!中国版:https://www.runninghub.cn/post/1982360512455426049/?inviteCode=sdhs0trb通过上述链接注册领1000RH币,每日登录再送100币,免费玩!
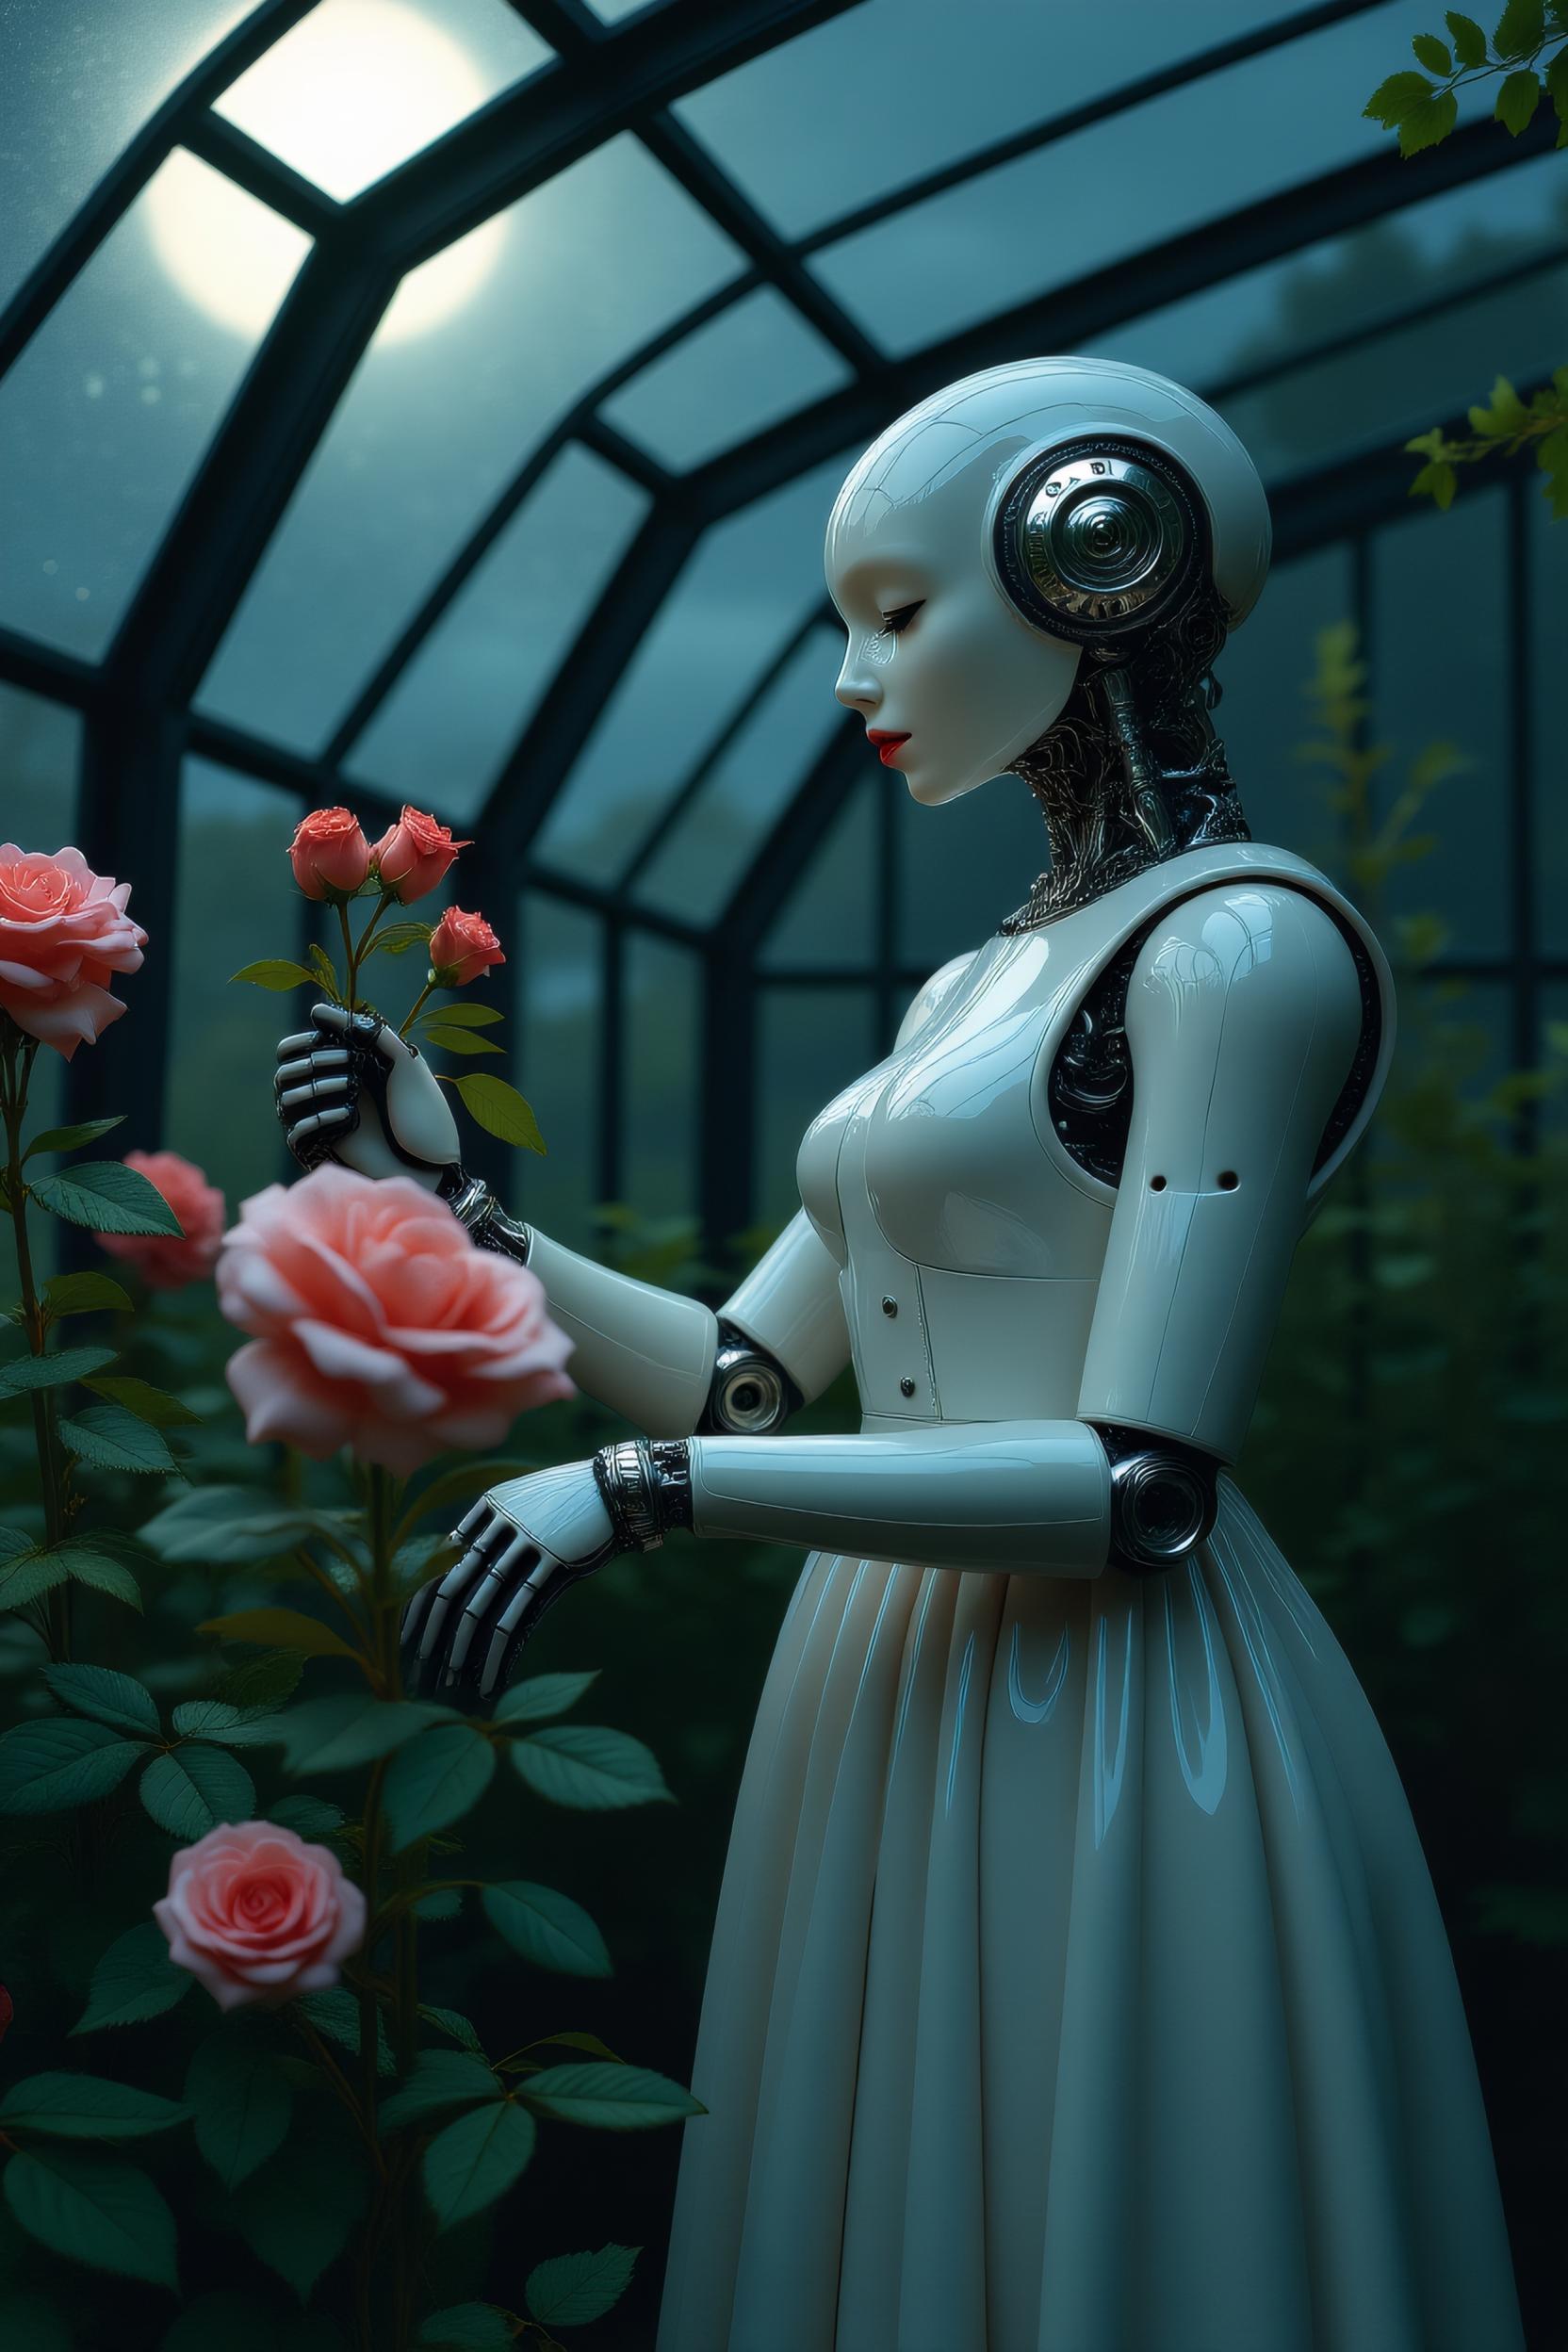
Flux Kontext Easy Workflow +Power Lora +Upscaler
A simple and efficient ComfyUI workflow for Flux Kontext with optional LoRA support and built-in upscaling. Designed to run without quantization, it works reliably on GPUs with 12GB VRAM.This workflow was created based on the basic Flux Kontext version and extended with LoRA integration and image upscaling to improve detail and flexibility.
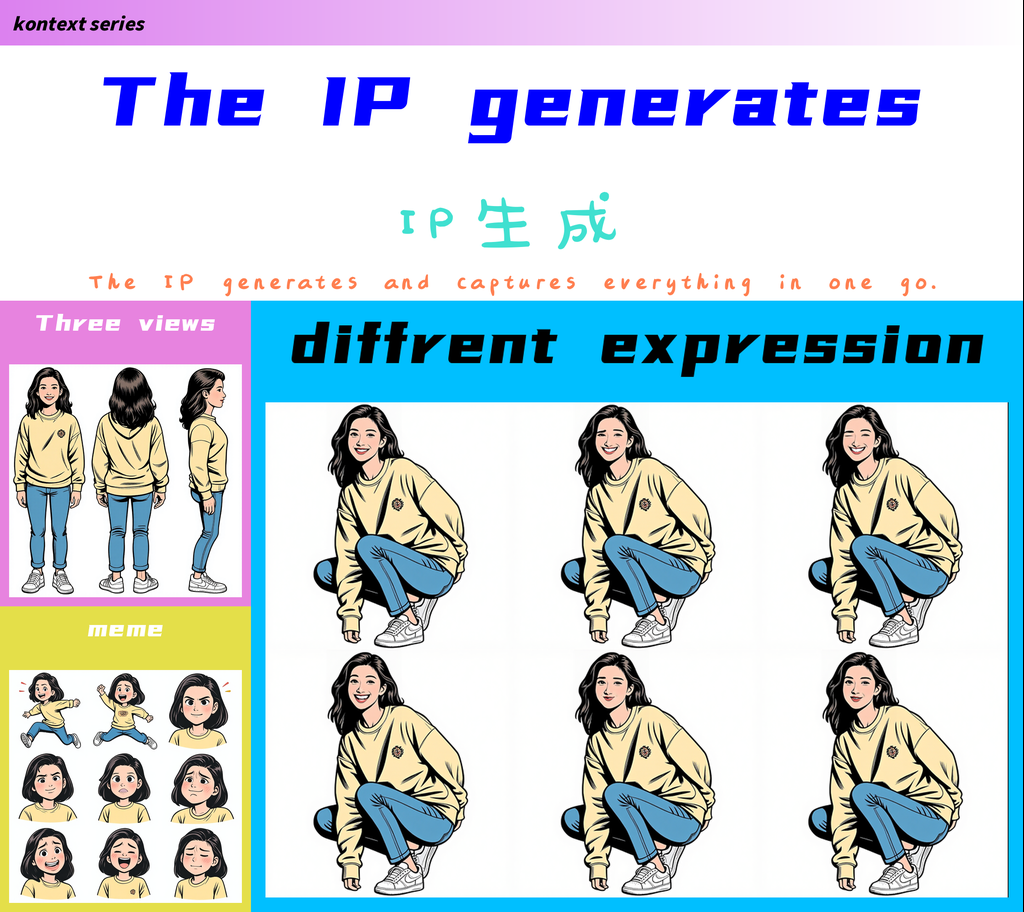
kontext series:The IP generates IP生成
It can now be run online for free through:https://www.runninghub.ai/post/1970134079578533890/?inviteCode=rh-v1180,invitation code : rh-v1180,Register through the link or add the code to get 1000 RH coins, and 100 RH per day,kontext series: The IP generates and captures everything in one go.you can use it to generate the Three views、meme、diffrent expression of the IP, You can upload your photo or your IP to generate a highly realistic yet cute IP character. However, the randomness is quite high, and you may need to draw cards to get what you want. Come and give it a try!哔哩哔哩:https://www.bilibili.com/video/BV1T9J1zkE33/?vd_source=1894c457f898b4dd087ae9178cb771c6youtube:
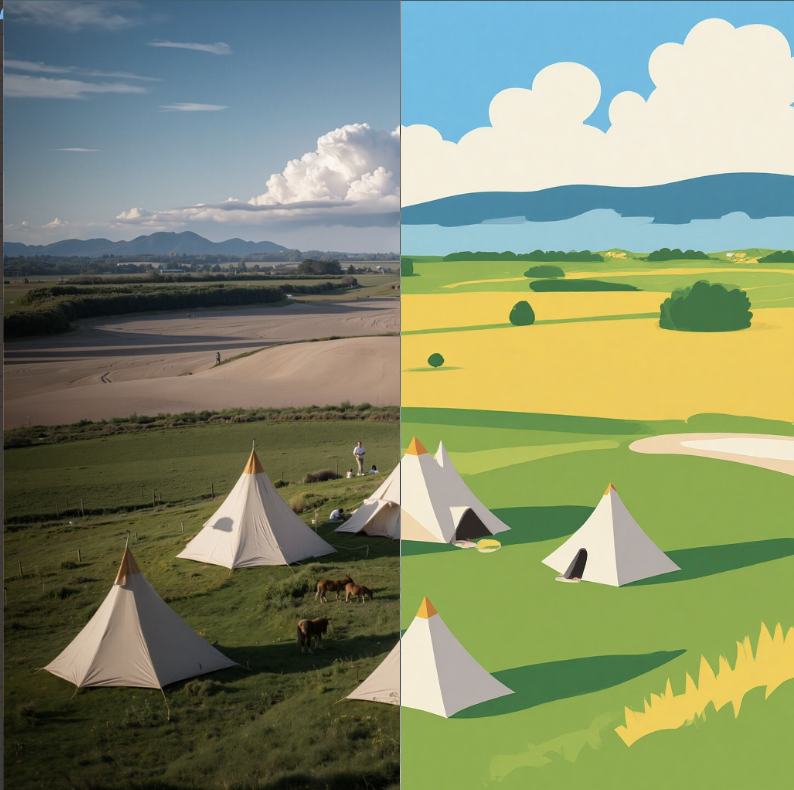
illustration style - Flux Kontext Workflow
Flux Kontext Illustration Style WorkflowLora Model Link:https://civitai.com/models/1976778/illustration-style-flux-kontextWorkflow Online Test Linkhttps://www.runninghub.ai/post/1969630143583035393/?inviteCode=rh-v1171AI Application for Rapid Image Generationhttps://www.runninghub.ai/ai-detail/1969696628397514754/?inviteCode=rh-v1171First Click: Click the link to claim 1100 RH Coins (for new users only)Uses of the Coins:1. Can use RTX 4090 for free to render workflows for 2 hours2. Allows generating approximately 200 images------------------------------------------------------------------------------------------------Recommended Parameters:Sampling Method: EulerSteps: 20-30CFG Scale: 1.0Trigger Word: Convert the picture to an illustration style.Adaptation weight: 0.8-1.0
E-commerce series: cloth change指定模特场景换装
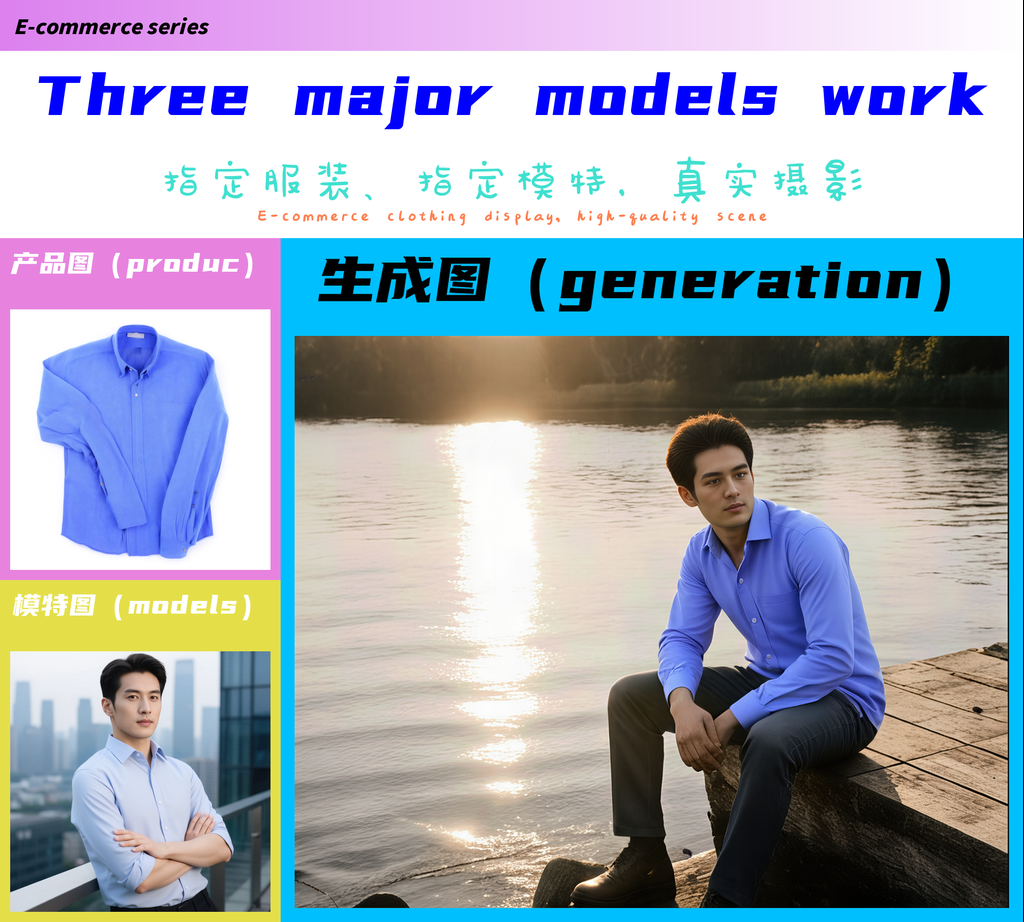
It can now be run online for free through:https://www.runninghub.ai/post/1969336482546786306/?inviteCode=rh-v1180,invitation code : rh-v1180,Register through the link or add the code to get 1000 RH coins, and 100 RH per day,E-commerce series:Designated models, designated clothing, random scenes, but real and rich, full of photographic sense. The clothing display is the best choice, as long as you have inspiration, we can help you realize it. Come and give it a try!For details, please refer to the video link: https://www.bilibili.com/video/BV1JgpdzYEQW/?vd_source=1894c457f898b4dd087ae9178cb771c6youtube :

4K Upscaling kontext_hires+PMRF
Online experience address of the workflow: https://www.runninghub.ai/post/1967343441250279425?inviteCode=rh-v10524090 free online, various fun and interesting AI applications, daily updates fan benefits, open the link:https://www.runninghub.ai/?inviteCode=rh-v1052Register through the above link to receive 1000RH coins, log in daily and receive an additional 100 coins for free!All my workflows will be published here: https://www.runninghub.ai/user-center/1911389038958239745?inviteCode=rh-v1052openart.ai:https://openart.ai/workflows/profile/wwrs?tab=workflows&sort=latestcivitai:https://civitai.com/user/ksxh0524736x: https://x.com/hydra_ksxhtg:https://t.me/wwrs1wechat:wwrs_AIstudiointroduction video:

kontext series :Fully automatic全自动万物迁移5.0
It can now be run online for free through:https://www.runninghub.ai/post/1967128329113493506/?inviteCode=rh-v1180,invitation code : rh-v1180,Register through the link or add the code to get 1000 RH coins, and 100 RH per day,kontext series:Fully automatic positioning for the migration of everything, eliminating manual adjustments, just one click is enough, come and give it a try!For details, please refer to the video link:哔哩哔哩:https://www.bilibili.com/video/BV1KRHZz7Efr/?vd_source=1894c457f898b4dd087ae9178cb771c6youtube:

(Ice Master Lao Yang Open-Source Edition) Universal Image Fusion V1
You can click on the link below and try it out directly. If the effect is good, you can deploy it locallyhttps://www.runninghub.ai/post/1952381519627259905/?/?inviteCode=rh-v1121Fan benefits, register to get 1000 points, daily login 100 points, play 4090! Experience the super power of 48G!B-site video: https://www.bilibili.com/video/BV1FZHbzXEkM/Knowledge Planet: https://t.zsxq.com/7F90AGraphic tutorial: https://t.zsxq.com/lNK8vThe workflow is very simple to use, and I have uploaded a tutorial on how to use it on YouTube. You can try it out and follow the tutorial and Civitai's workflow to easily reproduce the results. Thank you. If you have any other questions, please leave a comment in the comment sectionThis tutorial is very important, not watching it will surely lead to a lot of problems! Watch the video tutorial before trying !!!! Very important! Especially a key point at the end!

Flux+Kontext: Everything Transmigrates Put+it+here: Accelerated Edition
You can click on the link below and try it out directly. If the effect is good, you can deploy it locallyhttps://www.runninghub.ai/post/1952381519627259905/?/?inviteCode=rh-v1121Fan benefits, register to get 1000 points, daily login 100 points, play 4090! Experience the super power of 48G!B-site video: https://www.bilibili.com/video/BV1FZHbzXEkM/Knowledge Planet: https://t.zsxq.com/7F90AGraphic tutorial: https://t.zsxq.com/lNK8vThe workflow is very simple to use, and I have uploaded a tutorial on how to use it on YouTube. You can try it out and follow the tutorial and Civitai's workflow to easily reproduce the results. Thank you. If you have any other questions, please leave a comment in the comment sectionThis tutorial is very important, not watching it will surely lead to a lot of problems! Watch the video tutorial before trying !!!! Very important! Especially a key point at the end!
Blend Anything Kontext Lora
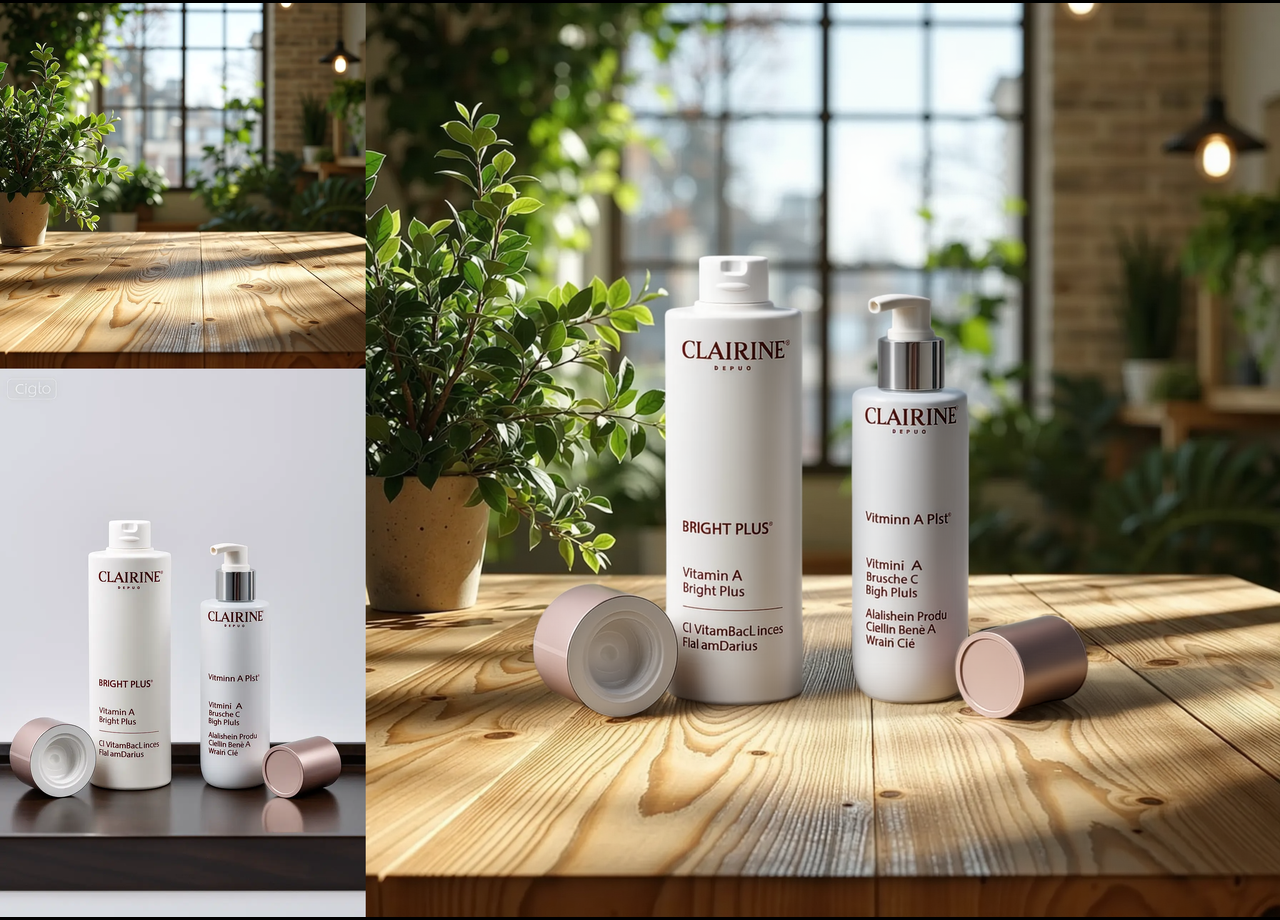
A workflow using the latest blend Lora. Excellent light match, even the water reflection. works better on subjects. Thanks to the author of the lora.Free try out link: https://www.runninghub.ai/post/1966426794368937986All the model details are within the workflow notes.If your local computer is unable to run this workflow or you just want to see how good the model is and check all the workflow parameter settings before downloading, please open the link above to run it online for free on RTX4090. Just click and run. No brain-racking local setup.1000 credits upon signing in using the above link(One gen only takes about 10-30 credits), with an extra 100 credits on daily login.
ComfyUI beginner friendly Kontext GGUF Consistent Character Dataset Builder Workflow by SarcasticTOFU
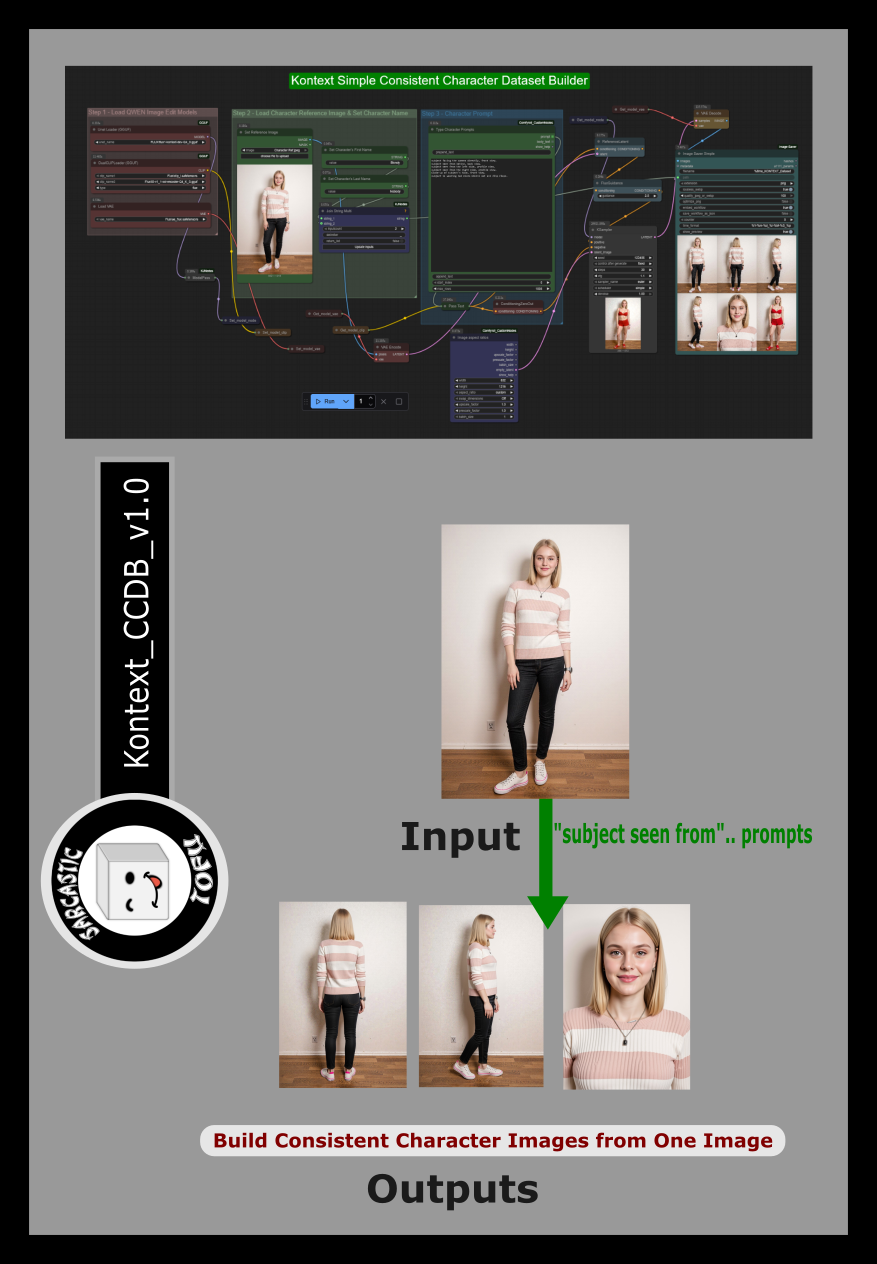
This is a very simple ComfyUI beginner friendly Kontext workflow that will work with very simple text editing instructions in natural language to build a consistent character dataset from your desired reference image so that you can build a character LORA later. This is the Flux Kontext adaptation of my previously released Character Dataset Builder Workflow for QWEN Image Edit. It does not have any lengthy process that you may have been seen for other consistent character dataset builder you may have seen using SDXL or Flux. Kontext is very good on it's own to conserve and reuse character details from reference image to provide outputs. You need a Hugging Face account to download your necessary Flux Kontext files (Details are mentioned below). Make sure you install GGUF addon for ComfyUI using ComfyUI manager and place the correct files in correct places. Also check out my other workflows for SD 1.5 + SDXL 1.0, HiDream, WAN and QWEN Image.How to use this -#1. Just select your desired Kontext GGUF models first#2. now select your input character reference image and set the character's first and last name (Like "Blondie", "Nobody")#3. on next step enter your image editing instructions - Batch character prompts like "subject seen from" followed by other details.#4. after this select image sampling methods, CFG, steps etc. settings (this part is tricky, if you want you can just have the values as it is)#5. finally press the run button to generate. That's it..** I have given two reference images (1 SFW and 1 NSFW, both with their character builder prompts you can try out or modify, 60 for each) for you already in the zip file containing this workflow along with a text file with links to any downloads you may need to do for my other workflowsEnjoy!## Flux Kontext Models=========================================================================================================================### Download Links for Kontext Checkpointhttps://huggingface.co/QuantStack/FLUX.1-Kontext-dev-GGUF/resolve/main/flux1-kontext-dev-Q4_0.gguf### Download Links for Flux Encodershttps://huggingface.co/comfyanonymous/flux_text_encoders/resolve/main/clip_l.safetensorshttps://huggingface.co/comfyanonymous/flux_text_encoders/resolve/main/t5xxl_fp8_e4m3fn.safetensors### Download Links for Flux VAEhttps://huggingface.co/black-forest-labs/FLUX.1-dev/resolve/main/ae.safetensors
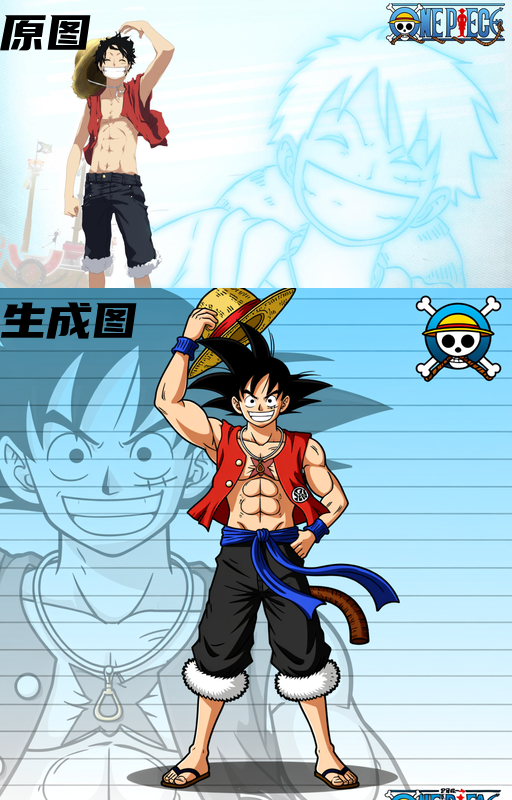
Just a few seconds!qwen series: nunchaku+Reference image generation
It can now be run online for free through:https://www.runninghub.ai/post/1964316198315937794/?inviteCode=rh-v1180,invitation code:rh-v1180,Register through the link or add the code to get 1000 RH coins, and 100 RH per day, there's no need to worry about local computer specifications being insufficient.The strongest quick live photo, it only takes about ten seconds to generate interesting images based on the reference image you want. Come and try it out, all specific operational parameters are in the workflow!
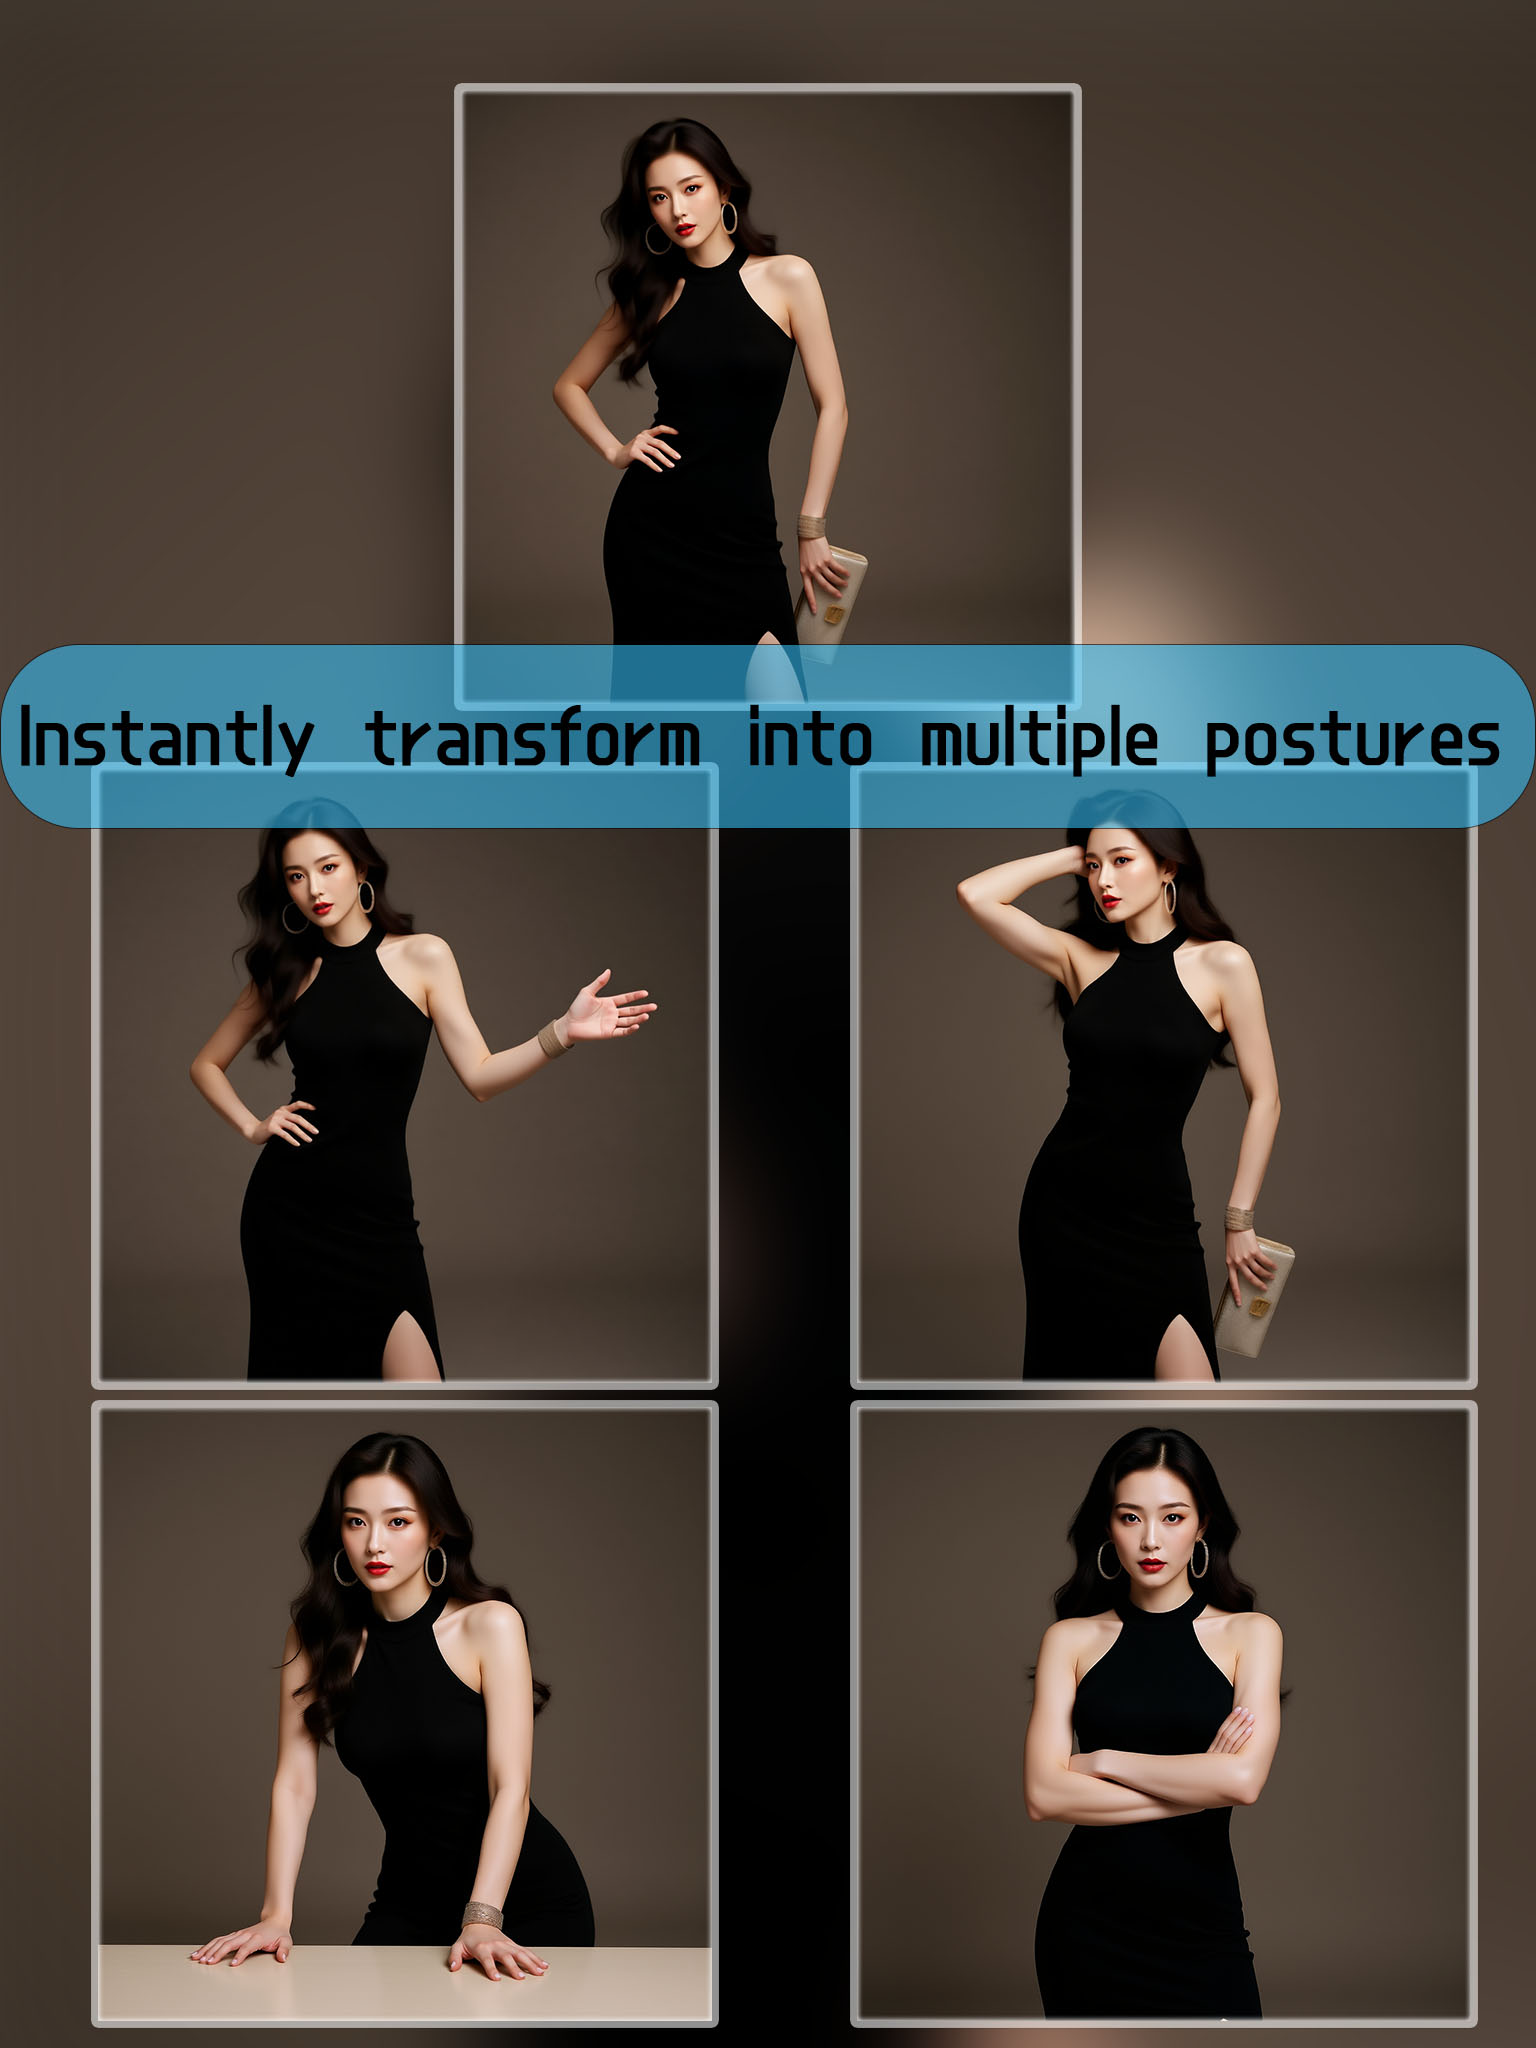
QY5 - Thousand Forms Engine
You can easily change your position, but it is recommended to use the image generated by the link below. This is because it requires API calls and the effect is better. The local model has limitations and the effect is not very stable. There may be situations where the position change does not occur. It is currently available for free trial. Also, there are fan benefits!The following links will directly lead you to the experience:(Chinese version) Link: https://www.runninghub.cn/post/1940669153202122753/?inviteCode=rh-v1088(International version) Link: https://www.runninghub.ai/post/1940669153202122753/?inviteCode=rh-v1088You can use it for free for 4090 hours. Various fun and interesting AI applications and workflows can be downloaded for free.Register through the above link to get 1000 RH coins and easily generate hundreds of exquisite pictures. Free trial of high-speed 4090![Fan benefits: Click the upper right avatar - Invitation code - Enter the invitation code to receive 1000 coins. Every day of login also gives 100 coins. Play for free! Play for free! Play for free!Invitation code: rh-v1088]

USO seriesThe Strongest Style Transfer uso最强风格迁移
It can now be run online for free through:https://www.runninghub.ai/post/1963955360618958849/?inviteCode=rh-v1180,invitation code:rh-v1180,Register through the link or add the code to get 1000 RH coins, and 100 RH per day, there's no need to worry about local computer specifications being insufficient.The most powerful single-body style transfer, the best way to generate IP, upload any style you want, generate it with one click, diverse and interesting, come and try it!

Major upgrade! kontext series:replaceproductv2.0 万物迁移v2.0
The workflow is quite complex, and local execution may require a substantial amount of GPU and memory. It can now be run online for free through:https://www.runninghub.ai/post/1963238492639825922/?inviteCode=rh-v1180,invitation code:rh-v1180,Register through the link or add the code to get 1000 RH coins, and 100 RH per day, there's no need to worry about local computer specifications being insufficient.Major upgrade! The kontext migration workflow automates positioning migrations, eliminating complex manual adjustments. It can batch-generate the items or character outfits you want to replace. Compared to the old workflow, it reduces background changes and light-shadow blending. Give it a try! For specific parameters, see the workflow! Or leave a message in the comments, and I'll tell you everything I know!
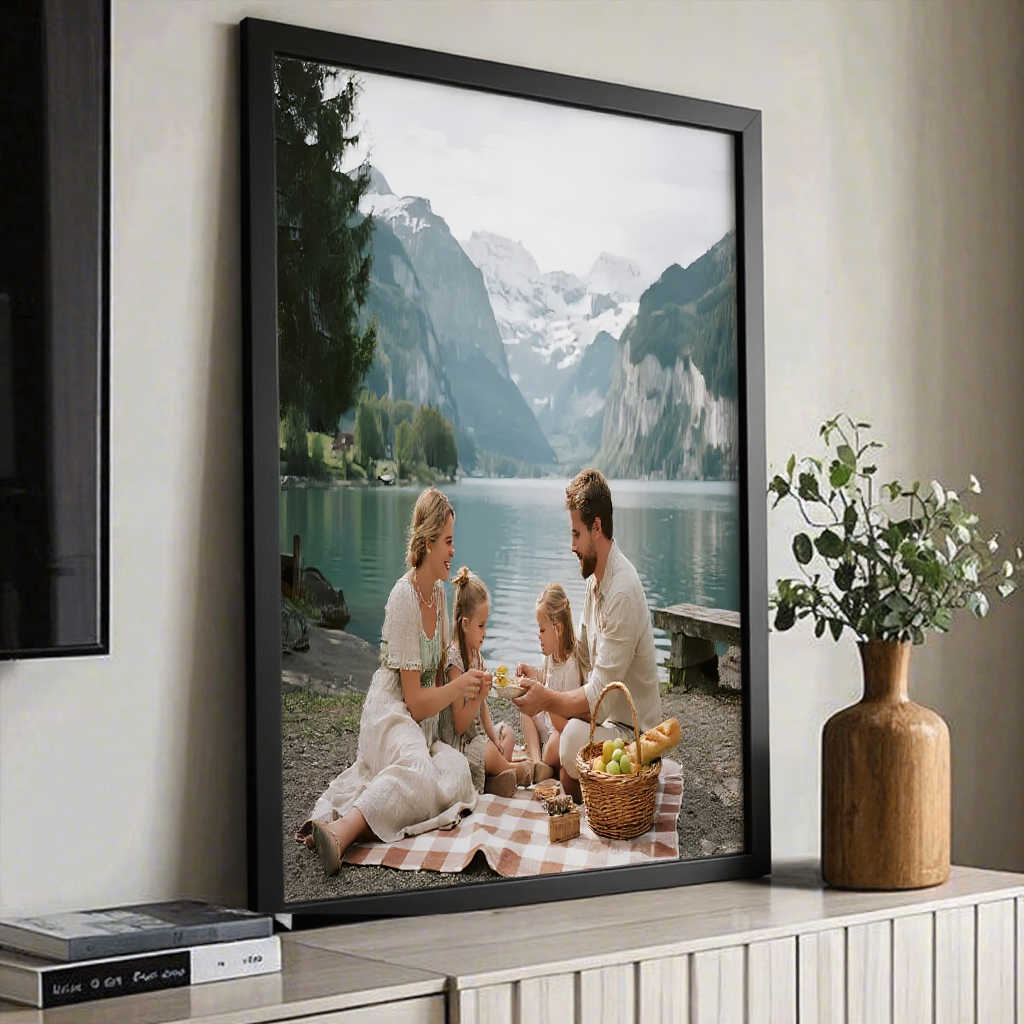
kontext series:automatic replace anything (E-commerce)全自动电商万物迁移
https://www.runninghub.ai/model/public/1960566907193688066/?inviteCode=rh-v1180,invitation code:rh-v1180,Register through the link or add the code to get 1000 RH coins, and 100 RH per day, there's no need to worry about local computer specifications being insufficient.kontext series: you can use the workflow to replace any thing ,No need to manually adjust the position anymore.Just one click ,you can do want you want to put! For specific parameters, please refer to the workflow, which is very detailed, so there's no need to worry.
Workflow RefControl Flux Kontext – Reference Canny LoRA
workflow for model https://civitai.com/models/1915192
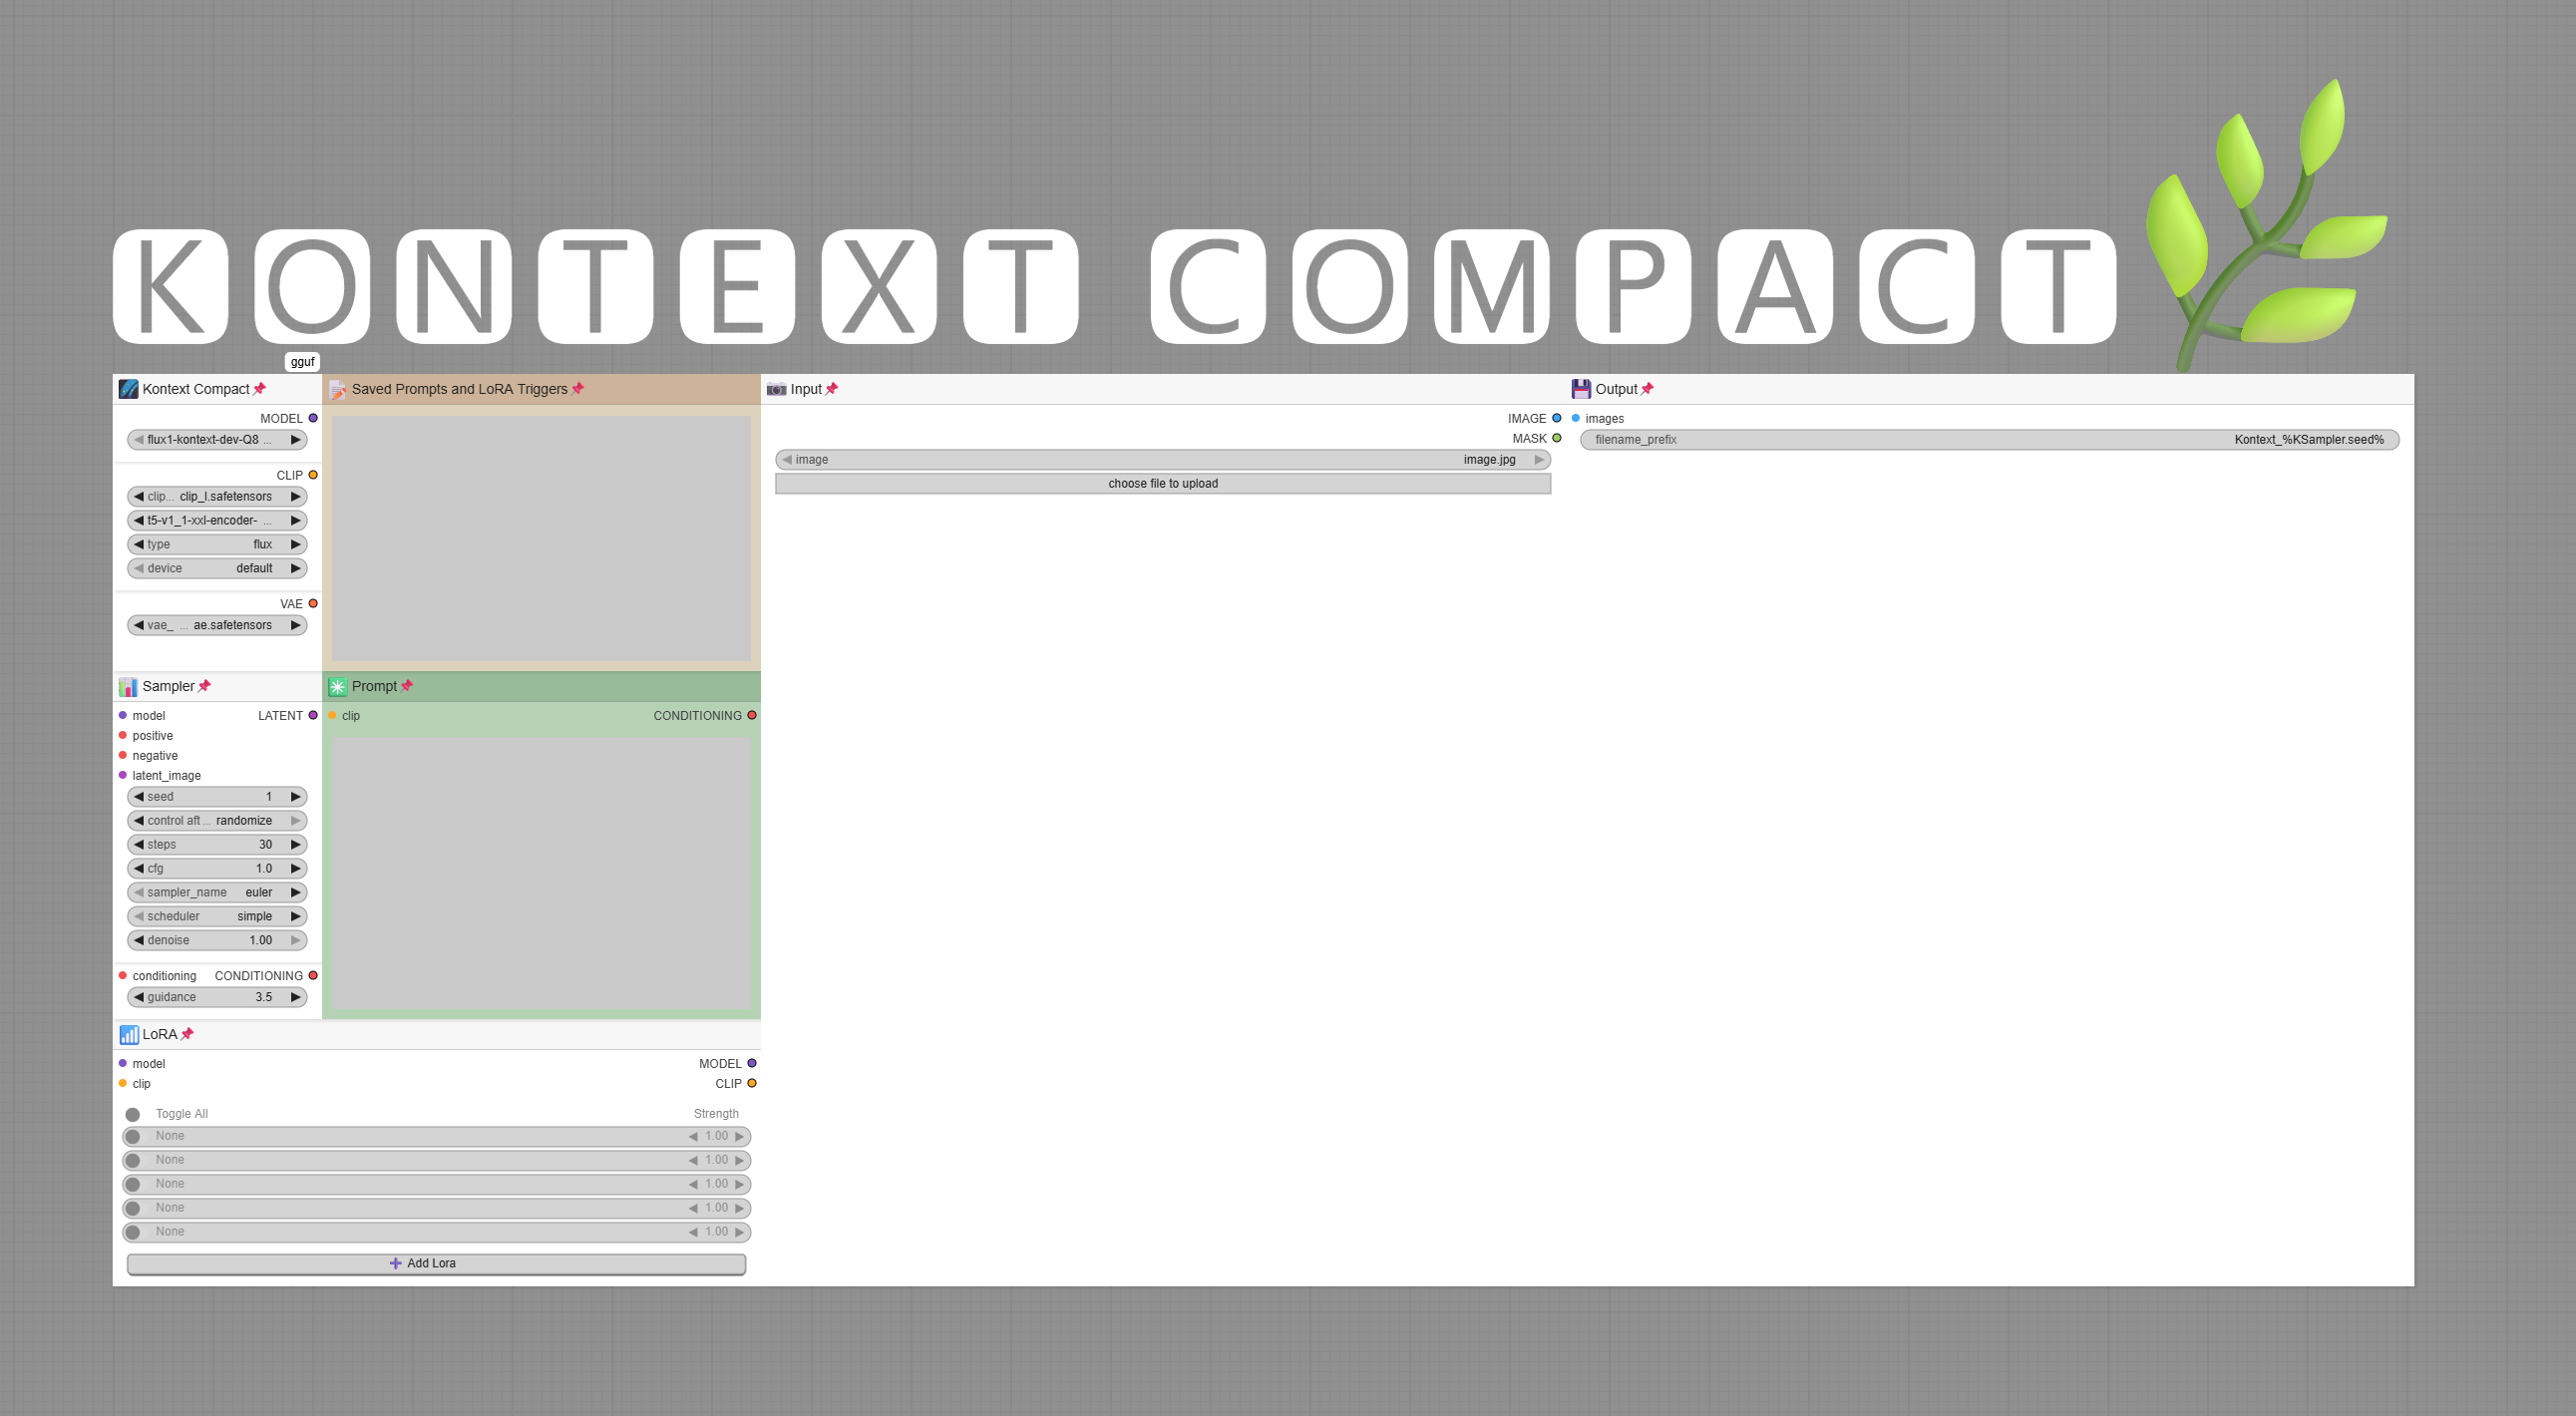
Kontext Compact
A simple compact workflow for Flux Kontext_________Required models:Flux Kontext GGUF: https://huggingface.co/QuantStack/FLUX.1-Kontext-dev-GGUF/tree/mainClip L model: https://huggingface.co/comfyanonymous/flux_text_encoders/resolve/main/clip_l.safetensorsT5 XXL FP8 model: https://huggingface.co/comfyanonymous/flux_text_encoders/resolve/main/t5xxl_fp8_e4m3fn.safetensorsT5 XXL GGUF model: https://huggingface.co/city96/t5-v1_1-xxl-encoder-gguf/tree/mainVAE model: https://huggingface.co/black-forest-labs/FLUX.1-dev/resolve/main/ae.safetensors_________

Flux Kontext High-Precision Face-Swapping
A workflow maintains high fidelity and character consistency. Free try out link: https://www.runninghub.ai/post/1961548972307451905If you are a total beginner of ComfyUI, you could check out my video:If your local computer is unable to run this workflow or you just want to see how good the model is and check all the workflow parameter settings before downloading, please click the link above to run it online for free on RTX4090. Just click and run. No brain-racking local setup.1000 credits upon signing in using the above link(one gen only takes about 10-30 credits), with an extra 100 credits on daily login.Originally created by 有趣的80后程序员 on Runninghub.ai

kontext series:change the background
It is the kontext series,you can use it toquickly change backgrounds and achieve good blending. it maintains a relatively realistic display without any AI flavor , it looks so great!. Specific parameter adjustments can refer to the workflow parameters in the link below:https://www.runninghub.ai/publish/1961400767578095618/?inviteCode=rh-v1180. However, if you want to deploy this model and nodes locally, your computer requirements will be quite high; lower-end computers will generate images very slowly. Through the link above, you can quickly experience it online, and by registering through the link, you get 1000 points, plus an additional 100 points for logging in daily, which is completely sufficient for testing images. Come and give it a try! cfg:1.0,step:20,denoise:1,you can try the Parameter,may have a great result!
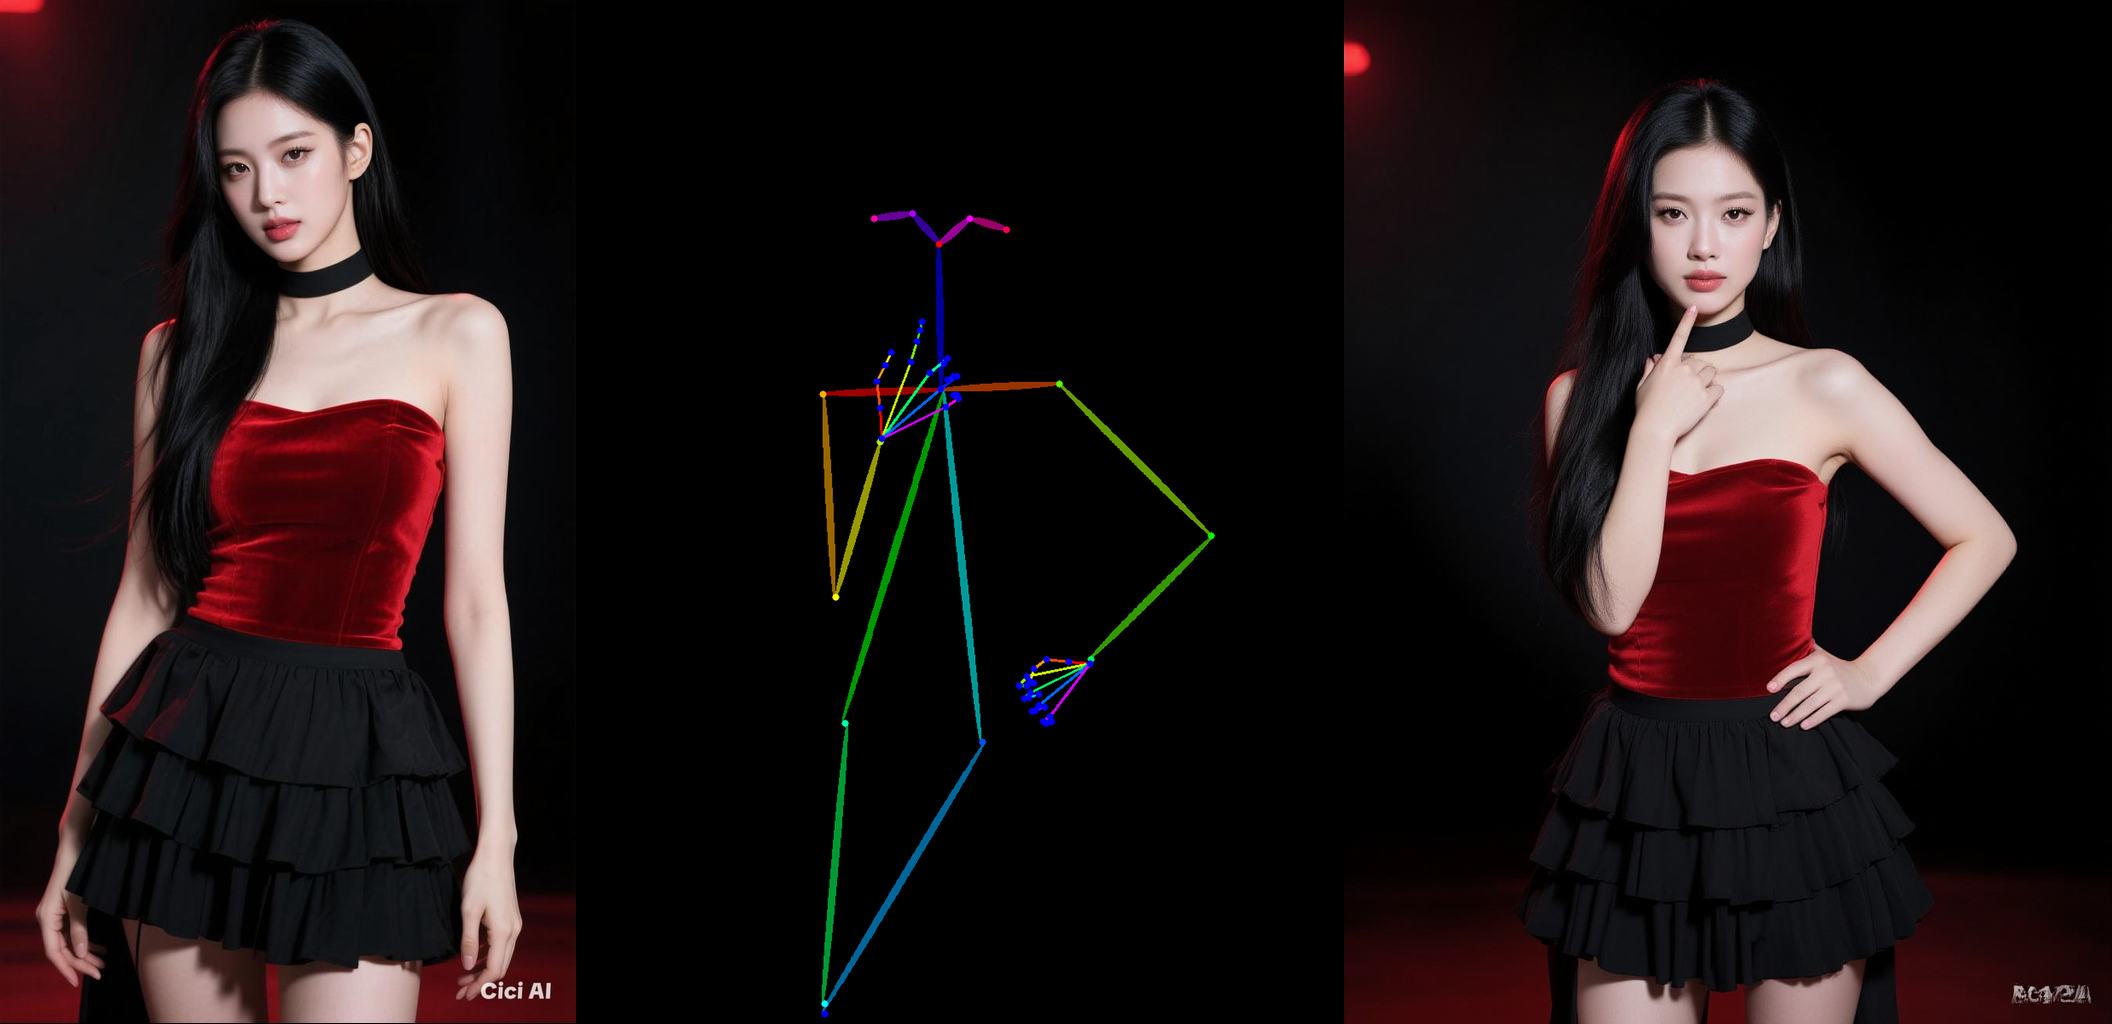
Style transfer & Pose adjust RefControl
Hey friends, great news 🎉 If you sign up on RunningHub with Gmail, you’ll get 1000 free credits and can run this workflow right away! All nodes and models are already integrated, so you don’t have to worry about missing files or errors — super fast and convenient.Workflow Link:https://www.runninghub.ai/workflow/1961375602395779073/?inviteCode=rh-v1153Using KONTEXT + LoRA, you can combine OpenPose, Depth, and Lineart controls to achieve advanced effects (e.g., style/color transfer and pose/motion control).Switch modes by entering 1 / 2 / 3:1 = Pose, 2 = Depth, 3 = Lineart.The Lora dowload:Openpose:https://civitai.com/models/1894154/refcontrol-flux-kontext-reference-pose-loraDepth:https://civitai.com/models/1875016/refcontrol-flux-kontext-referencedepth-fusion-loraLineart:https://civitai.com/models/1902256/refcontrol-flux-kontext-reference-lineart-lora

QY4 - Context (An interesting style transformation)
This workflow integrates many styles of conversion models - Lora. Using it locally might be a bit troublesome. You can experience it online instead. It includes over 10 Lora models. Just input the corresponding number and it will generate automatically.The following link leads directly to the experience:(Chinese version) Link: https://www.runninghub.cn/post/1940669153202122753/?inviteCode=rh-v1088(International version) Link: https://www.runninghub.ai/post/1940669153202122753/?inviteCode=rh-v1084090 is available for free online. Various fun and interesting AI applications and workflows can be downloaded for free.Register through the above link to get 1000 RH coins and easily generate hundreds of exquisite images. Free trial of high-speed 4090!【Fan Club Benefits: Click the avatar on the top right corner - Invitation Code - Enter the invitation code. Every day when you log in, you will get 100 coins and can play for free!Invitation Code: rh-v1088】
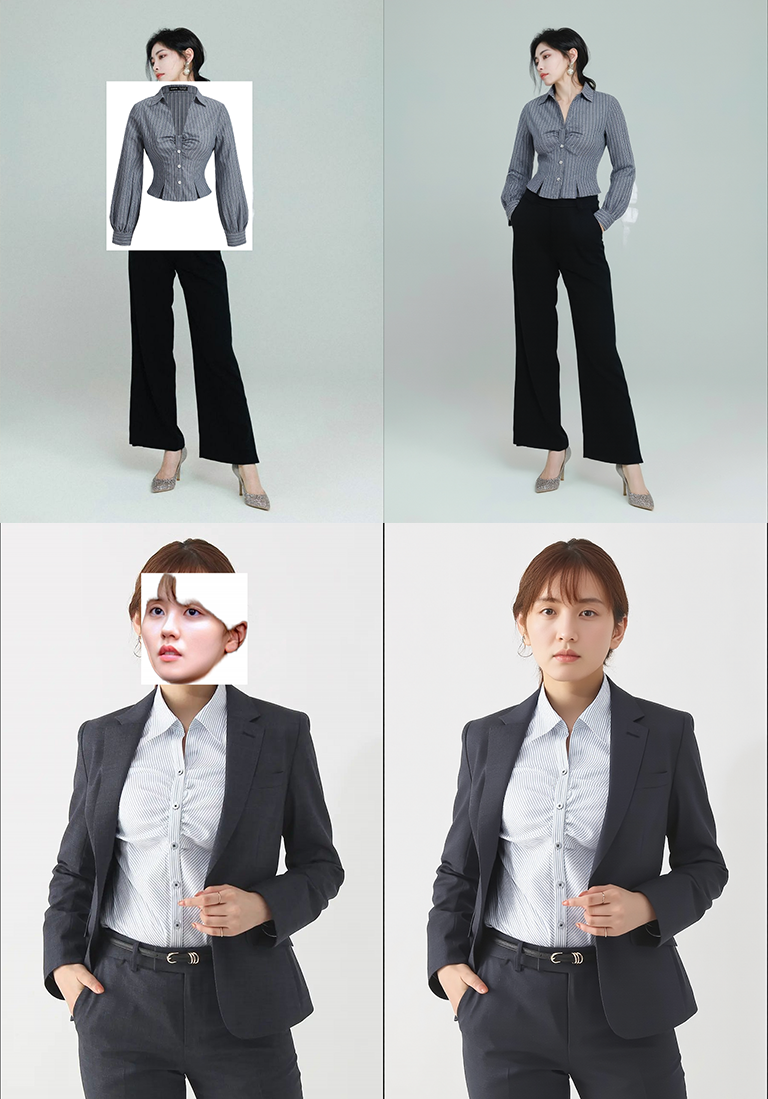
Place & Composite(Kontext)
Hey friends, great news 🎉 If you sign up on RunningHub with Gmail, you’ll get 1000 free credits and can run this workflow right away! All nodes and models are already integrated, so you don’t have to worry about missing files or errors — super fast and convenient.Workflow Link:https://www.runninghub.ai/workflow/1961272982058549250?inviteCode=rh-v1153This workflow leverages KONTEXT to plausibly place and blend objects into people or scenes. Its key strength is the CANVAS node, which lets you intuitively position and resize the object directly on the image. Limitation (outfit replacement): the inserted garment must fully occlude the clothing on the base subject. Because coverage depends on pose, many poses won’t allow a perfect clothing swap.First, use “加載” in the FastCanvas node to place the product onto the background image. Adjust its size and position with the mouse and scroll wheel.When ready, click the blue-green “Run” button in the top-right corner to execute the workflow. The system will automatically blend the product into the background, matching lighting and shadows for a natural and harmonious result.I’ve highlighted some important points in the notes—please take a look.The LoRAs needed for this workflow are as follows:place it:https://civitai.com/models/1780962/place-it-flux-kontext-loraput it here:https://civitai.com/models/1808575/put-it-herekontextv4?modelVersionId=2118949
Workflow RefControl Flux Kontext – Reference Lineart LoRA
Workflow for this modelhttps://civitai.com/models/1902256?modelVersionId=2153190
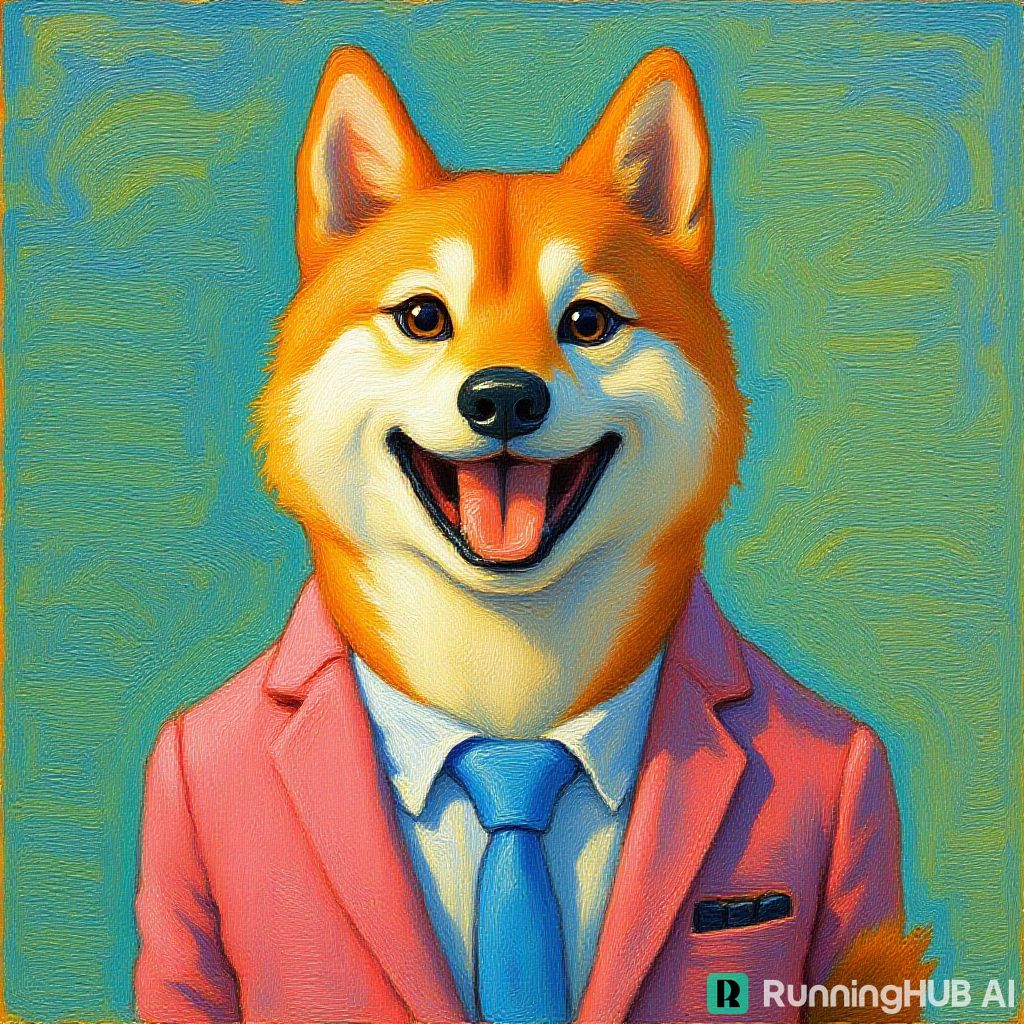
kontext series:oil painting style 油画画风
The kontext series adapts the style of the target image based on related images to create a oil painting style, with very bright colors. However, due to limitations with Lola, you currently need to draw multiple cards. Specific parameter adjustments can refer to the workflow parameters in the link below:https://www.runninghub.ai/post/1960333042994786306/?inviteCode=rh-v1180. However, if you want to deploy this model and nodes locally, your computer requirements will be quite high; lower-end computers will generate images very slowly. Through the link above, you can quickly experience it online, and by registering through the link, you get 1000 points, plus an additional 100 points for logging in daily, which is completely sufficient for testing images. Come and give it a try!cfg:1.0,step:20,denoise:1,you can try the Parameter,may have a great result

Product Integration into Background(Kontext)
Hey friends, great news 🎉If you sign up on RunningHub with Gmail, you’ll get 1000 free credits and can run this workflow right away!All nodes and models are already integrated, so you don’t have to worry about missing files or errors — super fast and convenient.Workflow Link:https://www.runninghub.ai/workflow/1967437112964419585/?inviteCode=rh-v1153This workflow is a Product Image Composition Generator:You only need to provide one product image and one background image.First, use “加載” in the FastCanvas node to place the product onto the background image. Adjust its size and position with the mouse and scroll wheel.When ready, click the blue-green “Run” button in the top-right corner to execute the workflow. The system will automatically blend the product into the background, matching lighting and shadows for a natural and harmonious result.No need to modify the prompt — simply click the green “Run” button in the top-right corner to generate a realistic composite product image.
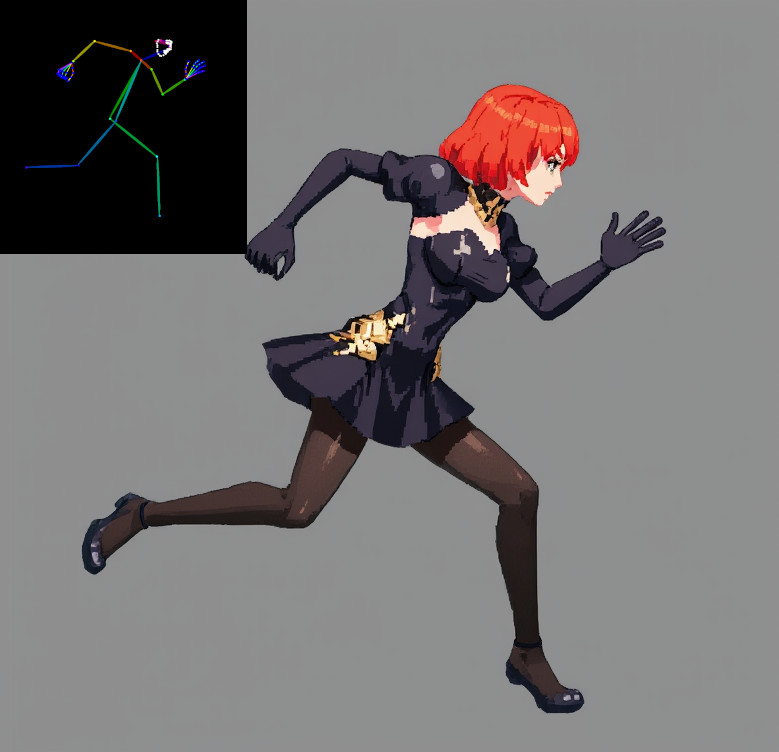
Pose Selector Flux Kontext Workflow
About WorkflowsThere is 3 workflows:1_recomended_pose_lora - recommended workflow with new pose lora created by thedeoxen. Paste DW Pose image from poses folder in DW Pose Image node, paste image of your character, in Reference Image node.classic_pose_lora - same thing like 1_recomended_pose_lora, but, you are limited by list of poses, you not need to paste DW Pose, only Reference Image. All pose images are baked in workflow.classic_without_pose_lora - workflow without any lora, uses descriptive predefined prompts and pose images as a reference. All pose images are baked in workflow.Tutorial for classic_without_pose_lora workflowChoose pose for you character from list of poses.How to use:Choose pose in "Choose your pose" nodeLoad full body image of your characterClick runAdditionalyYou can choose output image sizeYou can change height of reference image. It can make pose following better or worse. I recommend to keep height size > 1080px (1080px height size of pose image)You can add a new output image size, or a new pose, by duplicating any of existent "size" or "pos" groups. "Size" groups must have "size" word inside of title. "pos" group must have "pos" word in the title.New poses or sizes will automatically appear in "Choose your" listPose images are baked in workflowThis workflow is based on Kontext character creator workflow, made by alcaitiff

Reference Pose Lora Workflow. Low VRAM GGUF.
AboutThis is my implementation of Reference Pose workflow, designed for weak GPUs.You can find a official workflow from author (thedeoxen) here: https://civitai.com/models/1894175/workflow-refcontrol-flux-kontext-reference-pose-loraTested on:GPU: RTX 3060 12GBRAM: 16 GB DDR4
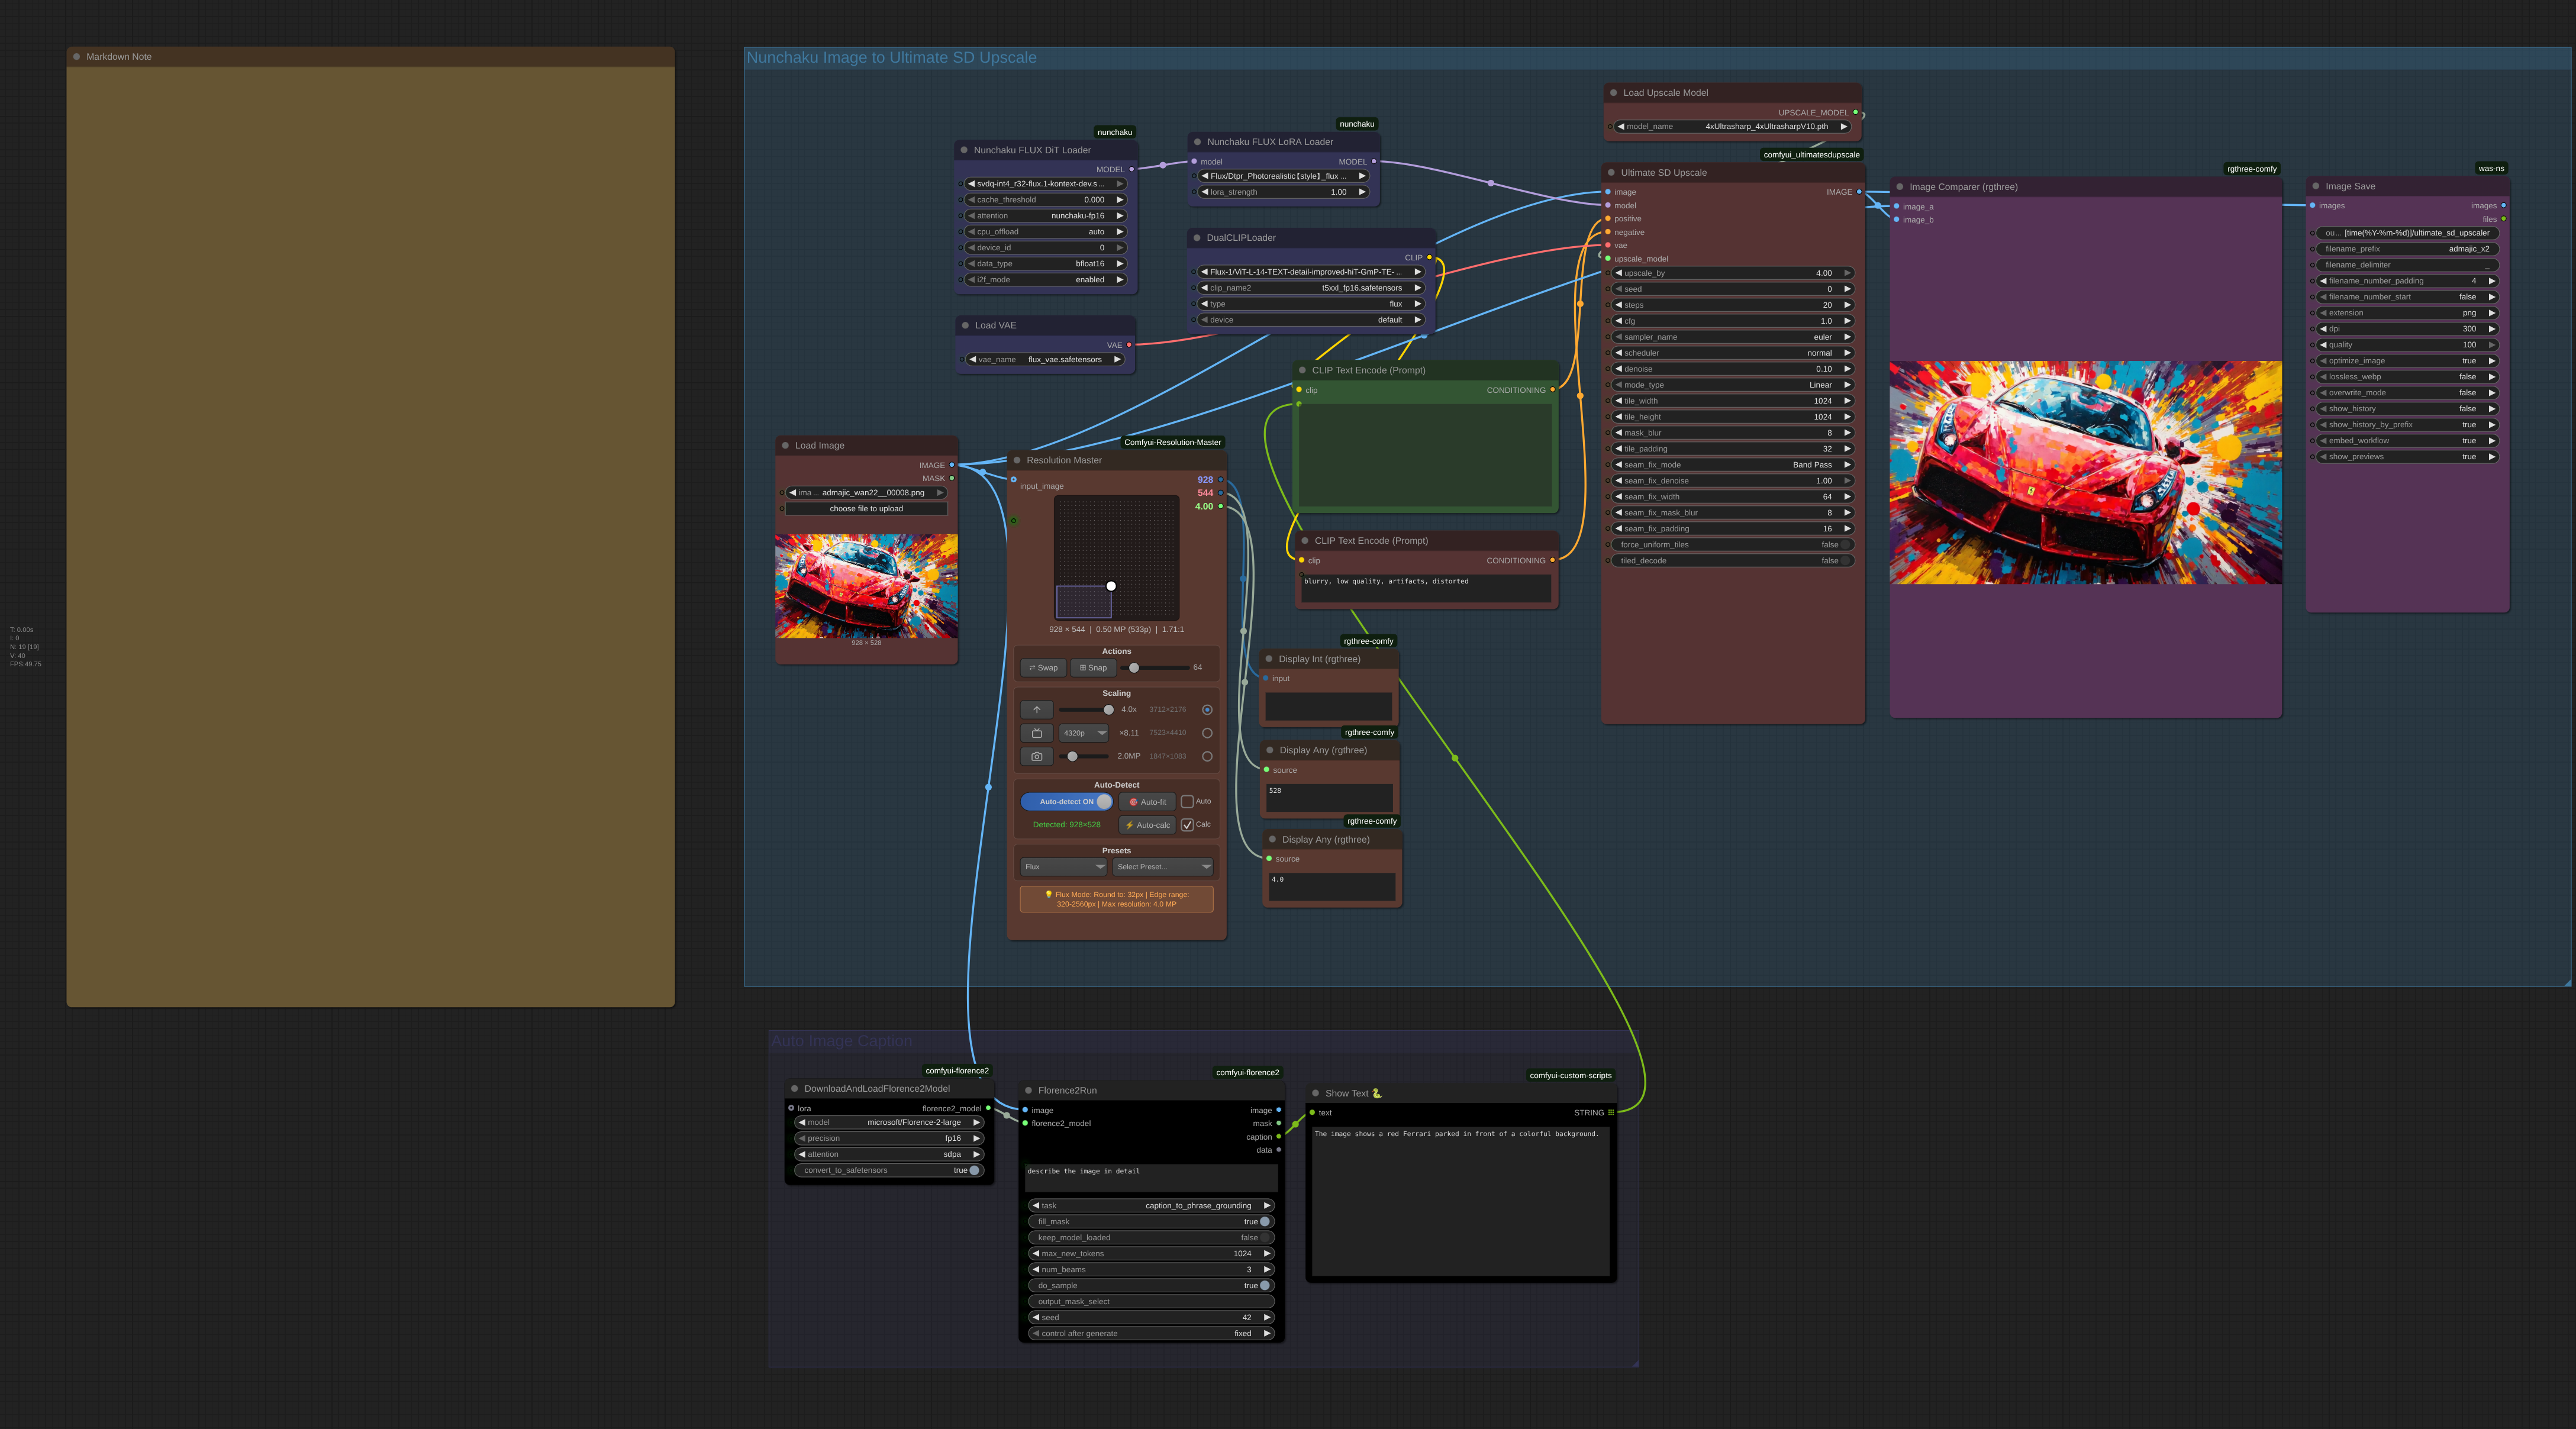
Flux Nunchaku Ultimate SD Upscale Workflow
# 🚀 SD Ultimate Upscaler with Nunchaku Setup GuideThis guide covers the complete setup for the enhanced SD Ultimate Upscaler workflow with Nunchaku, including Florence2 automatic captioning for optimal results.## 🔧 Prerequisites- ComfyUI installed and working- NVIDIA GPU with 8GB+ VRAM (12GB+ recommended)- CUDA 12.6+ (12.9 recommended)## 📦 Custom Nodes Installation### Required Nodes- [ComfyUI_UltimateSDUpscale](https://github.com/ssitu/ComfyUI_UltimateSDUpscale) Enables tiled upscaling for high-resolution images- [ComfyUI-nunchaku](https://github.com/nunchaku-tech/ComfyUI-nunchaku) Quantized Flux models for blazing speed- [ComfyUI-Florence2](https://github.com/spacepxl/ComfyUI-Florence2) Automatic image captioning for better upscaling prompts- [rgthree-comfy](https://github.com/rgthree/rgthree-comfy) Image comparison tools- [was-node-suite-comfyui](https://github.com/WASasquatch/was-node-suite-comfyui) Advanced save options### Installation- Clone all repositories into ComfyUI/custom_nodes/- Restart ComfyUI after installation## 📁 File Structure & Model Downloads### Directory Layout```ComfyUI/├── models/│ ├── checkpoints/ # Nunchaku models│ ├── clip/ # Text encoders│ ├── vae/ # VAE models│ ├── upscale_models/ # AI upscalers│ └── loras/ # LoRA models (optional)```### 🤖 Nunchaku ModelsSource: mit-han-lab/nunchaku-flux.1-dev- RTX 20s/30s/40s: svdq-int4_r32-flux.1-kontext-dev.safetensors- RTX 50 series: svdq-fp4_r32-flux.1-kontext-dev.safetensors - Place in: models/checkpoints/### 📝 Text EncodersSource: comfyanonymous/flux_text_encoders- t5xxl_fp16.safetensors (~9.79GB)- ViT-L-14-TEXT-detail-improved-hiT-GmP-TE-only-HF.safetensors (~246MB)- Place in: models/clip/### 🎨 VAE ModelSource: black-forest-labs/FLUX.1-schnell- flux_vae.safetensors (~335MB)- Place in: models/vae/### 🔍 Upscaler ModelsRecommended Options:- 4x_NMKD-Siax_200k.pth- 4x-UltraSharp.pth- RealESRGAN_x4plus.pth- Place in: models/upscale_models/### 🎯 LoRA Models (Optional)- Photorealistic LoRAs for enhanced quality- Place in: models/loras/Flux/## 🧠 Florence2 Setup### Model DownloadFlorence2 will auto-download the first time you run the workflow:- Model: microsoft/Florence-2-large- Size: ~1.5GB- Purpose: Automatic image analysis and prompt generation## 📋 Complete Workflow Features### 🎨 Workflow Components| Node | Purpose | Key Settings ||------|---------|--------------|| LoadImage | Input your image | Support for various formats || Florence2 | Auto-generate prompts | Analyzes image content automatically || NunchakuFluxDiTLoader | Load quantized model | INT4/FP4 variants available || NunchakuFluxLoraLoader | Apply LoRA enhancements | Optional for style improvement || UltimateSDUpscale | Main upscaling engine | Tiled processing with seam fixing || Image Comparer | Before/after comparison | Side-by-side visual comparison |## ⚙️ Ultimate SD Upscaler Settings (From Actual Workflow)### 🎯 Current Workflow Settings| Parameter | Current Value | Purpose | Alternative Options ||-----------|---------------|---------|-------------------|| upscale_by | 2.0 | Upscaling factor | 4.0, 6.0, 8.0 for higher scaling || steps | 20 | Quality steps | 12-16 (faster), 26+ (max quality) || cfg | 1.0 | Must stay 1.0 | Never change for Flux models || denoise | 0.1 | Conservative enhancement | 0.15-0.30 for more changes || sampler | "euler" | Sampling method | dpmpp_2m, dpmpp_sde alternatives || scheduler | "normal" | Noise scheduling | karras, exponential options |### 🧩 Tile Processing Settings| Parameter | Current Value | Purpose | VRAM Optimization ||-----------|---------------|---------|-------------------|| tile_width/height | 1024 | Processing chunks | 768 (8-10GB), 512 (6-8GB) || mask_blur | 8 | Blend tile edges | 12-16 for softer blending || tile_padding | 32 | Tile overlap | 48-64 for better seams |### 🔧 Seam Fixing Settings| Parameter | Current Value | Purpose | When to Adjust ||-----------|---------------|---------|----------------|| seam_fix_mode | "Band Pass" | Fix tile boundaries | "None" for speed, "Half Tile" alternative || seam_fix_denoise | 1.0 | Seam blending strength | Lower if artifacts appear || seam_fix_width | 64 | Seam processing width | 32-128 based on image complexity || seam_fix_padding | 16 | Seam overlap area | Increase for complex images |## 🎨 Florence2 Auto-Prompting### How It Works1. Automatic Analysis: Florence2 analyzes your input image2. Caption Generation: Creates detailed description3. Prompt Enhancement: Uses description for better upscaling4. Manual Override: You can still edit the generated prompt### Benefits- Better Results: AI understands your image content- Consistency: Maintains image characteristics during upscaling - Time Saving: No need to manually describe images- Accuracy: Preserves important visual elements## 🚦 Optimization Presets### ⚡ Speed Preset (Quick Preview)```json{ "upscale_by": 2.0, "steps": 12, "denoise": 0.1, "seam_fix_mode": "None"}```### ⚖️ Balanced Preset (Current Workflow)```json{ "upscale_by": 2.0, "steps": 20, "denoise": 0.1, "seam_fix_mode": "Band Pass"}```### 💎 Quality Preset (Maximum Detail)```json{ "upscale_by": 4.0, "steps": 26, "denoise": 0.2, "seam_fix_mode": "Band Pass"}```### 🔋 Low VRAM Preset (8GB GPUs)```json{ "tile_width": 768, "tile_height": 768, "steps": 16, "seam_fix_mode": "None"}```## 📱 Using the Workflow### Step-by-Step Process1. Load Image: Drop your image into the LoadImage node2. Auto-Analysis: Florence2 automatically describes the image3. Review Prompt: Check the generated caption in ShowText node4. Adjust Settings: Modify upscaling parameters if needed5. Run Workflow: Execute the complete pipeline6. Compare Results: Use Image Comparer to see before/after7. Save Output: Images automatically saved with timestamps### 🎯 Prompt CustomizationThe workflow uses automatic prompting, but you can enhance it:For Photos:```[Florence2 caption] + highly detailed, sharp focus, professional photography, enhanced details```For Art:```[Florence2 caption] + vibrant colors, sharp lines, professional quality, enhanced details```## 🔧 Troubleshooting### 💥 Memory Issues- Reduce tile size to 768 or 512- Lower steps to 12-16 - Disable seam fixing temporarily- Use smaller upscale factor (2x instead of 4x)### 🧩 Visible Seams- Keep "Band Pass" seam fixing enabled- Increase tile_padding to 48-64- Increase mask_blur to 12-16- Check seam_fix_width is adequate (64-128)### 🐌 Slow Performance- Reduce steps to 12-16- Set seam_fix_mode to "None"- Use 2x upscaling instead of 4x+- Increase tile size if VRAM allows### 🎭 Florence2 Issues- First run takes longer (model download)- Restart ComfyUI if Florence2 fails to load- Check internet connection for initial download## ⏱️ Performance Benchmarks| GPU | VRAM | Settings | Processing Time ||-----|------|----------|-----------------|| RTX 4090 | 24GB | 2x upscale, 1024px tiles, 20 steps | 15-30s || RTX 4080 | 16GB | 2x upscale, 1024px tiles, 16 steps | 25-45s || RTX 3080 | 10GB | 2x upscale, 768px tiles, 16 steps | 45-75s || RTX 3070 | 8GB | 2x upscale, 768px tiles, 12 steps | 60-90s |## 🎁 Workflow Advantages### 🚀 Speed Benefits- Nunchaku quantization: 3-5x faster than standard Flux- Smart tiling: Efficient memory usage- LoRA integration: Enhanced quality without speed loss### 🎯 Quality Features - Florence2 analysis: Intelligent prompt generation- Seam fixing: Professional tile blending- Comparison tools: Easy before/after evaluation- Flexible scaling: 2x to 8x upscaling options### 🛠️ User Experience- Automatic workflow: Minimal manual input required- Visual feedback: Image comparison built-in- Organized output: Timestamp-based file naming- Memory efficient: Works on consumer GPUs***🎯 This enhanced workflow combines Nunchaku's speed, Florence2's intelligence, and Ultimate SD Upscaler's quality for professional results with minimal setup
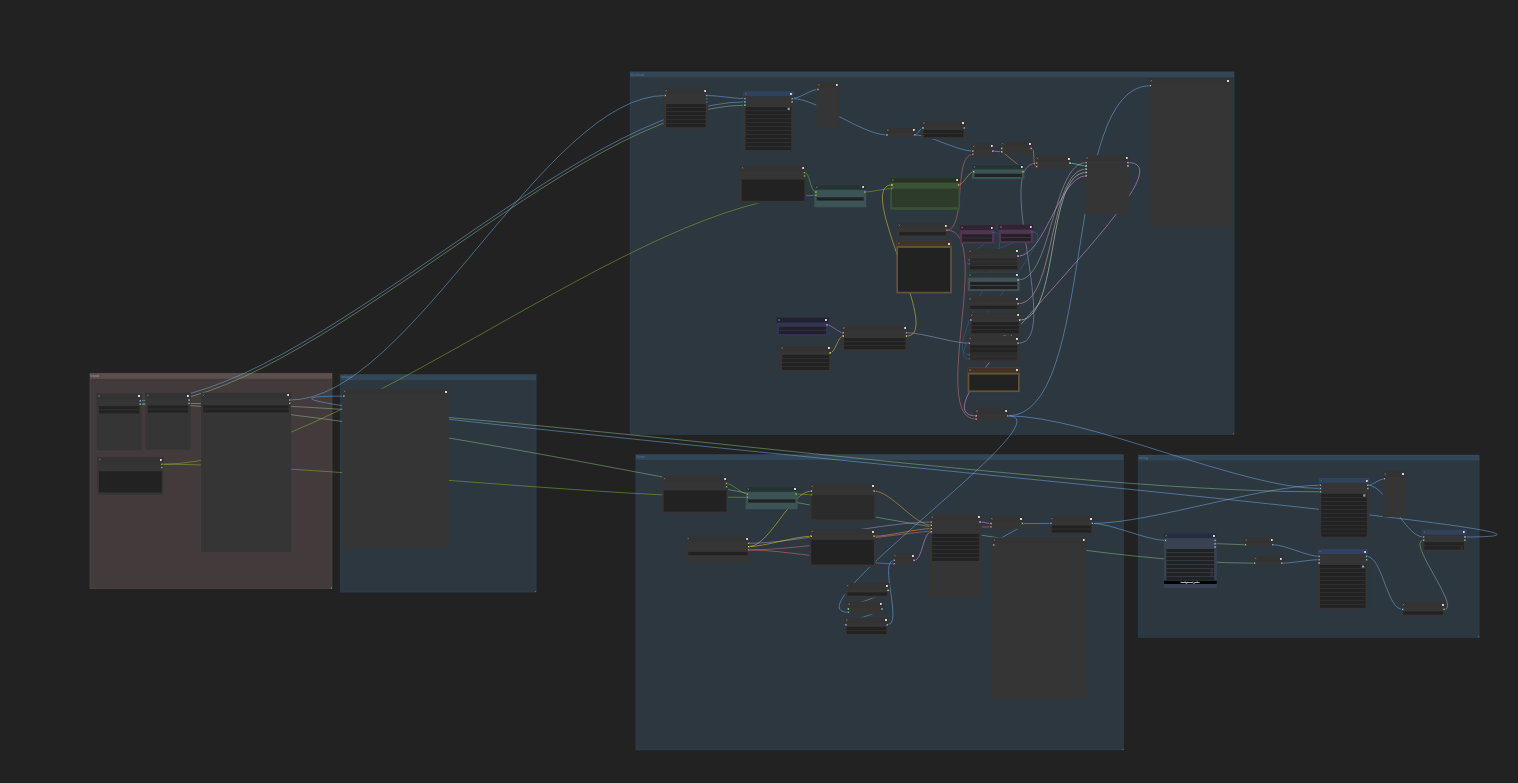
(workflow)头像框-add a frame!
生成边框的配套工作流:头像框-add a frame! - frame v1.0 | Flux Kontext LoRA | Civitai您需要注意:将压缩包中的“frame-original.png”放入“input”组内的“frame-original”节点里将压缩包中的“frame-mask.png”放入“input”组内的“frame-mask”节点里将您想输入的图片放入“input”组内的“your file”节点里将您想输入的对边框的描述提示词放入 “input”组内的“your prompt”节点里同时使用了WAI-NSFW-illustrious模型进行高清修复*本lora使用了网络上搜集的图片素材进行训练,本人仅以爱好者的身份娱乐使用Workflow for 头像框-add a frame! - frame v1.0 | Flux Kontext LoRA | CivitaiPlace “frame-original.png” (included in the package) into the “frame-original” node inside the input group.Place “frame-mask.png” (included in the package) into the “frame-mask” node inside the input group.Place the image you want to process into the “your file” node inside the input group.Enter the description of the frame (your prompt) into the “your prompt” node inside the input group.also used the WAI-NSFW-illustrious model For high-resolution enhancement* This LoRA was trained using image materials collected from the internet. I share this purely as a hobbyist for fun.
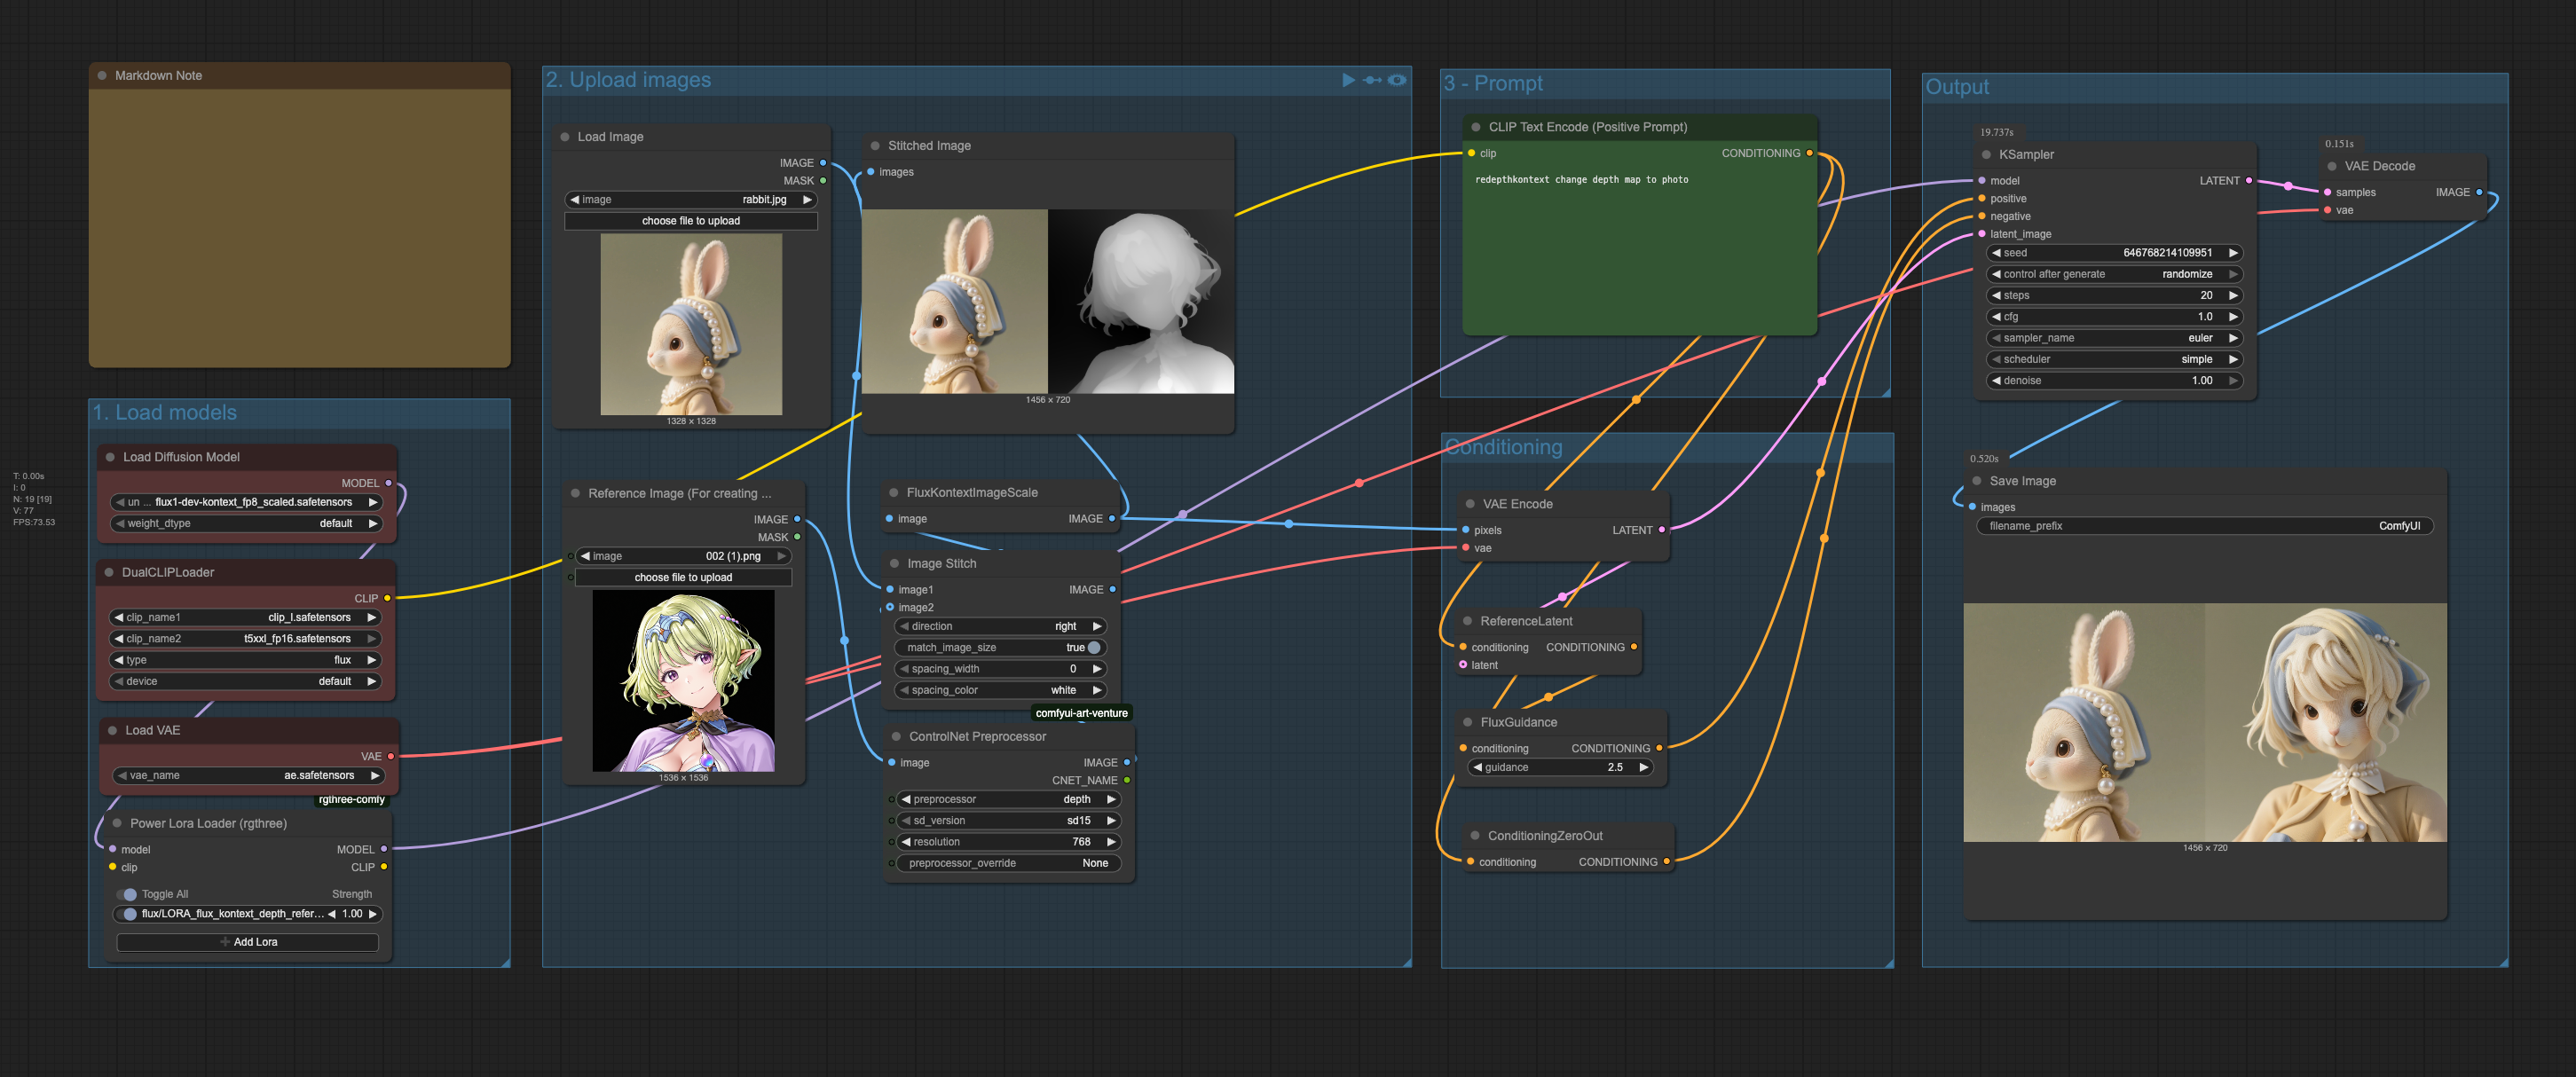
Depth Reference Fusion LoRA Example Workflow
That is a simple workflow to demonstrate how to use Depth Reference Fusion LoRA.https://civitai.com/models/1875016/depth-reference-fusion-loraIt is based on the default kontext workflow at https://docs.comfy.org/tutorials/flux/flux-1-kontext-dev
Kontext Image enlargement without distortion
This workflow uses kontext dev together with Deblur LoRA; the prompts in the workflow maximize consistency of a character’s appearance, but because the control can be too strong it often fails to high‑res the image. In that case you need to adjust the “Deblur lora strength” and “Flux Guidance” values, and you may even need to increase the CFG value.Note: this workflow cannot restore old, damaged photos.
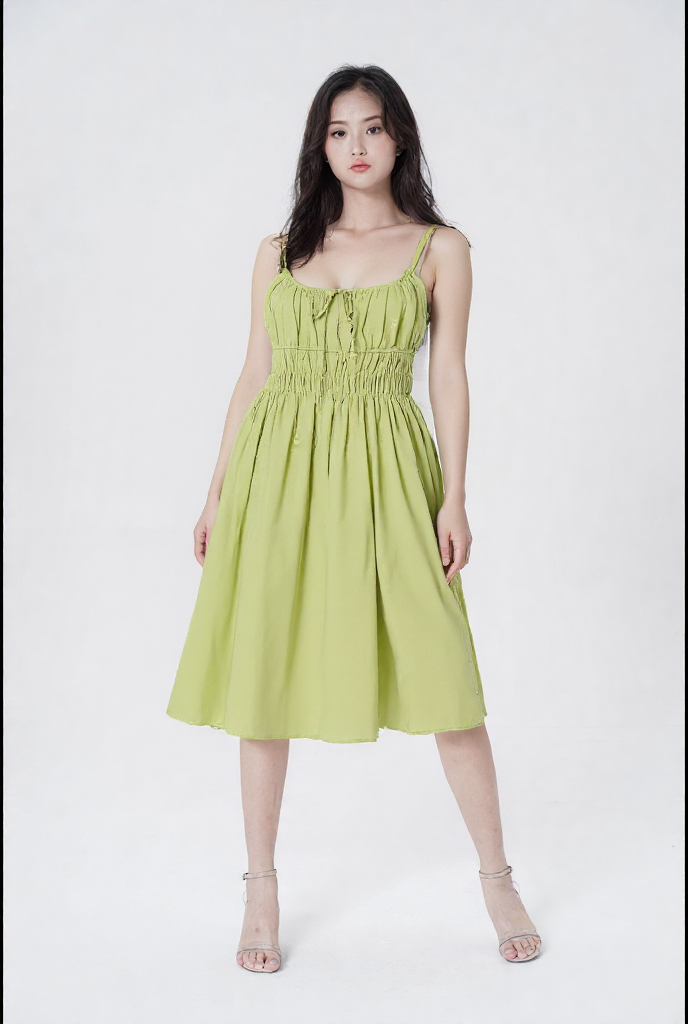
kontext-Any outfit change任意换装
kontext series!Changing the outfit workflow, with a slight modification of the prompt words, can alter the desired scene, character poses, etc. The workflow nodes may be a bit difficult to install, so it is recommended to test online first. If the results are good, then download this advanced workflow. Specific parameters and tutorials are also included in the online link below, so there's no need to worry about insufficient local computer configuration. Through the link: https://www.runninghub.ai/post/1956980051344547842/?inviteCode=rh-v1180 , and by registering via the above link, you can get 1000 rh points, and earn an additional 100 points daily, which can generate about 200 images. Come and give it a try!一键快速为模特换装,现可免费在线体验,工作流节点可能有些难以安装,因此建议先在线测试。如果结果良好,那么下载这个高级工作流。具体的参数和教程也包含在下面的在线链接中,无需担心本地电脑配置不够的问题 ,通过https://www.runninghub.ai/post/1956980051344547842/?inviteCode=rh-v1180 ,并通过上方链接注册,可获得 1000 rh 积分,每天额外获得 100 积分,可生成约 200 张图片。快来试一试吧!

kontext一One-click to generate Disney style 迪斯尼风格
The kontext series adapts the style of the target image based on related images to create a disney style, with very bright colors. However, due to limitations with Lola, you currently need to draw multiple cards. Specific parameter adjustments can refer to the workflow parameters in the link below:https://www.runninghub.ai/post/1955979424728580097/?inviteCode=rh-v1180. However, if you want to deploy this model and nodes locally, your computer requirements will be quite high; lower-end computers will generate images very slowly. Through the link above, you can quickly experience it online, and by registering through the link, you get 1000 points, plus an additional 100 points for logging in daily, which is completely sufficient for testing images. Come and give it a try!kontext系列,根据相关图像改编目标图像的风格成为复古未来主义风格,颜色非常的艳丽,不过由于罗拉的限制,目前还需要多次抽卡,具体参数调整可参照以下链接中的工作流参数:https://www.runninghub.ai/post/1955979424728580097/?inviteCode=rh-v1180,不过该模型及节点如果要本地部署对电脑要求较高,较低的电脑会生成图像会非常慢,通过上述链接,可在线快速体验,并且通过链接注册,送1000点,每天登陆还送100点,对测试图像完全够用,快来试试吧!
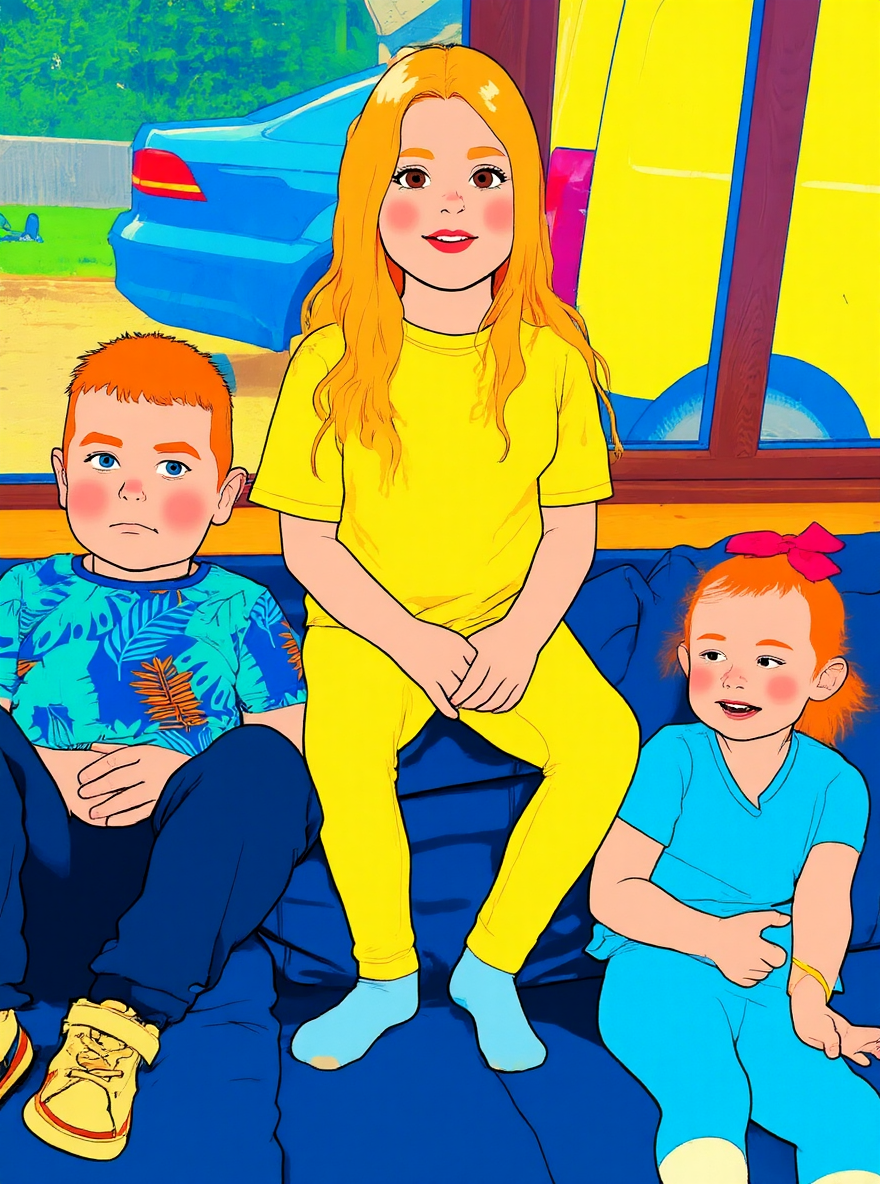
Kontext Repainting Series Retro Futurism复古未来主义
The kontext series adapts the style of the target image based on related images to create a retro-futuristic style, with very bright colors. However, due to limitations with Lola, you currently need to draw multiple cards. Specific parameter adjustments can refer to the workflow parameters in the link below:https://www.runninghub.ai/post/1957806868758458369/?inviteCode=rh-v1180. However, if you want to deploy this model and nodes locally, your computer requirements will be quite high; lower-end computers will generate images very slowly. Through the link above, you can quickly experience it online, and by registering through the link, you get 1000 points, plus an additional 100 points for logging in daily, which is completely sufficient for testing images. Come and give it a try!kontext系列,根据相关图像改编目标图像的风格成为复古未来主义风格,颜色非常的艳丽,不过由于罗拉的限制,目前还需要多次抽卡,具体参数调整可参照以下链接中的工作流参数:https://www.runninghub.ai/post/1957806868758458369/?inviteCode=rh-v1180,不过该模型及节点如果要本地部署对电脑要求较高,较低的电脑会生成图像会非常慢,通过上述链接,可在线快速体验,并且通过链接注册,送1000点,每天登陆还送100点,对测试图像完全够用,快来试试吧!
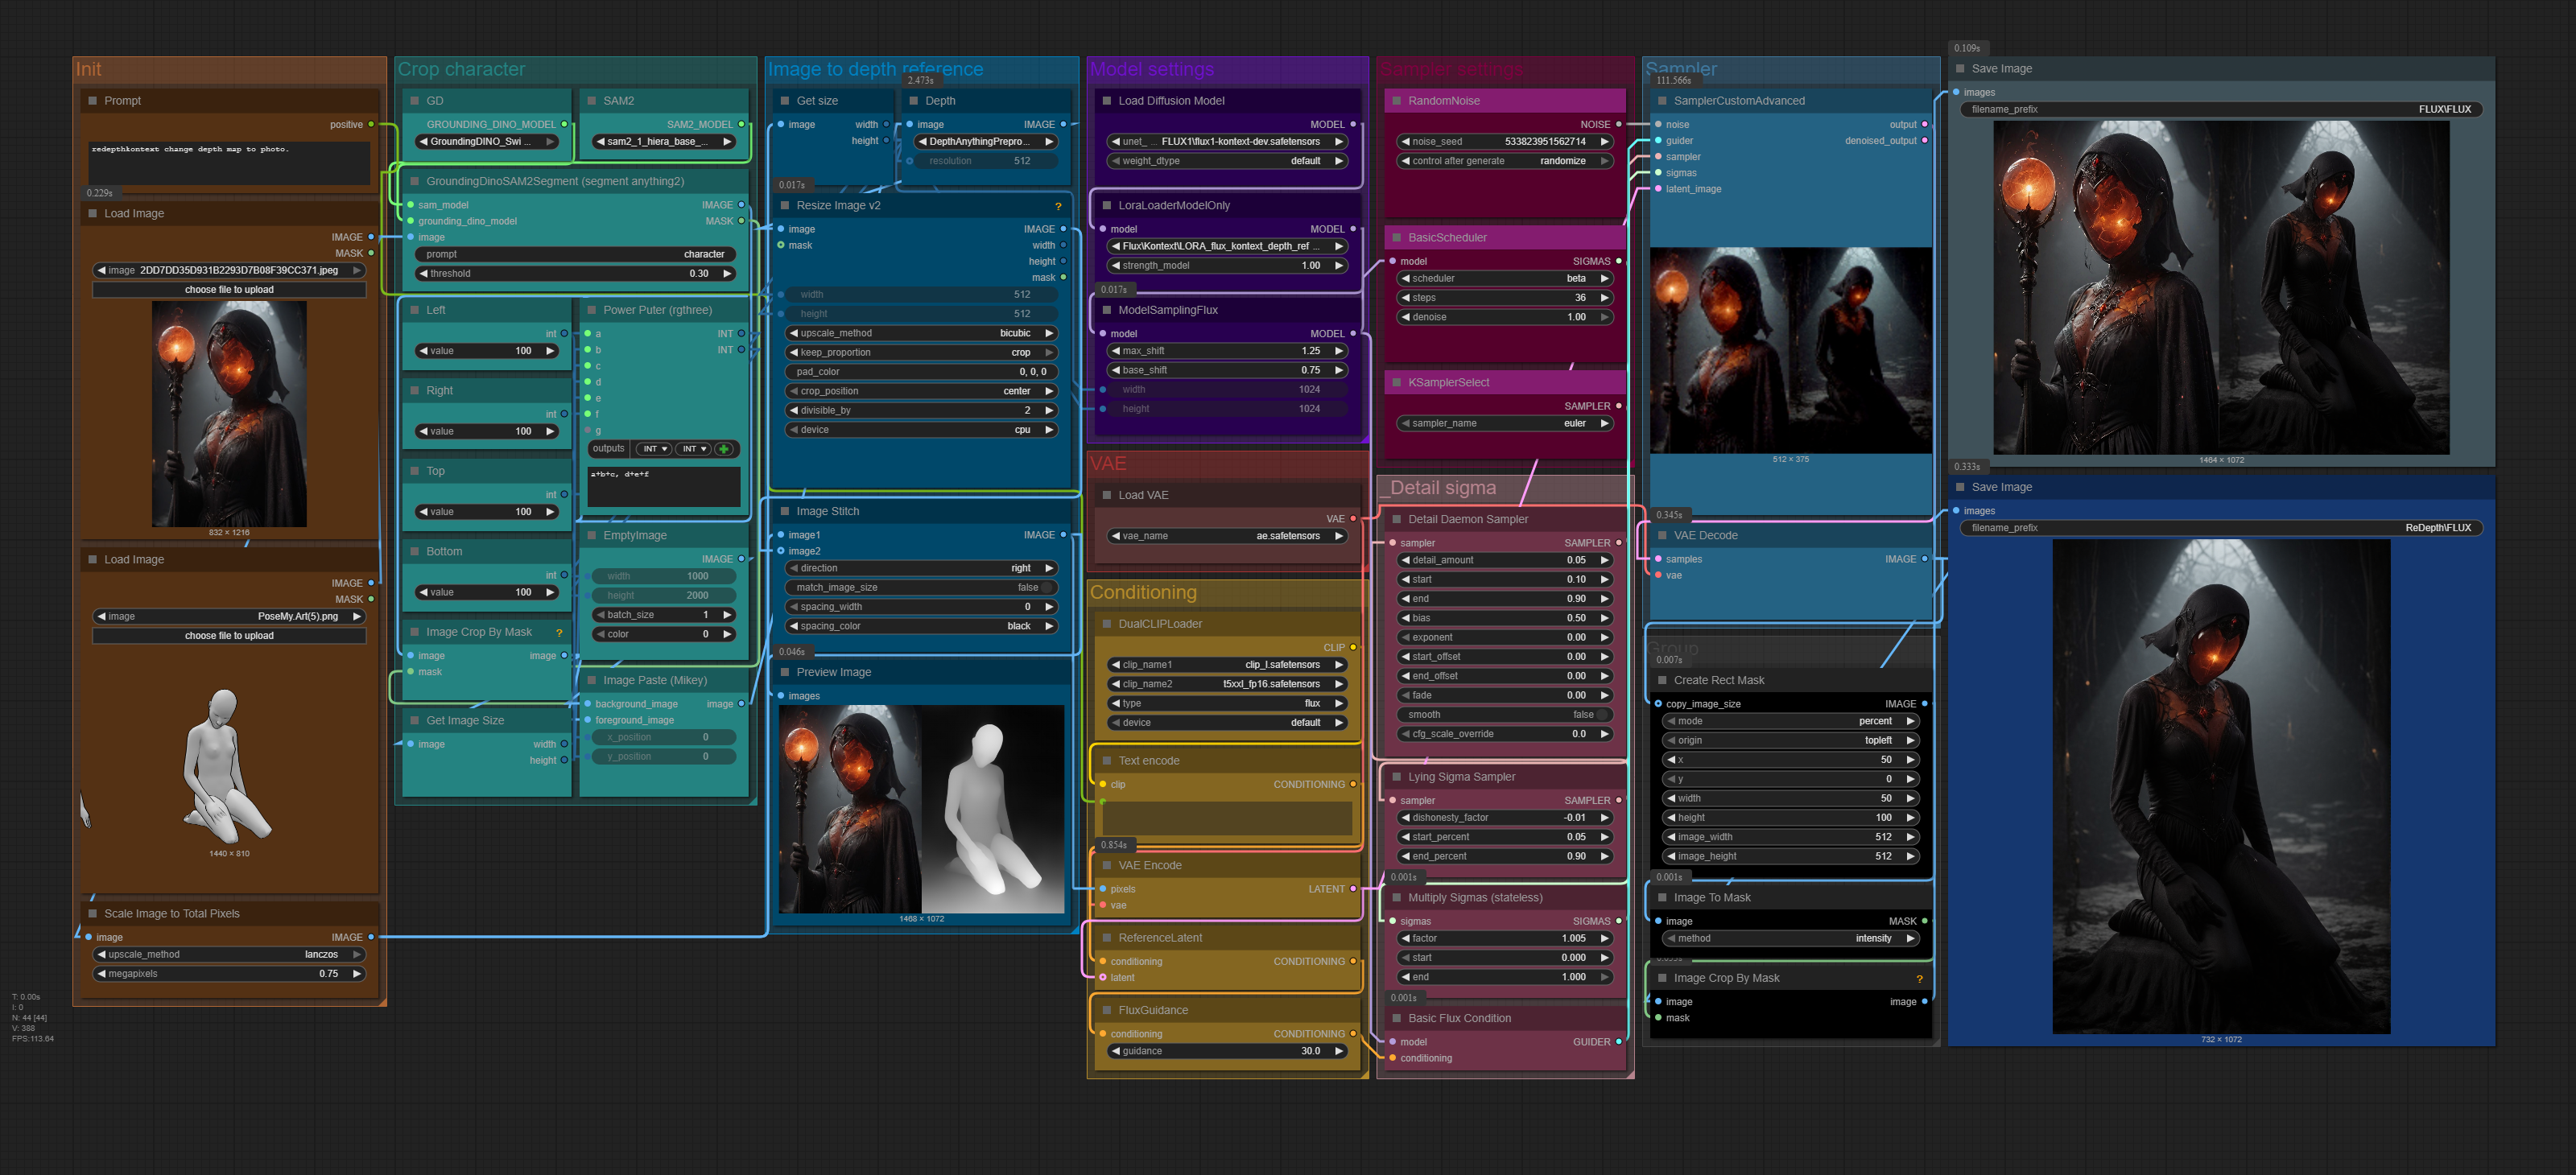
Copy pose from any image - Flux Kontext workflow
Using https://civitai.com/models/1875016/depth-reference-fusion-lora.The workflow lets you load any 2 images: first is the reference character, second is the pose image., It makes the pose into a depth reference, resize to your original image, you can pad the image (ie. zoom), though it will be cropped and resized keeping aspect ratio of original image.
Desaign Kontext Edit & Inpaint
🛠️ Desaign Kontext Edit & InpaintA new addition to the Desaign workflow suite — this one focuses on precise inpainting with Flux Kontext, giving you more control over how you edit, replace, or enhance zones inside your image.Unlike traditional inpainting setups that often disrupt the entire composition, this method blends Flux Kontext with smart inpaint logic to preserve the overall image while only modifying the targeted masked area. That means your colors, textures, and noise stay consistent everywhere else.🔑 Key Features:Flux Kontext-powered editing → use natural language to reimagine a masked area.Preserves composition & details → instead of recalculating the whole image (changing noise, tones, or colors globally), it only edits the selected region.Flexible control → edit small zones, swap elements, or make global adjustments seamlessly.Side-by-side comparison → instantly see the before/after with integrated image comparer.⚙️ How It Works:Load your base image.Draw a mask over the area you want to modify.Enter a new context prompt in the Flux text box (e.g. “this is now a man mounting a polar bear”).Run the workflow — the masked area updates while the rest of the image stays untouched.⚠️ Notes:Results depend not only on your prompt, but also on the type of image and the size of the inpaint zone.If the mask is too large, Flux Kontext may sometimes refuse to apply any change at all.💬 Join our community: Desaign Discord
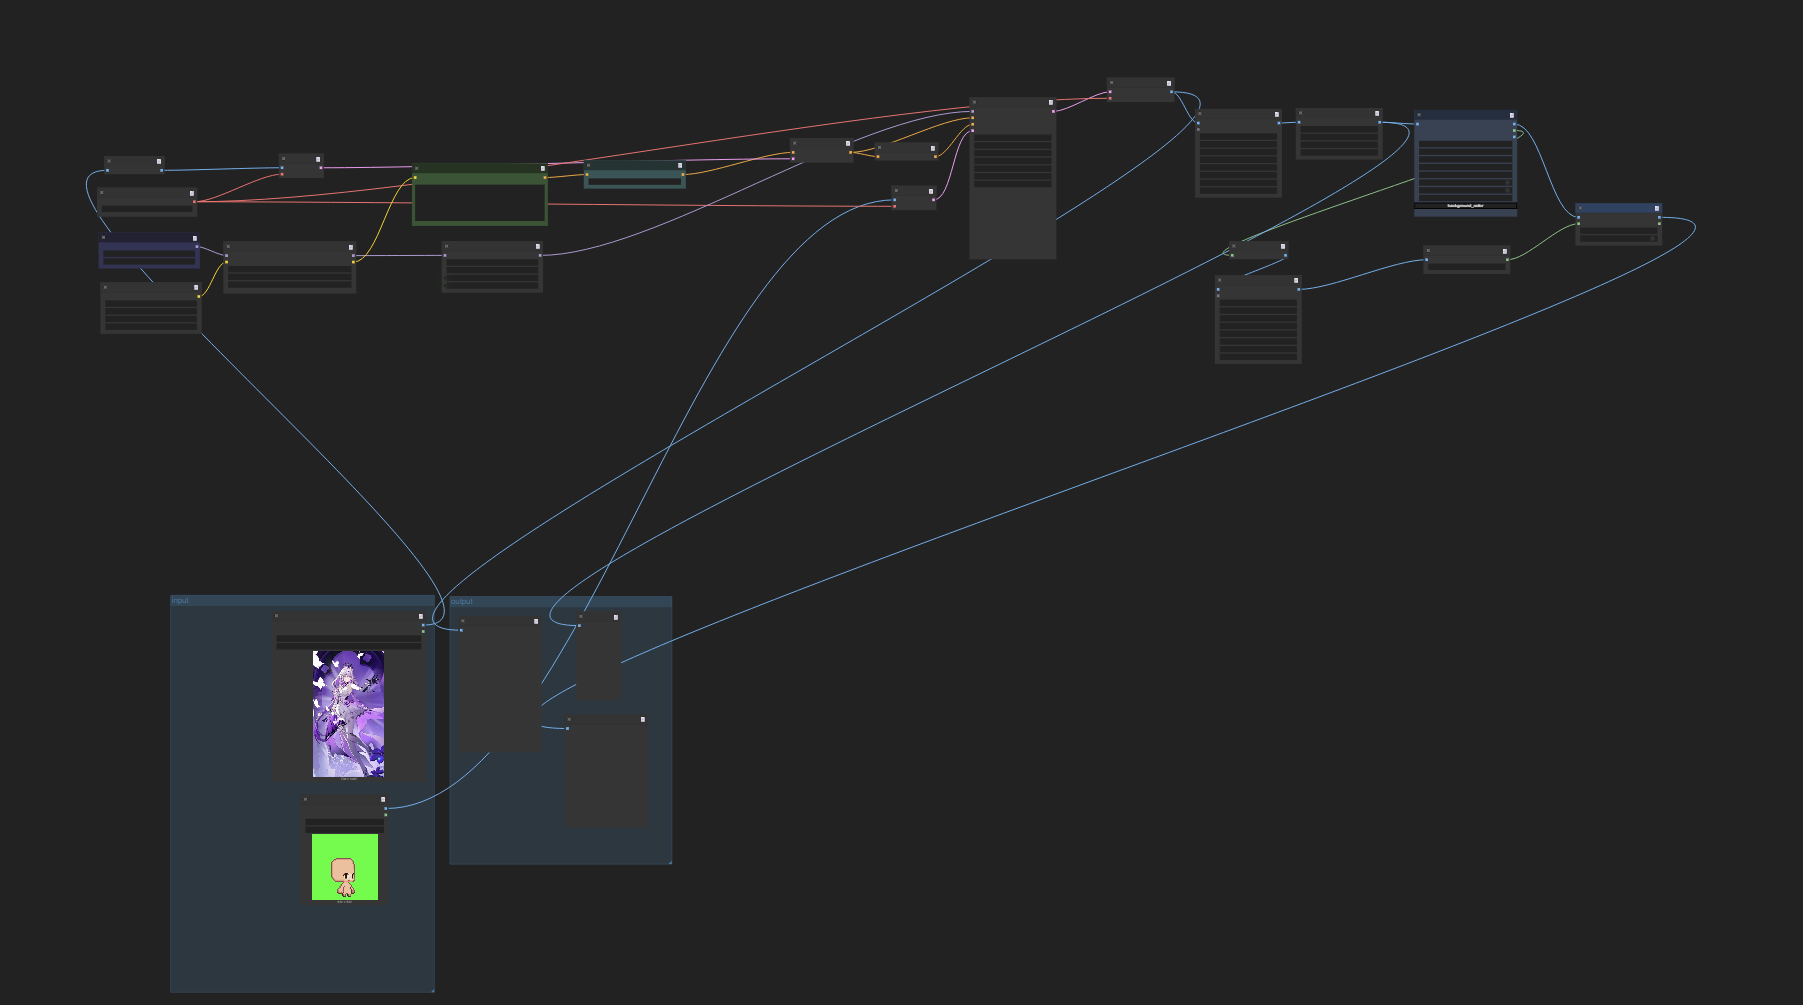
(workflow)像素游戏角色化-make a pixel sprite!
生成像素角色的配套工作流>>>像素游戏角色化-make a pixel sprite! - pixelsprite v1.0 | Flux Kontext LoRA | Civitai用原型图以控制生图的比例,您需要注意:将压缩包中的“sample-x.png”放入“input”组内的“sample-x”节点里将您想输入的图片放入“input”组内的“your file”节点里“output”组内的“original”节点输出原生图像512*512“output”组内的“pixelate”节点输出真实的像素画图像64*64“output”组内的“pixelate+rmbg”输出透明背景的像素化图像64*64*本工作流中使用的lora使用了手游“坎公骑冠剑”的素材进行训练,本人仅以爱好者的身份娱乐使用This workflow uses a reference image to control proportions>>>像素游戏角色化-make a pixel sprite! - pixelsprite v1.0 | Flux Kontext LoRA | CivitaiPlace the file “sample-x.png” (included in the package) into the “sample-x” node inside the “input” group.Place the image you want to process into the “your file” node inside the “input” group.“original” node (inside the output group): outputs the original 512×512 generated image.“pixelate” node (inside the output group): outputs a true pixel-art image at 64×64.“pixelate+rmbg” node (inside the output group): outputs a pixelated 64×64 image with transparent background.* The LoRA used in this workflow was trained with material from the mobile game Guardian Tales. I share this purely as a hobbyist for fun.
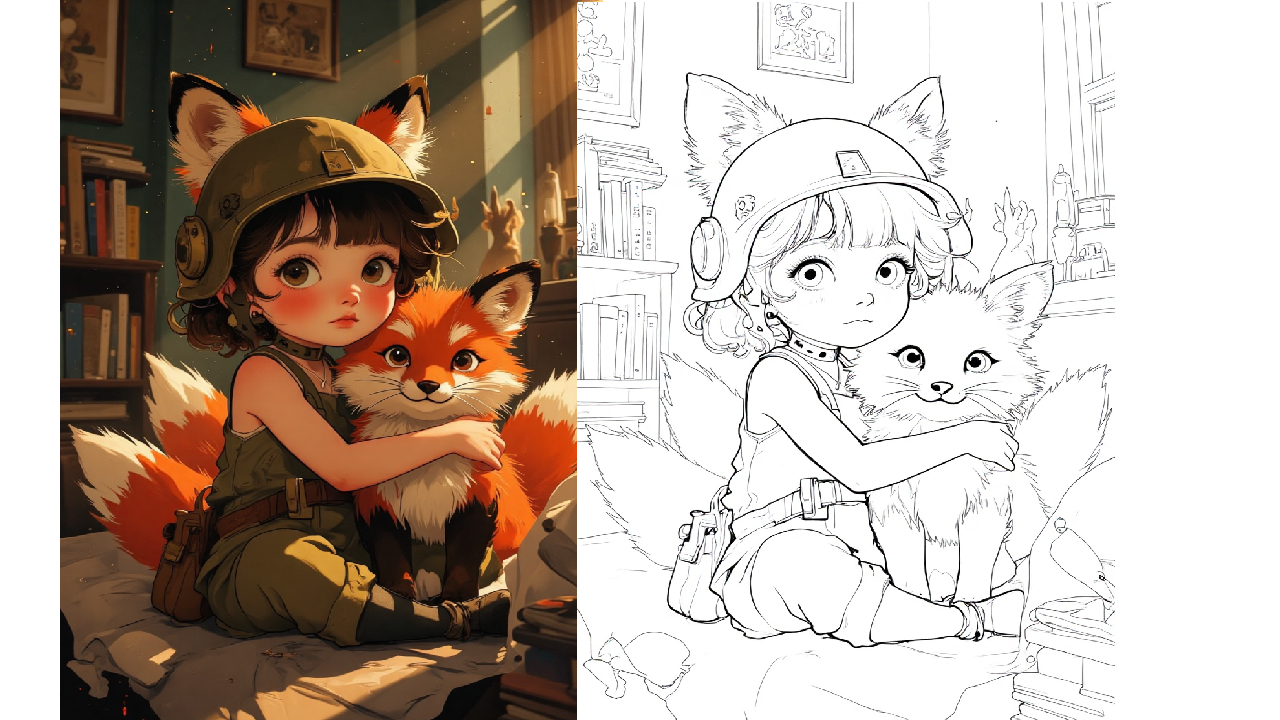
ColoringBook - KontextDev - 1 I2I - 1 Lora - V2
Upload an image and it will be transformed into a drawing, ready to be colorized.Create for this BOUNTY .Workflow in WebLive.Working live APPLI make with this workflow.--------V2 =>add LORAadd Prompt SELECTERadd PRE-VAE-Encoder UPScaler -> For more Details------------------> only ONE Guidance CFG-> Sampler => Euler A + simle-> shift 0.2 to 1Choice:-> Background <=> No background> For Appli :> auto setting => Final Image Size = Source Image Size> auto setting => Batch = 1> auto setting => 10 Steps> auto setting => Guidance 2.5> auto setting => Denoise 1> auto setting => clipskip = 2===============
Simple Kontext Inpaint Cropping workflow
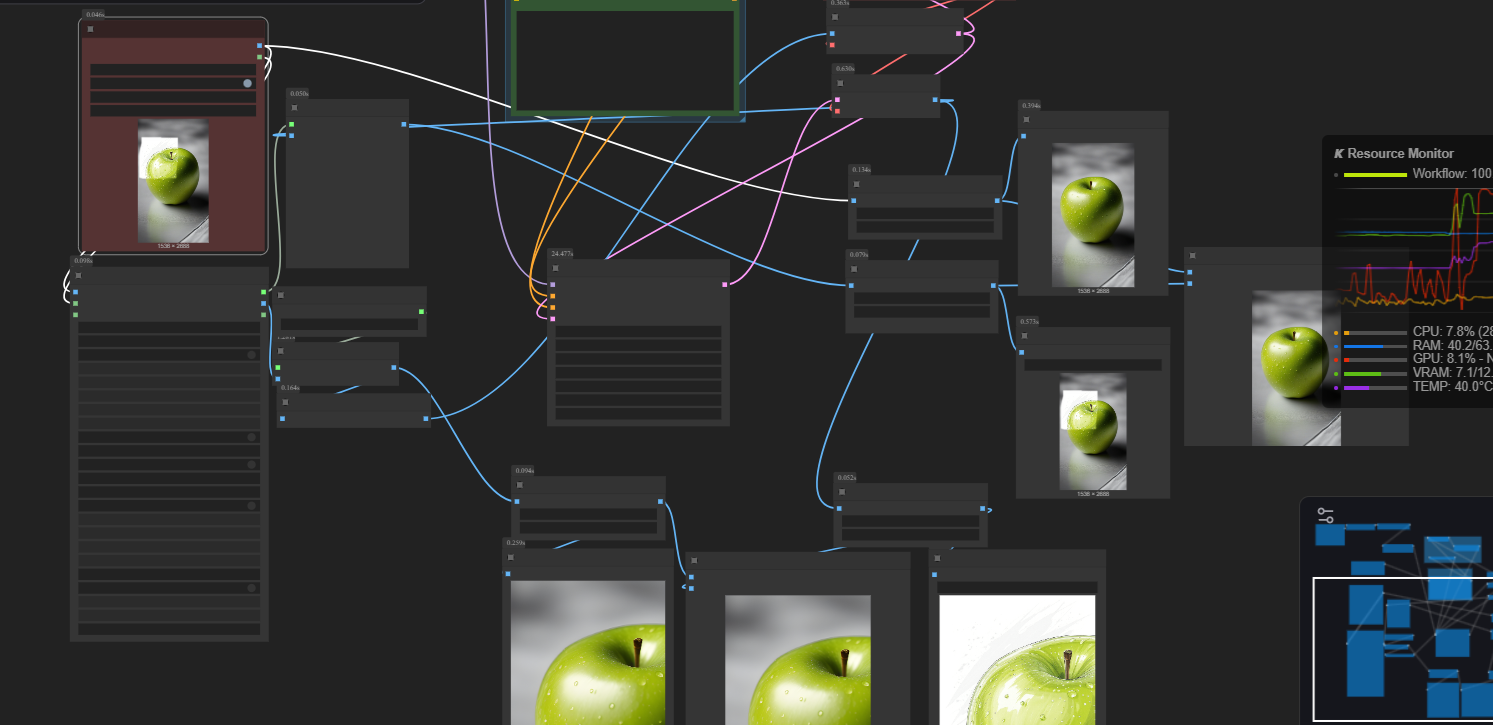
This workflow is designed to focus on a specific region of an image when prompting for changes in the image. You simply open the mask editor and mask the part you want to use. (right click on the "load image" node and select open mask editor")Version 2 adds better upscaling of the masked portion for much better end results. It also adds both a nunchaku and non nunchaku version. (If you were one of the first 10 people to download version 2, please re-download it or at least replace the Load Image (from outputs) with a regular Load Image node. Comfy somehow automatically changed it during an update).You can install sage attention and nunchaku by following this person's guide:www.youtube.com/watch?v=CgLL5aoEX-sYou can mess with the inpaint crop node settings a little, but I found better results by upscaling using an upscaler model after it is cropped, right before it gets resized for flux kontext. The final upscalers don't do as much, just make it bigger. You could probably rescale again here with a model if you wanted to.Kontext often changes the resolution slightly which results in the final image not matching up correctly. This workflow works best for lora that only change one small part of the image.
JUJIAO-Business design(workflow)
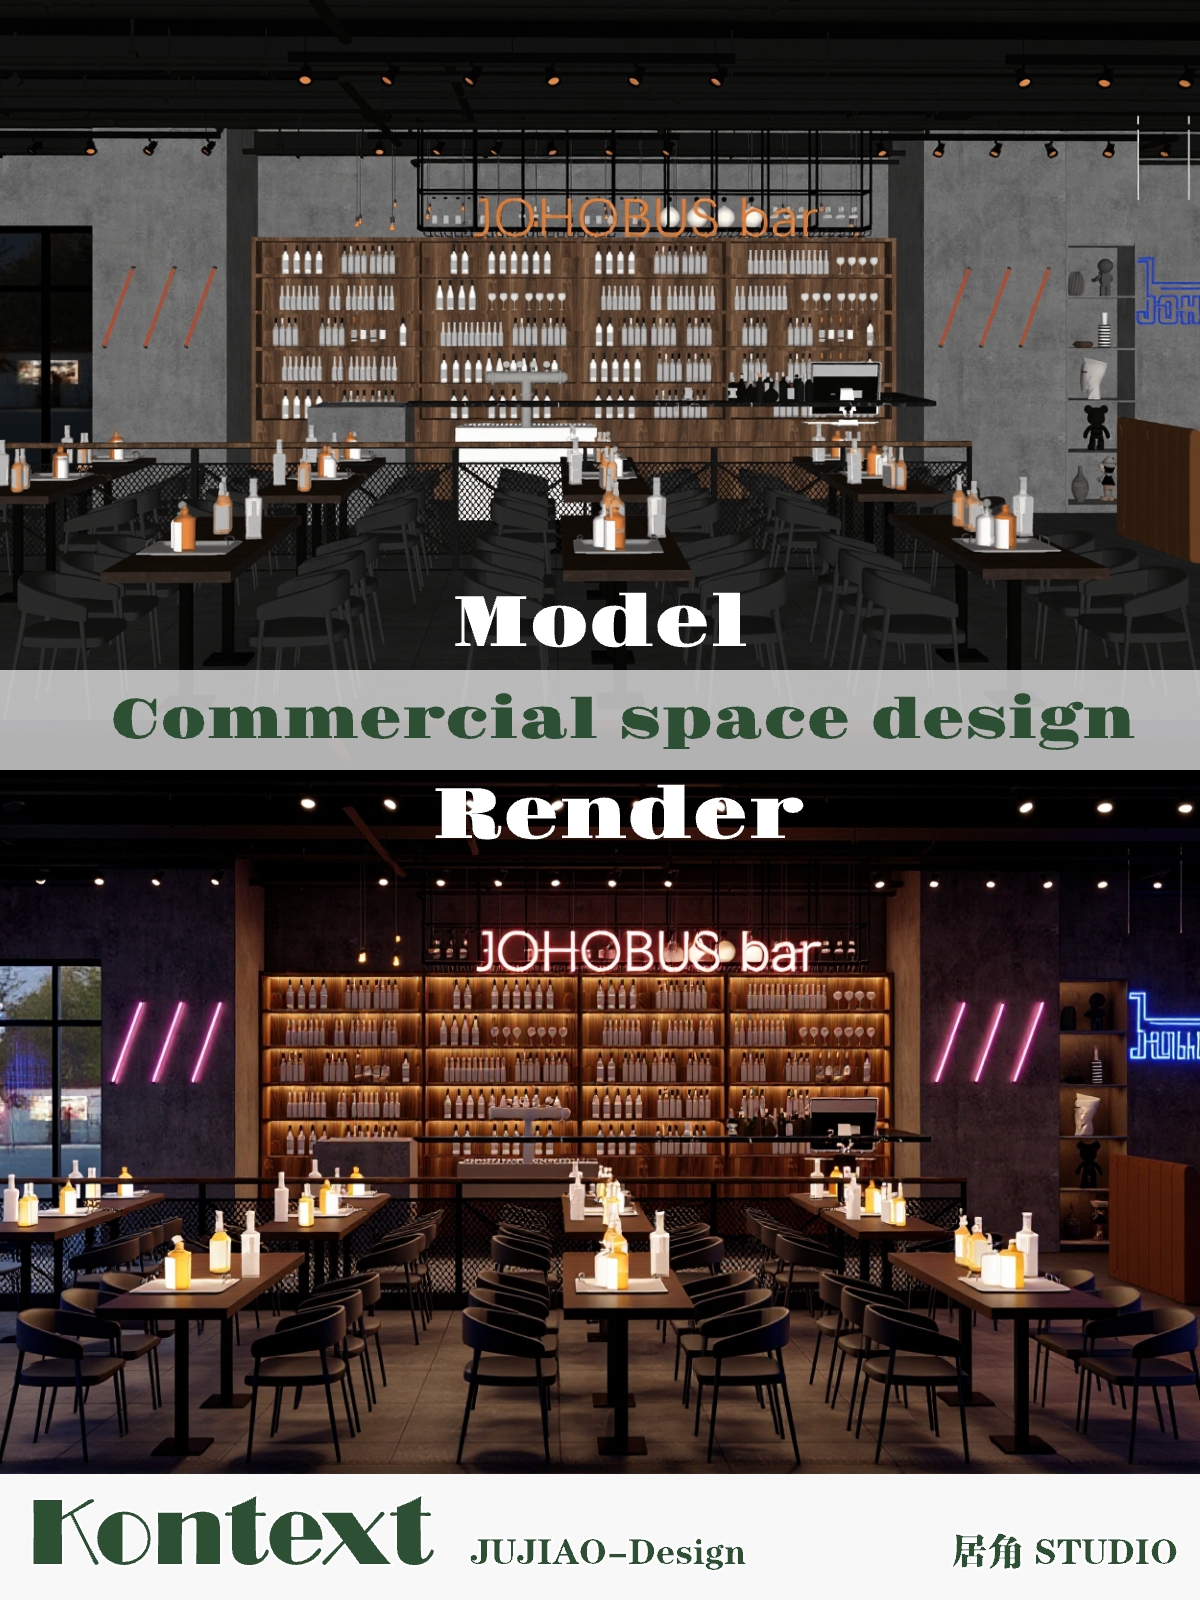
📄 模型说明书 | Model Guide居角 · Jujiao Studio 感谢大家的支持! Thanks for your support! 通过以下链接注册可获得专属福利: Register via the links below to get exclusive rewards:中文说明:本模型由 100+ 对商业空间设计效果图 训练而成,能够快速生成高质量的商业空间渲染图。欢迎大家进行测试和体验:🌍 世界用户体验地址:https://www.runninghub.ai/post/1955939161154965505/?inviteCode=rh-v1037(点击链接注册即可获得 1000 RH币,可生成 50+ 张图片)🇨🇳 中国用户体验地址:https://www.runninghub.cn/post/1955939161154965505/?inviteCode=rh-v1037🔗 备用链接:https://www.runninghub.ai/?inviteCode=rh-v1037(点击链接注册即可获得 1000 RH币,可生成 50+ 张图片)English Description:This model is trained on 100+ pairs of commercial space design renderings, capable of generating high-quality commercial interior visuals in seconds.You are welcome to test and experience it:🌍 For Global Users:https://www.runninghub.ai/post/1955939161154965505/?inviteCode=rh-v1037(Click the link to register and get 1000 free credit, enough to generate 100+ images)🇨🇳 For Chinese Users:https://www.runninghub.cn/post/1955939161154965505/?inviteCode=rh-v1037(Click the link to register and get 1000 free credit, enough to generate 100+ images)📌 我的平台 | My Platforms 📷 小红书 | Xiaohongshu https://www.xiaohongshu.com/user/profile/6377a1d2000000001f01fc99 💬 微信 | WeChat JUJIAODESIGN 📢 Telegram频道 | Telegram Channel https://t.me/jujiaostudio_comfyui 👥 Telegram群组 | Telegram Group https://t.me/+8pphWHC0u6lmNGVlJUJIAO 渲染指令——中英双语小说明书JUJIAO Rendering Prompt — Mini Bilingual Guide用途 | Purpose用四句话,快速把“模型截图”转成品牌一致、可控风格的效果图/渲染。Use four simple sentences to turn a “model screenshot” into a styled, controllable rendering.结构 | Structure (4 句必填 / 4 required lines)触发词CN:第一句触发词:JUJIAOEN: First sentence (trigger word): JUJIAO任务说明CN:第二句:将模型截图转为效果图 / 渲染EN: Second sentence: Convert the model screenshot into an effect picture / rendering空间描述CN:第三句:空间类型(如办公、酒店、商业、KTV、酒吧等),可附风格/功能EN: Third sentence: Space description (office space, hotel, business, KTV, bar, etc.), optionally with style/function光照与氛围CN:第四句:自然采光或补充室内灯光,并描述光色与整体氛围EN: Fourth sentence: Natural light or adding indoor lighting, and describe light color and overall mood/atmosphere
ComfyUI - Coloring Book using Flux Kontext
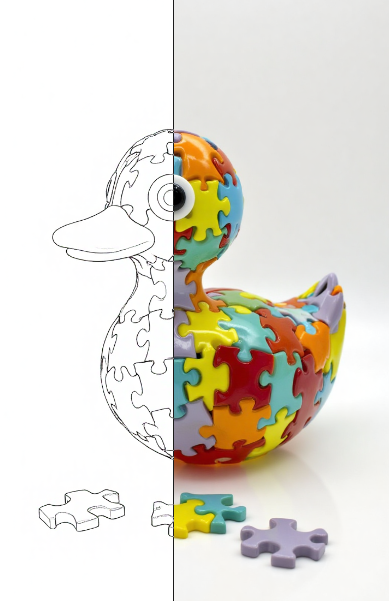
Convert images to coloring book style using Flux Kontext model.Other style options that work well:southpark animationclaymationdisney princess cartoonjapanese woodblock carvingpixel artVaporwaveZen brush illustrationUnderground comixPsychedelic tripStencil artEncaustic pigmented waxthick texture ImpastoAcrylic pour cell marblingdark evil creepy styleplushie style, everything is soft furry plush fabricaction figure toys, everyone is an action figure toy and items are action toy accessoriesivory carvingwood carvingsand sculpturesteampunk clockwork and gearsneonpunk