ComfyUI Workflows
Browse real AI workflows from Flux, SDXL, Pony, ControlNet, video generation and commercial AI creators.

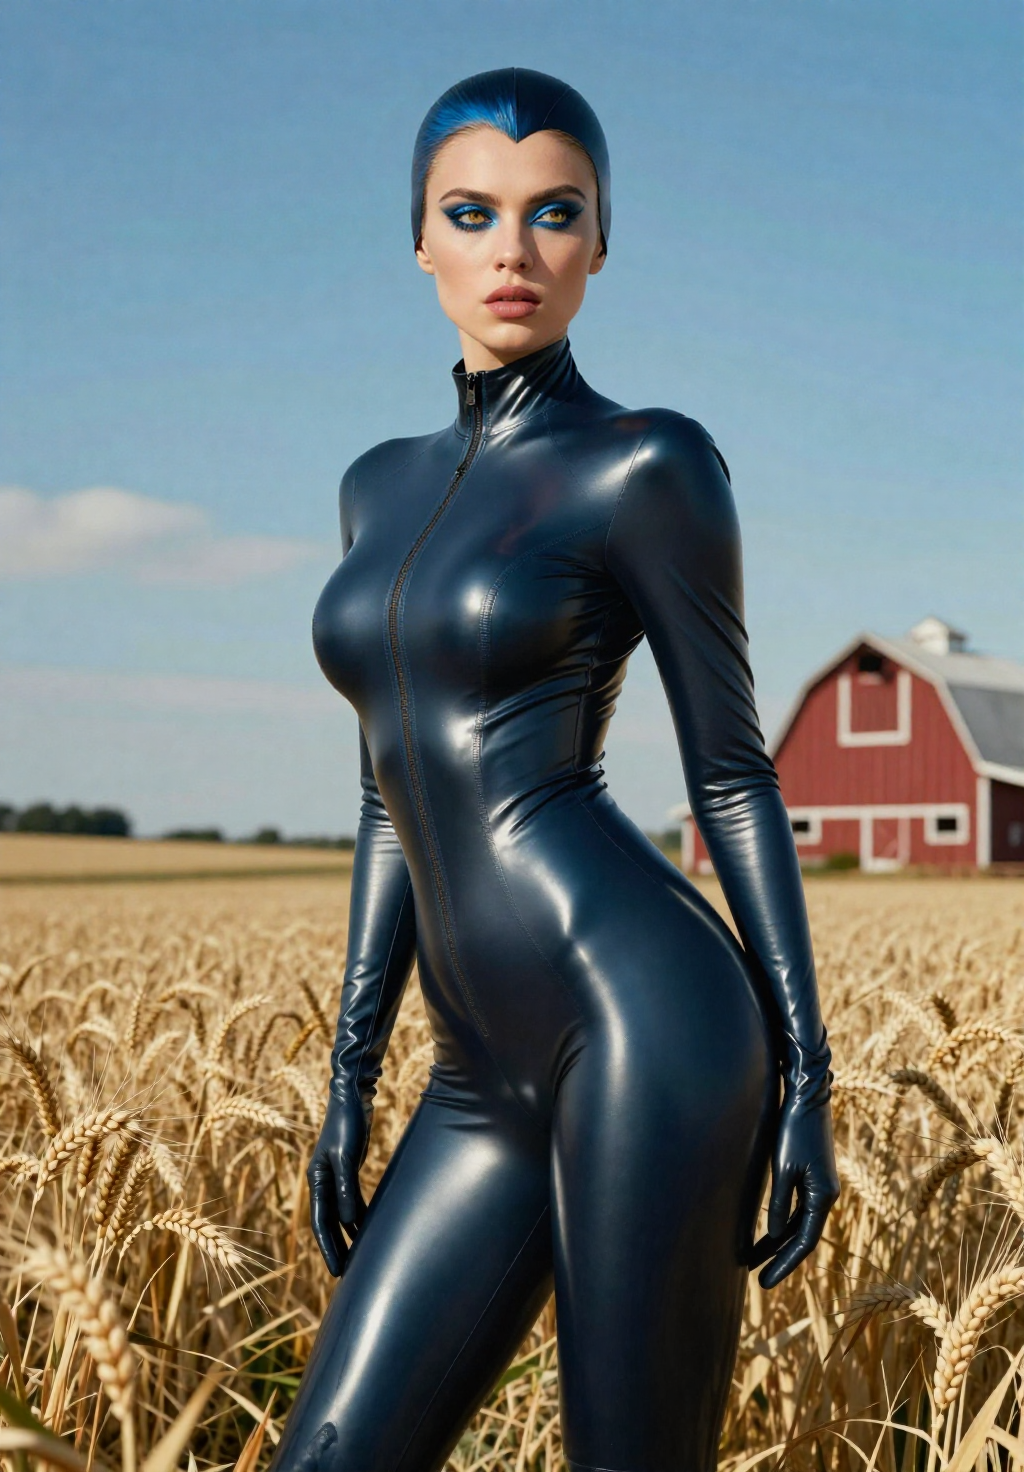
Rebels SPARK.Chroma V1
SPARK.Chromaa fine-tuned model designed for generating realistic images. Based on the Chroma1-HD model with 8.9B parameters and Apache License 2.0bf16 modelhttps://huggingface.co/SG161222/SPARK.Chroma_v1/blob/main/SPARK.Chroma_v1_1024.safetensorsfp8 modelhttps://huggingface.co/clover-supply/SPARK.Chroma_v1_1024_fp8_e4m3fn/blob/main/SPARK.Chroma_v1_1024_fp8_e4m3fn.safetensorstext encoderhttps://huggingface.co/comfyanonymous/flux_text_encoders/blob/main/t5xxl_fp8_e4m3fn_scaled.safetensorsvaehttps://huggingface.co/Comfy-Org/z_image_turbo/blob/main/split_files/vae/ae.safetensors

Lonecat's Chroma Workflow
Note: I spend a lot of time on these to make sure they are top notch. If you have ANY issues, I'm very responsive. hit me up and I'll resolve them for you.A complete user and troubleshooting guide inclusing a list of common error messages can be found here https://civitai.com/articles/24678/how-to-use-my-workflows-a-comprehensive-breakdown也有中文说明Instagram: https://www.instagram.com/synth.studio.models/Buy me a☕ https://ko-fi.com/lonecatoneThis represents many of hours of work. If you enjoy it, please 👍like, 💬 comment , and feel free to ⚡tip 😉Features:I2I prompt assistQwenV2 Prompt enhancer.Sage Attention: Speeds up productionUltimate Upscaler for prescaling and hi res fixDetailing Suite for face, hands, eyes, Seed VR2 Upscaler to get 4k on low VRAMMassive Post Production SuiteFull tutorial available.也有中文说明

Flux.2-Klein-Base-9B — All-in-One Workflow by TreeMale
🐞 Send feedback about any bugs you find or potential improvements.A series of processes for generating high-quality images focused on realism use model Flux.2-Klein-Base-9B (for the test, I took one image and ran it through the entire creation process).⚠️ You can find a list of required models, instructions and a description of the process in the Workflow.For your convenience i have combined all processes into one workflow and made "user friendly" interface. Processes list:🤖 Flux.2-Klein-Base-9B — Mannequin Character by TreeMale🗓️ RELEASE DATE: [17.03.2026]📋 What does this workflow do?This workflow converts a photograph of a character into a stylized mannequin image.🚩 Result: A clean 3D mannequin with a crisp white surface on a black background.🤖 Flux.2-Klein-Base-9B — Camera Angle by TreeMale🗓️ RELEASE DATE: [18.03.2026]📋 What does this workflow do?This workflow changes the camera angle of the input composition image.🚩 Result: The input composition image is acquired from a different camera angle.🤖 Flux.2-Klein-Base-9B — SeedVR2 Upscaler by TreeMale🗓️ RELEASE DATE: [20.03.2026]📋 What does this workflow do?This workflow upscale the input image and removes random noise.🚩 Result: Upscaled and improved version of image.🤖 Flux.2-Klein-Base-9B — Qwen-3-VQA Prompt by TreeMale🗓️ RELEASE DATE: [26.03.2026]📋 What does this workflow do?This workflow creates a structured prompt from a set of user positive and negative tags.🚩 Result: Generate text prompt from a set of user tags.🤖 Flux.2-Klein-Base-9B — Text Label by TreeMale🗓️ RELEASE DATE: [31.03.2026]📋 What does this workflow do?This workflow creates a text label in bottom image border.🚩 Result: Image with a frame and text label.🤖 Flux.2-Klein-Base-9B — Realistic Skin by TreeMale🚫 Soon... Works in progress... Look to updates!🙏 Special thanks!Black Forest Labs — for the FLUX.2-Klein-9B model!Comfy-Org — for the optimized CLIP and VAE!Civit.AI — for the good community!You — for using!Created with ❤️ for the community. Share your results and feedback! Many thanks to the creators of the original models - give him some tips!

AUTO-SEND FILES PRIVATE/SECURE 🔐: ComfyUI Output Folder >> Encrypt >> Send to GoogleDrive / Dropbox 😎👍
Sick of manually downloading your ComfyUI output files from the cloud? Want them to just show up in your GoogleDrive automatically? (or DropBox - Link Below)Need to share files with a team? Want to keep your files private and secure? Encrypt your files and send with privacy and security (optional).If unsure if this is useful to you read my article about why you might want to consider this tool: https://civitai.com/articles/26091/how-to-encrypt-and-privately-send-your-filesDownload this workflow and follow instructions to access DriveSend tools to work like a pro, privately and secure. Prefer Dropbox? version available too here >> DropSendTool Workflow:New Files save in Output folder.New Files Get Encrypted (optional)(encryption uses AES-128 encryption for the files and SHA256 checksum verification for file integrity)New Files get sent to your Google Drive (or DropBox if preferred DropSend)Move Files from GoogleDrive (or DropBox if using) to your local Drive or External Hard Drive.Decrypt Files Locally with Decryption Scripts.Works with any free Gmail account or Dropbox version available too.DriveSend · DropSendSetup is around 20 mins. FOLLOW SETUP INSTRUCTIONS As you have to do some setup, once setup its set it and forget it. Very helpful tools for getting automatic file access from cloud to your Google Drive or Dropbox.

Chroma-ZIT-Upscaler-Detailer
This workflow combines the positive attributes from Chroma and Z-Image without them stepping on each other.Chroma generates the based image, z-image details the image without destroying it, then it upscales it using Ultra Flux VAE, finally it is detailed further by Z-image in the new high resolution.Credits:The original workflow came from https://github.com/vrgamegirl19/. However the original workflow will absolutely destroy the image, specifically any anatomical detail.Original Workflow(s):https://github.com/vrgamegirl19/comfyui-vrgamedevgirl/tree/main/Workflows/Z-ImageUpscaleUltra Flux VAE:https://huggingface.co/Owen777/UltraFlux-v1/resolve/main/vae/diffusion_pytorch_model.safetensors?download=truecustom_nodes:erosdiffusion-eulerflowmatchingdiscreteschedulercontrolaltai-nodesRES4LYFwas-nsrgthree-comfyComfyUI_JPS-Nodes

Chroma refine to Z-image turbo
This workflow allows users to generate a coarse image using Chroma and then refine it with the Z-Image-Turbo model.Regarding Denoise Strength: If you are generating NSFW images or subjects that Z-Image might not recognize, you should keep the denoise around 0.2-0.3 to preserve details. Alternatively, use 0.6 or higher to make the images more realistic.Tip: If you want to reduce VRAM usage, simply use the same checkpoint for both model loaders.This is just my personal workflow, intended only as a rough reference. It's not perfect, but I hope it serves as a starting point to inspire better ideas. Huge thanks to Lodestone Lodestone Creator Profile | Civitai for providing such an amazing model.

GonzaLomo Chroma Refiner Workflow
This is the workflow I use with my GonzaLomo Chroma checkpoint.
Lazy people's workflow ( Wildcards + Random Resolution )
With a help of an user in Banodoco discord, I've change the way it generates the sampler by adding a noise correction to generate better quality imagesAugust 26th 2025 - I'm also abandoning Flux and moving to chroma, will keep all versions here, but probably will not update them anymoreI've created this workflow as a way to streamline my process—partly due to a bit of laziness and a frequent lack of creative spark. It’s designed to help generate consistent, high-quality results with minimal effort.Please note: for this to work correctly, you’ll need to install the Image Metadata Extension directly from the GitHub repository below, if you want to save the images with Metadata, otherwise just replace it for the normal save image or one of you preference:https://github.com/edelvarden/comfyui_image_metadata_extensionThe version included with ComfyUI currently has some issues, so it’s highly recommended to use the GitHub version instead to ensure full functionality.You will need to create the Wilcards folder in the main ComfyUI folder and have the wildcards there:Workflow explanation:Wildcards group:The Wildcards group is where you will setup the wildcards that you want to use. All wildcards are written with double underscore ( __ ) before and after the name of the file that includes the values to be used.Example, I have a wildcard in the ComfyUI/Wildcards folder that is called poses.txt, to use it, I would need to add the __poses__ in the Wildcard Processor (Mikey) nodeI've kept a Note node So i can keep up with all the wildcards files that I have createdHere are all the wildcards that I've generated until this point:https://drive.google.com/drive/folders/1pxNUsNx7EUBxm55fHdcpWsEGmzpl1euK?usp=sharingRandomFluxResolution GroupIn this group, it is using the wildcard FluxResolutionCalculatorNode-AR that has all the AR that the Flux Resolution Calc node is expecting to receiveWith this change, you don't need to worry about having the wrong resolution, as it will generate the correct one with the correct ARIf you don't want to use a random resolution, you only need to disable this group and add the latent node as you wish.Randomize LoRAs nodeI've added this node in the attempt to also randomize the loras for drawing styles.You can enable it or disable it as intended.These are my custom nodes, one is for you to only select the folder and the other one is for specific lorasLora Stack ApplierIn case you don't want to apply any lora, you can bypass this node / groupLoaders GroupThis is the group with what I've been using together with fluxIf you want to use with other models, you will need to adapt this as needed and also taking attention to the Samplers group as there is the ModelSamplingFlux and FluxGuidancenodesInitNoise GroupThese are the new samplers that correct the noiseGrainyRemover GroupThe purpose is to correct the images with a lot of grainy, I would let it run together with the InitNoise so you could have both raw and corrected imageSecondInitNoiseGroupThis is not a mandatory one, but it is only to run a second run of the InitNoise to correct the grainy and also to change the image a little bitUpscaler GroupThis is the group that I used to upscale images with Ultimate SD UpscaleTogether with SD Prompt Reader is no longer needed to manually add any data to have the upscale image saved with the same metadata as the originalNoteThere is a known bug with SD Prompt Reader - https://github.com/receyuki/comfyui-prompt-reader-node/issues/113 and you might need to uninstall it and then install it manually using the command git clone --recursive https://github.com/receyuki/comfyui-prompt-reader-node.git inside your custom_nodes folderThis part of the group is to collect the images from a folder and upscale them one-by-one per each queue job.If you don't want to do that and want to go through a selected image, you will need to remove the connection from the SD Prompt Reader image input and then select the fileInstantUpscaleIn case you want something more light, this node is to upscale faster and on the go after generating each imageAutomatic Captions groupThis group is to help people to get captions / prompts for some images, it uses Florence2.You just need to load the image and read the information from it or ask to generate the description text for it.

ComfyUI beginner friendly Chroma GGUF Outpainting Workflow by SarcasticTOFU
This is a very simple ComfyUI beginner friendly Outpainting workflow that will work with a single Chroma GGUF model with multiple LORAs (This workflow does require ComfyUI's LORA Manager plugin to function. It is a good idea to install both ComfyUI manager and LORA Manager plugin to help you easily download and manage Checkpoints, LORAs and other resources. Not only these two are helpful for this workflow but they will help you a lot in any other cases). You need a Hugging Face account to download your necessary Chroma model files (Details are mentioned below). Make sure you install GGUF addon for ComfyUI using ComfyUI manager and place the correct files in correct places. Also check out my other workflows for SD 1.5 + SDXL 1.0, WAN 2.1, QWEN, HiDream, KREA and Flux. In my personal experience I have found this Chroma model a good middle-ground model between SDXL 1.0 models and Flux models, this has been forked from Flux. This can generate nearly as good quality image output as Flux can (it's quality is more like SDXL, but better) with less resources, can do decent text rendering within image (like Flux, QWEN, WAN etc.) while giving prompters options to provide negative prompts for some additional control of output. This uses regular Flux encoders and VAE (you can use existing one for Flux) and sometimes work very well with your existing Flux LORAs (you may encounter some issues with some). It is however highly recommended to use Chroma specific LORAs like I used in this workflow. This is definately worth trying! How to use this -#1. Just select your desired Chroma GGUF model first and then load #2. one or multiple matching LORA(s) from LORA Manager to start #3. then load your image to write your positive and negative prompts for output. #4. select how many images you want (Change the number besides the "Run" button)#5. select image sampling methods, CFG, steps etc. settings#6. finally press the run button to generate. That's it.. ** You can also load your original image to view and compare it with Outpainted output on an optional viewing pane.### To use this workflow you need to log into huggingface and download necessary files from there (I also included a text file on the archive that has the workflow file, in which you will find even more links for essential downloads for my other workflows) -## Required Models=========================================================================================================================### Download Links for Chroma GGUF Checkpointhttps://huggingface.co/silveroxides/Chroma-GGUF/resolve/main/chroma-unlocked-v50/chroma-unlocked-v50-Q4_0.gguf### Download Links for Flux Encoderhttps://huggingface.co/comfyanonymous/flux_text_encoders/resolve/main/t5xxl_fp8_e4m3fn.safetensors### Download Links for Flux VAEhttps://huggingface.co/black-forest-labs/FLUX.1-dev/resolve/main/ae.safetensors## LORAs Used in this Workflow=========================================================================================================================Lenovo UltraReal (Chroma v1.0) - https://civitai.com/models/1662740?modelVersionId=2299345psxZStyle Photography Style Lora (Chroma v1.0) - https://civitai.com/models/2076522?modelVersionId=2349813

ComfyUI beginner friendly Chroma GGUF Image-To-Image Workflow by SarcasticTOFU
This is a very simple ComfyUI beginner friendly Image-To-Image workflow that will work with a single Chroma GGUF model with multiple LORAs (This workflow does require ComfyUI's LORA Manager plugin to function. It is a good idea to install both ComfyUI manager and LORA Manager plugin to help you easily download and manage Checkpoints, LORAs and other resources. Not only these two are helpful for this workflow but they will help you a lot in any other cases). You need a Hugging Face account to download your necessary Chroma model files (Details are mentioned below). Make sure you install GGUF addon for ComfyUI using ComfyUI manager and place the correct files in correct places. Also check out my other workflows for SD 1.5 + SDXL 1.0, WAN 2.1, QWEN, HiDream, KREA and Flux. In my personal experience I have found this Chroma model a good middle-ground model between SDXL 1.0 models and Flux models, this has been forked from Flux. This can generate nearly as good quality image output as Flux can (it's quality is more like SDXL, but better) with less resources, can do decent text rendering within image (like Flux, QWEN, WAN etc.) while giving prompters options to provide negative prompts for some additional control of output. This uses regular Flux encoders and VAE (you can use existing one for Flux) and sometimes work very well with your existing Flux LORAs (you may encounter some issues with some). It is however highly recommended to use Chroma specific LORAs like I used in this workflow. This is definately worth trying! How to use this -#1. Just select your desired Chroma GGUF model first and then load #2. one or multiple matching LORA(s) from LORA Manager to start #3. then load your Image-To-Image input image to write your positive and negative prompts for output. #4. select how many images you want (Change the number besides the "Run" button)#5. select image sampling methods, CFG, steps etc. settings#6. finally press the run button to generate. That's it.. ### To use this workflow you need to log into huggingface and download necessary files from there (I also included a text file on the archive that has the workflow file, in which you will find even more links for essential downloads for my other workflows) -## Required Models=========================================================================================================================### Download Links for Chroma GGUF Checkpointhttps://huggingface.co/silveroxides/Chroma-GGUF/resolve/main/chroma-unlocked-v50/chroma-unlocked-v50-Q4_0.gguf### Download Links for Flux Encoderhttps://huggingface.co/comfyanonymous/flux_text_encoders/resolve/main/t5xxl_fp8_e4m3fn.safetensors### Download Links for Flux VAEhttps://huggingface.co/black-forest-labs/FLUX.1-dev/resolve/main/ae.safetensors## LORAs Used in this Workflow=========================================================================================================================ChromaBabe_Morka_v1.0 from my Chroma AI Babe Pack (Part 04) - https://civitai.com/models/2114742?modelVersionId=2392312Tattooed Babe Chroma - https://civitai.com/models/2114934?modelVersionId=2392542
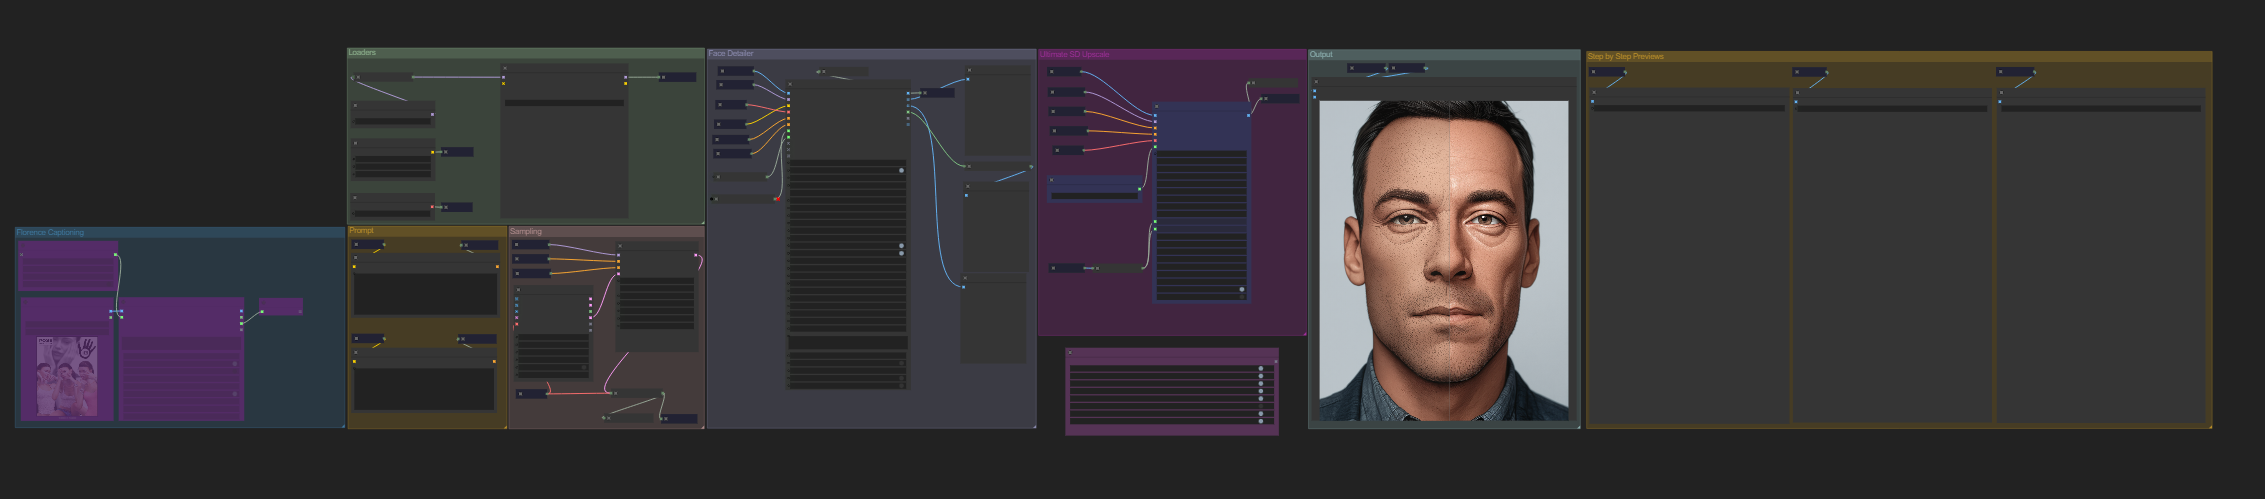
Chroma HD Simple Workflow + Multi Lora + Face Detailer + Ultimate SD Upscale
v3.0Added Florence 2 Captioning for lazy prompt testAdded Fast Groups BypasserCleaner and more organized workflowFine adjustments in Face Detailer and Ultimate SD Upscalerless VRAM neededOptimized for Velvet Chroma v2.0v2.0Added Ultimate SD UpscalerCleaner and more organized workflowv1.0Simple yet efficient ComfyUI workflow designed for Chroma HD. It includes a flexible UNet or GGUF loader, Multi LoRA loader, and a built-in Face Detailer and Ultimate SD Upscale with a preset 2× upscale for enhanced detail and clarity. Perfect for quickly testing your own LoRAs and trained checkpoints.
chroma Compatibility Test
🎥 YouTube Video TutorialWant to know what this workflow actually does and how to start fast?This video explains what the tool is, how to launch the workflow instantly, and shares my core design logic — no local setup, no complicated environment.Everything starts directly on RunningHub, so you can experience it in action first.👉 YouTube Tutorial: https://youtu.be/iBA-boqBJh8Before you begin, I recommend watching the video thoroughly — getting the full context helps you understand the tool faster and avoid common detours.⚙️ RunningHub WorkflowTry the workflow online right now — no installation required.👉 Workflow: https://www.runninghub.ai/post/1962357639025987586/?inviteCode=rh-v1111If the results meet your expectations, you can later deploy it locally for customization.🎁 Fan Benefits:Register to get 1000 points + daily login 100 points — enjoy 4090 performance and 48 GB super power!📺 Bilibili Updates (Mainland China & Asia-Pacific)If you’re in the Asia-Pacific region, you can watch the video below to see the workflow demonstration and creative breakdown.📺 Bilibili Video: https://www.bilibili.com/video/BV1ZKanzDEZ9/☕ Support Me on Ko-fiIf you find my content helpful and want to support future creations, you can buy me a coffee ☕.Every bit of support helps me keep creating — just like a spark that can ignite a blazing flame.👉 Ko-fi: https://ko-fi.com/aiksk💼 Business ContactFor collaboration or inquiries, please contact aiksk95 on WeChat.🎥 YouTube 视频教程想了解这个工作流到底是怎样的工具,以及如何快速启动?视频主要介绍 工具定位、快速启动方法 和 我的构筑思路。我们会直接在 RunningHub 上进行演示,让你第一时间看到实际效果。👉 YouTube 教程: https://youtu.be/iBA-boqBJh8开始前建议尽量完整地观看视频 —— 把握整体思路会更快上手,也能少走常见弯路。⚙️ 在线体验工作流现在就可以在线体验,无需安装。👉 工作流: https://www.runninghub.ai/post/1962357639025987586/?inviteCode=rh-v1111打开上方链接即可直接运行该工作流,实时查看生成效果。如果觉得效果理想,你也可以在本地进行自定义部署。🎁 粉丝福利:注册即送 1000 积分,每日登录 100 积分,畅玩 4090 体验 48 G 超级性能!📺 Bilibili 更新(中国大陆及南亚太地区)如果你在中国大陆或南亚太地区,可以通过下方视频查看该工作流的实测效果与构思讲解。📺 B站视频: https://www.bilibili.com/video/BV1ZKanzDEZ9/我会在 夸克网盘 持续更新模型资源:👉 https://pan.quark.cn/s/20c6f6f8d87b这些资源主要面向本地用户,方便进行创作与学习。

Chroma1-HD Text-to-Image
🎥 YouTube Video TutorialWant to know what this workflow actually does and how to start fast?This video explains what the tool is, how to launch the workflow instantly, and shares my core design logic — no local setup, no complicated environment.Everything starts directly on RunningHub, so you can experience it in action first.👉 YouTube Tutorial: https://youtu.be/iBA-boqBJh8Before you begin, I recommend watching the video thoroughly — getting the full context helps you understand the tool faster and avoid common detours.⚙️ RunningHub WorkflowTry the workflow online right now — no installation required.👉 Workflow: https://www.runninghub.ai/post/1962355322230915073/?inviteCode=rh-v1111If the results meet your expectations, you can later deploy it locally for customization.🎁 Fan Benefits:Register to get 1000 points + daily login 100 points — enjoy 4090 performance and 48 GB super power!📺 Bilibili Updates (Mainland China & Asia-Pacific)If you’re in the Asia-Pacific region, you can watch the video below to see the workflow demonstration and creative breakdown.📺 Bilibili Video: https://www.bilibili.com/video/BV1ZKanzDEZ9/☕ Support Me on Ko-fiIf you find my content helpful and want to support future creations, you can buy me a coffee ☕.Every bit of support helps me keep creating — just like a spark that can ignite a blazing flame.👉 Ko-fi: https://ko-fi.com/aiksk💼 Business ContactFor collaboration or inquiries, please contact aiksk95 on WeChat.🎥 YouTube 视频教程想了解这个工作流到底是怎样的工具,以及如何快速启动?视频主要介绍 工具定位、快速启动方法 和 我的构筑思路。我们会直接在 RunningHub 上进行演示,让你第一时间看到实际效果。👉 YouTube 教程: https://youtu.be/iBA-boqBJh8开始前建议尽量完整地观看视频 —— 把握整体思路会更快上手,也能少走常见弯路。⚙️ 在线体验工作流现在就可以在线体验,无需安装。👉 工作流: https://www.runninghub.ai/post/1962355322230915073/?inviteCode=rh-v1111打开上方链接即可直接运行该工作流,实时查看生成效果。如果觉得效果理想,你也可以在本地进行自定义部署。🎁 粉丝福利:注册即送 1000 积分,每日登录 100 积分,畅玩 4090 体验 48 G 超级性能!📺 Bilibili 更新(中国大陆及南亚太地区)如果你在中国大陆或南亚太地区,可以通过下方视频查看该工作流的实测效果与构思讲解。📺 B站视频: https://www.bilibili.com/video/BV1ZKanzDEZ9/我会在 夸克网盘 持续更新模型资源:👉 https://pan.quark.cn/s/20c6f6f8d87b这些资源主要面向本地用户,方便进行创作与学习。
Chroma WF Done Properly
I was not satisfied with the existing Chroma workflows for their ability to reliably generate high-quality images. After some research, I created this workflow for myself!You will need to visit the following resources for the models you need:1) Chroma GGUF: https://huggingface.co/silveroxides/Chroma-GGUF/tree/main2) CLIP GGUF: https://huggingface.co/silveroxides/flan-t5-xxl-encoder-only-GGUF/tree/main3) upscale model: https://huggingface.co/Kim2091/UltraSharpV2/tree/mainAlso, (most importantly!), you absolutely must familiarize yourself with the following project: https://github.com/ClownsharkBatwing/RES4LYF <-- to understand WTF is res_3m / beta57 or res_2s / bong_tangent ;)Feel free to experiment with the sampler/scheduler combinations, as they have a significant impact on the output!P.S.: use it well 😏

Chroma-V35 Preview Text-to-Image Test
🎥 YouTube Video TutorialWant to know what this workflow actually does and how to start fast?This video explains what the tool is, how to launch the workflow instantly, and shares my core design logic — no local setup, no complicated environment.Everything starts directly on RunningHub, so you can experience it in action first.👉 YouTube Tutorial: https://www.youtube.com/watch?v=NtNNDcuGlbMBefore you begin, I recommend watching the video thoroughly — getting the full context helps you understand the tool faster and avoid common detours.⚙️ RunningHub WorkflowTry the workflow online right now — no installation required.👉 Workflow: https://www.runninghub.ai/post/1931586622008000513/?inviteCode=rh-v1111If the results meet your expectations, you can later deploy it locally for customization.🎁 Fan Benefits: Register to get 1000 points + daily login 100 points — enjoy 4090 performance and 48 GB super power!📺 Bilibili Updates (Mainland China & Asia-Pacific)If you’re in the Asia-Pacific region, you can watch the video below to see the workflow demonstration and creative breakdown.📺 Bilibili Video: https://www.bilibili.com/video/BV16XTizMEQZ☕ Support Me on Ko-fiIf you find my content helpful and want to support future creations, you can buy me a coffee ☕.Every bit of support helps me keep creating — just like a spark that can ignite a blazing flame.👉 Ko-fi: https://ko-fi.com/aiksk💼 Business ContactFor collaboration or inquiries, please contact aiksk95 on WeChat.🎥 YouTube 视频教程想了解这个工作流到底是怎样的工具,以及如何快速启动?视频主要介绍 工具定位、快速启动方法 和 我的构筑思路。我们会直接在 RunningHub 上进行演示,让你第一时间看到实际效果。👉 YouTube 教程: https://www.youtube.com/watch?v=NtNNDcuGlbM开始前建议尽量完整地观看视频 —— 把握整体思路会更快上手,也能少走常见弯路。⚙️ 在线体验工作流现在就可以在线体验,无需安装。👉 工作流: https://www.runninghub.ai/post/1931586622008000513/?inviteCode=rh-v1111打开上方链接即可直接运行该工作流,实时查看生成效果。如果觉得效果理想,你也可以在本地进行自定义部署。🎁 粉丝福利: 注册即送 1000 积分,每日登录 100 积分,畅玩 4090 体验 48 G 超级性能!📺 Bilibili 更新(中国大陆及南亚太地区)如果你在中国大陆或南亚太地区,可以通过下方视频查看该工作流的实测效果与构思讲解。📺 B站视频: https://www.bilibili.com/video/BV16XTizMEQZ我会在 夸克网盘 持续更新模型资源:👉 https://pan.quark.cn/s/20c6f6f8d87b这些资源主要面向本地用户,方便进行创作与学习。

Lazy-META Flux Chroma Upscaler
Text to image Comfy UI workflow designed for Chroma, Flux and Krea models.The main purpose of this workflow is to be a beginner friendly.Their are multiple image to image sections based on the desired upscale resolution, along with quality of life node for ease of use.Output 1 is for image that have a pixel count around 1024x1024, standard or irregular aspect ratios that are close to that pixel count also work well. It uses the Impact Detailer node.Output 2 is for 1536x1536 and uses the Impact Detaler node.Output 3 goes up to 3072x3072 and uses the UltimateSD Upscale node.Create an image or upload 1 bypass the unused sections with the Fast Groups Bypasser and press RUN!

Chroma v48 with Wan 2.2 refiner
This uses Chroma v48 for the base image and then lightly refines it with a Wan 2.2 14b low noise stage to clean up the details.Chroma v48 on hugging face (I've tried the latest Chroma-HD and I still find v48 superior):https://huggingface.co/lodestones/Chroma/blob/main/chroma-unlocked-v48-detail-calibrated.safetensorsWan 2.2 14b diffusion models:https://huggingface.co/Comfy-Org/Wan_2.2_ComfyUI_Repackaged/tree/main/split_files/diffusion_modelsWan 2.2 Reward Lora:https://huggingface.co/alibaba-pai/Wan2.2-Fun-Reward-LoRAs/blob/main/Wan2.2-Fun-A14B-InP-low-noise-HPS2.1.safetensorsRES4LYF Samplers:https://github.com/ClownsharkBatwing/RES4LYFKijai's KJNodes for wan 2.2 compiler node:https://github.com/kijai/ComfyUI-KJNodes
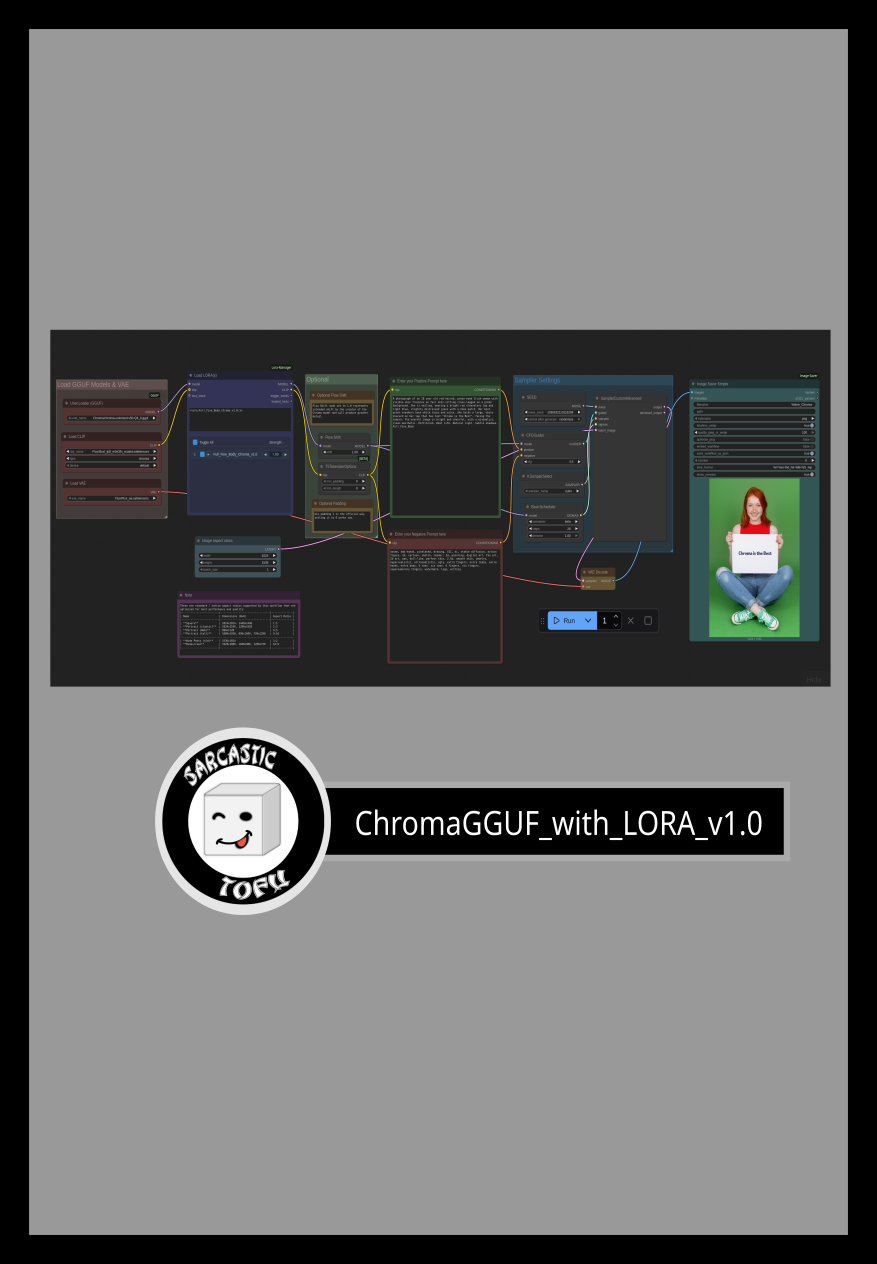
ComfyUI beginner friendly Chroma GGUF Text-to-Image Workflow by SarcasticTOFU
This is a very simple ComfyUI beginner friendly Text-to-Image workflow that will work with a single Chroma GGUF model with multiple LORAs (This workflow does require ComfyUI's LORA Manager plugin to function. It is a good idea to install both ComfyUI manager and LORA Manager plugin to help you easily download and manage Checkpoints, LORAs and other resources. Not only these two are helpful for this workflow but they will help you a lot in any other cases). You need a Hugging Face account to download your necessary Chroma model files (Details are mentioned below). Make sure you install GGUF addon for ComfyUI using ComfyUI manager and place the correct files in correct places. Also check out my other workflows for SD 1.5 + SDXL 1.0, WAN 2.1, QWEN, HiDream, KREA and Flux. In my personal experience I have found this Chroma model a good middle-ground model between SDXL 1.0 models and Flux models, this has been forked from Flux. This can generate nearly as good quality image output as Flux can (it's quality is more like SDXL, but better) with less resources, can do decent text rendering within image (like Flux, QWEN, WAN etc.) while giving prompters options to provide negative prompts for some additional control of output. This uses regular Flux encoders and VAE (you can use existing one for Flux) and sometimes work very well with your existing Flux LORAs (you may encounter some issues with some). This is definately worth trying! How to use this -#1. Just select your desired Chroma GGUF model first and then load#2. one or multiple matching LORA(s) from LORA Manager to start#3. then input your positive and negative prompts.#4. select how many images you want (Change the number besides the "Run" button)#5. select image output dimensions, sampling methods, CFG, steps etc. settings and any other optional settings #6. finally press the run button to generate. That's it..*** This workflow will also function if you know how to properly disable the LORA Node and bypass it.Enjoy!### To use this workflow you need to log into huggingface and download necessary files from there (I also included a text file on the archive that has the workflow file, in which you will find even more links for essential downloads for my other workflows) -## Required Models=========================================================================================================================### Download Links for Chroma GGUF Checkpointhttps://huggingface.co/silveroxides/Chroma-GGUF/resolve/main/chroma-unlocked-v50/chroma-unlocked-v50-Q4_0.gguf### Download Links for Flux Encoderhttps://huggingface.co/comfyanonymous/flux_text_encoders/resolve/main/t5xxl_fp8_e4m3fn.safetensors### Download Links for Flux VAEhttps://huggingface.co/black-forest-labs/FLUX.1-dev/resolve/main/ae.safetensors
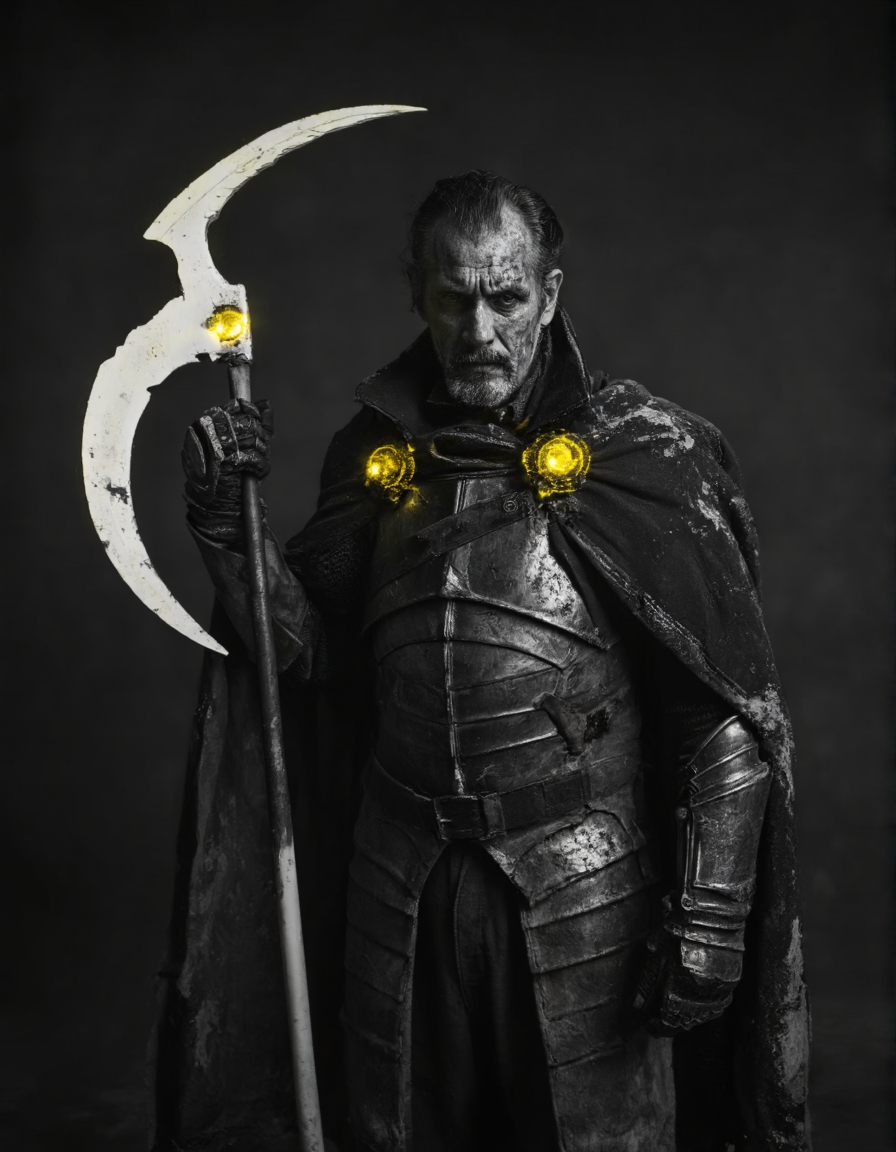
ChromaHD Photorealistic Workflow
Look at examples and decide if it's worth it for yourself.What's needed:Chroma1-HD model (https://civitai.com/models/1330309/chroma)T5XXL file (https://huggingface.co/comfyanonymous/flux_text_encoders/blob/main/t5xxl_fp16.safetensors)Nodes:1. SigmoidOffsetScheduler (for good noise control)What it does: This tool helps set up noise steps for Chroma models. It makes pictures clear with good colors in 30 steps, no extra bright spots.Get it: https://github.com/silveroxides/ComfyUI_SigmoidOffsetSchedulerHow to add:Use Manager: Search "SigmoidOffsetScheduler" and click install.By hand: Type git clone https://github.com/silveroxides/ComfyUI_SigmoidOffsetScheduler.git in your custom_nodes/ folder. If it needs more files, run pip install -r requirements.txt.2. ComfyUI-Extra-Samplers (for special samplers and noise)What it does: Adds more ways to mix noise, like "er_sde" for smooth changes, and SamplerCustomNoise for exact noise with a set number (like 861659032085096). Great for real photos.Get it: https://github.com/Clybius/ComfyUI-Extra-SamplersHow to add:Use Manager: Search "Extra Samplers" and click install.By hand: Type git clone https://github.com/Clybius/ComfyUI-Extra-Samplers.git in your custom_nodes/ folder. If it needs more files, run pip install -r requirements.txt.3. ComfyUI-Easy-Use (for fixing color problems)What it does: Helps with settings so high details don't make colors wrong or add bad spots. Use it with numbers like 1 for scale and 0.99 for limit, for steady results.Get it: https://github.com/yolain/ComfyUI-Easy-UseHow to add:Use Manager: Search "Easy-Use" and click install.By hand: Type git clone https://github.com/yolain/ComfyUI-Easy-Use.git in your custom_nodes/ folder. If it needs more files, run pip install -r requirements.txt. (It includes tools for better colors.)LORAs:lenovo ultrareal https://civitai.com/models/1662740/lenovo-ultrarealChroma - Professional Photos - V1 https://civitai.com/models/1908534?modelVersionId=2160197

Context Upscale FLUX/Chroma
Context upscale using FLUX model.
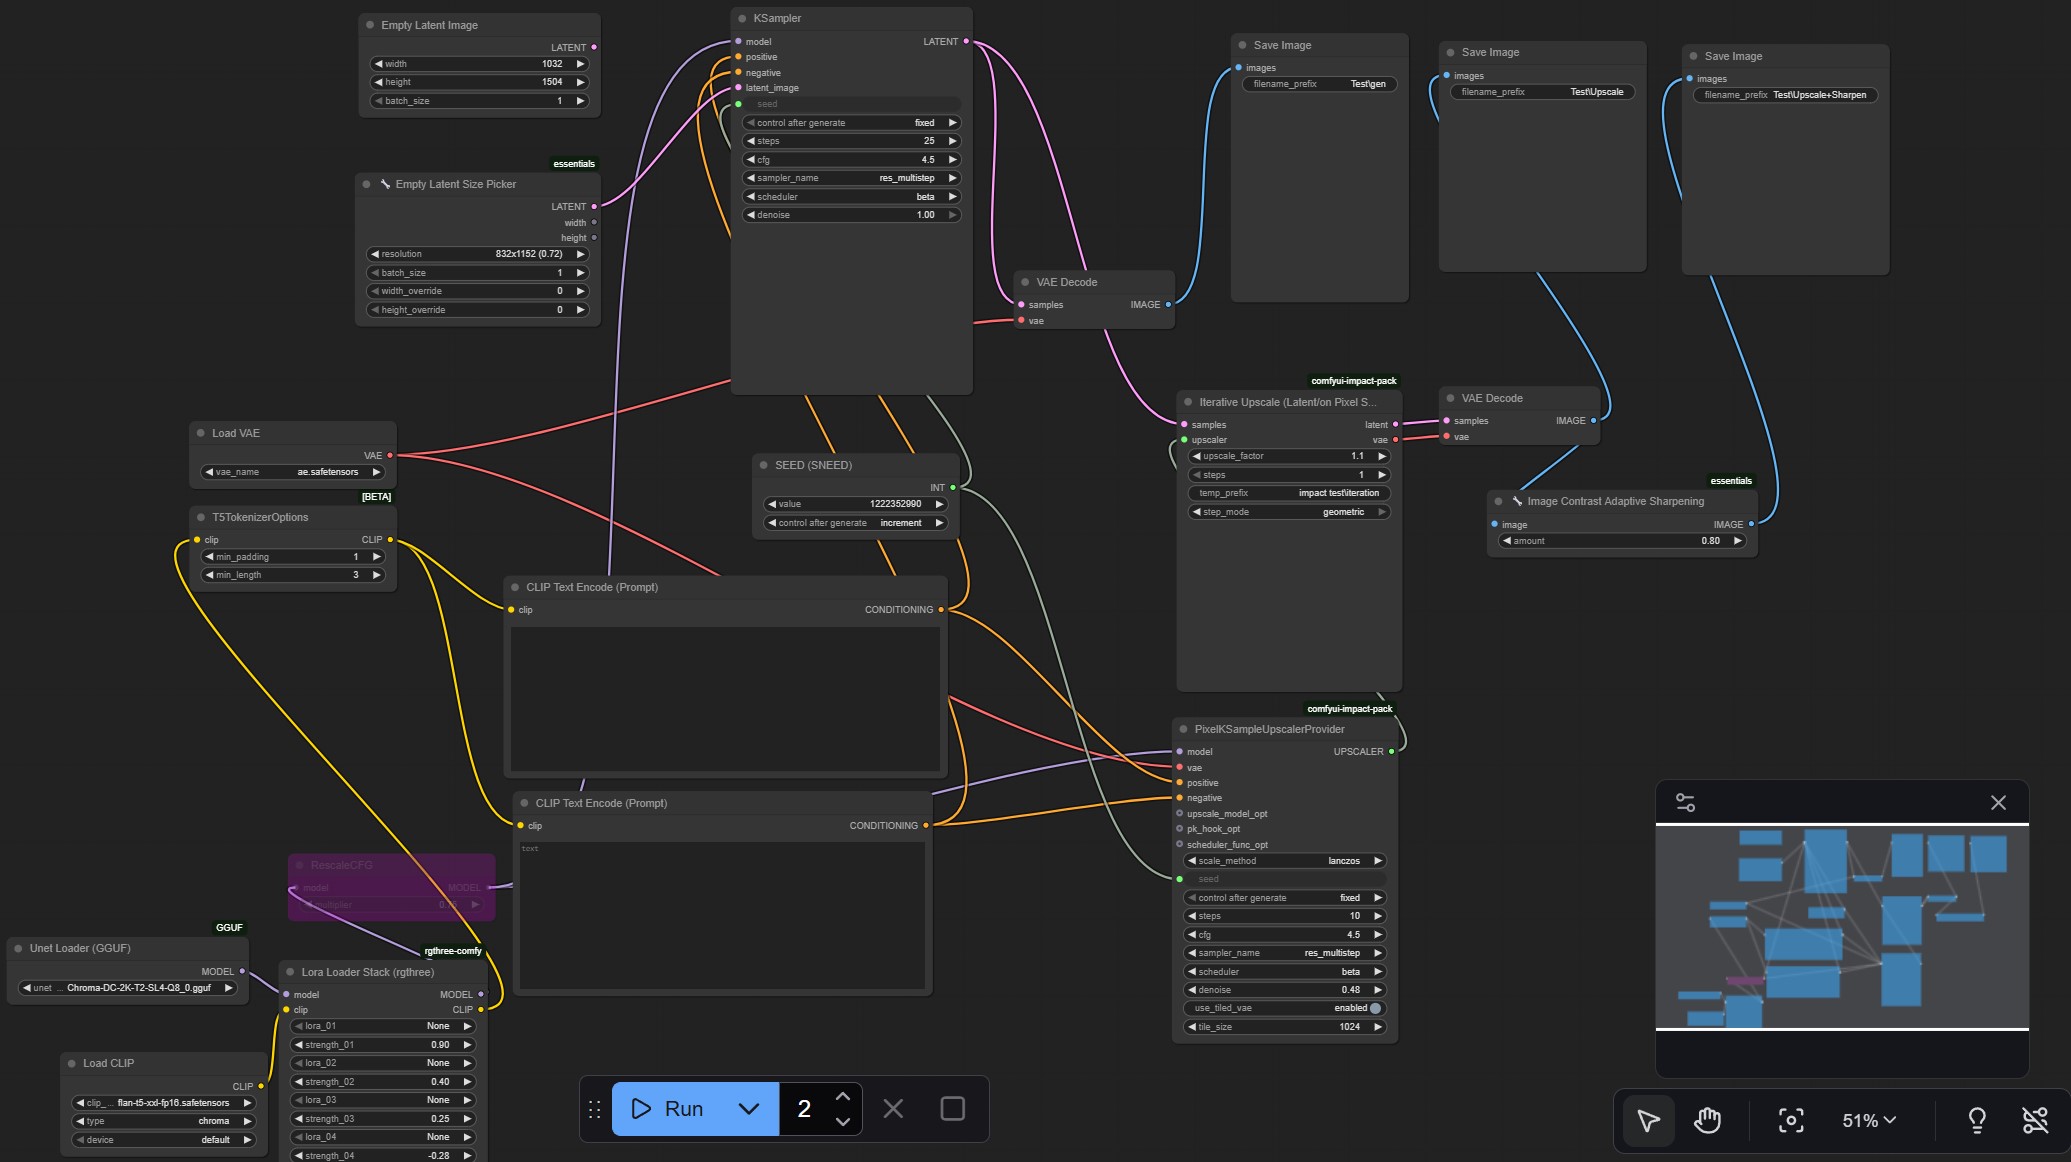
Chroma workflow with simple upscale + sharpening
Simple workflow with small upscale + sharpening for clear images. Works great with Chroma-DC-2K-T2-SL4-Q8_0. DL from here The idea is that a small image-to-image (i2i) upscale often removes the unfortunate 'slop' look from AI-generated images. For example, it can transform outputs from prompts that didn't originally resemble photos into more photorealistic results. Enabling the RescaleCFG node can enhance this effect even further.I started using this workflow after noticing that Chroma adheres to the prompt style much better when paired with an input image.

Chroma-Anime-AIO Simple Workflow
# 🎨 Chroma-Anime-AIO Simple WorkflowMy super simple plug-and-play workflow for Chroma-Anime-AIO that just works! Perfect for beginners and anyone who wants to get started quickly without complexity.No extra nodes needed. No VAE to load. No CLIP to configure. Just load the checkpoint and start creating! I hope you find it useful in any way. Have fun! 🚀---## 📦 What's Included:✅ Standard ComfyUI nodes only - no custom nodes required!✅ Helpful note nodes with tips and settings guides✅ Pre-configured settings (16 steps, CFG 4.2, 1024×1024)✅ Example prompts to get you started✅ Resolution presets and tweaking tips---## 🔧 Resources used in this workflow:Checkpoint: [Chroma-Anime-AIO](https://civitai.com/models/2022057)------## 💡 Quick Start:1. Download and place Chroma-Anime-AIO.safetensors in ComfyUI/models/checkpoints/2. Load this workflow in ComfyUI3. Enter your prompt (tip: start with "anime," for stronger anime style!)4. Click "Queue Prompt"5. Done! ✨---## ⚙️ Recommended Settings:Fast/Test:- Steps: 16- CFG: 3.6- Resolution: 512×512 or 1024×1024Balanced Quality:- Steps: 16-20- CFG: 4.2- Resolution: 1024×1024High Detail:- Steps: 22-26- CFG: 4.2-5.0- Resolution: 1024×1024 or higher---## 📝 Prompting Tips:✅ Add "anime," at the start for stronger anime aesthetic✅ Natural language works great: "a girl with silver hair in a spring garden"✅ Tags work too: "1girl, silver hair, green eyes, smile"✅ Mix both: "anime, 1girl with flowing silver hair, detailed emerald eyes, cherry blossoms"---## 🎮 Tested on: RTX 4060 Ti (8GB VRAM)All resolutions up to 2K work smoothly! Should also work on 6GB+ VRAM cards.---Enjoy creating! 🎨

Comfyui Chroma1-hd full pipeline
This is a workflow example to work with Chroma1-hd.With this workflow you will be able to upscale from 664x664 to 4669x4669. It includes full resolution inpaint section using Chroma1-hd models workflow based on inpaint at full resolution.It also includes batch processing mode, just connect the "Load image list from dir" node or for single image the "Load image" node.Use the Chroma1-HD.safetensors model its vae and clip filesDownload Chroma-Hyper-Flash-Heun-Low-Step-r04-fp32.safetensors (uploaded in civitai as original source seems missing) and place in lorasFor ControlNet you can use diffusion_pytorch_model.safetensors originally for Flux but works on ChromaThe upscalers using as defaults are 4x-UltraSharp.pth, 4x_UniversalUpscalerV2-Sharp_101000_G.pth and 4x_NickelbackFS_72000_G.pthTo use just import the .json file in comfyui and install the missing nodes under manager -> install missing custom nodes. This workflow was tested to work on MacBook pro M2. but it should also work on linux and windows systems.
![Fast Chroma w/ Upscaler, Refiner and Face detailer [Low VRAM]](https://image.civitai.com/xG1nkqKTMzGDvpLrqFT7WA/fe822b6a-c226-4d95-9aa7-eda568207e13/original=true/97073962.jpeg)
Fast Chroma w/ Upscaler, Refiner and Face detailer [Low VRAM]
So, here’s how I roll: this workflow generates a little Chroma image with txt2img, upscales and refines it for some extra polish with FluxRefinerV1.1 with img2img, and gives faces a nice touch-up (Face Detailer). On my trusty laptop (rockin’ an RTX 3070 with 8GB VRAM and 40GB RAM), it makes a 1120 x 1120 pic in about 180 to 280 seconds —depending on the prompt, as I said in my previous workflow, I’m new to ComfyUI, so if you’ve got any tips or tricks, I’m all ears! On the bright side, at least I didn’t make a huge Spaghetti Monster this time!Models:chroma-unlocked-v48-detail-calibrated-Q4_0.gguffluxRefiner_v11.safetensorsCLIPs:flan_t5_xxl_TE-only_FP8.safetensorsVAE:ae.safetensors (Flux VAE) LoRA:NoneUpscale models:4x_NMKD-Siax_200k.pth4x-UltraSharp.pth Custom nodes:comfyui-uscape-by-modelcomfyui_memory_cleanupcomfyui-vrgamedevgirl-maincomfyui_essentials_mbcomfyui-impact-packcomfy-image-saver
![Flexi-Workflow [ ☠️ ]](https://image.civitai.com/xG1nkqKTMzGDvpLrqFT7WA/12b4e287-0549-4e4c-aa12-aaf01aaf16d4/original=true/91048628.jpeg)
Flexi-Workflow [ ☠️ ]
⚠️ NOTICE ⚠️This workflow has now morphed into the UniFlex-Workflow 9.0!!!
Super Basic Chroma Workflow
Barebones workflow

(Video Tutorial Resources) Kontext, Speed Boosts and updated Loaders
INSTALLFP8 (or GGUF) models (goes in your models/checkpoints or unet folder) - https://huggingface.co/marduk191/flux1-kontext-dev-quants/tree/mainFlux VAE (goes in models/vae) - https://huggingface.co/lovis93/testllm/blob/ed9cf1af7465cebca4649157f118e331cf2a084f/ae.safetensorsT5 Clip - FP16 (goes in models/clip) - https://huggingface.co/comfyanonymous/flux_text_encoders/blob/main/t5xxl_fp16.safetensorsNAG (ComfyManager #2706) - https://github.com/ChenDarYen/ComfyUI-NAGHyper Chroma Speed Booster LORA - https://huggingface.co/silveroxides/Chroma-LoRA-Experiments/blob/main/Hyper-CHROMA-8steps-lora-minimal.safetensorsKEY COMFY & STABLE DIFFUSION TOPICSKontext IntroductionKontext SetupKontext Speed BoostsUpdated Flux and Chroma Loaders with KontextYouTube Tutorial:

Chroma Modular WF (discontinued)
This workflow is now discontinued as I will focus on other AI models.Chroma is a new 8.9B parameter model, still being developed, based on Flux.1 Schnell.It’s fully Apache 2.0 licensed, ensuring that anyone can use, modify, and build on top of it.CivitAI link: https://civitai.com/models/1330309/chromaLike my HiDream workflow, this will let you work with:- txt2img or img2img,-Detail-Daemon,-Inpaint,-HiRes-Fix,-Ultimate SD Upscale,-FaceDetailer.The model is still being trained, so there are many updated versions (latest today, June 8th, is the v35). Here are all the versions: https://huggingface.co/lodestones/Chroma/tree/mainIn brief, this model is:Training on a 5M dataset, curated from 20M samples including anime, furry, artistic stuff, and photos.Fully uncensored, reintroducing missing anatomical concepts.Built as a reliable open-source option for those who need it.Being based on Flux.1 Schnell, it should run on low-Vram GPUs, so you can use it locally very easily.You will need one of the t5xxl text encoder model files that you can find in: this repo, fp16 is recommended, if you don’t have that much memory fp8_scaled are recommended. Put it in the ComfyUI/models/text_encoders/ folder. The VAE is the same as FLUX or HiDream, so you should already have it.Important: You must load an image (any image) in the Load Image node (at the left of the Prompts nodes) before running the workflow; otherwise, the workflow will give you an error. You must do this the first time you use the workflow only, and you must do it even if you are not planning to use that image for img2img or inpaint.==========================================================⚡️ Buzz for the Best Images ⚡️Every weekend, I will reward some Buzz to the best image added to the Workflow's gallery!
Simple Fast Chroma
Simple accelerated Chroma workflow utilizing a Hyper lora for 16-step functioning with minimal loss of quality and an optional second step. approx 1 minute for the first step, 1m20s for the second on an A4000 (Second step is bypassed by default, select the 2nd pass nodes/group and press b to enable).Tested with Chroma v29.5 fp8 and FLAN-T5XXL-fp8. You will need the Hyper Chroma low Step Lora saved to your loras folder. Check out the same profile on the huggingface link for other acceleration loras, but this is the one I've settled on.Mostly comfy core nodes but Uses CR Upscale from ComfyRoll custom nodes for the upscaling step if enabled.
Flux image reverse engineering Chroma, Dev, Flex. 2, Shuttle+Jugar comparison workflow
Flux image reverse engineering Chroma, Dev, Flex. 2, Shuttle+Jugar comparison workflowThe workflow is very simple to use, and I have uploaded a tutorial on how to use it on YouTube. You can try it out and follow the tutorial and Civitai's workflow to easily reproduce the results. Thank you. If you have any other questions, please leave a comment in the comment section