ComfyUI Workflows
Browse real AI workflows from Flux, SDXL, Pony, ControlNet, video generation and commercial AI creators.

Illustrious/ Pony/ SDXL SFW & NSFW Pro Grade Workflow (Low and high VRAM)
Note: I spend a lot of time on these to make sure they are top notch. If you have ANY issues, I'm very responsive. hit me up and I'll resolve them for you.This is an advanced workflow. It is node heavy and designed for multiple options and to return professional high quality results. If you are looking for simpler workflows, they are here:An essentials one can be found here: https://civitai.com/models/2349309/illustriousponysdxl-essentialsA simple one can be found here:https://civitai.red/models/2600919/lonecats-simple-zitilluanimaflux-workflows?modelVersionId=2921603A complete user and troubleshooting guide inclusing a list of common error messages can be found here https://civitai.com/articles/24678/how-to-use-my-workflows-a-comprehensive-breakdownInstagram: https://www.instagram.com/synth.studio.models/Buy me a☕ https://ko-fi.com/lonecatoneThis represents hundreds of hours of work. If you enjoy it, please 👍like, 💬 comment , and feel free to ⚡tip 😉也有中文说明VER 10.1:Got tired of having to always mess with resolution, so I gave you the option to make it automaticMath node replacements to deal with the Linux errorsAdded psst... fast bypassers (you'll thank me).💡use the upgraded face yolo I added. much more accurate.Improved notes throughoutVer 8.0/ 9.0:Major overhaul to bring it up to speed with my other workflowsAdded second checkpoint metadataadded a prompt to hi-res fixadded Inpainting suite from the pro grade workflow by request.V7.0Apparantly , I forgot to hook up Face Swap in my last model and nobody told me until today, so a free major upgrade it is!Installed a sentence remover in the prompt assist area to help eliminate CivitAI 🚩Cleaned up some bugsResinstalled Qwen VL Prompt EnhancerUpgraded Face Swapalso upgraded notes on how to remove it.Minor changes to detailersAdded an inline crop tool in the post production suite.Ver 6.0:Major overhaul to bring it up to speed with my other workflowsAdded a refiner checkpoint that can easily be switched on or offAdded FaceID as well as a style and composition IP Adapter for character consistencyReowked the Detailers ro improve thembetter version of Hi Rez fixReworked the Save with Metadata to align with CivitAi and fix the Comfy update bug 🙄This is an all in one workflow:ControlnetI2I with prompt generationDual Model Loader: Better controlSage Attention: Speeds up productionUltimate upscaler: For prescale and hi-res fixDetailers: Face, eyes, hand, expressionNSFW Detailers: Male & Female anatomySeed VR2 Upscaler: Get up to 4k pics, even on low VRAMPost production suite: My pride and joy. Does everything.

Illustrious/ Pony/ SDXL Pro Grade Workflow (Low or High VRAM)
Note: I spend a lot of time on these to make sure they are top notch. If you have ANY issues, I'm very responsive. hit me up and I'll resolve them for you.This is an advanced workflow designed for people familar with Comfyui and who want pro grade results. I encourage you to learn it, but if it is overwhelming, the simple version can be found HEREA complete user and troubleshooting guide inclusing a list of common error messages can be found here https://civitai.com/articles/24678/how-to-use-my-workflows-a-comprehensive-breakdown也有中文说明Instagram: https://www.instagram.com/synth.studio.models/Buy me a☕ https://ko-fi.com/lonecatoneThis represents hundreds of hours of work. If you enjoy it, please 👍like, 💬 comment , and feel free to ⚡tip 😉V15.0Because it is not in my nature to leave things alone....Gutted the stock face detailer nodes and replaced them with a SEGS suite for infinately better resultsNote: Yes, I will be going through all my workflows and replacing them, including teh NSFW onesControlnet Update.Added local bypass nodes so ou don't have to zoom and scrollAdded a quality modifier prompt area that follows after Qwen so that they stay preserved.Major update to notes, especially for detailersV12.1Added an Inpaint areaModified controlnet so it doesn't fault out if a mask isn't loaded without resetting teh switchRemoved the sentence remover (it sucked)added "banned tag remover" at the metadata saver so you can still process normallyV11.1.2Updated 📝Prompt AssistUpdated ⚙️ main areaAdded back Qwen VL prompt enhancer (now that it's fixed)Updated 🔎 detailersUpdated 💾 Save area so that you can embed workflows as well as add a simple date to the folders so you aren't endlessly looking for them.Added an inline ✂️ crop tool in the 🎨Post Production SuiteVer 10Improved regional prompt suitesAdded IP Adapters for Face, style, and composition for Facial and pose consistencyImproved detailer suitereworked settings for easier useAdded CivitAI sentence ✂️Ver 9.0Qwen nodes keep getting mbroken due to updates. I removed them in V9Removed outdated sectionsAdded a 2nd KSampler & model option for refinementV 8.1 is included in the folderVER 8Created a really cool regional prompter.Works with controlnetUpgraded detailers to accomodate for it so you can detail each face seperatelyThis is an all in one workflow:Controlnet: background remove, canny, openpose, depth, canny/depthI2I prompt assistQwenV2 Prompt enhancer.Florence and Qwen prompt assistStyle selectorDual Model Loader: Better controlSage Attention: Speeds up productionUltimate Upscaler for prescaling and hi res fixDetailing Suite for face, hands, eyes, and expressionsmulti face detailerSeed VR2 Upscaler to get 4k on low VRAMMassive Post Production SuiteSmart Noise scrubberFull tutorial available.也有中文说明

Text2Img Workflow with Detailer Arrays
Hello Everyone!Have you ever created an image you like and would have kept, but and a face, or hand just came out wrong? You need a workflow that can take control address that.Ever make an image that had multiple characters, but when you tried to assign them the correct eye color or expression, the checkpoint got confused, and you had to play generation roulette? You need a workflow that lets you decide whose face has just came out like what.That is what this workflow, used properly, will allow you to do. This workflow is my daily driver T2I workflow for checkpoints based in SDXL, Illustrious and Pony. It is based upon my Img2Img SDXL Workflow + META, which I was only able to create thanks to bits taken from other workflows, particularly those of Legendaer and Yukichan_, and advice from Lonecatone23. Over several revisions, I have made a number of refinements to the workflow while at the same time striving to keep it simple so that even a beginner can take hold of this workflow and start generating.Main Features:✦ Text to Img Generation - That's what we're here for, text to image.Include Metadata / Embed Workflow Option. Stable 1 megapixel generation, or dare to increase it with Size Boost.✦ Metadata saving included — CivitAI ready. You can also embed the entire workflow into your images, by default this is turned off.✦ Upscaler with Color Matching - this is the feature that makes images go from good to great. Or use HiresFix for a quick increase in resolution✦ Quality Tags Presets Switch - instead of typing Masterpiece, best quality, etc. etc.✦ Two Segs Detailer Arrays - two SEGS pipelines (by default, hands and faces) that you can individually prompt or apply one prompt to all. Sophisticated tool created to handle individual details - your backstop for when the image has to be perfect.✦ Parallel development with I2I workflow - if you learn this one my Img2Img works essentially the same way.✦ CFG Controls - need more control, more CFG? It's handled automatically, crank it up to 10.✦ LoRA Manager — Search your LoRA database with style, I love this node. Dump it if you prefer something else.✦ Simple and reliable — Enter your prompt, hit run, let the segs previews populate, freeze the gen seed, and fill in prompts and run it again. That's it.New with 5.0 SESkipped 4.0, just becauseSeed JumpStyle Preset switchingAdded a toggle and Subgraph for exceeding native SDXL resolution on initial genFixed Typos for name of Face Detailer LoRA blocker nodesDoes not include Quality Tags Fast Switching, uses native concatenate nodes5.0.1 Changes:Changed Positive Text Box to Mira, which was already being used in this workflowChanged Wildcard ProcessorSeed controls Wildcard selection (Freezing seed freezes your wildcards too now)Added Final Prompt PreviewAdded a toggle and Subgraph for exceeding native SDXL resolution on initial genSlight rearrangement of Control Group, hopefully optimalNew with 3.0:With 3.0, the layout has changed and metadata flows have changed. The checkpoint loader is now the checkpoint selector, which should provide some convenience and added stability. The LoRA blocker no longer requires fiddling with the spaghetti string to toggle it, there is now a toggle switch. Sliders have been implemented throughout the Input center, including controls for the Upscaler.New with 2.2:Added toggles for including the workflow in the image's metadata.Added a means by which you can bypass the upscaler and still send the image (directly from phase 1 gen/hires fix) to the detailer, rather than being forced to use upscaler in order to access the detailer.Color Matching directly following Upscaler - I have found that some models have noticeable drift in color tone and this corrects that, works beautifully.New with 2.1:Detailer moved to the back of the order, after upscale, to ensure that full control over expressions remains with you, the artist. I'm very happy with this workflow in its current form, although there might be new versions or changes down the line.New with 2.0:Raise CFG without crushing the imageUpscaler with a third save nodeSomehow resists LoRA bleed, whether it's the scheduler / sampler combo or what I'd love to know. It's not perfect though!Preview KSampler - a game changer for skipping unsatisfactory seeds. Use it!You will need to download an upscaler model if you don't have one already.How this Workflow Came to BeI was using one of these massive workflows with all the bells and whistles and I ran into a snag. A LoRA was confounding the hand detailer and the hands were all coming out like macaroni alfredo. So, I turned off that LoRA. I was also running into a common problem: when two characters are in the frame, they end up with the same eye or hair color. The tags were blending across character BREAKs which is ultra common, and detailers that handle all bboxs in order cannot be instructed on each bbox individually. That's something that my I2I workflow was designed to do, and the mega huge T2I workflow with all its heft didn't have detailer separation as a feature.I don't think I could add to such a complex workflow without tripping up and it end up taking 2 hours. I thought if I'm going to modify a workflow it might as well be my own. It would keep things simple with only nodes I know I have, I'd finish in under 30 minutes, and then I would have complete control over faces.Saving the metadata is important too, however somehow in converting things and removing things that get concatenated (such as the natural language prompt), the metadata portion got a little scrambulated, and don't worry I fixed it -- but 30 minutes turned into a several hour affair. Under nine hours though, I'm pretty sure. The latter part was mostly testing and tweaking. I ended up making some changes to the detailer modules so that they don't spam the image feed, and upgraded that module to V1.1.During testing, I started with one figure, then two, and I soon discovered that this workflow is absolutely a beast at ensuring your faces all look great. Whether you have one face in the image or five, the detailer can make each one pop with high aesthetic quality and unique expressions, and the SEGS previewer keeps you in control.The hand detailer gives you per-segs control over hands although sometimes bad hands are going to happen, particularly when there are many in one image. Fingers in AI is always a little trickier, but the workflow allows you to add a hand detailer LoRA directly to the detailer, upping your chances of success dramatically. Do it. At the same time, that LoRA will be blocking other LoRAs that could create havoc on delicate fingers. I haven't seen this approach elsewhere, curious whether it holds up in your experience. Please let me know in the comments what you think about my LoRA blocker, if you have any aspects you think ought to be changed, bug fixes, etc. This is just version 1, it's bound to evolve.RequirementsYou will need a face bbox detector - like this oneYou will needs a hands bbox detector - like this oneYou might decide to add or replace a bbox detector for face or hands with one for eyes, or add another bbox array. For eyes, try this oneIn ComfyUI you may need to turn some safety features off to use pickletensors. Consult AI if you run into problems.Custom Nodes Used:rgthree-comfyComfyUI Impact PackComfyUI Impact SubpackComfyUI-Easy-UseComfyUI-Lora-ManagerComfyUI Image SaverComfyUI_essentialsComfyUI-KJNodescg use everywhere Anything EverywhereDynamic ThresholdingComfyui_MiraSkimmed_cfgefficiency-nodes-comfyuiComfyroll StudioComfyMath

Eazy Illustrious - Workflow for ComfyUI
Easy Illustrious Workflow v0.4 - (See installation requirements)This ComfyUI workflow is designed for SDXL/Illustrious models. It features an all-in-one solution, with txt2img > hires fix > face detailer. The primary goal of this workflow is to provide an intuitive, easy-to-use UI that mirrors A1111 / Invoke, while remaining flexible for advanced use cases. The final image will include embedded metadata to make uploading to Civitai easier.Positive prompts now support wildcards and dynamic tags!Wildcards: Reference files from your ComfyUI custom nodes directory by enclosing the filename in double underscores (e.g., __filename__).Dynamic Tags: Create instant random variations directly in your prompt using curly brackets separated by vertical bars, like {blue|red} ball or {sitting|standing}.Wildcard preview: Use the 'Preview Wildcard' node to view the final prompt generated by your wildcards and dynamic tags.Installation RequirementsThis workflow requires the following model types:Base model: ComfyUI/models/checkpointsVAE eg. sdxl-vae-fp16-fix: ComfyUI/models/vaeUpscale Model eg. remacri: ComfyUI/models/upscale_modelsThis workflow also requires these node packs in order to function, these can be easily installed via the built-in Custom Nodes Manager:

【SDXL】MEGAPACK
✨ SDXL — Workflow MEGAPACK — Simple WorkflowHere you will find all my workflows for SDXL. The easiest way is to copy this folder to ComfyUI\user\default\workflows.✔️ What's included :TXT to IMGIMG to IMGINPAINTOUTPAINTControlNetUpscalerLoRA tester⚠️ IMPORTANT — Nodes 2.0 RequiredThis workflow is built for the Nodes 2.0 (Vue) interface of ComfyUI. If you don't enable it, the workflow may have display problems.How to activate Nodes 2.0:Open ComfyUIGo to Settings (⚙️ icon, bottom-left)Find "Use Nodes V2 (Vue)" and toggle it ONRefresh the pageLoad the workflow📦 Custom Node RequiredOnly one custom node to install:👉 ComfyUI-UmeAiRT-ToolkitInstall via ComfyUI Manager (search "UmeAiRT") or use the UmeAiRT Auto-Installer.The Toolkit packages everything internally — upscaler, face detailer, metadata saver. No other custom nodes needed.📂 Files you need An SDXL model : like this one in ComfyUI/models/checkpoints/An upscale model (optional) : like this one in ComfyUI/models/upscale_models/As many LoRAs as you like (optional) : like this one in ComfyUI/models/loras/For the Subject Detailer (optional, download automatically by my toolkit) :A BBOX detector model : like this one in ComfyUI/models/ultralytics/bbox/A SAM model : like this one in ComfyUI/models/sams/A SEGM detector model : like this one in ComfyUI/models/ultralytics/segm/

✦ NIGHTRUN ✦ Overnight Forge Randomizer (Low-High VRAM Optimized)
Installation — Folder StructureNightrun expects to live two levels inside your WebUI folder:YOUR-WEBUI-FOLDER\ workflows\ nightrun_2.0\ ← hereA local Forge companion that builds structured prompt batches, runs them overnight, manages metadata-based upscales, and watches the boring parts, so your PC can do the babysitting for once.GitHub Link: https://github.com/Bluenochian/NightrunNightrun 2.0A portable workflow system for Stable Diffusion Forge / Forge-Neo.Nightrun is not a model. Not a LoRA. Not a prompt file.It is the system that sits beside Forge and turns a messy local generation setup into something that can run for hours — without you checking whether the prompt broke, a LoRA name was wrong, the GPU is cooking itself, or the batch slowly turned into repetitive garbage.Nightrun is built for long local runs, editable prompt pools, metadata replay, LoRA-aware batching, upscale workflows, cooldown logic, and controlled randomness.Set the run. Leave it alone. Come back to something organized, replayable, and worth sorting through.What Nightrun DoesNightrun builds prompts from editable pools, sends jobs through Forge, writes replayable metadata, manages upscales, scans LoRAs, protects long runs with cooldown logic, and keeps the whole thing configurable.It is made for people who want big batches without babysitting every prompt, every upscale, every progress bar, and every local setup problem.Controlled chaos. Not prompt soup.What's New in 2.0Modular ArchitectureThe engine was split from a single ~2055-line file into a purpose-driven module system:nightrun_runtime.py — core shared logicprompt_engine.py — pool loading, weighted selection, prompt compositionlora_resolver.py — LoRA scanning, aliases, tag constructionforge_client.py — Forge API, txt2img/img2img, GPU guardsrunner.py — execution modes, output folders, cleanup, cooldowns, summariesvalidation.py — pool validation and dry-run reportingnightrun_engine.py — compatibility shim for older importsnightrun.py is now a thin entrypoint that only imports and runs main().Three-Engine Prompt RoutingPrompt generation now routes through three distinct builders, selected by weighted random choice (default 1/1/1). You can control routing via prompt_engines in config, or disable it to revert to legacy behavior.Classic — Standard pool sampling with optional world module support. Closest behavior to 1.5, cleaned and optimized.Combinator — Builds on Classic output by applying controlled transformations:Internal combinators modify existing elements (e.g. a katana becomes a burning variant)External combinators inject additional motifs (e.g. surreal, cursed, steampunk layers)At least one combinator fires per prompt, capped at twoFranchise — Forces generation through a world module from franchise_catalog.py. All visual elements are sourced from that universe for full coherence. Falls back to Classic if no module is available.Prompt Cleanup PipelineA post-processing stage via prompt_cleanup now runs after every engine:Duplicate comma-tag removalConcept-family repetition controlCompact SD-style prompt length enforcementRemoval of redundant subject labels when already impliedConsistent prompt structure across all three engines.Prompt Pools — Full RebuildAll pools were rebuilt for SD-style tag efficiency. Verbose prose entries are gone. 2.0 uses compact, composable tags throughout.Pool 1.5 lines 2.0 lines concept.txt 3,601 154 genre.txt 8,317 2,743 glamour_pose.txt 4,241 761 clothing.txt 1,801 721 character.txt 701 44 body_focus.txt 1,105 481 sensual_layer.txt 1,921 529 hair.txt 2,401 790Removed: character_loras.txt, style_loras.txt, lora_sampler_speed.txtAdded: genre_core.txt (69 lines), genre_root.txt (475 lines)A curated weighting system (curated_top_count / curated_top_weight) boosts high-quality early entries without removing full pool diversity.Franchise Catalog — Expanded to ~50 ModulesModules now use full dictionary-based definitions instead of compact tuples. The catalog grew from ~24 to ~50 entries:alien batman bloodborne cowboy_bebop doctor_who dungeons_and_dragons elder_scrolls evangelion final_fantasy_vii game_of_thrones halloween hellraiser lord_of_the_rings matrix midsommar nier_automata nightmare_on_elm_street persona pokemon scream shadowrun terminator the_conjuring the_ring the_witcher vampire_masquerade x_men zeldaNew filtering controls without touching the catalog directly: enabled_module_ids / disabled_module_ids / enabled_source_names / disabled_source_names / label_allow_patterns / label_block_patternsSelection Memory — RetunedLarger recent history windows across categoriesReduced repetition penalties for more natural variationAdded concept-level tracking via recent_conceptsDedicated repetition control for candle/light motifsCurated weighting for high-quality biasingConfig Changesfixed_suffix updated for sharper SD output:Before: clean coherent design, sharp focus, high detail, polished lightingAfter: crisp linework, sharp focus, high detail, clear material texture, clean color separation, high micro-contrast, dramatic lightingbase.steps_min raised: 30 → 50Output folders now use nightrun-YYYYMMDD-HHMMSS--reset-local now preserves local tuning instead of overwriting itNew VRAM Profile — tuned_6gbSetting Value Base resolution 1344×768 Upscale resolution 3072×1728 Steps 65 LoRA cap 7 VRAM threshold ≤ 6144 MBNSFW — sensual_layer ExpansionThe sensual_layer pool was fully reworked to properly support explicit NSFW generation paths. It now includes dedicated nudity, erotic styling, body exposure, lingerie, fetish-adjacent aesthetic, and mature composition tags designed to integrate cleanly with the SD-style prompt system and franchise/genre routing.NSFW is enabled by default. For SFW-only runs, open config.json, find sensual_layer, and set "chance": 0.Core FeaturesEditable Prompt PoolsNightrun uses plain .txt prompt pools instead of one giant hardcoded prompt. Edit pool files to change how the whole machine behaves:concept genre genre_core genre_root character hair eyes clothing pose glamour_pose expression sensual_layer body_focus equipment environment lighting camera effects style_layer color_grade composition detail and more.The world module system is deeper and optional. The pool system is where most users should start.Controlled RandomnessNightrun is random — but not stupid-random. You can configure:Pool chances and pick countsBoosted chances when related pools appearBase step rangesLoRA chances, weight ranges, and capsWorld module and fusion mode chancesCooldown timing and upscale behaviorSelection memory and color repetition penaltiesYou are not stuck with one fixed behavior. Tune the machine until it behaves like your machine.Selection MemoryDuring a run, Nightrun remembers recent choices and penalizes repetition. It tracks broad color families — blue, cyan/teal, red, purple, green, gold, black, silver, iridescent — so if a batch starts drifting into one color mood, it pushes away.This is one of the main reasons long runs do not feel repetitive.Rare Detail ControlSome details are only interesting when they stay rare. Heterochromia, for example, can be configured so it does not take over an entire batch. Special things stop feeling special when every third image has them.LoRA HandlingNightrun does not blindly slap LoRAs into the prompt. It can:Scan local LoRA folders and resolve namesUse aliases and soft-match ugly filenamesSkip missing LoRAs without crashing the runRandomize LoRA weights within configured rangesAdd synergy/support LoRAs with controlled chancesCap random and total LoRA countsDeduplicate final LoRA tagsLocal LoRA libraries are messy. Civitai names, trigger names, and local filenames are often all slightly different. Nightrun tries to survive that.Coherent World ModulesThe normal prompt pools are the everyday engine. The world module system is the coherence layer.When it activates, Nightrun selects a world/franchise module and pulls related elements from the same source family — character archetypes, outfits, environments, props, factions, technology, magic systems, lighting mood, color palettes, cinematic language, and more.The goal is not to replace the normal pools. The goal is to give the run a coherent themed spine when that system activates.Fusion mode allows controlled cross-world combinations while reducing risky generic pool chances — unusual mixes without the machine blindly dumping everything into one prompt.Long-Run SafetyGPU temperature pause — Nightrun watches GPU temperature through nvidia-smi. If the GPU gets too hot, it pauses. When it cools below the configured resume threshold, it continues.VRAM chill sessions — For big batches, Nightrun schedules random cooldown sessions. Run several generations, pause for a few minutes, let the system settle, continue. Small thing. For overnight workflows it matters.Between-image rest — Configurable sleep time between images so the machine is not being tortured nonstop.Nightrun is not just "go fast." It is "keep going safely."Upscale WorkflowNightrun supports both scheduled upscale workflows and metadata-based re-upscaling. It can:Generate base images and upscale during full runsAuto-upscale low-step base rendersAccept drag-and-drop metadata for upscalingRecreate from metadata if neededWrite new metadata beside upscaled imagesChain later upscales from previous upscale metadataA fast base image does not have to stay a rough base image. Low-step renders can go through upscale logic and recover quality without burning time on every single base generation.Metadata ReplayEvery image gets a metadata sidecar with everything important saved:seed prompt negative prompt selected pools selected modules LoRAs LoRA sources base steps status upscale reason errors GPU infoSo later, you are not staring at a good image wondering what made it. The answer is saved beside it.Validation and Dry-RunValidation mode checks pool loading, prompt formatting, LoRA resolution, missing resources, alias behavior, and generation logic — before wasting GPU time.Dry-run mode writes prompt and metadata without calling Forge image generation. See what the run would do before committing to a real batch.Measure twice. Render once.Prompt Variety AnalyzerA built-in tool scans old metadata and reports:Repeated categories, colors, and modulesRepeated prompt fragmentsWorld module usage patternsExact prompt repeatsSigns that a batch is becoming too sameyTune the machine instead of guessing.OutputsEach run creates an organized folder:nightrun-YYYYMMDD-HHMMSS/ 0001_base_WIDTHxHEIGHT.png 0001_upscale_WIDTHxHEIGHT.png 0001_prompt.txt 0001_metadata.json summary.json run.log contact_sheet.jpg validation_report.json Exact files depend on the run mode.Basic UsageTask Launcher First-time setup Run First Setup.bat Validate before rendering Run Validation Stress Test.bat Preview one prompt, no render Run One DRY TEST.bat Base generation only Run Nightrun BASE only.bat Full run with scheduled upscale Run Nightrun FULL upscale.bat Re-upscale from metadata Run 2x Upscale From Metadata.bat Analyze prompt variety Run Prompt Variety Analyzer.bat Stop cleanly after current image Stop After Current Image.batMetadata Upscalingpy upscale_from_metadata.py "D:\renders\0001_metadata.json" --config config.local.json --scale 2 Force base image as source:py upscale_from_metadata.py "D:\renders\0001_metadata.json" --config config.local.json --source base --scale 2 Use an existing upscale as source:py upscale_from_metadata.py "D:\renders\0001_metadata.json" --config config.local.json --source upscale --scale 2 Dry-run the upscale:py upscale_from_metadata.py "D:\renders\0001_metadata.json" --config config.local.json --scale 3 --dry-run First-Run SetupThe setup script creates a local config for your machine. It will:Ask for your Forge / Forge-Neo path and output folderDetect your VRAM profileCheck checkpoint path and count local LoRAsCheck for Ultimate SD UpscaleCreate config.local.json and desktop shortcutsThe shared config.json stays portable. Your private machine paths stay in config.local.json. The project can be shared without leaking your local folder structure.Recommended ForNightrun is useful if you:Use Forge / Forge-Neo locallyGenerate in large batches or overnight runsWant editable prompt pools instead of hardcoded promptsUse many LoRAs and want safer handlingWant metadata replay for good imagesWant upscaling tied to generation metadataWant less repetitive outputs over long runsWant a workflow you can tune instead of replaceNotesNightrun does not include checkpoints, LoRA files, model files, Forge itself, or Ultimate SD Upscale. You need your own local Forge / Forge-Neo setup and your own models.Franchise and world module names are used as inspiration labels for prompt organization only.License / Usage noteUse this with models, LoRAs, and extensions you are allowed to use.Franchise module names are inspiration labels for prompt organization. Nightrun does not include model files, LoRA files, checkpoints, or copyrighted assets.Nightrun is a prompt generation and batch runner tool. It does not include, distribute, or download any AI models, checkpoints, LoRAs, extensions, or generated images. All content is produced locally using software and model files you have installed yourself.You are solely responsible for the models and extensions you use, the content you generate, compliance with third-party license terms, and compliance with the laws of your jurisdiction.NSFW generation is supported. It is your responsibility to ensure any explicit content you generate is legal in your jurisdiction. This tool must not be used to generate illegal content of any kind.Nightrun is provided as-is, without warranty of any kind.Built for the dark hours between intention and discovery.

Image to Image (CGI to real Life)
Turn your CGI images into realistic real life images.Change the denoise level to stay true to the original image or get creative.Add a second combined prompt when stage 2 needs that extra nudge in the right directionOriginal size of Image is auto input then upscale to desired size.Face detailer, color, contrast, brightness and sharpening included. just bypass what you don't want.Image comparing at all stages so you can finetune at all levels.If you like what I have done, please post an image or two down below.and a thumbs up would be great.
Illustrious/ Pony/ SDXL SFW & NSFW Pro Grade Workflow (Low and high VRAM)
Note: I spend a lot of time on these to make sure they are top notch. If you have ANY issues, I'm very responsive. hit me up and I'll resolve them for you.This is an advanced workflow. It is node heavy and designed for multiple options and to return professional high quality results. If you are looking for simpler workflows, they are here:An essentials one can be found here: https://civitai.com/models/2349309/illustriousponysdxl-essentialsA simple one can be found here:https://civitai.red/models/2600919/lonecats-simple-zitilluanimaflux-workflows?modelVersionId=2921603A complete user and troubleshooting guide inclusing a list of common error messages can be found here https://civitai.com/articles/24678/how-to-use-my-workflows-a-comprehensive-breakdownInstagram: https://www.instagram.com/synth.studio.models/Buy me a☕ https://ko-fi.com/lonecatoneThis represents hundreds of hours of work. If you enjoy it, please 👍like, 💬 comment , and feel free to ⚡tip 😉也有中文说明VER 10.1:Got tired of having to always mess with resolution, so I gave you the option to make it automaticMath node replacements to deal with the Linux errorsAdded psst... fast bypassers (you'll thank me).💡use the upgraded face yolo I added. much more accurate.Improved notes throughoutVer 8.0/ 9.0:Major overhaul to bring it up to speed with my other workflowsAdded second checkpoint metadataadded a prompt to hi-res fixadded Inpainting suite from the pro grade workflow by request.V7.0Apparantly , I forgot to hook up Face Swap in my last model and nobody told me until today, so a free major upgrade it is!Installed a sentence remover in the prompt assist area to help eliminate CivitAI 🚩Cleaned up some bugsResinstalled Qwen VL Prompt EnhancerUpgraded Face Swapalso upgraded notes on how to remove it.Minor changes to detailersAdded an inline crop tool in the post production suite.Ver 6.0:Major overhaul to bring it up to speed with my other workflowsAdded a refiner checkpoint that can easily be switched on or offAdded FaceID as well as a style and composition IP Adapter for character consistencyReowked the Detailers ro improve thembetter version of Hi Rez fixReworked the Save with Metadata to align with CivitAi and fix the Comfy update bug 🙄This is an all in one workflow:ControlnetI2I with prompt generationDual Model Loader: Better controlSage Attention: Speeds up productionUltimate upscaler: For prescale and hi-res fixDetailers: Face, eyes, hand, expressionNSFW Detailers: Male & Female anatomySeed VR2 Upscaler: Get up to 4k pics, even on low VRAMPost production suite: My pride and joy. Does everything.

Characters generator | Generation of detailed сharacter for full body
V1.3 - Anima:- This is the version for Anima, I really liked it.- Added frame control to prevent the character from moving out of the frameV1.2:- Added "ControlNet"Some people have asked me to share my character workflow.Why not?So I refined it and added a randomizer, enjoy!WARNING! This method does not work well with V-Pred models.

ComfyUI Image Workflows
Workflow for XL/Illustrious/NoobAI ModelsAny feedback would be appreciated.See the Article for a Guide:https://civitai.com/articles/17339 (probably doesn't work rn)https://civitai.red/articles/17339Key Features:LoRATIPO PromptingDetail EnhancersControlNet UpscaleIPAdapterHiresFixOpenPoseWildcardsControlNETColor MatchFBCNNRegional PromptingInpaintOutpaintWorkflows included:🟥Advanced: comprehensive text to image workflow🟨Basic: more basic version of the Standard workflow🟦Standard: more basic version of the Advanced workflow🟩Detailer: detailing previously generated or existing imagesExperiment and enjoy!

Simple SDXL workflow with upscaling RTX | SVR2
A simple Comfyui Workflow I use for basic testing and image generation. Contains the "RTX Video Super Resolution" upscaling node to upscale images and videos. Only works on Nvidia RTX GPUs. https://github.com/Comfy-Org/Nvidia_RTX_Nodes_ComfyUI.git05/2/26 updateAlso added seed vr2 version for non nvidia users. The quality is about the same though I prefer RTX solution as it is notably faster (almost instant) and I prefer the upscalling quality slightly better. Still probably better to go with a good forge workflow :p.

Ultimate ComfyUI SDXL/PDXL/Illustrious Workflow
Ultimate ComfyUI SDXL/PDXL/Illustrious WorkflowMy ComfyUI SDXL/PDXL/Illustrious workflow features three upscale/refine stages, OpenPose ControlNet, numerous detailers, and a neatly organized structure. Most options are easily configurable via the dashboard, using dropdowns or boolean toggles.Notes:You will need to download the various bbox models to successfully run the detailers. You can find these models on huggingface/civitai. You can find the SAM model in the ComfyUI model manager.You can disable detailers by bypassing the detailer node. You can also disable the entire group and the model loader. However, you must leave the get_DETAILER_*_IMAGE nodes enabled.Features:- Dual Model Setup: Enables a stylized model for initial generation and a secondary model for refinement/upscale stages. I typically use a PDXL/Illustrious model as the secondary one, as it excels at handling human anatomy, hands, and faces.- Three-Stage Sample/Upscale Design: Provides full control over upscaling and sampling, unlike consolidated HiRes Fix nodes. The incremental approach reduces artifacts and distortions while preserving details from the original generation.- Control Panel: Centralizes easy configuration of models, settings, and more—all in one place.- Consolidated Prompts: Dedicated locations for all prompts and detailer prompts.- Prompt Bypass Options: Bypass stage 2/3 prompts with a single click to use one positive/negative prompt across all stages. Selectively bypass positive, negative, or both.- Full Scaling Control: Adjust scaling factors for each stage independently.- Pony Toggles: Automatically add Pony scores to prompts if desired, keeping prompts clean and organized. This can be edited, and the text replaced, for embeddings instead.- Image Loader and Switch: Supports img2img or txt2img modes, with optional inversion and tinting.- LoRA Stacks: Separate stacks for stage 1, stages 2/3, and detailers, offering maximum control over LoRA application.- Automatic Image Dimensions: Handles width and height automatically (conditioning and scaling).- Eight Detailers: Includes hands, breasts, penis, butt, vagina, face, eyes/mouth, and jewelry.- Precise Masking: All detailers use bounding box (bbox) and Segment Anything Model (SAM) for accurate masks.- Hand Detailer: Utilizes OpenPose ControlNets to guide refinements for hands and fingers.- Face Detailer: Employs MediaPipe FaceMesh for ultimate control, detecting face, eyes, pupils, mouth, etc., individually or together.Dependencies (Custom Nodes):Comfyroll StudioCustom ScriptsDream ProjectImpact PackInspire PackKJNodesTiled DiffusionEasy Use

SDXL Omni IMG Gen
A unified, modular SDXL/Pony/Illustrious powerhouse designed to consolidate professional-grade tools into a single, cohesive environment. This workflow eliminates "tab fatigue" by integrating CFG/Noise engineering, multi-LoRAs management, ControlNet, IPAdapter, InstantID, advanced Upscaling, and Detailers into ONE interface.Designed for speed and high-precision control, this workflow is essentially a "power workbench" overflowing with switches, sliders, and logic gates. It is undeniably complex, complex enough to make a beginner’s brain do a backflip, but for the pros and technical geeks - it’s a total playground. Think of it as the cockpit of a fighter jet: intimidating at first, but incredibly powerful once you know what the buttons do.Don’t panic! I’ve left a breadcrumb trail of notes and mini-tutorials in every single section. Please, I’m begging you read them. If you skip the manual and things get weird, don't say I didn't warn you! Devour the notes before you hit that "Queue Prompt" button; your VRAM (and your sanity) will thank you.Core Philosophy: Process in clear layers; fully configure the workflow in Row 1, generate and review a draft in Row 2, then produce the final high-quality render in Row 3. The completed image returns to Row 2 for side-by-side comparison before saving.The workflow is intentionally organized into three horizontal zones for logical progression:Row 1 (Top) – Setup & ConfigurationRow 2 (Middle) – Draft Generation & ReviewRow 3 (Bottom) – Final Processing & Output🛠️ System Requirements & HardwareGPU: NVIDIA (30xx/40xx Series).VRAM: 12GB Minimum / 24GB Recommended.System RAM: 32GB Minimum / 64GB+ Recommended.🎯 Software EnvironmentComfyUI Version: 0.15.0+ComfyUI Frontend: 1.39.16+💻 Core Software EnvironmentPython 3.12.x: (Highly recommended). While versions as low as 3.10, 3.11 may work, 3.12 provides the best compatibility for recent dependency updates). This version provides native support for nested f-strings and delivers improved execution speed.PyTorch: 2.10.0+cu130 - (Minimum 2.6.0+cu124) specialized build specifically engineered for full compatibility with CUDA 13.0.TorchVision: 0.25.0+cu130TorchAudio: 2.10.0+cu130📦 Essential Python DependenciesThese libraries are crucial for the stability of your Custom Nodes. Versions are strictly locked to prevent conflict.Core: numpy==1.26.4, setuptools>=70.0.0, pydantic>=2.10.0.Imaging: pillow==10.x, opencv-python, blendmodes==2025, glitch_this, rembg.Identity & Face: insightface==0.7.3, onnxruntime-gpu.Miscellaneous: tensorflow⚡ High-Performance AttentionPlease read this article for more information: https://civitai.com/articles/21516/install-sageattention-2-notes.SageAttention: Version 2.2.0 (Mandatory optimization).Flash Attention 2: (Fallback/Legacy support via Torch SDPA).Flash Attention 3: Version 3.0.0+cu130 (Optimized for RTX 40 series).Triton: 3.+ Windows-compatible build for FP8/NF4 dequantization.🧩 Required Custom Node PacksCore Infrastructure: rgthree-comfy, ComfyUI-Manager, ComfyUI_essentials, Use Everywhere (UE Nodes), ComfyUI-LogicUtils, ComfyMath, ComfyUI-JNodes, ComfyLiterals.CFG & Sampling: efficiency-nodes-comfyui, sd-perturbed-attention, Skimmed_CFG, RES4LYF, pre_cfg_comfy_nodes_for_ComfyUI, ComfyUI-Detail-Daemon.Identity & Perception: ComfyUI_IPAdapter_plus, comfyui_controlnet_aux, ComfyUI_ZenID, ComfyUI-WD14-Tagger, ComfyUI-AdvancedLivePortrait, Extra Models for ComfyUI.Upscaling & Motion: ComfyUI Impact Pack, ComfyUI Impact Subpack, UltimateSDUpscale, ComfyUI-SeedVR2_VideoUpscaler.Creative Suite: JPS Custom Nodes, Comfyroll Studio, ComfyUI-KJNodes, ComfyUI_Primere_Nodes, ComfyUI-JakeUpgrade, ComfyUI-pause, ComfyUI-mxToolkit.VFX & Realism: ComfyUI-Optical-Realism, CRT-Nodes, Virtuoso Nodes, ComfyUI_SKBundle, ComfyUI-FBCNN, comfyui_fill-nodes.📥 Model RequirementSDXL Checkpoint: Any SDXL/Pony/IllustriousSDXL VAE: Baked VAE (or any SDXL VAE)Upscale/ESRGAN: Any 4x upscale models.ControlNet: xinsir/controlnet-tile-sdxl-1.0; ttplanet_sdxl_controlnet_tile; diffusion_pytorch_model-instantID; diffusion_pytorch_model_union_promax (or you can use separated models for every preprocesses)IPAdapter: ip-adapter_sdxl_vit-h or ip-adapter-plus_sdxl_vit-h; ip-adapter-faceid-plusv2_sdxl ; ip-adapter-faceid-portrait_sdxl; ip-adapter-faceid-portrait_sdxl_unnormCLIP-Vision: CLIP-ViT-H-14 or CLIP-ViT-bigG-14Instant-ID: ip-adapter_instant_id_sdxlDetailers: Any detailer you prefer, I use person (#1), face (#2), eyes (#3), hair (#4), hands (#5), skin (#5), fashion (non-cond #1), furry (non-cond #2)Others: depth_anything_v2_vitl (depth map); ema_vae_fp16 (SeedVR2); seedvr2_ema_7b_fp8_e4m3fn_mixed_block/seedvr2_ema_3b_fp8_e4m3fn (SeedVR2); clipseg-rd64-refined-fp16 (noise map)🚩 Optimized Execution Flags (Optional)Use these flags in your .bat file to leverage the full power of your GPU--fast fp16_accumulation--dont-upcast-attention--use-sage-attention--disable-xformers (because xformers only support python <= 3.10.11)--preview-method auto--highvram/--normalvram/--lowvramIf you love my works, please review them with images and consider donating me some yellow buzz. This would be my great motivation to release more future works.

txt2img2img
This is a 2 stage workflow that will first generate an image from text then, if the image is suitable, it can refine the image to a more realistic version. I have used this with pony generations to start and then to my go to LEGACY - YAPRM - Yet Another Pony Realistic Merge V70 to finish

ComfyUI Random Prompts
Example workflow for how to use text gen plus random choice to get truly diverse prompts. Simply asking a text gen model to generate a random prompt often leads to very similar outputs for the same input, even with high temperature settings. This is solved by having earlier text gen models make a list of possible concepts, and then selecting one of those concepts at random.

ComfyUI workflow with Regional Prompt for couple focus V3
Regional prompt workflow for XL ModelsThis is a combination of some workflow I'v used in the past or recently.Most of the part from the regional prompt was originally on this workflowHuge thx to @zml_w for all the testing and the helpI'v just found that Levpat might be banned or deleted account Upscale Method for V2 by @LevPat https://civitai.com/models/1994653/custom-upscale-flowUSER GUIDEhttps://civitai.com/articles/18257For V3 Merged WorkflowMerged the two method into one workflow, you can now toggle between Dense Diffusion and Attention coupleChanged the detailer method, I'v kept Couple Face Detail group (for some image it's ok)Now I'm mostly using a method from MGHerderFound on this workflowAdded some settings to the Face detailer, I'v linked all the merged text prompt to the positive on the first two SEGS for each two characters, you can swicth between character (I couldn't find a good way to had wildcard or overwrite prompt on the SEGS detailer)Added SeedVr2 upscale you will need to download the model and VAE for it to workAdded a more simple and lighter latent UpscaleI'v kept the Advanced latent upscale (was called Crazy Upscale before) linked all the text positive and negative prompt to it, converted to subgraph all the noodlesKept the USDU upscale in some use it can be good tooBasically you have now 4 upscale method to choose with, you can delete the Upscale group you don't want it will not break the workflow.You will need all the the custom nodes below that was used for V2 and all the followinghttps://github.com/numz/ComfyUI-SeedVR2_VideoUpscaler (If you want to use it)https://github.com/mcmonkeyprojects/sd-dynamic-thresholdinghttps://github.com/chrisgoringe/cg-use-everywherehttps://github.com/BlenderNeko/ComfyUI_ADV_CLIP_embhttps://github.com/LAOGOU-666/Comfyui-Memory_Cleanuphttps://github.com/Extraltodeus/Skimmed_CFGhttps://github.com/mirabarukaso/ComfyUI_Mirahttps://github.com/ltdrdata/was-node-suite-comfyuiFOR V2 Dense Diffusion and Attention CoupleI'v made two separate workflow with different Regional prompt method, both of them are in the archive if you want to try.Dense DiffusionSo the error "The size of tensor a (924) must match the size of tensor b (308) at non-singleton dimension 3"Is still here with Dense Diffusion BUT now I know 100% why it happens, so I will detail everythings how to avoid it.First you can put almost everything in every positive prompt, a lot of detail or action for left char and almost nothing for 2nd character will not trigger this error.The only way this error will pop is Positive VS Negative Prompt.So why it happens then, almost exclusivly with Embedings, because of Tokens count and the way Dense Diffusion work, the size of Tokens need to be almost the same, and when you put emebeddings, like Lazyhand, Lazyneg, etc will use a lot of Tokens (more exactly tokens Chunks)So how to avoid it, you can either not use emebeddings at all, I'v added note on the workflow with good (I think) quality prompt.You can still use Embeddings but you wiil need to balance them between positive and Negative. So for example if you put Lazyhand + Lazyneg in Negative, you will need to use at least one or more embeddings in the positive quality to get the same size of Tokens chunks.So because of that I'v added a custom nodes made by me (and GPT) to Normalize the negative quality, you can either turn it off or on, I'v put pics for comparaison in the archive.If you'r not happy or don't like this method I'v made another Workflow with a different nodes called Attention couple.Attention CoupleWith Attention Couple this error will never pop, then why not using it and getting rid of Dense Diffusion ?Attention couple work great and can have pretty good result, but in my testing I saw two major flaw with it.First the Lora did not get applied the same way with it, Dense Diffusion seems to have a better blend for the model and loras.Second the interaction seems more difficult too, I did not use it very extensively but the few image I'v made seems to have less prompt adherence.Here is every nodes you will need for bothFor Dense Diffusionhttps://github.com/Fannovel16/comfyui_controlnet_auxhttps://github.com/ltdrdata/ComfyUI-Impact-Packhttps://github.com/rgthree/rgthree-comfyhttps://github.com/yolain/ComfyUI-Easy-Usehttps://github.com/kijai/ComfyUI-KJNodeshttps://github.com/ssitu/ComfyUI_UltimateSDUpscalehttps://github.com/cubiq/ComfyUI_essentialshttps://github.com/ClownsharkBatwing/RES4LYFhttps://github.com/giriss/comfy-image-saverhttps://github.com/shiimizu/ComfyUI_smZNodeshttps://github.com/ltdrdata/ComfyUI-Impact-Subpackhttps://github.com/huchenlei/ComfyUI_densediffusionhttps://github.com/edelvarden/comfyui_image_metadata_extensionhttps://github.com/rcsaquino/comfyui-custom-nodeshttps://github.com/zml-w/ComfyUI-ZML-Image(https://github.com/zml-w/ZZZ_ZML_English_Patch)A small custom node is in the archive for the Negative Normalization, just need to put it in custom nodes folder. No requirements needed.For Attention CoupleEverythings above +https://github.com/BlenderNeko/ComfyUI_ADV_CLIP_embhttps://github.com/laksjdjf/cgem156-ComfyUIIf you have trouble with FAILED IMPORT for cgem156 you can try this fixhttps://github.com/laksjdjf/cgem156-ComfyUI/issues/17#issuecomment-2918745574Worked for me with ComfyUI desktop AppOlder VersionI'v added a chain sampler because I love this method, the render time and the result it gave.This is quiet an advanced workflow so you will need a lot of custom nodes, some may not work with ComfyUI manager, I will link them here if you want to install manually.Make sure you activate your venv environment for the requirements.txt for custom nodes.There is a simplified version in the archive if you want to try without all the nodes for HiresFix, Face detailer, upscale and color match.I'm not responsible if you break your ComfyUI install, some of the nodes may use different Pytorch version or requirements you already use.https://github.com/ltdrdata/ComfyUI-Impact-Packhttps://github.com/pythongosssss/ComfyUI-Custom-Scriptshttps://github.com/rgthree/rgthree-comfyhttps://github.com/yolain/ComfyUI-Easy-Usehttps://github.com/shadowcz007/comfyui-mixlab-nodeshttps://github.com/jags111/efficiency-nodes-comfyuihttps://github.com/ssitu/ComfyUI_UltimateSDUpscalehttps://github.com/Suzie1/ComfyUI_Comfyroll_CustomNodeshttps://github.com/cubiq/ComfyUI_essentialshttps://github.com/ClownsharkBatwing/RES4LYFhttps://github.com/ltdrdata/ComfyUI-Impact-Subpackhttps://github.com/huchenlei/ComfyUI_densediffusionhttps://github.com/edelvarden/comfyui_image_metadata_extensionhttps://github.com/Miosp/ComfyUI-FBCNNhttps://github.com/rcsaquino/comfyui-custom-nodeshttps://github.com/weilin9999/WeiLin-ComfyUI-prompt-all-in-oneDeprecated version use this one instead, I'v fixed the workflow with the new onehttps://github.com/weilin9999/WeiLin-Comfyui-ToolsFor V1 Multimaskhttps://github.com/chflame163/ComfyUI_LayerStylehttps://github.com/kijai/ComfyUI-KJNodeshttps://github.com/chrisgoringe/cg-use-everywherehttps://github.com/giriss/comfy-image-saver

LoRA Stack Weight Optimizer - Perfect Blends
Add as many LoRAs as you want.The optimizer automatically balances their weights to prevent conflicts.• Automatic LoRA balancing• Hires Fix included• Create Perfectly Balanced LoRA StacksRequired Custom Nodes1. ComfyUI-Easy-Usehttps://github.com/yolain/ComfyUI-Easy-Use2. ComfyUI-Impact-Packhttps://github.com/ltdrdata/ComfyUI-Impact-Pack3. ComfyUI-mxToolkithttps://github.com/Smirnov75/ComfyUI-mxToolkit4. ComfyUI-Image-Saverhttps://github.com/giriss/comfy-image-saver5. ComfyUI-LoRA-Optimizerhttps://github.com/ethanfel/ComfyUI-LoRA-Optimizer

Prompt from Image - ComfyUI
Workflow to create prompts from images using Janus and automatically generate the resulting image. Great for rapid testing of prompts when going for a certain effect. Modify by customizing LoRAs, adding prefixes or suffixes, create an iterative loop, etc. Janus prompt should be somewhat customized for the type of image and what you are trying to recreate. The current prompt works very well for a single person.Be careful with it - if you don't control the prompts you don't know for sure what you are going to get.Samples are representative of real performance with similar images.

AUTO-SEND FILES PRIVATE/SECURE 🔐: ComfyUI Output Folder >> Encrypt >> Send to GoogleDrive / Dropbox 😎👍
Sick of manually downloading your ComfyUI output files from the cloud? Want them to just show up in your GoogleDrive automatically? (or DropBox - Link Below)Need to share files with a team? Want to keep your files private and secure? Encrypt your files and send with privacy and security (optional).If unsure if this is useful to you read my article about why you might want to consider this tool: https://civitai.com/articles/26091/how-to-encrypt-and-privately-send-your-filesDownload this workflow and follow instructions to access DriveSend tools to work like a pro, privately and secure. Prefer Dropbox? version available too here >> DropSendTool Workflow:New Files save in Output folder.New Files Get Encrypted (optional)(encryption uses AES-128 encryption for the files and SHA256 checksum verification for file integrity)New Files get sent to your Google Drive (or DropBox if preferred DropSend)Move Files from GoogleDrive (or DropBox if using) to your local Drive or External Hard Drive.Decrypt Files Locally with Decryption Scripts.Works with any free Gmail account or Dropbox version available too.DriveSend · DropSendSetup is around 20 mins. FOLLOW SETUP INSTRUCTIONS As you have to do some setup, once setup its set it and forget it. Very helpful tools for getting automatic file access from cloud to your Google Drive or Dropbox.

ComfyUI beginner friendly Pony Text-to-Image Workflow with Easy Prompt Saver by Sarcastic TOFU
This is a very simple workflow that helps you to save your Pony Text to Image Generation Data into a human readable .txt file. This will automatically get and write your metadata to the .txt file. You will find all the saved prompt files that it generated with the images inside the Archive (.Zip) that has the workflow. Also with the Image Saver Simple node used you may embed the workflow itself with each saved image or save the image and workflow for your work seperately. You will get your prompts in this way inside a readable .txt file for each image generated (matching Automatic1111 / EasyDiffusion's .txt outputs) - Positive Prompt -------------------(embedding:CyberRealisticPony_POSV1:0.500), score_9, score_8_up, (Only_Saree:1.4), source_realistic, (cinematic photography style), masterpiece, high quality, ((beautiful eyes)), A stunning cinematic photograph of an Indian actress, capturing her graceful dance under the pouring rain near a mesmerizing waterfall. She is adorned in a wet, blouseless, no-sleeve Purple saree with a single shoulder, revealing her toned belly. Her dark hair is cascading down her back, and her eyes are filled with a deep sense of connection to the elements around her. The background showcases the powerful waterfall, with raindrops and water droplets enhancing the vivid colors of the scene., cinematic, photo, Woman in Saree, OnlySaree_Pony_Style, Wearing a BlouseLess BraLess SleeveLess OneShoulder Saree, Exposed Belly Button <lora:OnlySaree_Pony_2.0:1.0> <lora:Desi_Tabela_v3_PDXL_LoRA_prodigy_local:0.5> Negative Prompt -------------------(embedding:CyberRealistic_Negative_PONY_V2-neg:0.500), score_6, score_5, score_4, pony, furry, child, kid, chibi, 3d, elven ears, anime, nipple,asian, male, huge teeth, ugly, deformed, noisy, blurry, low contrast, deformed, bad anatomy, bad face, ugly, missing, glasses, missing fingers, extra fingers, bra, panty, blouse, underwear, fat, chubby, pregnent, old Seed - 84005258444181 Steps - 50 CFG - 8.0 Sampler - euler Denoise Strength - 1.0As you can see this is very much readable and ideal for easy reference reuse if you want to reuse the prompt on a different tool like WebUI Forge or Easy Diffusion or something else. This saves both the weights of LORAs along with positive & negative embeddings with the prompt. I just kept this workflow fairly simple and used only one recommended positive embedding and only one recommended negative embedding. (of course you are free to modify the workflow and add more, but that will make the workflow too wonkey). You can download your necessary Pony model and LORA used from CivitAI (Details are mentioned below). Make sure you have latest enough ComfyUI installation and install any necessary nodes for for this workflow using ComfyUI manager and place the correct files (Pony model, LORAs etc) in correct places. Also check out my other workflows for SD 1.5 + SDXL 1.0, WAN 2.1, WAN 2.2, MagicWAN Image v2, QWEN, HunyuanImage-2.1, HiDream, KREA, Chroma, AuraFlow, Illustrious, Lumina2, Z-Image Turbo, Flux.2 Klein and Flux.1 . Feel free to toss some yellow Buzz on stuffs you like.How to use this -#1. Just select your desired Pony model and embeddings first and now#2. set your desired image dimensions to start#3. then input your desired image prompt.#4. select how many images you want (Change the number besides the "Run" button)#5. select image sampling methods, CFG, steps etc. settings#6. finally press the run button to generate. That's it..** LORA usage for this workflow is optional you can use it without any LORAs, use with 1 or 2 or any other number of LORAs. to add new LORAs press the L button on top to lunch LORA Manager on a new tab find your LORA and if you want to use that LORA just click the upward Kite button. For many Pony models it is vital to select that model's recommended positive & negative embeddings but can ofcourse disable or bypass these.Required Files===============Pony Model Files used -### Download Link for Pony Model---------------------------------CyberRealistic Pony v16 -https://civitai.com/models/443821/cyberrealistic-pony?modelVersionId=2581228### Download Link for Pony Model Positive Embedding----------------------------------------------------https://civitai.com/models/1309512/cyberrealistic-positive-pony?modelVersionId=1477814### Download Link for Pony Model Negative Embedding----------------------------------------------------https://civitai.com/models/77976/cyberrealistic-negative-pony-v20?modelVersionId=1690589### Download Link for Pony Model VAE-------------------------------------Pony Enhanced VAE Pastels -https://civitai.com/models/660613/pony-enhanced-vae-pastels?modelVersionId=739267LORAs used===========Only Saree Pony v2 (This is my own trained LORA)---------------------------------------------------https://civitai.com/models/543000/only-saree-pony-by-sarcastic-tofuDesi Tabela v3 ------------------https://civitai.com/models/546857/desi-tabela-where-all-the-south-asian-ponies-live?modelVersionId=1241339

Img2Img _ Base + Refiner + Detailer _ ComfyUI _ SDXL ILLU NOOBAI PONY SD1.5 Etc _ Crix
Workflow I use when I want to create precisely, starting from an image.This is an Img2Img Workflow to have your images already optimized with just one Workflow!This workflow contains:BASE Img2Img to create your images,REFINER to immediately obtain a good-quality image,DETAILER to obtain precisely detailed faces and bodies if you create people,UPSCALER to obtain a super-quality image,SAVER to save your images with the right information, ready for publication,NOTES to make the most of the workflow.It has custom nodes, to use it you need to install them through "Manage custom node"Not interested in everything? NO PROBLEM!Each of these things can be disabled so that the workflow can work even when you don't need "refiner", "detailer", etc etc!!!If something doesn't work, you have questions, or you need help, message me! I'm happy to help!

PONY Compact Core - Murphylanga Base
"Stop building spaghetti. Start building architecture."The new standard for 2026 is here. Murphylanga's "Easy Pony Compact" is more than just a workflow—it is an architecture. We are moving away from the chaotic "node-spaghetti" of the past and embracing clean, high-end logic. This compact base-workflow utilizes advanced Transmitter/Receiver principles and intelligent custom nodes to extract the absolute maximum quality from PONY models while keeping your workspace pristine.Whether you are a professional creator or just starting out, this workflow is a must-have for anyone who wants to truly master ComfyUI.🚀 Architectural Highlights:Logic Overdrive: Full signal control via intelligent switches (rgthree-comfy) for dynamic, high-speed prompt processing.Transmitter/Receiver System: Utilizing Easy Set/Get logic to eliminate messy wires. Enjoy a clean workspace that allows your creativity to breathe.Visual Guidance: Fully color-coded via Custom-Node-Color. The logical layout guides your eye instantly to the right section—no more searching through grey node deserts.Performance Monitoring: Keep your system resources (VRAM/RAM) in sight at all times with the integrated Crystools dashboard.The Lying Sigma Secret: Built-in detail control via the Detail-Daemon, forcing the sampler into specialized ranges for maximum sharpness and texture.Civitai-Ready: The Image Saver ensures all metadata and hashes are preserved, so your uploads are recognized instantly on this platform.🛠️ Required Custom Nodes:To ensure the PONY Compact Core launches without any "Red Boxes," please install the following suites via the ComfyUI Manager:ComfyUI-Easy-Use (The heart of the Transmitter/Receiver logic)rgthree-comfy (Smart switches & UI organization)ComfyUI-Lora-Manager (Your central command for stacking styles)ComfyUI-Custom-Scripts (Essential UI features by pythongosssss)ComfyUI-Custom-Node-Color (For the visual color-coding system)Crystools (Resource monitor & performance dashboard)ComfyUI Image Saver (Metadata & hashing support for Civitai/OpenArt)WAS Node Suite (Revised) (Powerful backend logic tools)ComfyUI_essentials (Must-have core utilities by Matteo)ComfyUI-Detail-Daemon (Sigma & detail enhancement)Endless 🌊✨ Nodes (Batch prompting & text switching)💡 Quick Start Guide:Select your favorite PONY checkpoint.Configure your LoRAs in the dedicated Lora-Manager module.Follow the Colors: Each section is color-coded by function (Input, Processing, Output).Feel the Groove: Hit "Queue Prompt" and experience the clean magic of 2026.Credits:Architecture & Logic: MurphylangaCreative Presentation: Ziggy & VickyThe Funk-Soul Vibe: Cyrus & the Band

Snoodler's Transformation Workflow
Come check out my new Discord server and help me grow! https://discord.gg/qtMCySnn See more content not shared on CivitAI. Feel free to share your own images as well.this is a workflow i have created to make transformation sequences. i specifically created it to make corruption transformations with one of my lora (zxc style).

ZIT Refiner workflows - SDXL v1
A 4 stage workflow (1) generating a base image using a different base model (the model I used can be found in the version description), (2) refining the image with Z-Image-Turbo to add realism to the image, (3) detailing the image using detailer subgroups, and (4) upscaling and refining the image.The final step in stage 4 (enhance and sharpen) requires the ImageMagick binaries to be installed. They are available for download here: https://imagemagick.org/script/download.php.

ZIT Refiner workflows - PONY v1
A 4 stage workflow (1) generating a base image using a different base model (the model I used can be found in the version description), (2) refining the image with Z-Image-Turbo to add realism to the image, (3) detailing the image using detailer subgroups, and (4) upscaling and refining the image.The final step in stage 4 (enhance and sharpen) requires the ImageMagick binaries to be installed. They are available for download here: https://imagemagick.org/script/download.php.

Anime to Realism Multi-Stage Workflow
Anime → Realism Convergence is a multi-stage ComfyUI workflow designed to start with anime or stylized checkpoints (IL, Pony, etc.) and progressively refine the image into high-quality realism using low-denoise, and staged transitions.The key feature of this workflow is style preservation across checkpoints — you can use the same prompt across all stages, allowing the original anime/cartoon design language to carry through as the image resolves into realism. It also utilizes face detaiing and hand detailing as separate stages for further polishing.It works with virtually any:Anime / illustration base (IL, Pony, similar) as stage 1.Final realistic XL checkpoint (UltraRealistic, RealDream, or comparable) as stage 2.By gradually lowering denoise and transitioning checkpoints via latents instead of hard-switching, the workflow avoids common issues like identity loss, composition drift, or style snapping.Best use cases:Anime → photorealistic character conversionStylized concept art refined into realismPreserving anime facial structure, outfit design, and color language in realistic rendersNo prompt rewriting required — just set your models, seed, and let the stages do the work.Designed for users who want anime aesthetics without sacrificing realistic finish quality.
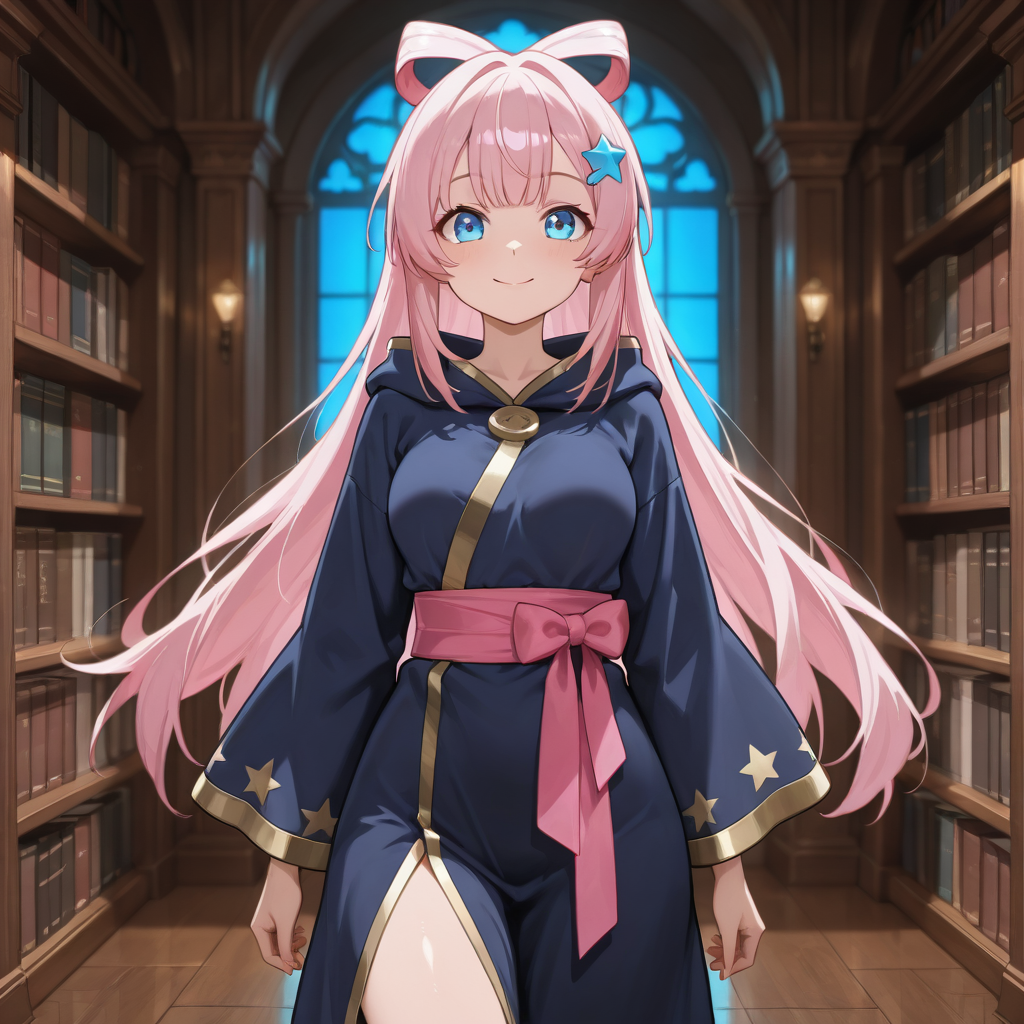
Persona-Director: The Ultimate Character Consistency Workflow
Stop fighting with tags. Start directing your character. Workflow for most of the ModelsShowcase: https://civitai.com/posts/25739743This workflow uses the ComfyUI-Persona-Director custom node to lock your character's identity using Logic, not luck.Unlike traditional methods that rely heavily on IP-Adapters or rigid LoRAs, this workflow uses a Semantic State Manager to keep your character's "DNA" (hair, eyes, signature accessories) persistent across wildly different scenes—from Cyberpunk cities to snowy streets.Key Features:0% Hallucination: Keeps accessories (like the blue star clip in the demo) consistent.No LoRA Needed: Works via structured prompting logic.Cross-Model Ready: Tested on Pony V6 XL and Nova Anime XL, but the logic works on most SDXL models.Complex Scenes: Handles drastic environment changes without breaking the character.How to run this workflow:Install the Node: Go to your ComfyUI/custom_nodes folder and clone the repo: git clone https://github.com/18yz153/ComfyUI-Persona-Director (Or simply install via ComfyUI Manager).Here is the workflow PNG. Also you can find the workflow in assets in GitHub.

ILL-to-REAL-Depth-2Pass
You don't have to pay EA as you may just drop any of my samples into ComfyUI window. But if you enjoy this workflow please consider the small BUZZ donation. Thanks in advance.IntroThis workflow showcases the effective approach to make realistic dataset pare (image + caption) from any Anime-ish checkpoint. With minimal modifications you can implement a hybrid workflow that combines any different checkpoint architectures in one pipeline. You can convert anime into realistic image (as I did) or make a reverse, realistic images into anime. You can replace the Illustrious prefab checkpoint with Flux or Qwen Image or Z-Image (if you have enough of VRAM) and use realistic SDXL checkpoint to amplify the textures and improve colors and lighting.Quick startModify the primary prefab prompt in "ANIME. PONY / ILL T2I POSITIVE PROMPT." box.Modify shared negative prompt in "ANIME. PONY / ILL T2I POSITIVE PROMPT." box.Modify the realism style and quality prompt in "Realism. Quality / Style prompt" box.Select the proper checkpoints for prefab and realistic render.Press run.You can also tune the KSampler and ControlNet parameters according to selected models and desirable degree of anime-realism conversion rate.How it worksRealistic render stage starts with ControlNet driven drafting. I used the Depth controlnet as it works better than Lineart or SoftEdge controlnets. Be aware that Depth driven conversion is not 100% stable. Sometimes Depth reconstruction breaks the anatomy especially in a very complex multi-character compositions, but it works much much better than lineart. You can also try Normal driven ControlNet conversion.So, realistic 1PASS is a draft which is also a Text-to-Image. I don't use the prefab anime-ish image as input for realistic draft pass as even with denoise 1.0 cartoonish colors and style affects too much the drafting result. You can use draft image as input for realistic draft if, for ex., you replaced the Illustrious model with Flux or other checkpoint that gives realistic colors. Then you might also need to adjust the denoise of the 1st pass of realistic stage KSampler. Please experiment and give a feedback.Second pass in realistic stage is boring. It is basically an I2I HiRes pass that fixes the anatomy and improves the textures.PS: [AD] In this workflow I use my latest CinEro NoiceAI checkpoint (R7j RC2) as I tried hard to make it render a super realistic textures and details. Give it a try and tell me if it works or not for you. Constructive feedback is welcome and desirable. [/AD]

Dual Checkpoint LoraManager Studio Workflow with FaceDetailer + Upscale
Dual Checkpoint Image Generation with Face Detailer & UpscalingComfyUI workflow featuring dual checkpoint architecture, multi-LoRA management, and progressive enhancement pipelineThis workflow uses a three-stage processing approach: base generation, face enhancement, and neural upscaling.🚀 Quick Installation GuideRequired Custom Node PacksComfyUI-Impact-PackProvides: FaceDetailer, UltralyticsDetectorProviderComfyUI-LoraManagerProvides: Lora Loader, Debug Metadata, TriggerWord Togglergthree-comfyProvides: Fast Groups Muter, Power Prompt - SimpleComfyUI-Custom-ScriptsProvides: ShowText|pysssss, CheckpointLoader|pysssssComfyUI-KJNodesProvides: JoinStringMulti, ImageResizeKJv2ComfyUI-Studio-Nodes (Optional)Provides: AspectRatioImageSizeRequired ModelsDetection Model:bbox/face_yolov8m.pt - Face detection modelAuto-downloads to: ComfyUI/models/ultralytics/bbox/Upscale Model:4x-AnimeSharp.pth or 4x-UltraSharp.pthDownload from: OpenModelDB or Upscale WikiPlace in: ComfyUI/models/upscale_models/Checkpoint Models: (User provided)Base checkpoint(s)Refinement checkpoint(s)LoRA Models: (User provided)LoRAs as needed for your generationInstallation MethodsOption 1: ComfyUI Manager (Recommended)Install ComfyUI-ManagerLoad the workflow in ComfyUIUse "Install Missing Custom Nodes" buttonRestart ComfyUIOption 2: Manual Installationcd ComfyUI/custom_nodes git clone https://github.com/ltdrdata/ComfyUI-Impact-Pack.git git clone https://github.com/Suzie1/ComfyUI-LoraManager.git git clone https://github.com/rgthree/rgthree-comfy.git git clone https://github.com/pythongosssss/ComfyUI-Custom-Scripts.git git clone https://github.com/kijai/ComfyUI-KJNodes.git git clone https://github.com/comfyuistudio/ComfyUI-Studio-nodes.git cd ComfyUI-Impact-Pack python install.py Additional Python DependenciesSome nodes may require additional Python packages:Impact Pack: ultralytics, segment-anything, mmdetKJNodes: May need numba for some operationsNotes:Core ComfyUI nodes are included with base ComfyUISome nodes install their own dependencies on first runThe workflow will show red/missing nodes if dependencies are missing🏗️ Workflow ArchitectureThree-Stage Processing PipelineStage 1: Base GenerationInitial image generationDual checkpoint supportMulti-LoRA managementPrompt processing and conditioningStage 2: Face EnhancementFace detection using YOLOv8Targeted inpainting and refinementUses secondary checkpointAdaptive denoisingStage 3: Neural UpscalingAI model-based upscalingTile-based processingEdge preservationMultiple save points with metadata📦 Main Node Types UsedModel LoadingCheckpointLoader|pysssssLoads checkpoint modelsOutputs: MODEL, CLIP, VAEEnhanced checkpoint loader with metadata featuresVAELoaderLoads VAE models separatelyAllows VAE selection independent of checkpointPrompt ProcessingPower Prompt - Simple (rgthree)Prompt input and processingSupports prompt weighting syntaxOutputs: CONDITIONING and TEXTCLIPTextEncodeConverts text prompts to CLIP embeddingsSeparate nodes for positive and negative promptsJoinStringMultiCombines multiple text stringsUsed for merging trigger words with promptsShowText|pysssssDisplays text outputUseful for debugging promptsLoRA ManagementLora Loader (LoraManager)Manages multiple LoRA modelsIndividual strength controls for each LoRASeparate model and CLIP strength settingsAutomatically extracts trigger wordsToggle system to enable/disable LoRAsTriggerWord Toggle (LoraManager)Manages trigger words from active LoRAsFilters based on enabled LoRAsGroup mode for batch managementDimension ManagementAspectRatioImageSizeCalculates dimensions for generationPreset aspect ratios availableEnsures VAE-compatible dimensions (divisible by 8)EmptyLatentImageCreates initial latent tensorSupports batch generationSamplingKSamplerCore generation nodeConfigurable samplers (DPM++, Euler, DDIM, etc.)Configurable schedulers (Karras, exponential, simple, etc.)Adjustable steps, CFG scale, and denoise strengthFace Detection and EnhancementUltralyticsDetectorProviderProvides YOLOv8 face detection modelGenerates bounding boxes for detected facesFaceDetailerEnhances detected face regionsPerforms targeted inpaintingUses separate model for face processingConfigurable denoise, crop factor, featheringSupports SAM model integrationProcesses faces at higher resolutionImage ProcessingVAEEncodeConverts pixel images to latent spaceVAEDecodeConverts latent tensors to pixel imagesImageResizeKJv2Resizes images with multiple interpolation methodsMaintains aspect ratiosDivisibility enforcement for model compatibilityUpscaleModelLoaderLoads neural upscaling models (ESRGAN, etc.)ImageUpscaleWithModelApplies neural upscaling to imagesTile-based processing for large imagesUtilitiesLazySwitchKJRoutes connections based on boolean switchUsed for conditional workflow pathsWildcardPromptFromStringProcesses wildcard syntax in promptsDebug Metadata (LoraManager)Tracks generation parametersOutputs metadata for documentationSaveImageWithMetaDataSaves images with embedded metadataConfigurable file naming and organizationMultiple instances for different pipeline stages🔧 Workflow StructureThe workflow uses:2 Checkpoint Loaders - Dual checkpoint architecture2 VAE Loaders - Separate VAE selection2 KSamplers - Base generation and refinement1 LoRA Loader - Multi-LoRA management1 FaceDetailer - Face enhancement2 Upscale nodes - Neural upscaling4 Save nodes - Multiple output points4 Debug Metadata nodes - Parameter trackingTotal: 36 nodes in the workflow⚙️ Key FeaturesDual Checkpoint SupportLoad different checkpoint models for base generation and face refinement, allowing specialized models for different stages.Multi-LoRA ManagementLoraManager system allows:Loading multiple LoRAs simultaneouslyIndividual strength control per LoRAToggle activation without reloadingAutomatic trigger word extraction and filteringFace Enhancement PipelineYOLOv8 detection → FaceDetailer inpainting:Automatic face detectionHigher resolution processing for facesSeparate model for face refinementConfigurable enhancement strengthProgressive EnhancementThree-stage approach:Generate base imageEnhance detected facesUpscale final resultMetadata TrackingDebug Metadata nodes throughout pipeline track:Generation parametersLoRA configurationsModel settingsFor reproducibility and documentation📋 Workflow GroupsThe workflow organizes nodes into functional groups:Prompt CreationModel Loaders - Base ImageModel Loaders - Face DetailBase Image generation and saveFace Detailer settings and saveCore Image Upscale and saveFinal Upscale and saveSubdirectory configurationBase Resolution settings💾 Output ManagementMultiple save points capture different stages:Post-base generationPost-face enhancementPost-first upscalePost-final upscaleEach save node:Embeds metadataCustomizable file namingSubdirectory organizationConfigurable output format🎯 UsageLoad checkpoint modelsLoad LoRA models (optional)Configure prompts (positive and negative)Set generation parameters (steps, CFG, sampler, scheduler)Set resolution via AspectRatioImageSizeConfigure face enhancement settingsSelect upscale modelQueue and generateThe workflow saves outputs at multiple stages, allowing comparison of results throughout the pipeline.This workflow provides a complete pipeline from initial generation through face enhancement to final upscaling with comprehensive parameter control and metadata tracking.
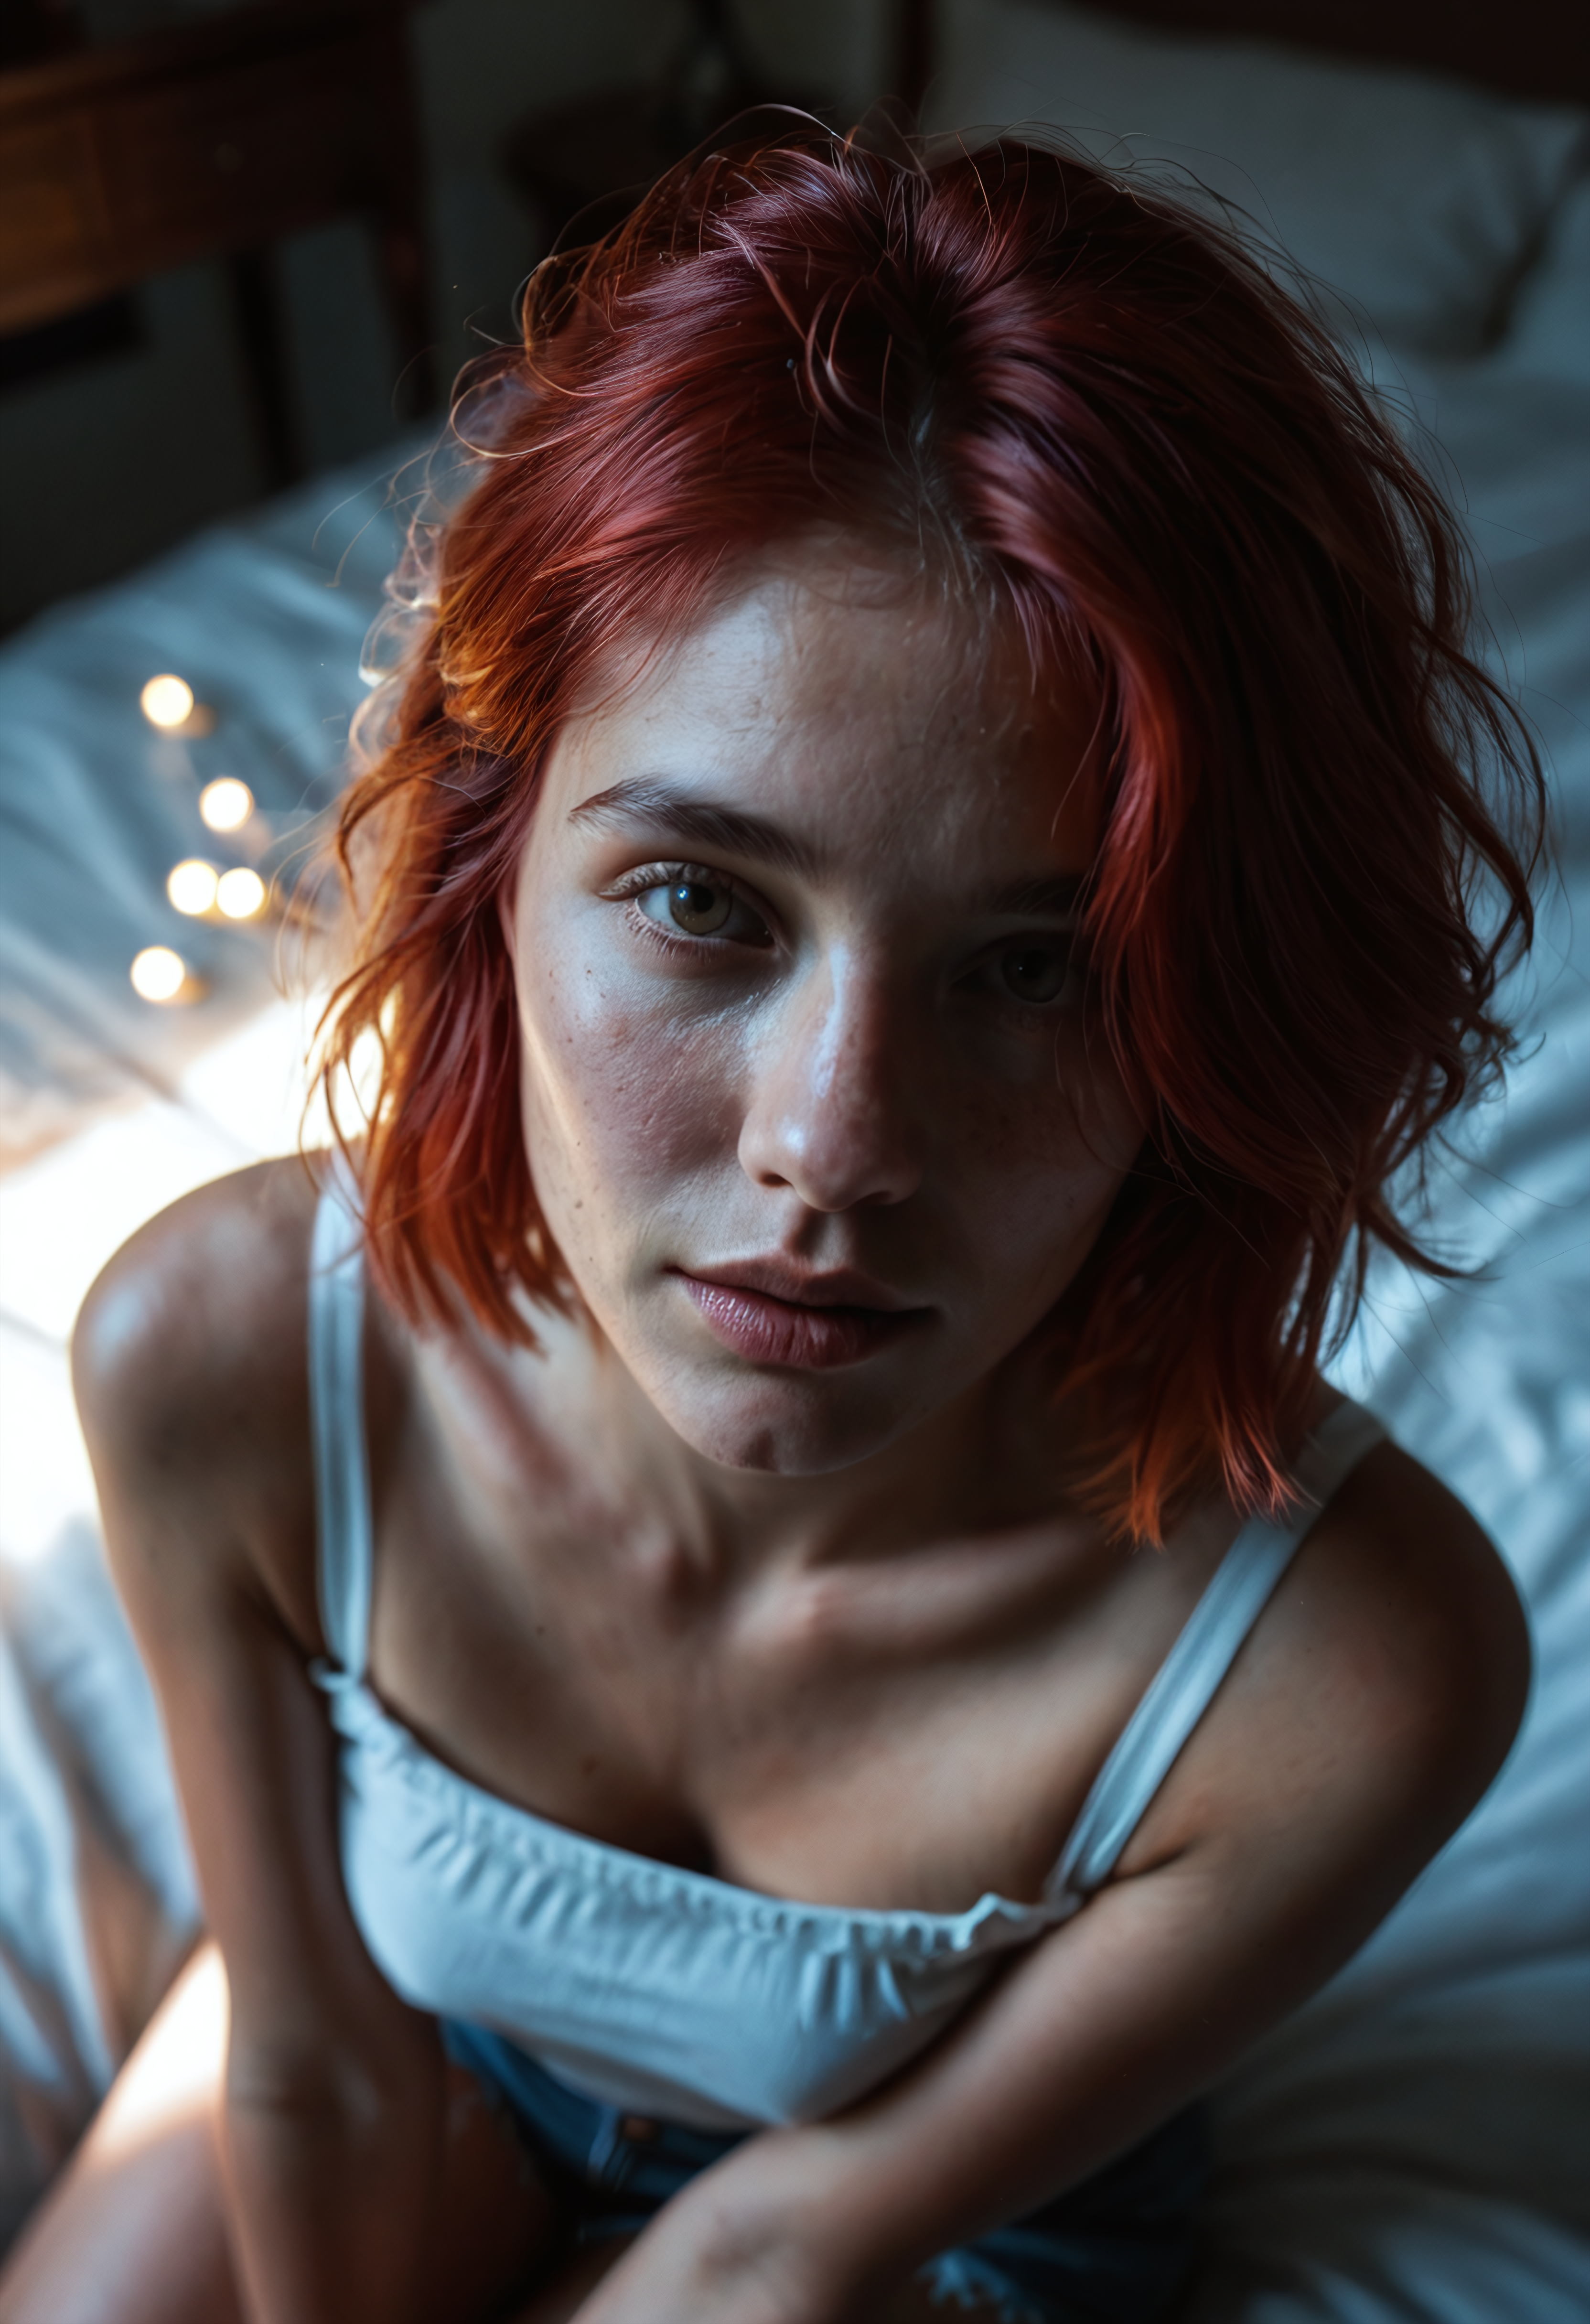
Simple text2img ComfyUI Workflow with optional refiner model and face/hand detailers
V3.0 Update - Working with the latest version of ComfyUI 0.3.75!I've been learning how to make simple and elegant looking ComfyUI workflows. I put this one together to have the option of using a base model and a refiner model as well as including a FaceDetailer node to fix any dodgy faces.I mostly run pony checkpoints and I have been using this workflow to generate the starting images for my recent WAN i2v videos.Check out my WAN 2.2 i2v workflow that I use after generating images with this workflow: https://civitai.com/models/2194801/simple-wan-22-i2v-60-fps-video-comfyui-workflow-6-step-lightning-with-3-ksamplers-and-upscalePlease tag the workflow in your image uploads if you use it. I don't care about attribution, I just want to see what others are creating using the tool I made :) I made this for myself, but I find it useful and pretty so I thought I'd share it!Feedback gratefully received. Otherwise, enjoy.

QoL workflows
This is a ComfyUI worklfowIt's not particularly crazy in what it can create - all there is are 2 KSampler passes with an upscaler in-between. Instead, the main point is in QoL features to limit the time spent fiddling with widget values as much as possible so you can spend more time actually generating.All the custom node requirements are listed in About this version and can be downloaded with ComfyUI ManagerFeatures:Size selector node for picking common aspect ratio resolutions at various sizes.Quality Selector lets you append your prompts with a preset intended for the boring copy pasta of every prompt; the (masterpiece:1.4), best_quality etc stuff. You can keep as many presets like this as you like and selection or adding more is dead simple. They even come with a paired negative prompt preset.Optional: Character Card system lets you easily reuse prompts. Here You place your character card into the Character Card node (left) that you only have to create once, then you write your main prompt into the Smart Prompt box (middle). Certain tags when used in the Smart Prompt box will affect which sections of the Character Card get included. Here we used 'cowboy_shot' (blue) so the COWBOY_SHOT section got included along with any section referencing a framing that is a subset of cowboy_shot but only the front views. If we added from_behind, it would be only the back views for example. Additionally in orange, we have 'covered_eyes' written in the character card preventing the EYEBALLS section from being included and adding blue_eyes which would conflict with the covered_eyes tag. Removing covered_eyes from the card would allow blue_eyes through. In green is the quality preset from the previous feature appended at the end of the prompt.Below is a table going over every rule for including each section. It might look intimidating, but the entire goal here is to be intuitive. It probably works how you think it should.Previews via Image Sender/Receiver allow multiple senders to be connected to the same receiver via the same link_id, so you can get just the latest generated preview in one receiver node instead of having like 10 of them everywhere and can still access each step's preview be checking the sender.Here left = latest preview, right = latest finished generation1st step finished generating a new preview, the rest hold their steps from the previous run.
![2 Sampler Workflow For [SDXL] | [ILLUSTRIOUS] | [PONY]](https://image.civitai.com/xG1nkqKTMzGDvpLrqFT7WA/a4812119-89c8-413a-8c47-a4f157cb2d67/original=true/109380253.jpeg)
2 Sampler Workflow For [SDXL] | [ILLUSTRIOUS] | [PONY]
This workflow uses two KSamplers instead of just one when working with SDXL or SD 1.5 models. That means stuff like Pony, Illustrious, or anything built on SDXL will work great.Why use this instead of 1Sampler? Because it cleans up the little things. One sampler can leave behind small glitches or weird bits, but running a second one usually fixes them without changing the main image much. You get a cleaner, sharper result.If you care about those extra details, it’s totally worth it. It doesn’t take that much longer, and it runs fine on any machine with 8GB VRAM or more.For me, the first pass took about 7 seconds, and the second one around 17, but yeah, that depends on your resolution.

Final illustrious (txt2img)
A complete workflow that includes Adetailer, ControlNet and Upscaler. This was made with more casual users in mind. Workflow should be simple to use for new users as well. So I decided to make a easy one that can still give great results.V2.0HiresFix included for better control over details.Multi-ControlNet removed for less GPU load.Face + Hand detailer still available.Upscaler is enabled in HiresFixV1.0Multi-ControlNet included (use only, if you have high-end GPU)Face detailerHand detailerUpscalerAny missing nodes can be easily downloaded by ComfyUI manager.In case of any issue please write a comment.
🦄Pony V7 Advanced Workflow
Prepare to unleash the true, unbridled power of Pony Diffusion V7 with this meticulously engineered ComfyUI Workflow, a masterpiece of node-based wizardry designed not just to generate images, but to breathe life into them! 🎨✨ This workflow is the ultimate fusion of Pony V7's incredible artistic understanding - renowned for its superior character, anime, and furry generation - and the hyper-efficient, non-destructive processing power of ComfyUI. We bypass the limitations of generic frontends to offer a customizable, lightning-fast pipeline that ensures every pixel is perfected from the first step to the final polish. It's a next-generation creative engine, transforming simple text prompts into breathtaking, high-fidelity art that retains the signature Pony aesthetic while reaching previously unattainable levels of detail and prompt adherence. Say goodbye to the frustrating "gacha" of generation and hello to reliable, high-quality output, where your creative vision is finally realized without compromise! 🚀🖼️What truly sets this workflow apart is its integration of the powerful upscaling and refinement nodes from the ClownsharkBatwing/RES4LYF repository, turning simple drafts into magnificent, gallery-ready canvases. 🤯🔍 This isn't just a basic upscale; it’s a sophisticated, multi-stage restoration and enhancement process that meticulously addresses the common pitfalls of AI generation, guaranteeing impeccable quality even at massive resolutions. The workflow features cascaded passes of detail enhancement, utilizing advanced algorithms to fix those notorious AI flaws like distorted hands, murky faces, and inconsistent anatomy, ensuring your characters are flawless from their fingertips to their expressions. Moreover, by intelligently re-injecting detail back into the latent space during refinement, we maintain the delicate texture and shading consistency that Pony V7 is known for, preventing the overly smoothed or "plastic" look that plagues lesser upscaling methods. It is the definitive toolkit for demanding creators who require pristine resolution and hyper-detailed realism in a style-focused model. 🛠️🌟This advanced architecture acts as a Master Key to unlocking the full spectrum of Pony V7’s revolutionary style control features, specifically its known style clusters like anime_1 and smooth_shading_48. 👑🔑 By providing the perfect, refined latent environment, the workflow amplifies the influence of these tags, granting you master-level control over your image's aesthetic right from the prompt. Whether you aim for the sharp lines and high contrast of a specific anime style, the soft, diffused look of a precise shading cluster, or a blend of multiple niche tags, this system ensures the stylistic tags you place in your prompt are interpreted and rendered with unparalleled fidelity. Forget struggling to coax a specific style out of your model; this workflow makes it effortless to jump between distinct artistic aesthetics, resulting in consistent, stylized, and utterly unique generations every time. Prepare to take full control of your creativity and experience the true potential of Pony V7! 🌈✨
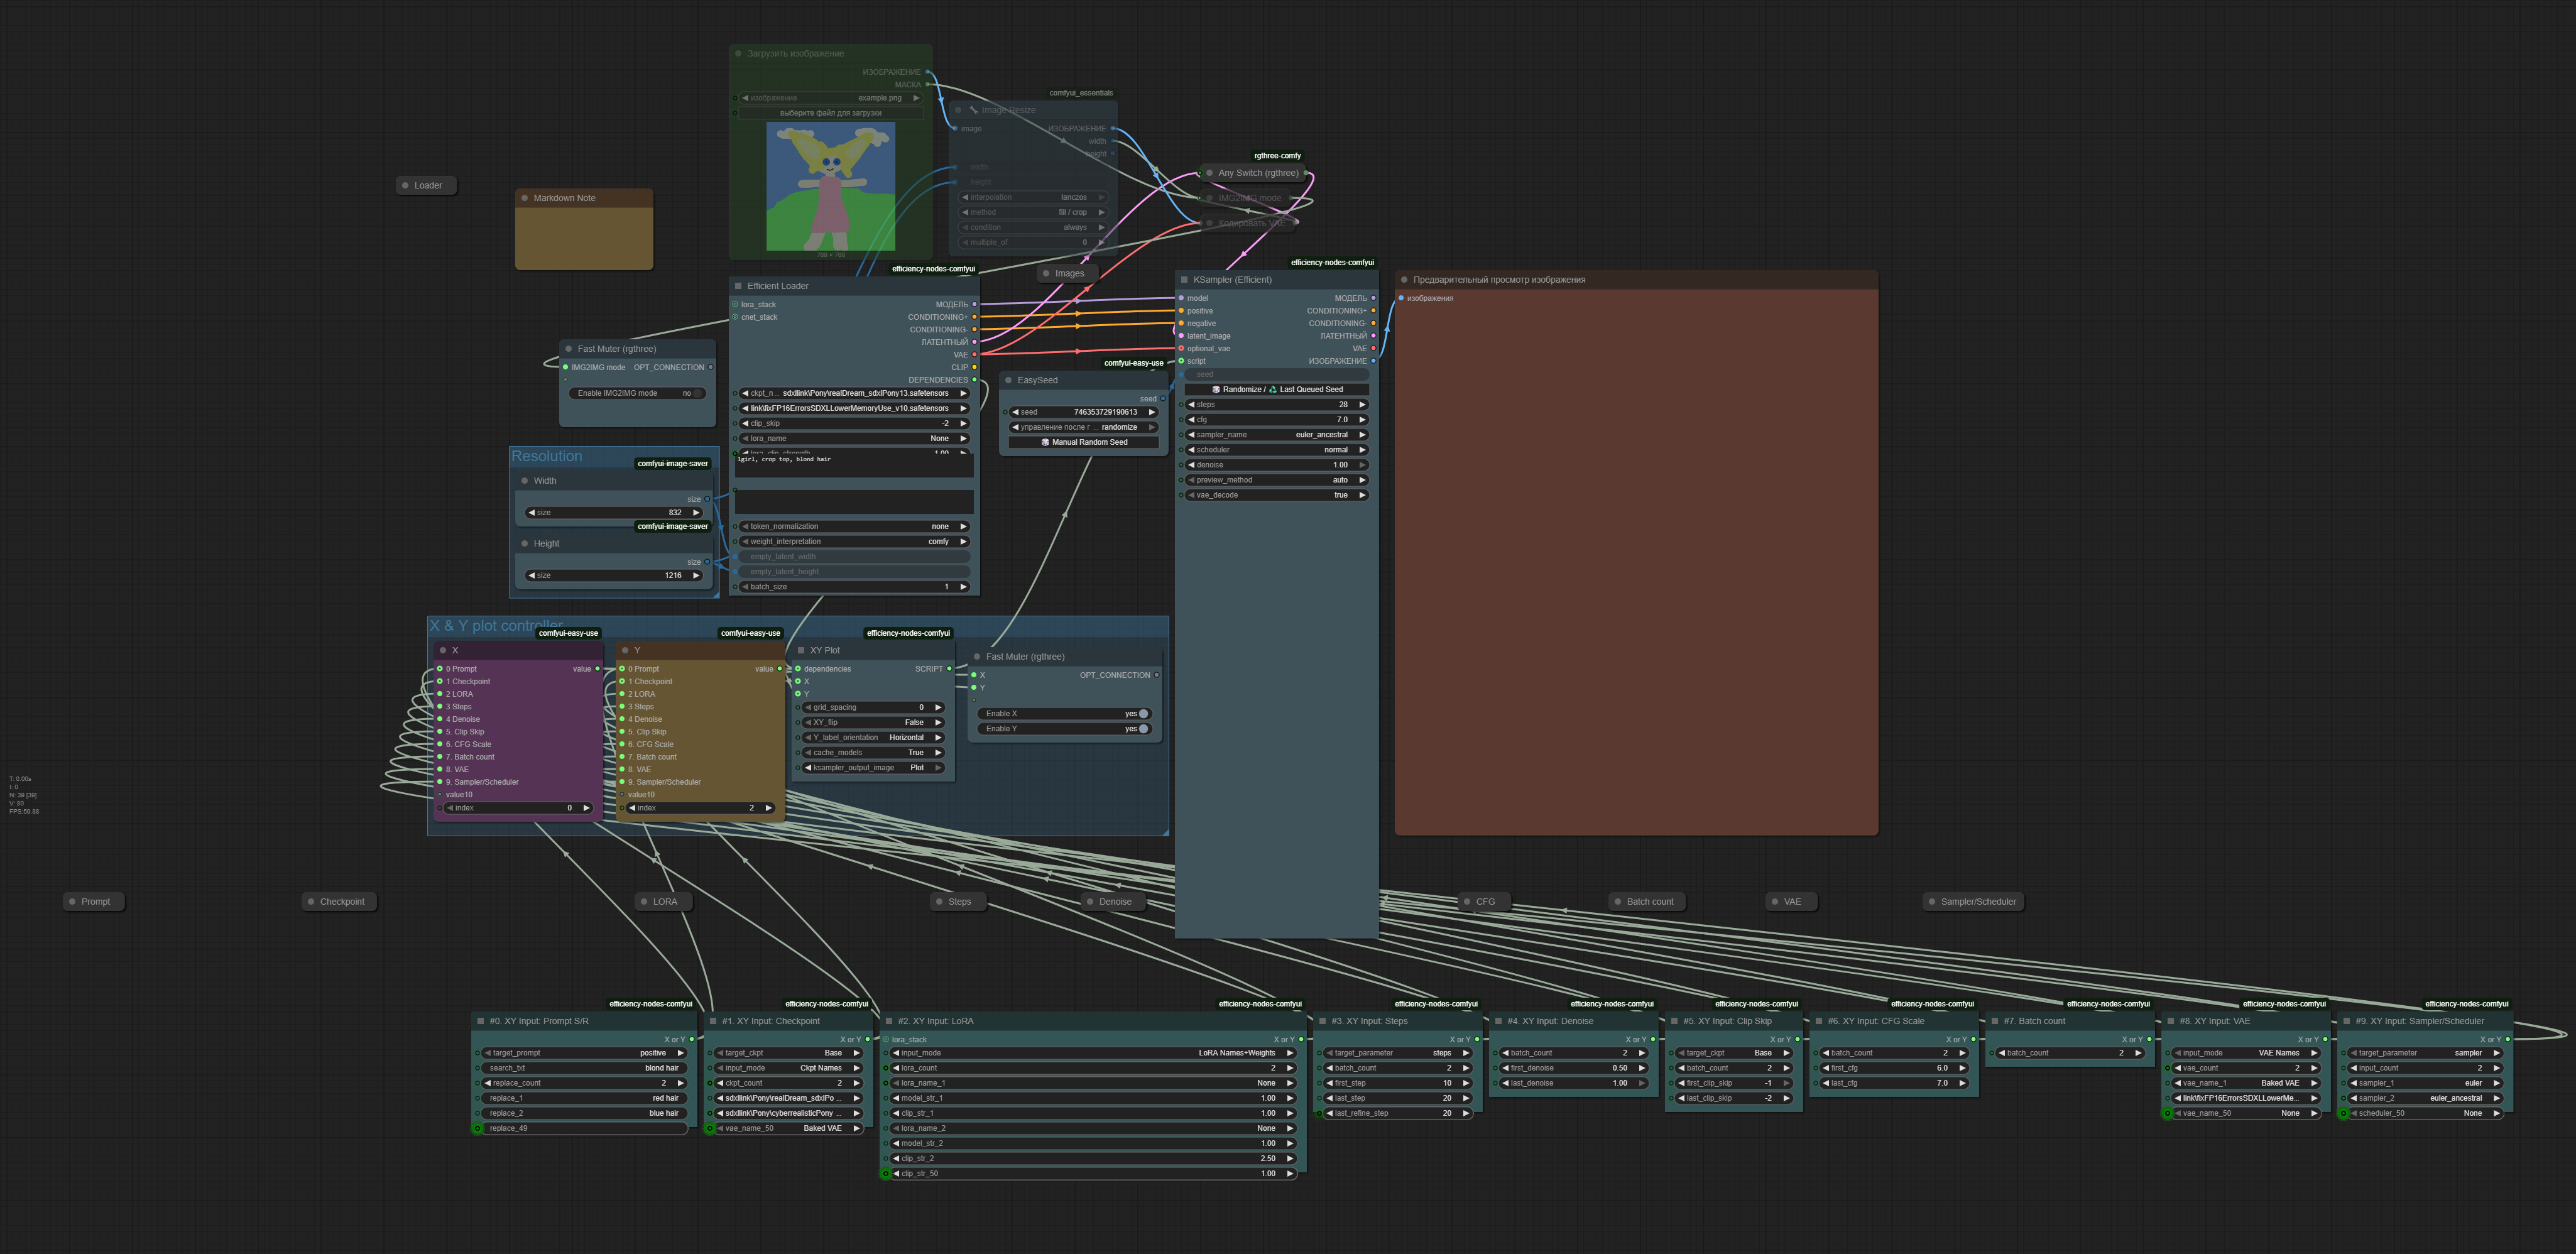
Simple universal XY Plot for SDXL/Pony/Illustrious/SD TXT2IMG, IMG2IMG (Efficiency)
I am not going to update this workflow. Use this one instead:https://civitai.com/models/2324973/v10-legacyMostly, the plots I have found are either too complex, with many levels of comparators, or too limited, comparing only a few parameters. So I spent a week trying to create my own very complicated method, but then I found an easier way for myself. The workflow is pretty simple, almost primitive. Just set up base parameters in the Loader, choose the number of things you want to compare and see the result.There are still some limitations: there's no protection against selecting the same X and Y, so some combinations will be executed anyway, while others will break generations. Another limitation is batch size: the value in the Loader will be ignored if X or Y are enabled and will always default to 1. If you need more, the way to get it is to set #7 Batch count for X or Y (maybe there's another way, but I just didn’t find out).I am going to add a more advanced version with adetailer and prompt morphing, but it will require more dependencies.I’m failing with it; I couldn’t find a way to connect Adetailer here, so I created another workflow based on a different extension. Alternative versionPut attention on a Clip Skip value.

SD 1.5 | SDXL | Illustrious | Pony - 2 step detailer + upscaler
A clean workflow ideally suited for SD models . It includes:a. Detailer pipe (to fix faces)b. Second Passc. UpscalerThe workflow uses:1. Wildcard node (because I just love wildcards)2. Anything Everywhere (make things neat and tidy)3. Fast Groups Muter (in case you want to skip the upscaler)Newer checkpoints are great but I still think you need detailers to fix the faces.

RenderFluid - Face Swap / Expression Control pipeline V0.0
Absolutely — here’s a slightly longer version suitable as a CivitAI workflow description:🧠 Face Swap + Expression Correction Workflow (ReActor-powered)This all-in-one workflow gives you powerful, flexible face swapping using the ReActor node suite, with built-in expression editing and optional face detailing for polished, emotionally accurate results.You can use this in either batch mode (load from a folder) or single image mode (drag and drop your wire). After the face is swapped in, the pipeline routes the output through an Expression Editor, letting you correct mismatched emotions, soften or sharpen expressions, or fine-tune eye position, brow movement, and mouth shape to better match the tone of your final image.An optional Face Detailer is included to clean up edges, skin texture, and facial clarity. You can disable this step if you plan to run a separate detail pipeline later. The workflow also supports generating a before-and-after comparison image so you can visually track changes.🔒 This pipeline includes NSFW filtering via the ReActor node and is explicitly forbidden from being modified to bypass those restrictions, per the licenses of both this workflow and the ReActor tools.Whether you're batch-processing swaps or working on a single portrait, this setup gives you full control over identity and expression — no manual masking or post-editing required.
Chained Face and Hand Detailer for ComfyUI
This ComfyUI workflow chains a face and hand detailer to give you perfect eyes and hands (almost!) every time in full body shots.Please consider supporting me on RiotModels. Your reward is exclusive content of the Seven Sisters in the most naughty of animations.
![Flexi-Workflow [ ☠️ ]](https://image.civitai.com/xG1nkqKTMzGDvpLrqFT7WA/12b4e287-0549-4e4c-aa12-aaf01aaf16d4/original=true/91048628.jpeg)
Flexi-Workflow [ ☠️ ]
⚠️ NOTICE ⚠️This workflow has now morphed into the UniFlex-Workflow 9.0!!!

HiFi Render and Mixed Caption Workflow
EA just for lols.. you can grab the same workflow from image posts. But I will be very glad if you pay m3n3mooom EA fee 🙏Read this guide for more details.The HiFi-Render workflow is a sophisticated two-stage image enhancement system built in ComfyUI that transforms low-quality input images into high-fidelity realistic renders. This workflow leverages the complementary strengths of different AI models to achieve superior results:1. Draft Stage: Uses NoobAI anime-style model for initial composition and structure2. Finalization Stage: Employs realistic Illustrious/Pony hybrid models with ControlNet guidance for photorealistic outputThe workflow is particularly valuable for dataset creation, as it generates both high-quality images and comprehensive hybrid captions combining Booru tags with natural language descriptions and style modifiers.Read this guide for more details.
Zenflow : Refiner & Upscaler (ComfyUI)
🥁 ZenflowWorks for models based on SDXL, uncluding Pony & Illustriousv5.0 introduce a huge (really huge, like a dinosaur) improvement to upscaled imagesAdvanced saving optionsCivit will now recognize the model & lora(s) you used🟡 File needed for upscalingDownload RealESRGAN_x4plus_anime_6B.pth (click to download)Put it in your ComfyUI\models\upscale_models folderYou're done 🎉🟡 The refinerA refiner can help you adjust specific details of your output while preserving the overall composition. In this simple example, I added more clouds in the skyI used the same model for both the base and the refiner. However, you can use two different models to mix their style etc🟡 Workflow overview (v5)The prompting area (green) is designed to fit on your screen, so you can focus on what really matters without having to move your view every 30sec

PONY+SDX-PRO
🔑 Key FeaturesHigh Resolution Images (v7): Generate stunning high-resolution images with unparalleled detail and clarity4 Simple Steps(v8): Enjoy a seamless experience with our streamlined 4-step image creation processBuilt-in Tiny AutoEncoder: Experience enhanced performance and reduced computational requirementsComprehensive System: Perfect for both seasoned artists and beginners🛠️ Ultimate ComfyUI WorkflowThis workflow isn't just another preset - it's a meticulously balanced system designed to extract DAVINCI's full potential:Perfect Parameter Balance: Optimized settings for sampling steps, CFG scale, and aspect ratiosAdvanced Upscaling: Integration with ControlNet Tile for artifact-free enlargementsSmart Prompt Engineering: using ollama or gemini for auto sdxl prompt Professional Color Palettes: Visual interfaces enhancing your creative process🔍 The ControlNet Tile IntegrationOur workflow incorporates the lightweight yet powerful TTPLANET_Controlnet_Tile_realistic_v2_rank256 module that:Eliminates grid artifacts common in upscaled imagesPreserves fine details during enlargementMaintains consistent quality across the entire imageDelivers professional results with minimal VRAM requirements🔧 Setting Up For SuccessImport our workflow into ComfyUIEnsure both DAVINCI and ControlNet Tile models are properly installed:DAVINCI model: Download from CivitaiControlNet Tile: Download from Hugging FaceStart with our recommended prompts or craft your ownAdjust resolution settings based on your hardware capabilitiesChoose your preferred color palette👨💻 Developer InformationHugging FaceGitHubLinkedInFor additional tools and updates, check out ComfyUI-OllamaGemini✨ Elevate Your Creative Vision with DAVINCI ✨
Cramped AF
This is a workflow that has a spot for Flux, HiDream, Pony, and SD3.5, PLUS an Upscaler. They aren't locked to those, I just made them into groups.So you'll want to collapse and open things as you use them otherwise things can get very cramped as it is pretty much full of the stuff, especially in the first group.For real though, you don't even have to leave that particular group because all the connections are there, you just have to disconnect and reconnect as you see fit.It really is fun to use if you're deranged.
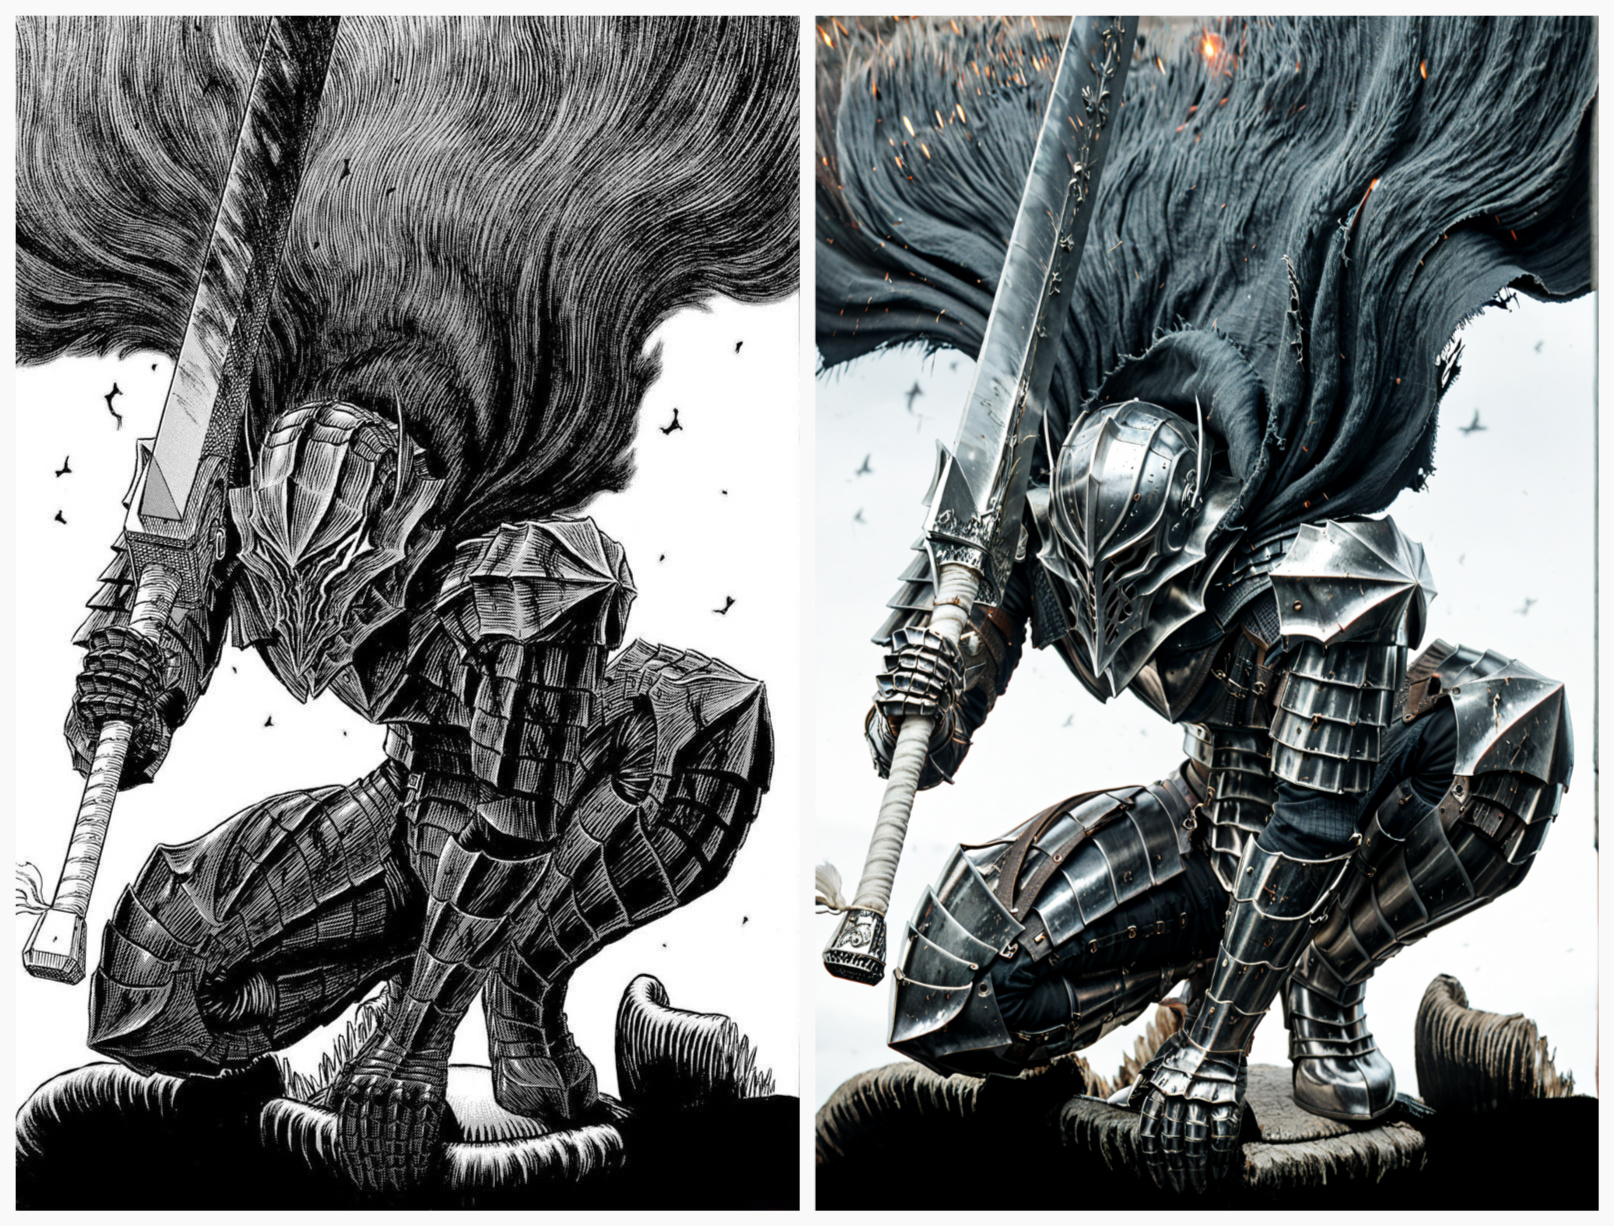
Img2Real
Workflow for making images look realistic.Models & Folders:Base - TAME Pony: The Authenticity MachinE - (ComfyUI\models\checkpoints)ControlNet - ControlNet Union SDXL ProMax 1.0 - (ComfyUI\models\controlnet\xinsir)BBOX - face_yolov8m - (ComfyUI\models\ultralytics\bbox)SEGM - Anzhc Eyes -seg-hd - (ComfyUI\models\ultralytics\segm)SAM - sam_vit_h_4b8939 - (ComfyUI\models\sams)Upscale - 4x-UltraSharp - (ComfyUI\models\upscale_models)Tagger - JoyTag - (ComfyUI\custom_nodes\Comfyui_joytag\checkpoints)Authors of the original images:Frieren – @_ZENA09Guts – Kentaro MiuraEllen Joe – @Kimsanlee6Goblin – someone (I lost the source >_<)

Image Cheating
lora tipp:Control LoRA CollectionCFG ScaleBoost : https://civitai.com/models/99619/control-lora-collectionXL Outline / 轮廓线 pony/sdxl/kohakuPony outline : https://civitai.com/models/169170?modelVersionId=385007pls fix self clip fix chackpoint loaderALL IN ONEloRA - embedding loaderFace and Hand detailerFace swap / ReActorImage to promptsControleNet pose and depthSD prompt Readerupscale x4Please give me feedback so I can improve the workflow or if there are any problems.Dieser Workflow kann mit SD1.5 / SDXL / Pony funktionieren. Andere habe ich noch nicht ausprobiertThis workflow can work with SD1.5 / SDXL / pony I haven't tried others yetV.1.4:Das Problem mit den Loras wurde behoben und funktioniert jetztThe problem with the loras has been fixed and is now working

Img2img DMD2 WF9 Wavespeed Upscale Skin Detailer Sharpen ColourMatch & FilmGrain Workflow By Stable Yogi
Features of the Workflow:It’s an img-2-img Work Flow. This version adds realism and remove AI plastic feel from images. Adds more realistic and less AI-generated style. Adds slight grain, minor imperfections, and natural human expression to greatly increase realism.Check the documentation in the Zip for more details.Models Used:Realism Pony by Stable Yogi V4 DMD2.Skin detection model using a YOLOv8 variant. (Uploaded in the zip file) Add this model here ComfyUI\models\ultralytics\bbox4x Ultrasharp model for upscaling.All models can be easily searched on Civitai.Join me on my Patreon for exclusive perks and early access to unique resources.To discuss custom Lora's or models, feel free to connect on Discord.Pro Version:There’s an advanced version called WF9PRO available on my Patreonsample images for the pro workflow here https://civitai.com/posts/14289784

GarouAI's Personal ComfyUI Worflow "One Click" TXT2IMG & IMG2IMG
Welcome to my personal workflow.This does not generate videos. I use this to make the images that i use with kling.Change Log:Remade LoRA stack to make it capable of bypassing all LoRA's or one by onePut IMG2IMG into its own ksampler group, so now you dont need to connect it to TXT2IMG group anymore.You may have noticed things look a lot different but don't worry it all works the same as the last version.Moved the bypasser to a more convenient spotupdated some notes to reflect these changesFeatures:First i added an easy group bypasser from rgthree-comfy. No more right clicking and searching for the bypass button.Second the workflow is using advanced LoRA loaders, in order to pull LoRA keywords directly into ComfyUI. So no more tab switching to find your needed keywords. Nodes are from ComfyUI-Lora-Auto-Trigger-WordsYou will need to download the two previous features using ComfyUI Manager. Once you have the manager installed, Open the manager find "Install Missing Custom Nodes" and install the ones it shows you. Then restart the UI.Requirements:ComfyUI: comfyanonymous / ComfyUIComfyUI Manager: ltdrdata/ComfyUI-ManagerHuman Brain, I think.....Also if you want it to look as clean as the one in the image. You will need to change your links to straight. To do this navigate to Settings > Lite Graph > Graph > Link Render Mode. Change it to straight.If you are new to ComfyUI id advice that you watch a few tutorials on what nodes are and how they work together.You can use this workflow with one click "BUT" id advise against it. You'll get better results if you turn off groups until you need them, or until you have an image you want to continue with.I highly recommend you to get ComfyUI manager. It will help you download all the required nodes and models needed to use this workflow.Please read the notes i placed around the groups. They will help you understand what each group does, and how they work together.PS. Thank you for trying out my workflow. If you'd like to support me just give me a follow on Civitai, or Buzz me if you feel like it.
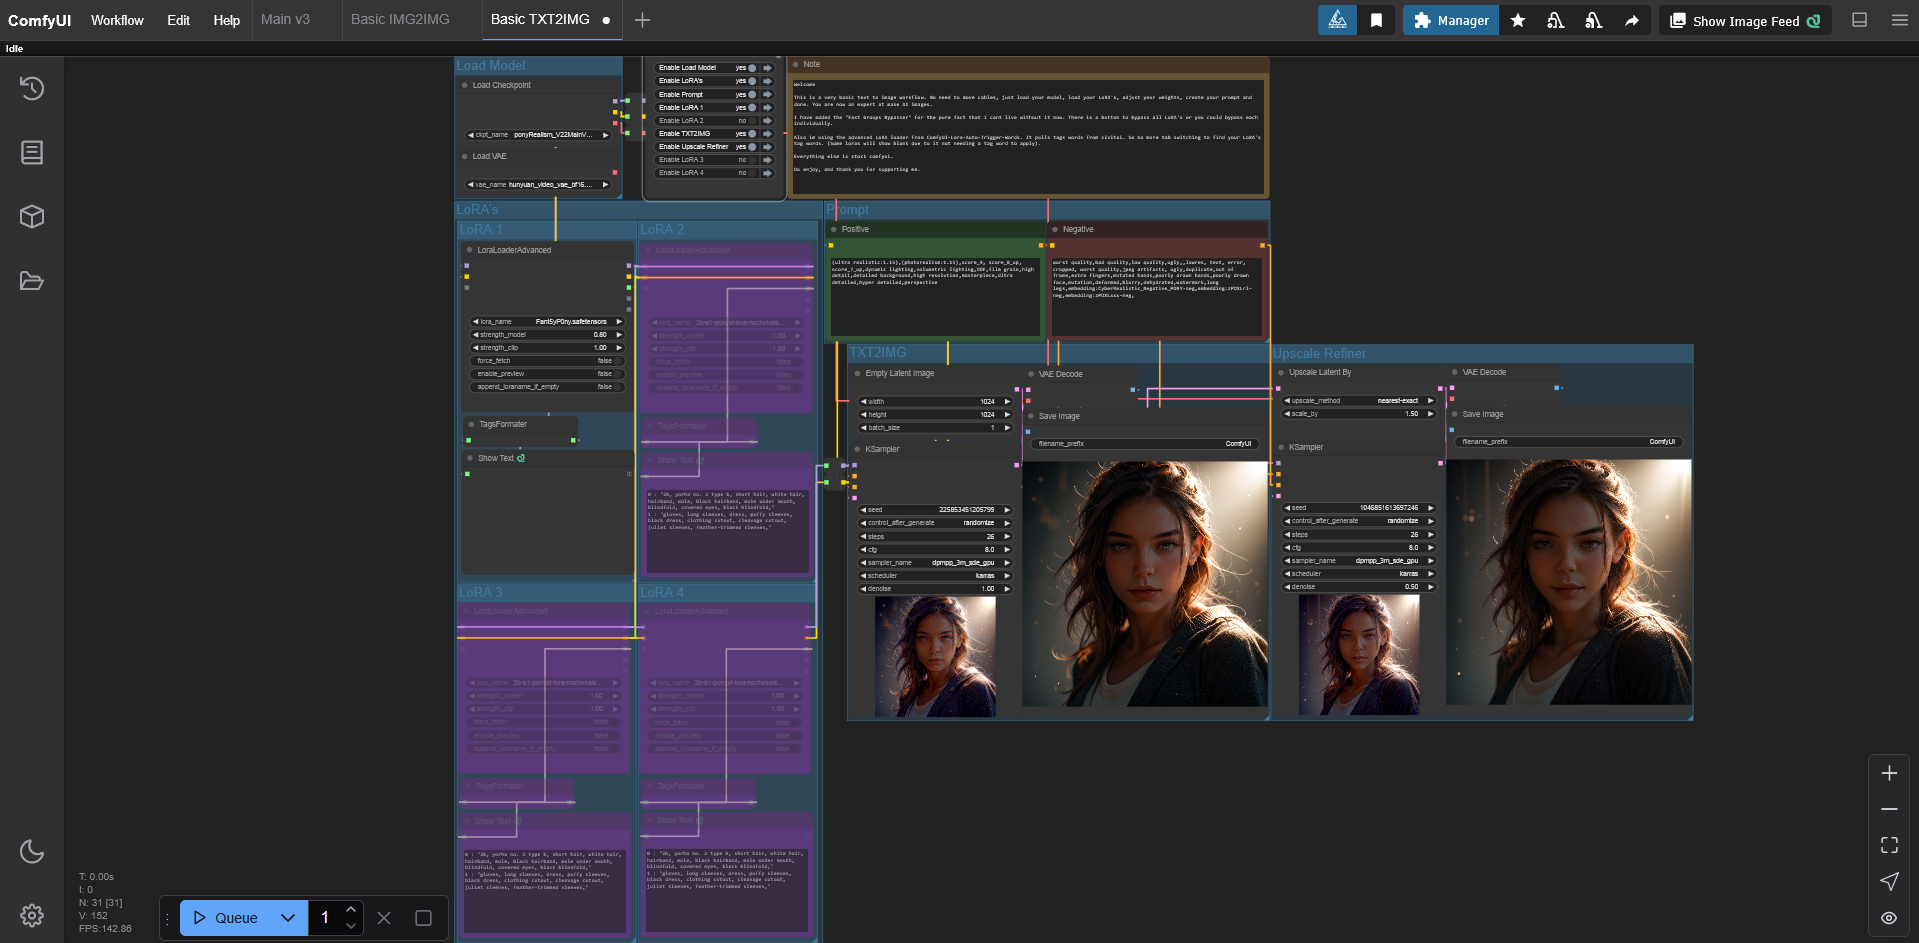
GarouAI's Basic TXT2IMG with Upscale
WelcomeThis is a ComfyUI workflow. Intended to be easy to use, very little knowledge of ComfyUI needed to be able to use this.Though it does have a few things i added to it for quality of life.First i added an easy group bypasser from rgthree-comfy. No more right clicking and searching for the bypass button.Second the workflow is using advanced LoRA loaders, in order to pull LoRA keywords directly into ComfyUI. So no more tab switching to find your needed keywords. Nodes are from ComfyUI-Lora-Auto-Trigger-WordsYou will need to download the two previous features using ComfyUI Manager. Once you have the manager installed, Open the manager find "Install Missing Custom Nodes" and install the ones it shows you. Then restart the UI.Requirements:ComfyUI: comfyanonymous / ComfyUIComfyUI Manager: ltdrdata/ComfyUI-ManagerHuman Brain, I think.....Also if you want it to look as clean as the one in the image. You will need to change your links to straight. To do this navigate to Settings > Lite Graph > Graph > Link Render Mode. Change it to straight.Change log:Added Upscale Refiner. (Helps iron out the usual AI kinks like bad hands and faces)Once again thank you for checking out my workflows. If you feel like supporting me just give me a follow or donate some buzz.
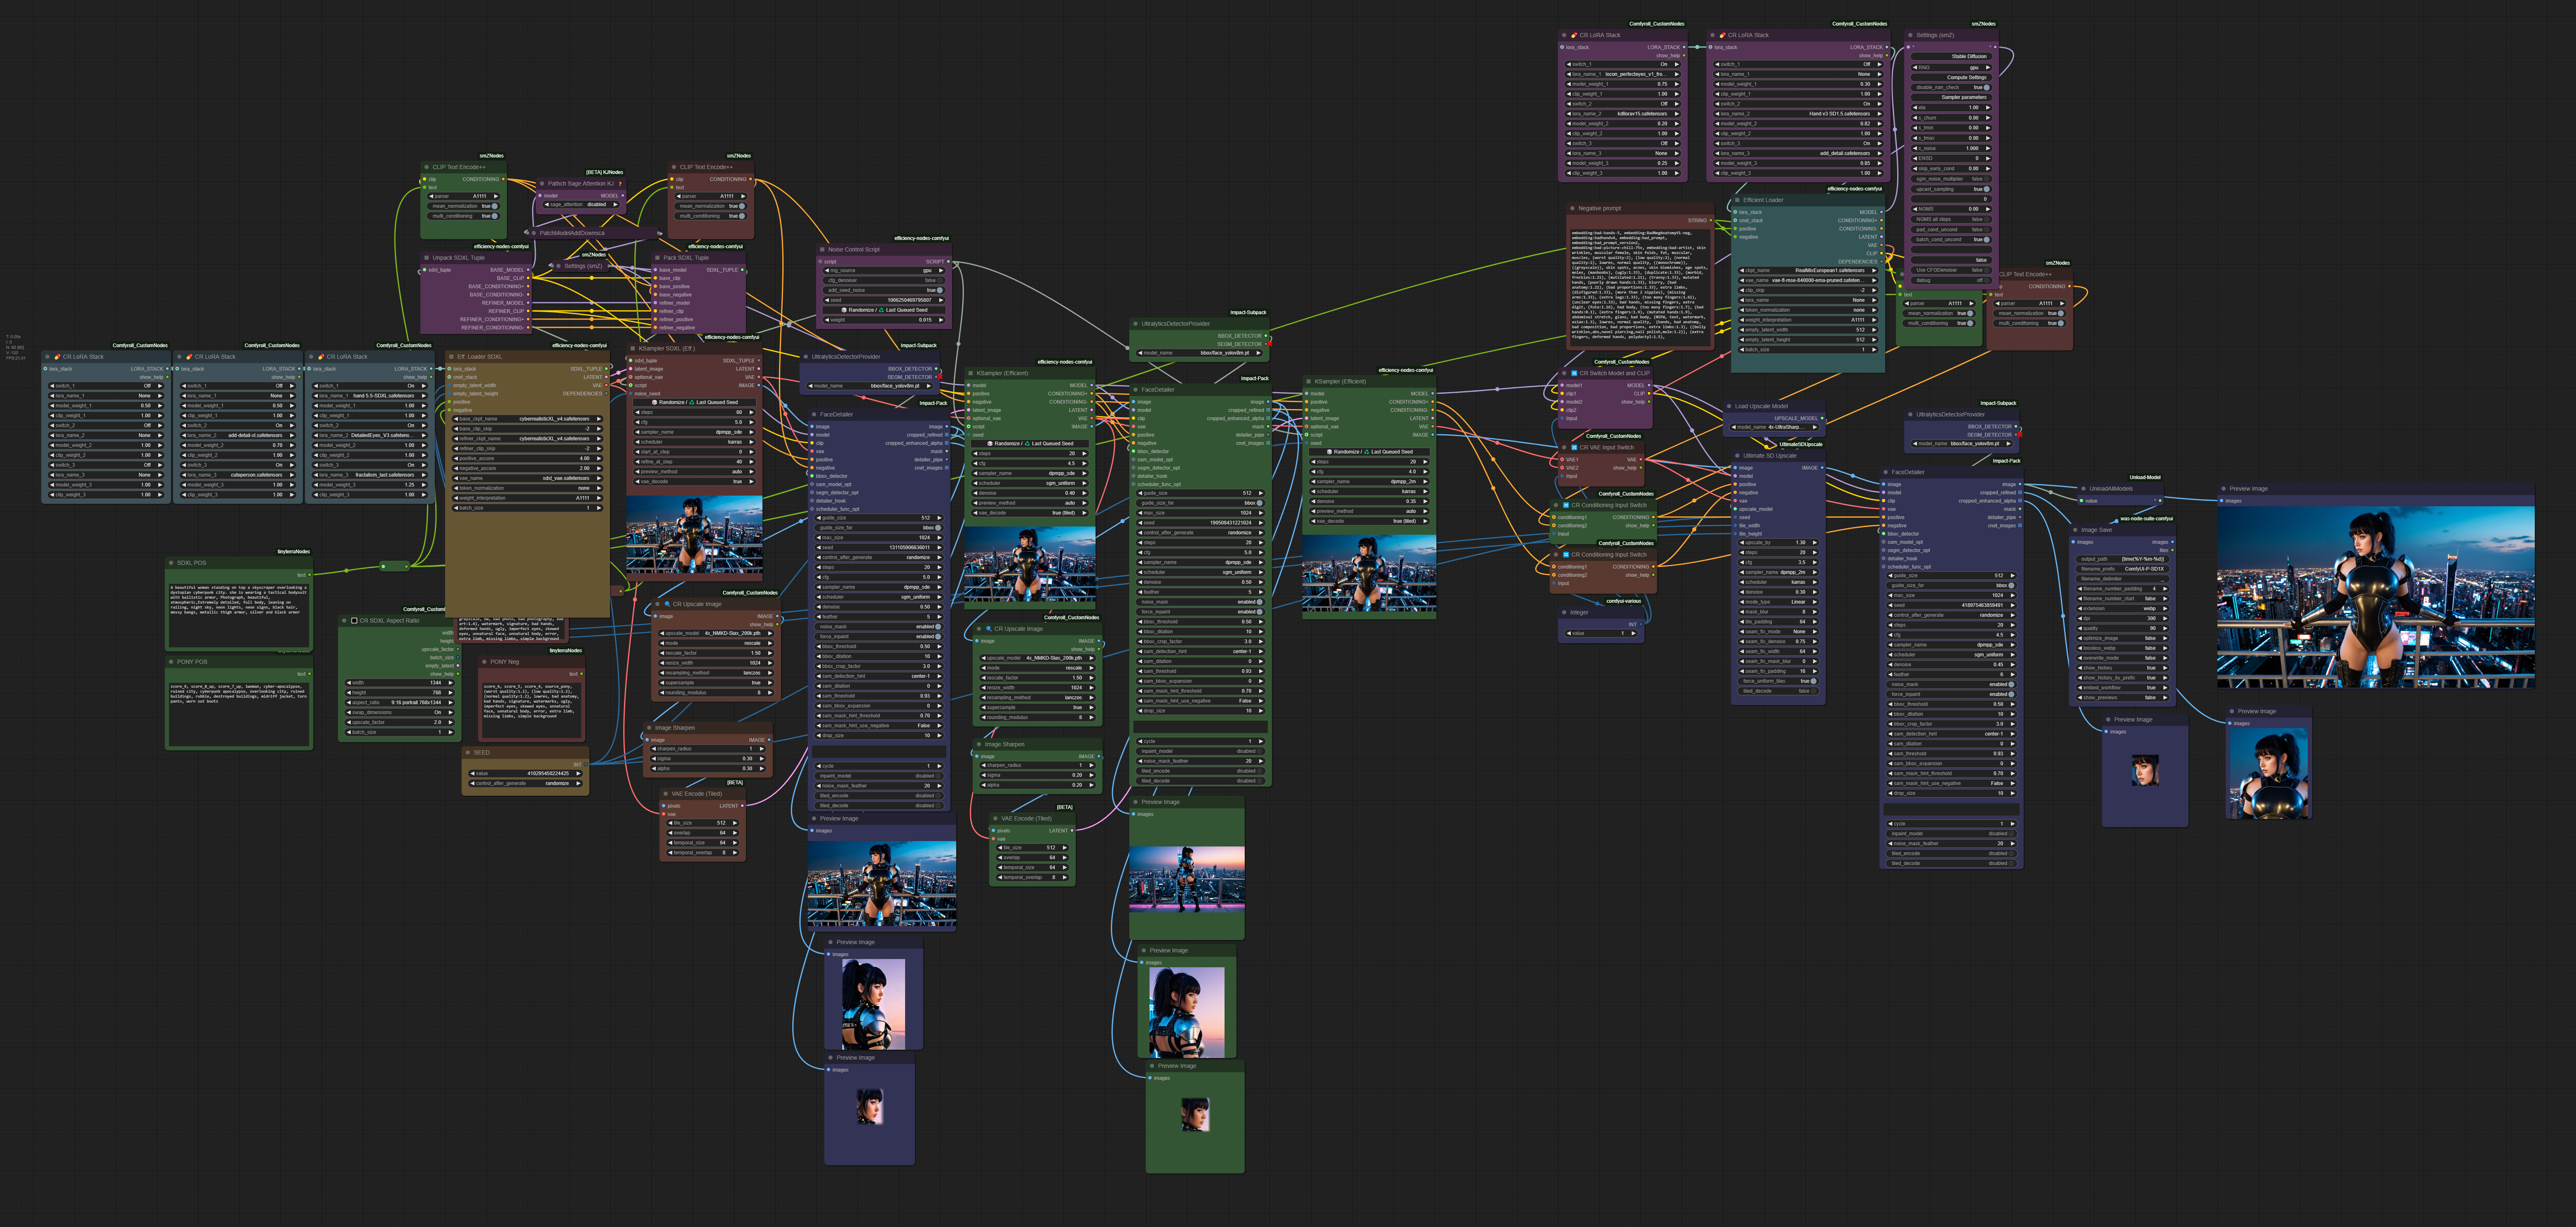
SDXL and PONY Diffusion 1 click 4K with multi face fix
Simple Comfy UI workflow for a simple 4K image generation with multi-step upscaling and multi-face fix. All nodes should be able to be automatically downloaded through comfy UI manager.I will upload the SD1.5 upscaler model soonWill also make a video on how to use this soon, but for most people who are comfortable with comfy UI this should be pretty self explanatory.Simple Video here. For the SD1.5 portion of the workflow, you can get the embeddings here. https://huggingface.co/Loarintang/SD1.5_Embeddings_pack
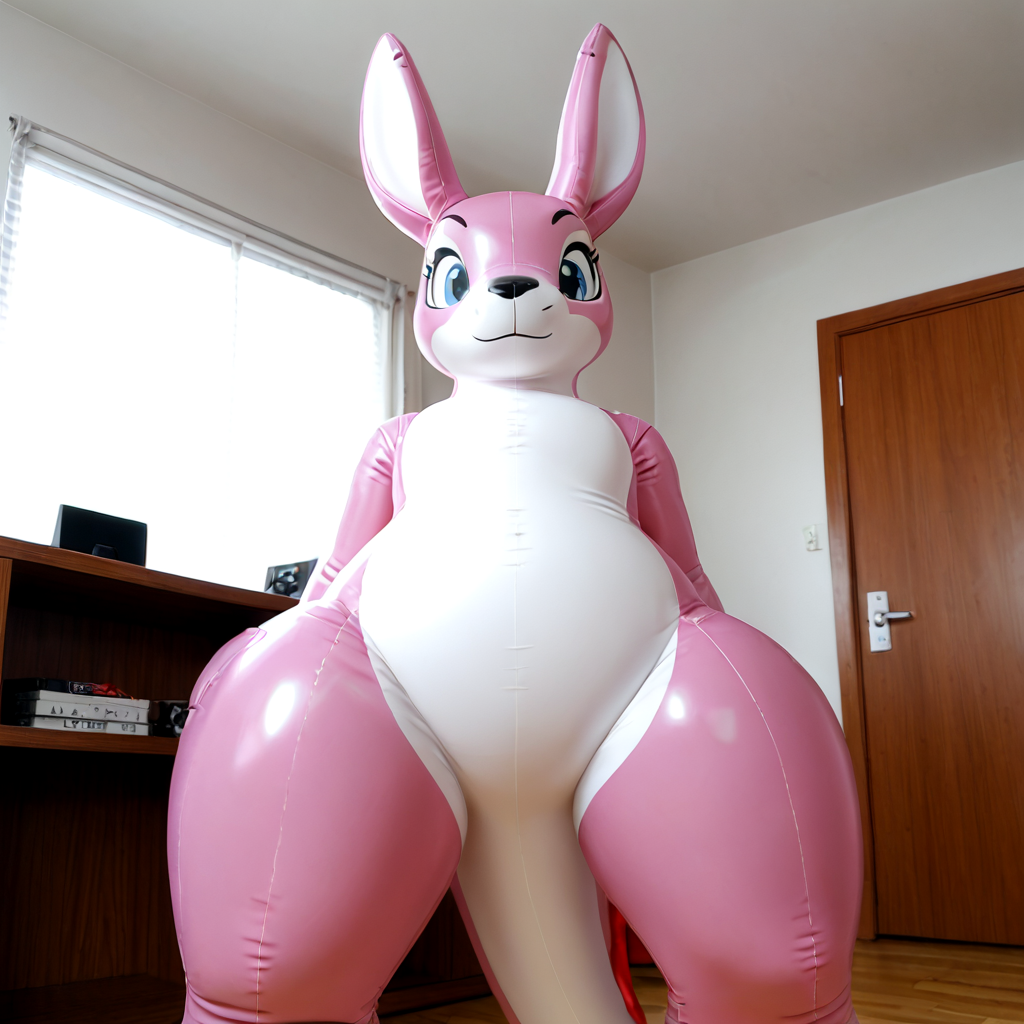
Big Inflatable Roos
Was experimenting with my workflow again and found some interesting results again.Models used are as follows.-Scrimblo Sauce XL v4 - https://civitai.com/models/870589?modelVersionId=1226294-Growth by Putyva - https://civitai.com/models/655128/growthInflatable Pony by DisplayDisplace - https://civitai.com/models/1137766/inflatable-ponyNAI-Style Inflatables (PonyXL) by aninflatabledragon - https://civitai.com/models/605747/nai-style-inflatables-ponyxlAge Slider LoRA | PonyXL SDXL by Shed_The_Skin - https://civitai.com/models/402667/age-slider-lora-or-ponyxl-sdxl (This is to stop the results from having massive tits and keep them looking toy-like)Facesitting (Close-up Reverse POV)/POV Buttcrush by btal - https://civitai.com/models/1190058/facesitting-close-up-reverse-povpov-buttcrush
![[[FIXED]] V2.6 txt2img compact workflow | Metadata, HiResFix, LoRa, Styler, and Refiner](https://image.civitai.com/xG1nkqKTMzGDvpLrqFT7WA/4ceef7b5-256b-4be3-b3db-7a76dff9ece3/original=true/53882546.jpeg)
[[FIXED]] V2.6 txt2img compact workflow | Metadata, HiResFix, LoRa, Styler, and Refiner
An ideal workflow for people who are just starting to use ComfyUI and don't have much knowledge (I'm a newbie too), but want a simple UI with a big potential to generate images.V2.6 Update-I finally had time to fix it, now everything should be working normally again.Best regards, and sorry for the delay :/V2.5.1 Update-Error fixes :DV2.5 Update-Added a Refiner*.-Fixed a bug caused because the Compact Ksampler (it was a fusion of Efficiency Nodes and some basic nodes) didn't recognize the Scheduler Selector imput after an update, after the workflow upload :/-The original V2 has been updated to fix the Ksampler bug as well. In case you are not interested in 2.5. You must download the new V2 version (or redo the Ksampler yourself).*The Refiner is optional, if you don't usually use Refiner in your creations, and you think you don't need it, you can simply delete the whole Refiner group without any problem and the workflow will continue working perfectly :DV2 is here!Improvements:-You can now add and remove LoRa from the same node, or even disable them with a switch.-You can now select the aspect ratio of your future artwork worth millions.-Now it's even more compact!LoRaIt works as it should, I think that in V1 the LoRa didn't work properly. That's not a problem anymore :DThis is the new selector:By clicking the +Add Lora button you can add as many as you want. With the switches you can deactivate and activate them individually (or press Toggle All). To remove a LoRa from the list, simply right click on it and this menu will appear:Aspect RatioIt may seem a minor addition... but for me it's something very useful, especially when you change a lot, because manually typing ALL the time "1024x1024" or "512x768" is quite boring. This is how the loader looks now:And when you click on the Aspect Ratio button:It is almost orgasmic.The promptI keep the same goal in mind: Simplify the prompt and get what I want. That's all I wrote in the prompt. 1girl, apo in the positive, and absolutely nothing in the negative (yes, I'm lazy, I know), I chose a LoRa from Marcille (Dungeon Meshi) and a couple of styles in the Styler node and this is the result:Obviously it's not perfect, but I mean... I literally wrote 2 words.... And with the Save Image With Metadata node, Civitai recognizes the metadata when uploading an image created with this workflow (not all, the LoRa, for example, I still can't get it to recognize them, but meh, it's fine, for now). Here is an example:As you can see, the selected styles are also saved in the Styler node at the prompt. I will continue to work on figuring out a way to get absolutely all the metadata as well as A1111 does.That's all for now. If you have any advice or suggestions, don't be shy :D

Two models 5 stages Wallpaper generator with outpainting workflow.
Create interesting wallpaper by using outpainting to add the environment around the character. Then it progressively increase the resolution in multiple stage to add more details and make the composition blend together.There are multiple prompt to adjust each stage. It should work with any SD SDXL Pony ect.. By default my settings use a SD 1.5 for the stages then it Switch to a Pony for the two final stages. There is a saving node for each stage. And the option to save the final with Civitai meta daya or in 4k/8k in webp with workflow.It use a couple of custom nodes so it might be a good idea to get ComfyUI Manager to install the missing node. https://github.com/ltdrdata/ComfyUI-ManagerGenerating all the stage take about 80 sec on a 7900xt with the current setting.
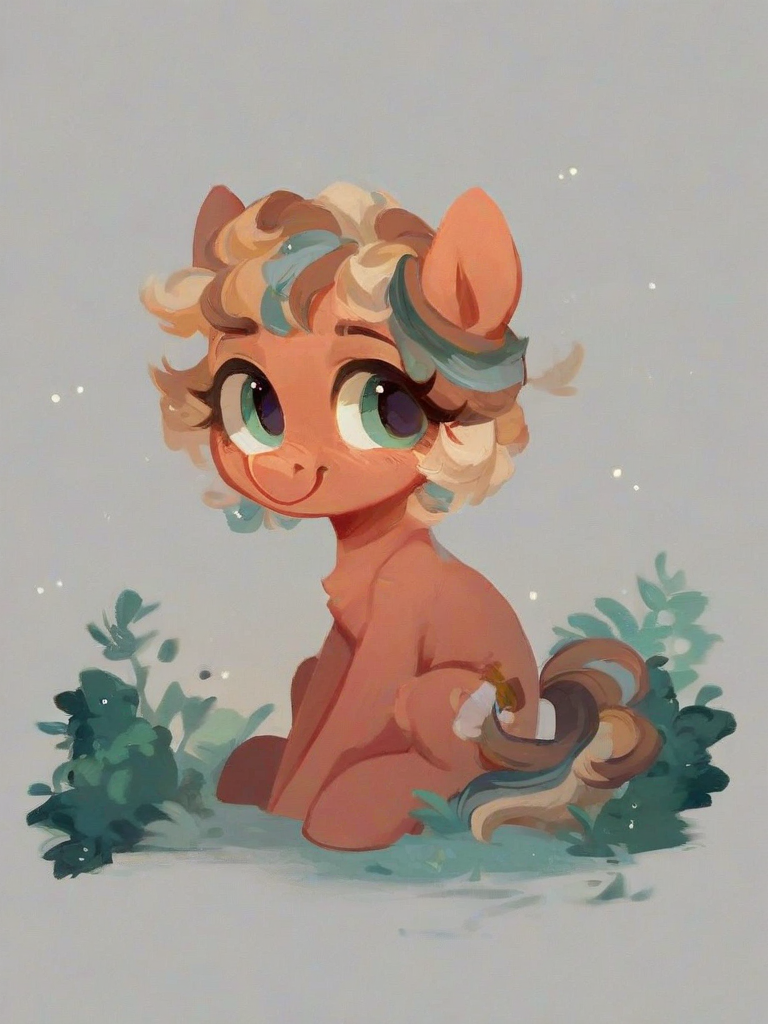
Cappy's PonyXL Workflow (LoRA and Adetailer support!)
Since I started using ComfyUI, I've been seeing people share their workflows so I decided to share mine. This workflow is made for Pony so it may need extra modification to work with other models.If you get a message saying something about missing nodes, go to the ComfyUI manager and click "install missing custom nodes"anyways, feel free to ask any questions in the discussion of this page! Enjoy my workflow! :>
![dmai-colors [PONY] workflow](https://image.civitai.com/xG1nkqKTMzGDvpLrqFT7WA/9b794f1c-15bf-486c-a816-bc20fe969759/original=true/49730522.jpeg)
dmai-colors [PONY] workflow
Due to getting requests about how I generated images for my lora dmai-colors, I am uploading the workflow I used when creating the images for my dmai-colors [PONY] lora.If you like my work you can buy me a coffee ˗ˏˋ☕ˎˊ˗ here ❤️

NOT FLUX - PONY WORKFLOWS
Download Adress For Models:- Realism_By_Stable_Yogihttps://civitai.com/models/166609/realismbystableyogi?modelVersionId=992946- Person Enhancer FLUX style for SDXL/PONYhttps://civitai.com/models/642347/person-enhancer-flux-style-for-sdxlpony?modelVersionId=718487- Eye catching - sliders / ntcai.xyzhttps://civitai.com/models/225334/eye-catching-sliders-ntcaixyz?modelVersionId=254162- ExpressiveH (Hentai LoRa Style) エロアニメhttps://civitai.com/models/341353/expressiveh-hentai-lora-style?modelVersionId=382152- Midjourney mimichttps://civitai.com/models/251417/midjourney-mimic?modelVersionId=678485- Envy Pony Pretty Eyes 01 - Pretty Anime Eyeshttps://civitai.com/models/393101/envy-pony-pretty-eyes-01-pretty-anime-eyes?modelVersionId=438481- Negative_&_Positive_Embeddings_By_Stable_Yogi Positivehttps://civitai.com/models/177792/negativeandpositiveembeddingsbystableyogi?modelVersionId=775151- Negative_&_Positive_Embeddings_By_Stable_Yogi Negativehttps://civitai.com/models/177792/negativeandpositiveembeddingsbystableyogi?modelVersionId=772342- [TI] EasyNegativeV2 [Textual Inversion Embedding]https://civitai.com/models/100191/ti-easynegativev2-textual-inversion-embedding