ComfyUI Workflows
Browse real AI workflows from Flux, SDXL, Pony, ControlNet, video generation and commercial AI creators.

FLUX.2 Dev PiD Direct 4K Image Generation Workflow
Watch the full video first if you want to understand how this FLUX.2 Dev + PiD workflow works in practice. The video shows how a 1024 base image can be generated with FLUX.2 Dev, how the PiD 2K-to-4K enhancement lane improves the final image, and how to launch the workflow online without building a local ComfyUI environment.This ComfyUI workflow is designed for FLUX.2 Dev direct 4K image generation using PiD as the high-resolution enhancement stage. Its main purpose is to create a strong FLUX.2 Dev base image first, capture the correct latent state during sampling, and then send that latent into a PiD refinement pipeline for a cleaner and more detailed final output.The workflow is built around flux2_dev_fp8mixed.safetensors as the main UNet model. It uses mistral_3_small_flux2_fp8.safetensors as the Flux2 text encoder, flux2-vae.safetensors as the VAE, and EmptyFlux2LatentImage for the base canvas. The base resolution is controlled through separate width and height primitive nodes, both set to 1024, giving the workflow a clean 1024×1024 starting point before the 2K-to-4K PiD pass.The prompt is handled through PiDTextPrompt. This node sends the same text into the positive prompt encoder and also provides the caption for PiD preparation. In this workflow, the prompt is written for a high-end commercial product photograph, with a luxury skincare bottle, wet black stone, cyan and gold rim lighting, crisp reflections, tiny water droplets, clean product label text, and premium advertising composition. This makes the workflow especially suitable for testing detail, typography, packaging clarity, lighting control, and product-style realism.The main FLUX.2 generation stage uses CLIPTextEncode, FluxGuidance, and PiDKSamplerCapture. FluxGuidance is set to 4, while the sampler route uses 50 steps, CFG 4, Euler sampler, simple scheduler, denoise 1.0, and capture_step 45. PiDKSamplerCapture outputs both the final native latent and a PiD latent. The native latent is decoded through the Flux2 VAE and saved as the baseline result, while the PiD latent is sent into the enhancement lane.The PiD lane is configured with the Flux2 backbone, 2kto4k checkpoint type, scale 4, auto download enabled, and cleanup after prepare enabled. PiDSample then performs the high-resolution enhancement pass with 4 PiD steps, CFG scale 1.0, fixed seed, aggressive cleanup, and sequential_blocks_aggressive offload. PiDFinalize converts the PiD result into the final enhanced image, which is saved separately from the native baseline.Compared with ordinary FLUX.2 Dev generation, this workflow is not only a simple upscale. It keeps the native output for comparison, captures a PiD-ready latent, and uses PiD to rebuild high-resolution structure in a more integrated way. This is useful for product photography, commercial posters, premium packaging visuals, sharp concept art, high-detail social media covers, RunningHub showcases, and Civitai workflow publishing.Main features:FLUX.2 Dev PiD direct 4K workflowFLUX.2 Dev fp8 mixed UNet routeMistral Flux2 fp8 text encoderFlux2 VAE decoding1024×1024 base latent generationPiDTextPrompt unified prompt and caption inputFluxGuidance 4 configurationPiDKSamplerCapture latent capture50-step Euler / simple sampling setupCapture step 45 for PiD preparationPiDPrepare with Flux2 backbonePiD 2K-to-4K enhancement routePiDSample with 4 PiD stepsSequential block offload and aggressive cleanupNative baseline and enhanced output comparisonSuggested workflow:Start with a strong prompt that clearly defines the subject, material, lighting, camera style, typography, texture, and final commercial use case. Keep the base canvas at 1024×1024 for the first test. Run the native FLUX.2 Dev lane first and check whether the main composition, label text, reflections, and product structure are correct. If the base image is weak, adjust the prompt before entering the PiD lane. Once the native result is stable, let PiDKSamplerCapture pass the captured latent and sigma into PiDPrepare, then run PiDSample and compare the native baseline with the enhanced output. If the result becomes too heavy or unstable, keep PiD steps at 4 and rely on cleanup / offload settings instead of pushing more aggressive enhancement.⚙️ RunningHub WorkflowTry the workflow online right now — no installation required.👉 Workflow: https://www.runninghub.ai/post/2059961769686294530?inviteCode=rh-v1111If the results meet your expectations, you can later deploy it locally for customization.🎁 Fan Benefits: Register to get 1000 points + daily login 100 points — enjoy 4090 performance and 48 GB super power!📺 Bilibili Updates (Mainland China & Asia-Pacific)If you’re in the Asia-Pacific region, you can watch the video below to see the workflow demonstration and creative breakdown.📺 Bilibili Video: https://www.bilibili.com/video/BV1tsVH6kEBJ/☕ Support Me on Ko-fiIf you find my content helpful and want to support future creations, you can buy me a coffee ☕.Every bit of support helps me keep creating — just like a spark that can ignite a blazing flame.👉 Ko-fi: https://ko-fi.com/aiksk💼 Business ContactFor collaboration or inquiries, please contact aiksk95 on WeChat.⚙️打开下方链接即可在线体验,无需安装。👉 工作流: https://www.runninghub.ai/post/2059961769686294530?inviteCode=rh-v1111如果觉得效果理想,你也可以在本地进行自定义部署。🎁 粉丝福利: 注册即送 1000 积分,每日登录 100 积分,畅玩 4090 体验 48 G 超级性能!📺 Bilibili 更新(中国大陆及南亚太地区)如果你在中国大陆或南亚太地区,可以通过下方视频查看该工作流的实测效果与构思讲解。📺 B站视频: https://www.bilibili.com/video/BV1tsVH6kEBJ/我会在 夸克网盘 持续更新模型资源:👉 https://pan.quark.cn/s/20c6f6f8d87b这些资源主要面向本地用户,方便进行创作与学习。

FLUX.2 Dev GGUF (Low VRAM) (Simple)
FLUX.2 Dev GGUF Workflow for ComfyUI, tested on RTX 3060 (12GB)Main Diffusion Model (GGUF) Model: FLUX.2-dev-gguf Download:https://huggingface.co/city96/FLUX.2-dev-ggufPut it here: ComfyUI/models/diffusion_models/Note: Choose the quantization that matches your GPU VRAM:Q2_K → ~13 GB file — 4GB VRAM (slow, ~3 hours on laptop) Q3_K_M → ~16 GB file — 6–8 GB VRAM Q4_K_M → ~20 GB file — 8–10 GB VRAM Q5_K_M → ~24 GB file — 12 GB VRAM (recommended for RTX 3060) Q8 → ~38 GB file — 16 GB+ VRAM (best quality)VAE flux2-vae.safetensors Download: https://huggingface.co/Comfy-Org/flux2-dev/resolve/main/split_files/vae/flux2-vae.safetensorsPut it here: ComfyUI/models/vae/Text Encoder mistral_3_small_flux2_fp8.safetensors Download: https://huggingface.co/Comfy-Org/flux2-dev/resolve/main/split_files/text_encoders/mistral_3_small_flux2_fp8.safetensorsPut it here: ComfyUI/models/text_encoders/Note: Use the fp8 version to save VRAM. Use bf16 if you have headroom and want slightly better quality.Required Custom Nodes Install via ComfyUI Manager or clone manually into ComfyUI/custom_nodes/ComfyUI-GGUF https://github.com/city96/ComfyUI-GGUF
![Red Protocol: Foundation [FLUX.2 32B / 16GB VRAM Optimizer]](https://image.civitai.com/xG1nkqKTMzGDvpLrqFT7WA/159b0f46-d8b1-4167-bcc9-2e0a303e0748/original=true/125590431.jpeg)
Red Protocol: Foundation [FLUX.2 32B / 16GB VRAM Optimizer]
# Red Protocol: Foundation Edition - 16GB VRAM OptimizerThis is a functional, standard workflow designed to run FLUX.2 with Mistral-3 Small as the text encoder on a 16GB VRAM environment.[Required Models] To avoid OOM (Out of Memory) errors and ensure this workflow runs correctly, you MUST download the exact model versions linked below and place them in your ComfyUI folders.1. Checkpoint / UNET Model (FLUX.2 32B GGUF Q4)Download: https://huggingface.co/city96/FLUX.2-dev-gguf/blob/main/flux2-dev-Q4_K_M.ggufPath: ComfyUI/models/unet/2. Text Encoder (Mistral-3 FP8)Download: https://huggingface.co/Comfy-Org/flux2-dev/blob/main/split_files/text_encoders/mistral_3_small_flux2_fp8.safetensorsPath: ComfyUI/models/clip/ (or text_encoders/ depending on your node setup)3. VAE (Autoencoder for FLUX)Download: https://huggingface.co/Comfy-Org/flux2-dev/blob/main/split_files/vae/flux2-vae.safetensorsPath: ComfyUI/models/vae/4. Upscaler (NMKD Superscale)Download: https://huggingface.co/gemasai/4x_NMKD-Superscale-SP_178000_G/blob/main/4x_NMKD-Superscale-SP_178000_G.pthPath: ComfyUI/models/upscale_models/[Setup Instructions]Install necessary Custom Nodes via ComfyUI Manager (e.g., GGUF support nodes).Load the JSON file into your ComfyUI window.Ensure the models loaded in the nodes match the ones you just downloaded.Hit "Queue Prompt".⚠️ Important Note (VRAM Allocation & Stability): This is a standard, unoptimized version of the workflow. While it can occasionally achieve fast generation times if your system happens to manage VRAM allocation perfectly, its reliability is highly inconsistent. Due to the massive 32B model and heavy VRAM swapping, you may experience severe slowdowns or unpredictable generation times depending on your memory state. It is essentially a gamble.========================================= 🚀 ELIMINATE THE GAMBLE: RED PROTOCOL V2.0Tired of leaving your generation speed up to chance? Want to push your 16GB GPU to its absolute limit with guaranteed stability?The RED PROTOCOL V2.0 is my fully optimized, premium workflow engineered to eliminate the "VRAM allocation roulette." It is specifically designed to achieve extreme stability and simultaneous 1K/4K generation in approximately 130-150 seconds, consistently.Get the complete setup guide, optimized JSON, and my fail-proof prompt structures here:🎥 SEE THE PROOF:Upgrade to the World Record Speed & Quality here:https://underplay.gumroad.com/l/flux2-16gb-limit-break/EARLY20

Flux.2 D Workflows (includes Edit workflow and Inpaint) with GGUF + SageAttention + MultiGPU
My TG Channel - https://t.me/StefanFalkokAIMy TG Chat - https://t.me/+y4R5JybDZcFjMjFiHi! I introduce my working workflows with Flux.2 D generating image for ComfyUI.I have included workflow with Flux.2 GGUF ModelYou need to have Flux 2.D GGUF Model (https://huggingface.co/city96/FLUX.2-dev-gguf/tree/main), clip (https://huggingface.co/Comfy-Org/flux2-dev/tree/main/split_files/text_encoders) and vae (https://huggingface.co/Comfy-Org/flux2-dev/tree/main/split_files/vae)If you need FP8 model - https://huggingface.co/Comfy-Org/flux2-dev/tree/main/split_files/diffusion_modelsIf you need GGUF Encoders version - https://huggingface.co/unsloth/Mistral-Small-3.2-24B-Instruct-2506-GGUF/tree/maindownload my ComfyUI Build https://huggingface.co/datasets/StefanFalkok/ComfyUI_portable_torch_2.10.0_cu130_cp313_sageattention_triton/tree/main, also u need download and install CUDA 13.0 (https://developer.nvidia.com/cuda-13-0-0-download-archive) and VS Code (https://visualstudio.microsoft.com/downloads/)Leave comments if you have trouble or you found the problem with workflows

Flux.2 dev Outpaint Workflow
V2It turns out you can still outpaint with Flux.2 dev without using LanPaint. It just needs the right prompts and more steps.V1This is an experimental workflow for outpaint in Flux.2 dev (not Klein) using LanPaint custom node.Please be informed LanPaint is extremely slow. Even with Turbo lora, a minimum of 40 steps (i.e. 8 x 5) are required.The result is hit-and-miss. Sometimes, the output image before stitch is better than the one after stitch.

(Loop - Anime Edition) SVI 2 Pro Dasiwa V9 Long Video Auto Prompt Dynamic Enhancement Edition V1 - RunningHub ComfyUI Workflow
You can click on the link below and try it out directly. If the effect is good, you can deploy it locally https://www.runninghub.cn/post/2011765719033188353/?inviteCode=rh-v1121Fan benefits, register to get 1000 points, daily login 100 points, play 4090! Experience the super power of 48G!B-site video: https://www.bilibili.com/video/BV1NzkwBXECG/Knowledge Planet: https://t.zsxq.com/7F90AGraphic tutorial: https://t.zsxq.com/lNK8vThe workflow is very simple to use, and I have uploaded a tutorial on how to use it on YouTube. You can try it out and follow the tutorial and Civitai's workflow to easily reproduce the results. Thank you. If you have any other questions, please leave a comment in the comment sectionThis tutorial is very important, not watching it will surely lead to a lot of problems! Watch the video tutorial before trying !!!! Very important! Especially a key point at the end!

Flux2 + Klein + Image Editor 4B Edition V1
You can click on the link below and try it out directly. If the effect is good, you can deploy it locally https://www.runninghub.cn/post/2012059257029533698/?inviteCode=rh-v1121Fan benefits, register to get 1000 points, daily login 100 points, play 4090! Experience the super power of 48G!B-site video: https://www.bilibili.com/video/BV1MBkPBwEJw/Knowledge Planet: https://t.zsxq.com/7F90AGraphic tutorial: https://t.zsxq.com/lNK8vThe workflow is very simple to use, and I have uploaded a tutorial on how to use it on YouTube. You can try it out and follow the tutorial and Civitai's workflow to easily reproduce the results. Thank you. If you have any other questions, please leave a comment in the comment sectionThis tutorial is very important, not watching it will surely lead to a lot of problems! Watch the video tutorial before trying !!!! Very important! Especially a key point at the end!

Flux2-Klein+4B Text-to-Image 2K Edition
You can click on the link below and try it out directly. If the effect is good, you can deploy it locally https://www.runninghub.cn/post/2012059929259020289/?inviteCode=rh-v1121Fan benefits, register to get 1000 points, daily login 100 points, play 4090! Experience the super power of 48G!B-site video: https://www.bilibili.com/video/BV1MBkPBwEJw/Knowledge Planet: https://t.zsxq.com/7F90AGraphic tutorial: https://t.zsxq.com/lNK8vThe workflow is very simple to use, and I have uploaded a tutorial on how to use it on YouTube. You can try it out and follow the tutorial and Civitai's workflow to easily reproduce the results. Thank you. If you have any other questions, please leave a comment in the comment sectionThis tutorial is very important, not watching it will surely lead to a lot of problems! Watch the video tutorial before trying !!!! Very important! Especially a key point at the end!

Flux2-Klein+9B Text-to-Image 2K Edition
You can click on the link below and try it out directly. If the effect is good, you can deploy it locally https://www.runninghub.cn/post/2012059534927335425/?inviteCode=rh-v1121Fan benefits, register to get 1000 points, daily login 100 points, play 4090! Experience the super power of 48G!B-site video: https://www.bilibili.com/video/BV1MBkPBwEJw/Knowledge Planet: https://t.zsxq.com/7F90AGraphic tutorial: https://t.zsxq.com/lNK8vThe workflow is very simple to use, and I have uploaded a tutorial on how to use it on YouTube. You can try it out and follow the tutorial and Civitai's workflow to easily reproduce the results. Thank you. If you have any other questions, please leave a comment in the comment sectionThis tutorial is very important, not watching it will surely lead to a lot of problems! Watch the video tutorial before trying !!!! Very important! Especially a key point at the end!

Flux2 + Klein + Image Editor 9B Edition V1
You can click on the link below and try it out directly. If the effect is good, you can deploy it locally https://www.runninghub.cn/post/2012042587716194306/?inviteCode=rh-v1121Fan benefits, register to get 1000 points, daily login 100 points, play 4090! Experience the super power of 48G!B-site video: https://www.bilibili.com/video/BV1Q6rVBoE4a/Knowledge Planet: https://t.zsxq.com/7F90AGraphic tutorial: https://t.zsxq.com/lNK8vThe workflow is very simple to use, and I have uploaded a tutorial on how to use it on YouTube. You can try it out and follow the tutorial and Civitai's workflow to easily reproduce the results. Thank you. If you have any other questions, please leave a comment in the comment sectionThis tutorial is very important, not watching it will surely lead to a lot of problems! Watch the video tutorial before trying !!!! Very important! Especially a key point at the end!
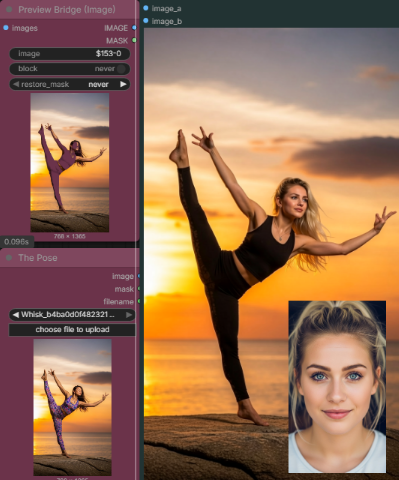
Flux Klein Pose & Background Thief (The Ultimate Persona Transfer)
Another fun toy. First of all I was able to achieve 90% success. 🚀 What Can It Do?Pose Stealing: Applies any pose you like to your own character in seconds.Background Highjacking: Places your character in a new location without getting bogged down in complex masking processes.Identity Preservation: Includes optimized Reference Conditioning nodes to preserve facial features and expression.🛠️ How to Use?Your Model: Upload your own photo.The Pose: Upload the photo containing the pose and background you want to steal (!).Prompt: Briefly describe your character's details and the pose.Boom! Now that pose is yours.☕ Buy Me a Coffee / SupportI consumed a lot of GPU hours and coffee while preparing this workflow.🔗 https://buymeacoffee.com/ugurdoyduk
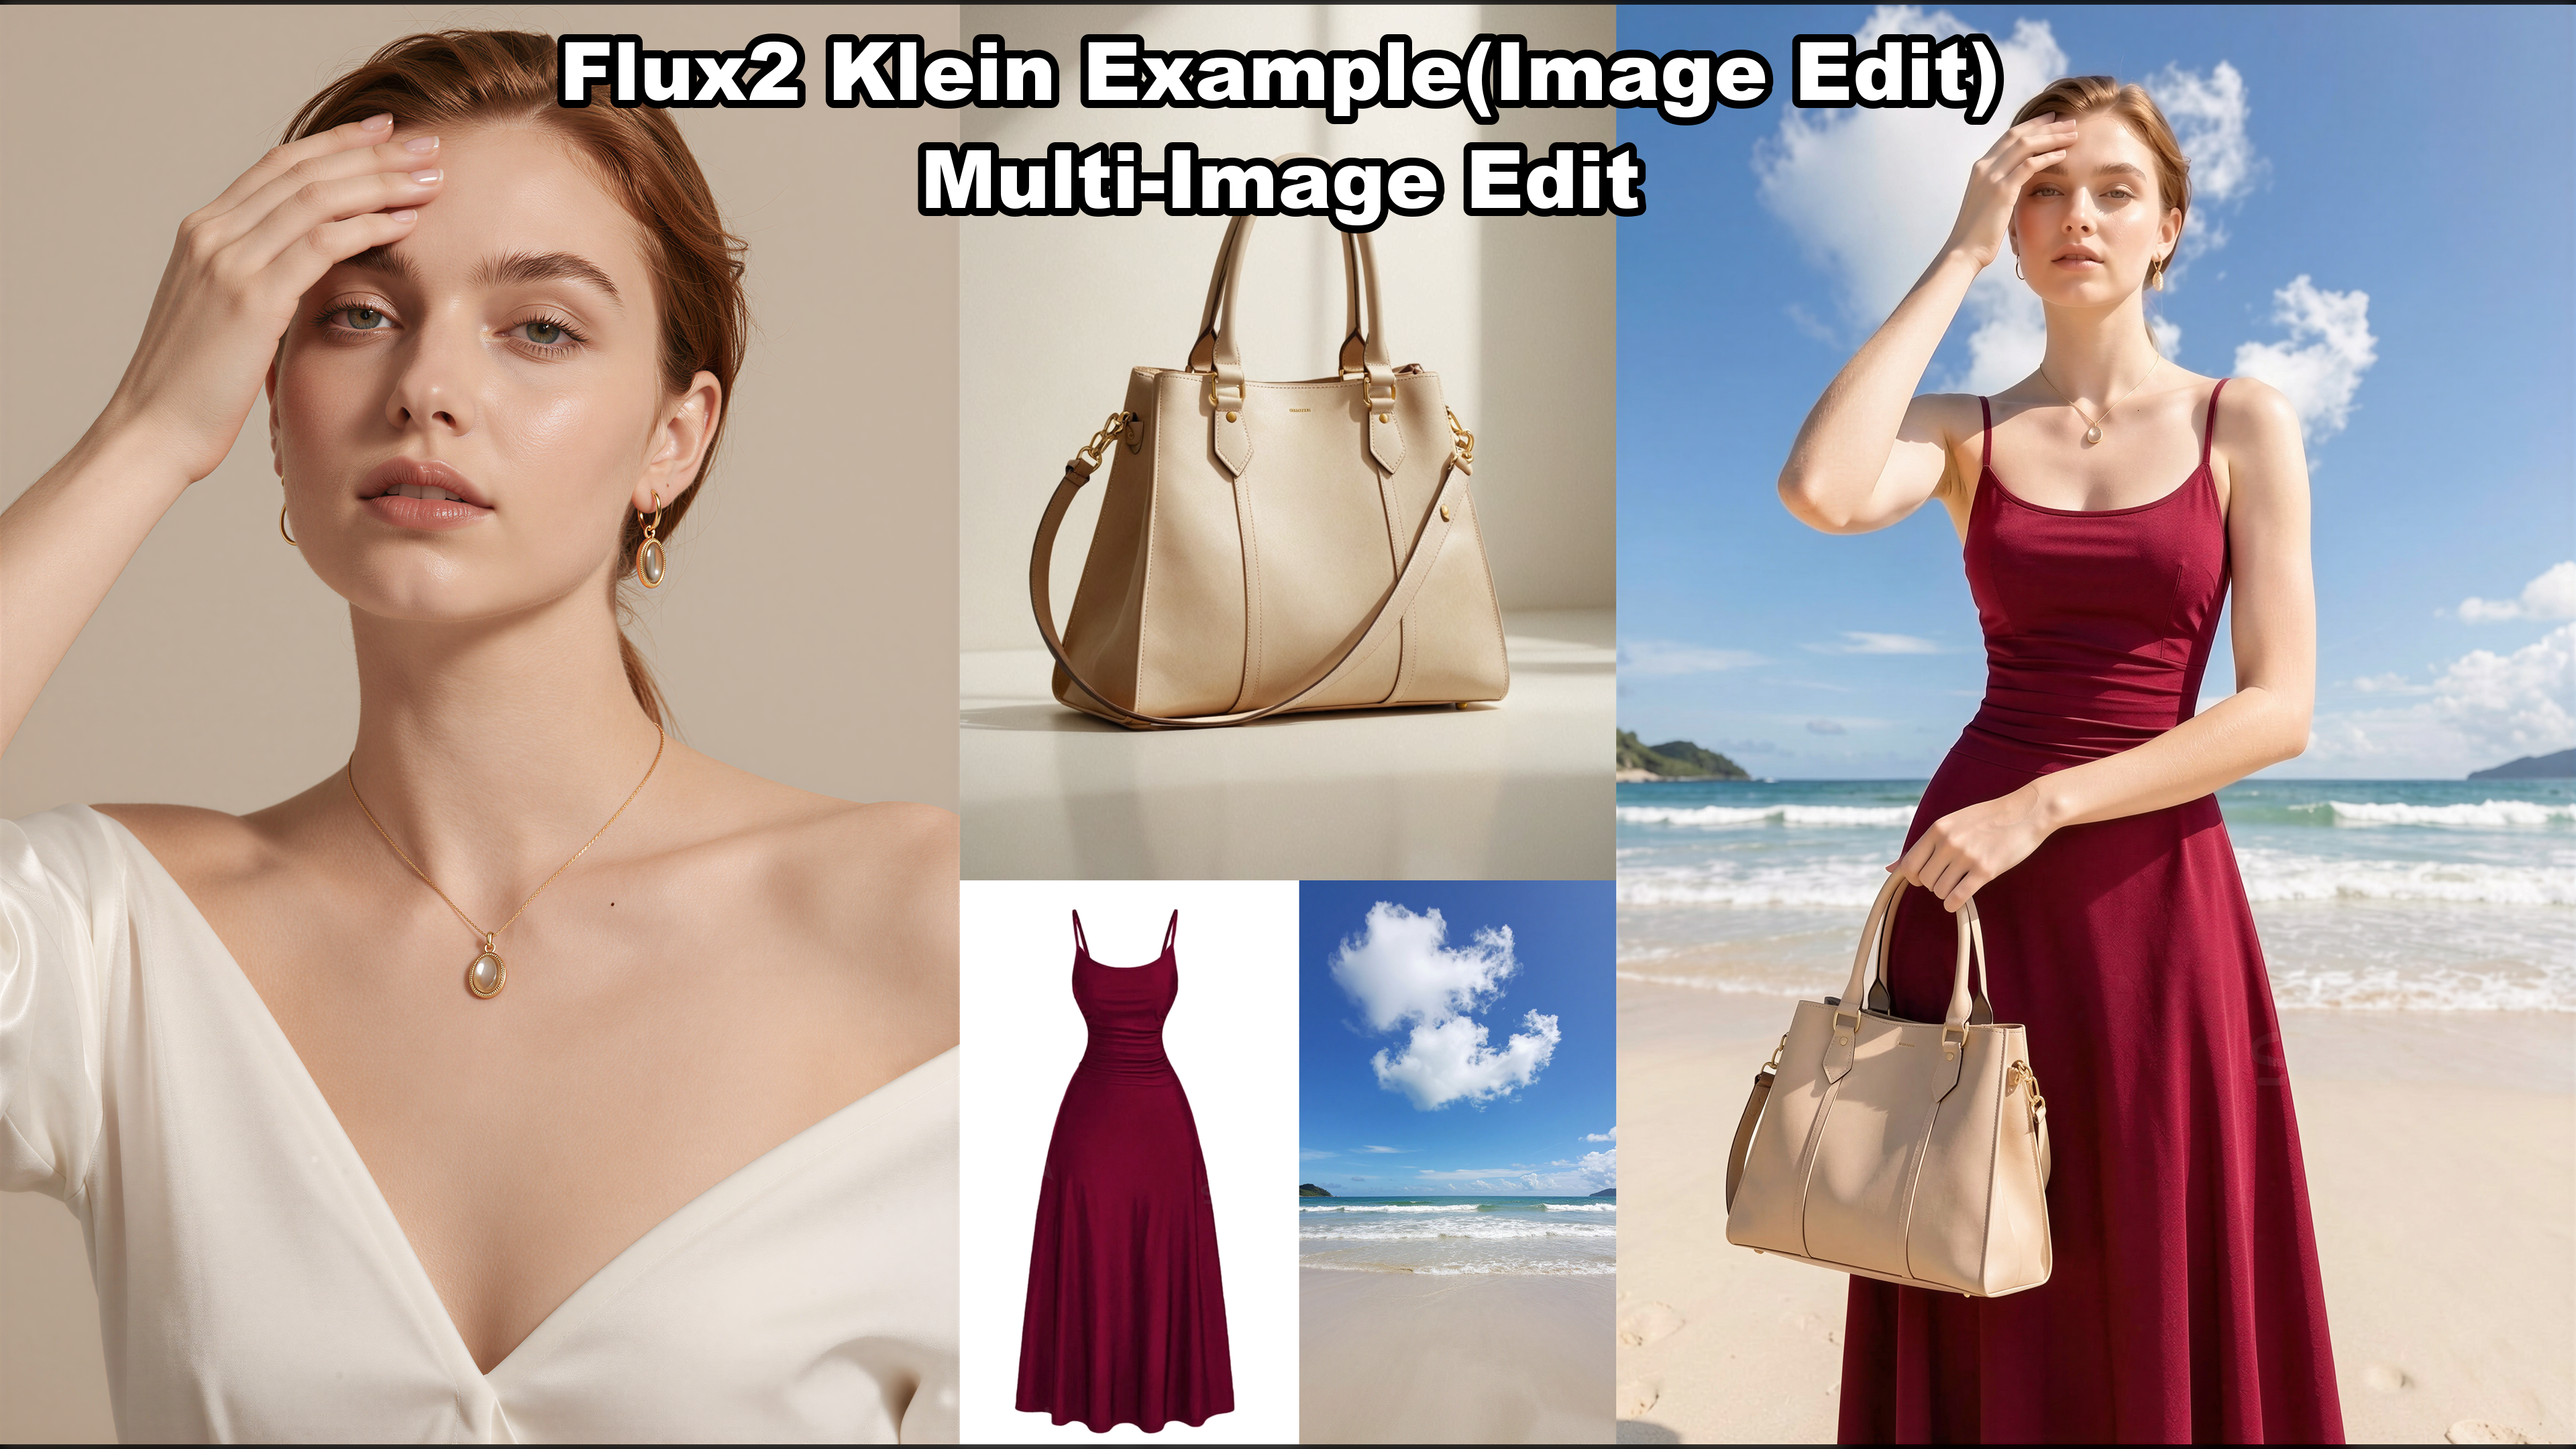
Flux2 Klein Multi-Image Edit Workflow
A workflow uses the latest Flux2 Klein 4B/9B models to edit images.All the model details are within the workflow:Try it online for free: https://www.runninghub.ai/post/2012104741957931009Please check the video guide before you start using this workflow: If you think the video is helpful, please like, share the video, and subscribe for more!

Flux2 Klein Text to Image Workflow
A workflow uses the latest Flux2 Klein 4B/9B models to generate high-quality images.All the model details are within the workflow:Try it online for free: https://www.runninghub.ai/post/2012097189715120130Please check the video guide before you start using this workflow: If you think the video is helpful, please like, share the video, and subscribe for more!
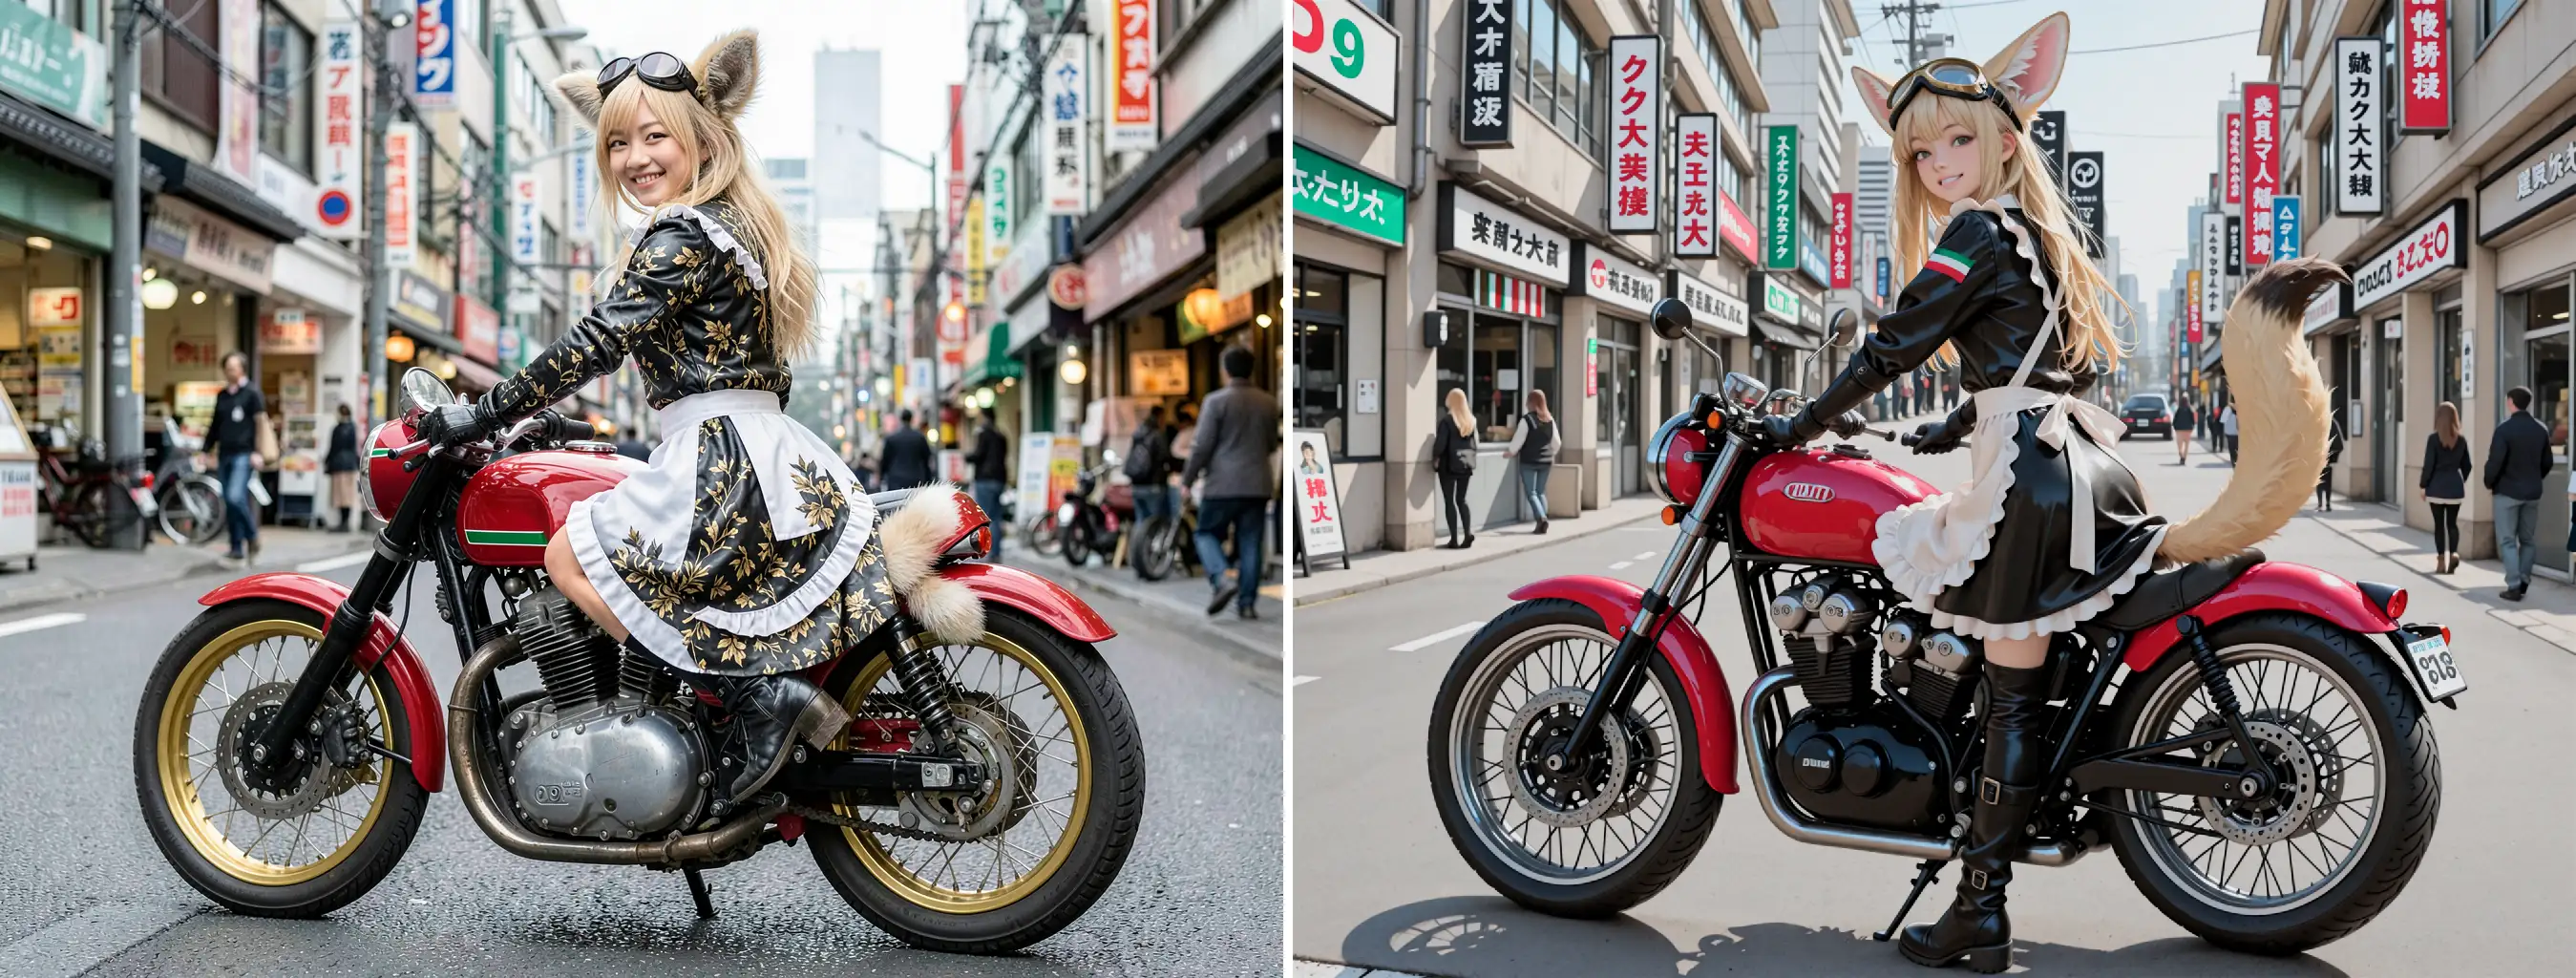
flux2_klein-SDXL_Upscale_workflow (T2i)
flux2_klein-SDXL_Upscale_workflow(text to image upscale)The purpose of this workflow is to mix flux2_klein excellent prompt tracking and high image quality with illustrious-SDXL's vast AGC character resources.In other words, characters that flux2_klein has not yet learned can be expressed using illustrious-SDXL's learned resources without using Lora.It combines flux2_klein and SDXL for extremely fast generation speeds.This is how I use it, but it's up to you to use it in your own way.* Note *Turn Off Upscale-Switch, only flux2_klein will be rendered.Can be used as a regular flux2_klein workflowDoesn't upscale anythingUpscale ratio 1.5 to 2.0 (1.5 recommended)RequirementsComfyUI ver. 0.9.1 or higherflux2_kleinModelsflux-2-klein-4b-fp8.safetensorsorflux-2-klein-4b.safetensorstext_encodershttps://huggingface.co/Comfy-Org/flux2-klein/resolve/main/split_files/text_encoders/qwen_3_4b.safetensorsVAEhttps://huggingface.co/Comfy-Org/flux2-dev/resolve/main/split_files/vae/flux2-vae.safetensorsIllustrious ModelCivitai | Share your models Illustrious Checkpointalso recommend my merge modelDMD2 Speed LoRAdmd2_sdxl_4step_lora_fp16 or dmd2_sdxl_4step_lora_fp32Recommend upscaler lollypophttps://huggingface.co/uwg/upscaler/blob/main/ESRGAN/lollypop.pthUse Custom Nodehttps://github.com/pythongosssss/ComfyUI-Custom-Scriptshttps://github.com/yolain/ComfyUI-Easy-Usehttps://github.com/LEv145/images-grid-comfy-pluginhttps://github.com/pixelpainter/comfyui-mute-bypass-by-ID
![FLUX.2 [klein] 4B & 9B - Fast Local Image Editing & Generation](https://image.civitai.com/xG1nkqKTMzGDvpLrqFT7WA/f5f4af04-cd78-45d9-9133-b8a16e01e174/original=true/117650263.jpeg)
FLUX.2 [klein] 4B & 9B - Fast Local Image Editing & Generation
FLUX.2 [klein] 4B & 9B is a lightweight, fast image generation and local editing workflow—ideal for precise inpainting, quick iterations, and everyday creative tasks. Runs smoothly even on 6GB VRAM (4B version). Try it online—no setup needed: https://www.runninghub.ai/post/2012024438618857474?inviteCode=rh-v1015 Sign up via the link to get 1,000 free credits + 100 daily login credits. Great for anyone who wants fast, local-quality results without the GPU hassle. Highly recommend sharing!

Flux2-TurboV2 Acceleration
This workflow is a Flux.2 Turbo V2 accelerated text-to-image (or optional reference-guided) setup using the ComfyUI “custom sampler” stack instead of the classic KSampler. It loads the Flux2 UNet (flux2_dev_fp8mixed.safetensors), the Flux2 text encoder (mistral_3_small_flux2_fp8…, type flux2), and the Flux2 VAE (flux2-vae.safetensors). Then it applies a model-only Turbo LoRA (Flux2TurboComfyv2.safetensors) at strength 1.0 before sampling, which is the main speed/behavior change in this graph.Sampling is assembled from modular nodes: CLIPTextEncode → FluxGuidance (guidance=4) produces the conditioning, then BasicGuider + KSamplerSelect(euler) + Flux2Scheduler(steps=8) feed into SamplerCustomAdvanced. The base latent comes from EmptyFlux2LatentImage with fixed width/height, and you can optionally enable ReferenceLatent nodes (Ctrl-B) to inject one or more reference images; if you bypass them, it becomes pure text-to-image. Finally the latent is VAE-decoded and saved. In short: Turbo LoRA + custom sampler pipeline, with optional reference-latent anchoring when you want extra similarity control.🎥 YouTube Video TutorialWant to know what this workflow actually does and how to start fast?This video explains what the tool is, how to launch the workflow instantly, and shares my core design logic — no local setup, no complicated environment.Everything starts directly on RunningHub, so you can experience it in action first.👉 YouTube Tutorial: https://youtu.be/CTIWLigZL1EBefore you begin, I recommend watching the video thoroughly — getting the full context helps you understand the tool faster and avoid common detours.⚙️ RunningHub WorkflowTry the workflow online right now — no installation required.👉 Workflow: https://www.runninghub.ai/post/2007448172402057217/?inviteCode=rh-v1111If the results meet your expectations, you can later deploy it locally for customization.🎁 Fan Benefits: Register to get 1000 points + daily login 100 points — enjoy 4090 performance and 48 GB super power!📺 Bilibili Updates (Mainland China & Asia-Pacific)If you’re in the Asia-Pacific region, you can watch the video below to see the workflow demonstration and creative breakdown.📺 Bilibili Video: https://www.bilibili.com/video/BV1s5iqBNE6F/☕ Support Me on Ko-fiIf you find my content helpful and want to support future creations, you can buy me a coffee ☕.Every bit of support helps me keep creating — just like a spark that can ignite a blazing flame.👉 Ko-fi: https://ko-fi.com/aiksk💼 Business ContactFor collaboration or inquiries, please contact aiksk95 on WeChat.🎥 YouTube 视频教程想了解这个工作流到底是怎样的工具,以及如何快速启动?视频主要介绍 工具定位、快速启动方法 和 我的构筑思路。我们会直接在 RunningHub 上进行演示,让你第一时间看到实际效果。👉 YouTube 教程: https://youtu.be/CTIWLigZL1E开始前建议尽量完整地观看视频 —— 把握整体思路会更快上手,也能少走常见弯路。⚙️ 在线体验工作流现在就可以在线体验,无需安装。👉 工作流: https://www.runninghub.ai/post/2007448172402057217/?inviteCode=rh-v1111打开上方链接即可直接运行该工作流,实时查看生成效果。如果觉得效果理想,你也可以在本地进行自定义部署。🎁 粉丝福利: 注册即送 1000 积分,每日登录 100 积分,畅玩 4090 体验 48 G 超级性能!📺 Bilibili 更新(中国大陆及南亚太地区)如果你在中国大陆或南亚太地区,可以通过下方视频查看该工作流的实测效果与构思讲解。📺 B站视频: https://www.bilibili.com/video/BV1s5iqBNE6F/我会在 夸克网盘 持续更新模型资源: 👉 https://pan.quark.cn/s/20c6f6f8d87b 这些资源主要面向本地用户,方便进行创作与学习。
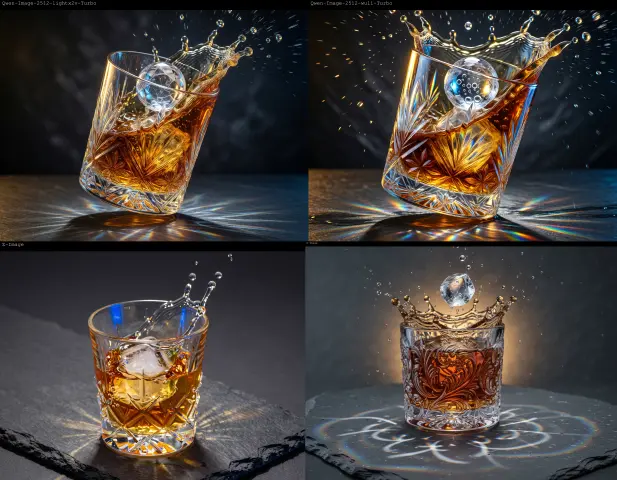
2512 vs z-image vs flux2
This workflow is a side-by-side benchmark setup: it generates the same prompt at the same resolution through four parallel branches so you can judge differences quickly. The top branches are Qwen-Image-2512 with two different acceleration LoRAs (one explicitly labeled “Lightx2v 4steps LoRA”), while the other branches run Z-Image and Flux.2 as baselines for realism, prompt adherence, and overall “finish.”In practice, you load the models/accelerators once, write the prompt once, set the image size once, and then run a single generation to get four comparable outputs. The workflow also adds clear labels/captions and saves each result with its own name (for example Qwen-Image-2512 and Flux2) so you can archive batches and review them later without confusion.🎥 YouTube Video TutorialWant to know what this workflow actually does and how to start fast?This video explains what the tool is, how to launch the workflow instantly, and shares my core design logic — no local setup, no complicated environment.Everything starts directly on RunningHub, so you can experience it in action first.👉 YouTube Tutorial: https://youtu.be/CTIWLigZL1EBefore you begin, I recommend watching the video thoroughly — getting the full context helps you understand the tool faster and avoid common detours.⚙️ RunningHub WorkflowTry the workflow online right now — no installation required.👉 Workflow: https://www.runninghub.ai/post/2006771390493499393/?inviteCode=rh-v1111If the results meet your expectations, you can later deploy it locally for customization.🎁 Fan Benefits: Register to get 1000 points + daily login 100 points — enjoy 4090 performance and 48 GB super power!📺 Bilibili Updates (Mainland China & Asia-Pacific)If you’re in the Asia-Pacific region, you can watch the video below to see the workflow demonstration and creative breakdown.📺 Bilibili Video: https://www.bilibili.com/video/BV1s5iqBNE6F/☕ Support Me on Ko-fiIf you find my content helpful and want to support future creations, you can buy me a coffee ☕.Every bit of support helps me keep creating — just like a spark that can ignite a blazing flame.👉 Ko-fi: https://ko-fi.com/aiksk💼 Business ContactFor collaboration or inquiries, please contact aiksk95 on WeChat.🎥 YouTube 视频教程想了解这个工作流到底是怎样的工具,以及如何快速启动?视频主要介绍 工具定位、快速启动方法 和 我的构筑思路。我们会直接在 RunningHub 上进行演示,让你第一时间看到实际效果。👉 YouTube 教程: https://youtu.be/CTIWLigZL1E开始前建议尽量完整地观看视频 —— 把握整体思路会更快上手,也能少走常见弯路。⚙️ 在线体验工作流现在就可以在线体验,无需安装。👉 工作流: https://www.runninghub.ai/post/2006771390493499393/?inviteCode=rh-v1111打开上方链接即可直接运行该工作流,实时查看生成效果。如果觉得效果理想,你也可以在本地进行自定义部署。🎁 粉丝福利: 注册即送 1000 积分,每日登录 100 积分,畅玩 4090 体验 48 G 超级性能!📺 Bilibili 更新(中国大陆及南亚太地区)如果你在中国大陆或南亚太地区,可以通过下方视频查看该工作流的实测效果与构思讲解。📺 B站视频: https://www.bilibili.com/video/BV1s5iqBNE6F/我会在 夸克网盘 持续更新模型资源: 👉 https://pan.quark.cn/s/20c6f6f8d87b 这些资源主要面向本地用户,方便进行创作与学习。

Flux+2-Pi+4-Step Super-Accelerated Image Editing V1
You can click on the link below and try it out directly. If the effect is good, you can deploy it locally https://www.runninghub.cn/post/2006071587203715073/?inviteCode=rh-v1121Fan benefits, register to get 1000 points, daily login 100 points, play 4090! Experience the super power of 48G!B-site video: https://www.bilibili.com/video/BV1XbiMBAEFL/Knowledge Planet: https://t.zsxq.com/7F90AGraphic tutorial: https://t.zsxq.com/lNK8vThe workflow is very simple to use, and I have uploaded a tutorial on how to use it on YouTube. You can try it out and follow the tutorial and Civitai's workflow to easily reproduce the results. Thank you. If you have any other questions, please leave a comment in the comment sectionThis tutorial is very important, not watching it will surely lead to a lot of problems! Watch the video tutorial before trying !!!! Very important! Especially a key point at the end!

Flux2 Controllable View Angle Multi-Angle Control
You can click on the link below and try it out directly. If the effect is good, you can deploy it locally https://www.runninghub.cn/post/2006048912230064130/?inviteCode=rh-v1121Fan benefits, register to get 1000 points, daily login 100 points, play 4090! Experience the super power of 48G!B-site video: https://www.bilibili.com/video/BV1XbiMBAEFL/Knowledge Planet: https://t.zsxq.com/7F90AGraphic tutorial: https://t.zsxq.com/lNK8vThe workflow is very simple to use, and I have uploaded a tutorial on how to use it on YouTube. You can try it out and follow the tutorial and Civitai's workflow to easily reproduce the results. Thank you. If you have any other questions, please leave a comment in the comment sectionThis tutorial is very important, not watching it will surely lead to a lot of problems! Watch the video tutorial before trying !!!! Very important! Especially a key point at the end!

(8-Step Accelerated Edition) Flux2+Turbo Single-Image Editing Acceleration Edition V1
You can click on the link below and try it out directly. If the effect is good, you can deploy it locally https://www.runninghub.cn/post/2006022078891511809/?inviteCode=rh-v1121Fan benefits, register to get 1000 points, daily login 100 points, play 4090! Experience the super power of 48G!B-site video: https://www.bilibili.com/video/BV1XbiMBAEFL/Knowledge Planet: https://t.zsxq.com/7F90AGraphic tutorial: https://t.zsxq.com/lNK8vThe workflow is very simple to use, and I have uploaded a tutorial on how to use it on YouTube. You can try it out and follow the tutorial and Civitai's workflow to easily reproduce the results. Thank you. If you have any other questions, please leave a comment in the comment sectionThis tutorial is very important, not watching it will surely lead to a lot of problems! Watch the video tutorial before trying !!!! Very important! Especially a key point at the end!

pi-Flux.2 4 step
Custom nodes: https://github.com/Lakonik/ComfyUI-piFlow?tab=readme-ov-file#pi-flux2Model: https://huggingface.co/Lakonik/pi-FLUX.2Demo: https://huggingface.co/spaces/Lakonik/pi-FLUX.2
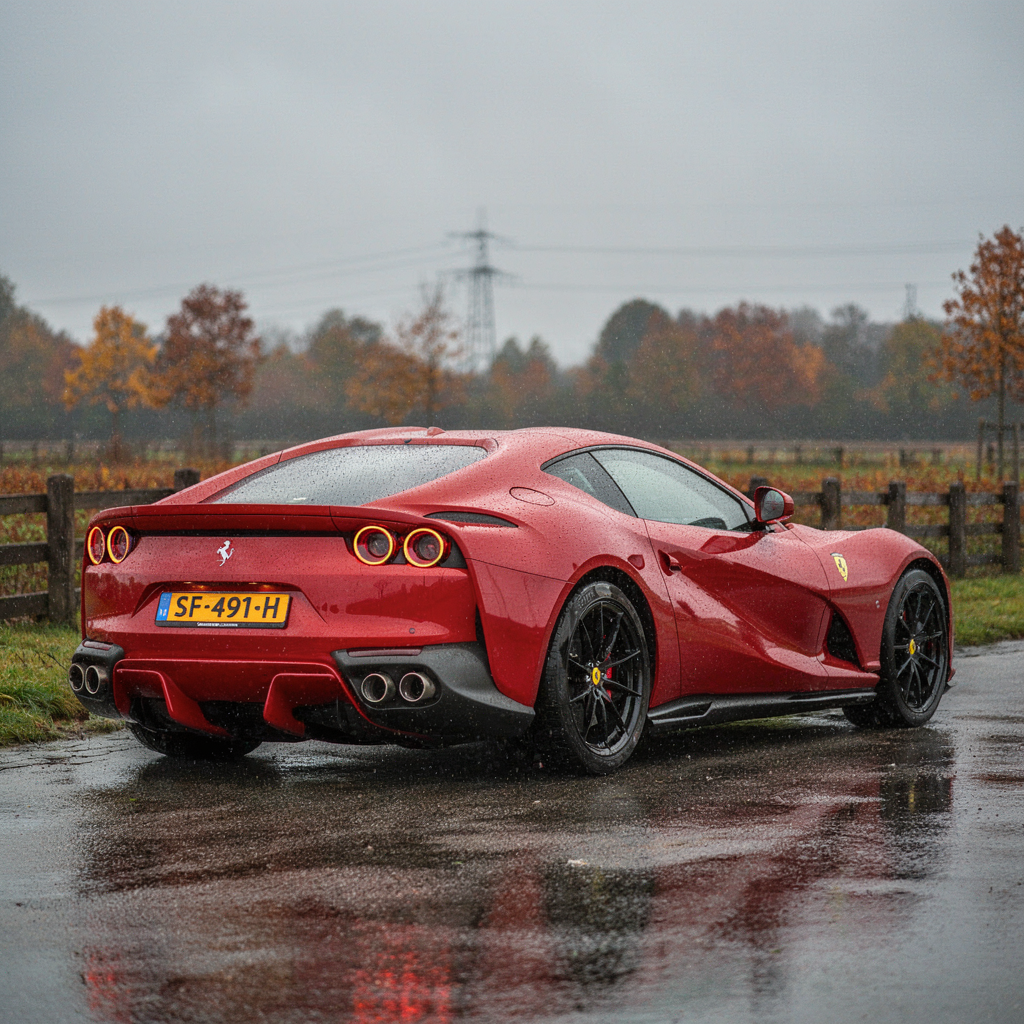
FLUX 2 IMAGE GENERATION + DETAILER
Flux.2D workflow for image generation, aimed realism,quality, and background blur removal.Model GGUF : https://huggingface.co/orabazes/FLUX.2-dev-GGUF/tree/mainCLIP : https://huggingface.co/Comfy-Org/flux2-dev/tree/main/split_files/text_encodersVAE : https://huggingface.co/Comfy-Org/flux2-dev/tree/main/split_files/vae

Flux.2 Workflow with optional Multi-image reference
A simple Flux.2 workflow.Initialize:Load model, CLIP, VAE and optional LoRA. Make your prompt (divided into 2 parts if you prefer to make separate prompt for edit instructions and overall).Reference image:Turn on or off reference images. It comes with 4 reference images, but you can easily copy-paste a new node if you need more.Sampler:Your common sampling options. I added upscaling options as well, since a few styles of what I do needed it. Batch normal and upscaled means you save both the initial output and the upscaled output. Blend adds a third output with the two blended. Custom nodes needed:ComfyUI-Easy-UseComfyUI-CrystoolsComfyUI-KJNodesComfyUI-utils-nodes

Simplified t2i Workflow for Flux2D
The workflow should run on the DisTorch2MultiGPUv2 nodes to control VRAM (RAM) allocation, preventing VRAM overflow and the resulting swapping. Unfortunately, these nodes are currently broken due to the latest ComfyUI updates. As a fallback, the older MultiGPUv1 nodes are used (with up to 10–15% lower inference speed compared to DisTorch2).GitHub: pollockjj/ComfyUI-MultiGPUIf you have a working SageAttention setup on your system, the workflow with fp8.safetensors should run without issues, depending on the available VRAM (RAM).With GGUF:The acceleration provided by SageAttention is significantly lower than with FP8 models and may sometimes not take effect at all, since GGUF formats are primarily designed for CPU-optimized inference and do not fully leverage the GPU kernels of SageAttention.-> Disable --use-sage-attention-> Use --fast (standard PyTorch optimization)-> Rely on the internal optimizations of the GGUF Nodes (backend)For RTX30xx, RTX40xx (and RTX50xx) systems with less than 24 GB VRAM, please refer to the table “Quick Reference: FLUX.2 + Mistral-3-Small GGUF” on my HF/Modelpage.GegenDenTag/comfyUI-Flux2D-t2i-workflow · Hugging FaceYou will also find notes there regarding memory management, run_nvidia_gpu.bat, SageAttention installation guide, and some CMD Console Outputs (see performance as follows)PerformaceTest Setup rtx3090 24GB VRAM + 32GB RAM:Flux2 fp8mixed.safetensors Nvidia (35.5GB), Mistral Text Encoder fp8.safetensors (18GB)Flux2 Q8_0 (35GB), Mistral Text Encoder Q8_K (29GB)flux2-vae.safetensors (336MB)Guidance: 4 | Steps: 20 (Production: Guidance: 2-2.5, 30-40 Steps)Based on: ~80 runs with different resolutionsFirst Run Initial loading of required layers into VRAM|RAM, first inference; Further inferences are then significantly faster as memory management is already initialized. Exact timings, loaded partially etc. see Console-Output / Screenshots.FP8 FormatFirst Run832×1216px: ~380-400sSubsequent Runs:832×1216px: 75-80s (~3.70-3.90s/it)1080×1920px: 135-150s (~6.75-7.50s/it)1440×2160px: 225-240s (~11.00-11.50s/it)GGUF Format (expectedly higher runtimes)First Run832×1216px: ~420-440sSubsequent Runs:832×1216px: 105-120s (~5.30-5.50s/it)1440×2160px: 250-260s (~12.00-12.75s/it)Addendum: No metadata is embedded in the sample images. I am running the workflow in Automation n8n-upscayl_1440px_ultrasharp-4x and have not yet managed to prevent the upscaler from overwriting the metadata.

Flux.2 image blending
This workflow uses Flux 2 as a high-quality blending and image-editing model, combining multiple inputs through controlled composition before passing the merged result into Flux’s diffusion pipeline. The model’s cinematic lighting and strong sense of realism make it well-suited for background replacement, relighting, and structural edits where natural visual integration matters. Quantized variants such as Q6 reduce VRAM use without heavily impacting quality, while SageAttention provides a noticeable speed boost. The compositor prepares the blended canvas, and Flux 2 then interprets the merged scene as a single coherent image, allowing edits that look organically fused instead of artificially pasted.In practice, the workflow works well for realistic edits like relighting, replacing environments, or transforming subjects into stylized versions while keeping overall form intact. Flux 2 handles single-image editing with strong stability, producing consistent results even at high resolutions such as 1536×1536. Its realism gives it an advantage for photographic or cinematic outputs, while the blending stage allows flexible assembly of multiple elements—even if some similarity is naturally lost when using many references. For users who don’t require strict multi-image consistency, it offers a smooth and visually convincing way to combine images and apply Flux 2’s expressive lighting and rendering strengths.🎥 YouTube Video TutorialWant to know what this workflow actually does and how to start fast?This video explains what the tool is, how to launch the workflow instantly, and shares my core design logic — no local setup, no complicated environment. Everything starts directly on RunningHub, so you can experience it in action first.👉 YouTube Tutorial:https://youtu.be/-MWq5srHU0EBefore you begin, I recommend watching the video thoroughly — getting the full context helps you understand the tool faster and avoid common detours.⚙️ RunningHub WorkflowTry the workflow online right now — no installation required.👉 Workflow:https://www.runninghub.ai/post/1995426699946995714/?inviteCode=rh-v1111If the results meet your expectations, you can later deploy it locally for customization.🎁 Fan Benefits:Register to get 1000 points + daily login 100 points — enjoy 4090 performance and 48 GB super power!📺 Bilibili Updates (Mainland China & Asia-Pacific)If you’re in the Asia-Pacific region, you can watch the video below to see the workflow demonstration and creative breakdown.📺 Bilibili Video:https://www.bilibili.com/video/BV1D9SqByEc9/☕ Support Me on Ko-fiIf you find my content helpful and want to support future creations, you can buy me a coffee ☕.Every bit of support helps me keep creating — just like a spark that can ignite a blazing flame.👉 Ko-fi:https://ko-fi.com/aiksk💼 Business ContactFor collaboration or inquiries, please contact aiksk95 on WeChat.🎥 YouTube 视频教程想了解这个工作流到底是怎样的工具,以及如何快速启动?视频主要介绍 工具定位、快速启动方法 和 我的构筑思路。我们会直接在 RunningHub 上进行演示,让你第一时间看到实际效果。👉 YouTube 教程:https://youtu.be/-MWq5srHU0E开始前建议尽量完整地观看视频 —— 把握整体思路会更快上手,也能少走常见弯路。⚙️ 在线体验工作流现在就可以在线体验,无需安装。👉 工作流:https://www.runninghub.ai/post/1995426699946995714/?inviteCode=rh-v1111打开上方链接即可直接运行该工作流,实时查看生成效果。如果觉得效果理想,你也可以在本地进行自定义部署。🎁 粉丝福利:注册即送 1000 积分,每日登录 100 积分,畅玩 4090 体验 48 G 超级性能!📺 Bilibili 更新(中国大陆及南亚太地区)如果你在中国大陆或南亚太地区,可以通过下方视频查看该工作流的实测效果与构思讲解。📺 B站视频:https://www.bilibili.com/video/BV1D9SqByEc9/我会在 夸克网盘 持续更新模型资源:👉 https://pan.quark.cn/s/20c6f6f8d87b这些资源主要面向本地用户,方便进行创作与学习。

Flux2+T2V+Accelerate Edition
Foundation Flux.2 DEV: Foundational Text-to-Image Acceleration WorkflowThose with insufficient graphics memory may try the app below for free online image generation.🔽 📱 For Beginners (Easy AI App - Phone Friendly!)🔽AI APP: Flux2 T2V Accelerated Edition: https://www.runninghub.ai/ai-detail/1994303430040682498/?inviteCode=rh-v1291🔽Free download of workflow models/Loras 🔽Download link for Flux_2_DEV: https://pan.quark.cn/s/bba2728ba8eb Download link for Flux_2_GGUF: https://pan.quark.cn/s/aa4a3daf0d1a Download link for Qwen3VL NSFW Version: https://pan.quark.cn/s/71503112e6e8✨ Fan Perks ✨ Click the avatar in the top right corner → Invitation Code → Enter code: rhv1291 🎁 Claim 1,000 FREE RH Coins immediately! 💰 Plus, get an extra 100 coins every day just for logging in.

FLux 2 Workflow
With this you can run either the fp8/16 version or the gguf. workflow is setup to do either. you will need to download the files on your own
Flux 2 - Master - GGUF - FP8 - Sage Attention - Promt Loader - 10 Reference Images - Promt Styler - Workflow
Flux 2 Image Workflow
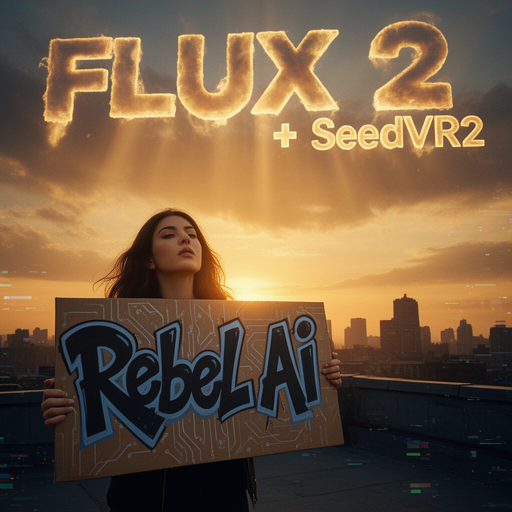
Rebels Flux 2 GGUF
(Links to files are provided at the bottom of the description.)v2 - adds Prompt cycler to autogenerate images with a text file list of prompts.v3 -adds SeedVR2 to upscale images to 4K resolution while maintaining ALL the detail quality.This is a condensed GGUF version of the ComfyUI template workflow for FLUX 2, designed with LOW VRAM USERS in mind. replaces the diffusion model with GGUFs. optional GGUF text encoder as well for extremely low vram users. (for some reason the fp8 works just as well as the fp16 with WAY less resource use. BE WARNED the text encoder is HUGE, around 18gb for the fp8. for some reason it runs easily on my 8gb vram card with 16gb of regular ram, i think that is because the text encoder and gguf weights arent stored on the vram card at the same time so your either just running sampling steps or encoding it but never at the same time so it should run well on most pcs.)IMPORTANT!!! :::FluxGuidance node is tricky, for regular images just use 4.0 . for TEXT you may need to raise the value to 11.0 or 8.0 if artifacting is too strong.FOR THOSE USING "cow_mistral" text encoder either install missing custom nodes or use the other text encoder file. its small and can fit on most cpus by default!❗️IMPORTANT FOR PROMPT CYCLER IN VERSION 2❗️Copy the address of the text file and paste it into the simple string node. REMOVE QUOTATIONS FROM BEGINNING AND END OF FILE ADDRESS OR THE CYCLER WONT RECOGNIZE THE FILE. Then feed the connector node into the text of the clip text encode node of your image generator, NOT THE NODE ITSELF. (Theres a smaller GREEN connector dot on the left side of the box of the clip text encode node, essentially your feeding the string into the box and not the clip nodes connector.)YOUTUBE VIDEO TUTORIAL FOR PROMPT CYCLER (using Z-Image-Turbo as model, workflow is interchangable so any image model can be run with it, including FLUX 1,FLUX 2, QWEN Image Edit 2509)LINKS:FLUX 2 GGUFhttps://huggingface.co/orabazes/FLUX.2-dev-GGUF/tree/mainVaehttps://huggingface.co/Comfy-Org/flux2-dev/tree/main/split_files/vaeVAE GGUFhttps://huggingface.co/chatpig/flux2-dev-gguf/tree/mainText Encoder (fp8 or fp16)https://huggingface.co/Comfy-Org/flux2-dev/tree/main/split_files/text_encoders
Flux 2 — Simple Text-to-Image Workflow | ComfyUI
Simple Flux-2 Text-to-Image Generation:This workflow is designed to give you a simple, streamlined way to generate high-quality images with Flux 2 using only a text prompt. Everything is arranged clearly on the canvas so you can see exactly what’s happening at a glance: Write your prompt, choose an aspect ratio, and hit generate...easy peasy.It includes optional LoRA support for users who want to drop in their own Flux-2 LoRAs. You can also adjust the aspect ratio to your liking.If you’re looking for a lightweight, easy-to-read starting point for Flux 2 — or just a clean template to build your own workflow from — this one keeps things straightforward and stable.Note: I'm running this on an RTX 4090 with 24GB VRAM and generations using this workflow take about 3 or 4 minutes per image.Workflow Requirements:1. flux2_dev_fp8mixed.safetensors (~35GB lite version)Place in folder: ComfyUI\models\diffusion_models2. flux2-vae.safetensorsPlace in folder: ComfyUI\models\vae3. mistral_3_small_flux2_fp8.safetensorsPlace in folder: ComfyUI\models\text_encodersDownload these here:https://huggingface.co/Comfy-Org/flux2-dev/tree/main/split_filesNote: If you're missing any nodes in the workflow, simply search for them using the ComfyUI Manager. Simply click on "Install Missing Custom Nodes" ____________________________Alternative Model OptionYou can also use the 65GB full Flux 2 model instead of the fp8mixed version:https://huggingface.co/black-forest-labs/FLUX.2-dev/tree/main____________________________
Flux2 Image Generation Accelerator V2 (Enhanced Edition)
You can click on the link below and try it out directly. If the effect is good, you can deploy it locallyhttps://www.runninghub.cn/post/1993502440953675777/?inviteCode=rh-v1121Fan benefits, register to get 1000 points, daily login 100 points, play 4090! Experience the super power of 48G!B-site video: https://www.bilibili.com/video/BV1SrUeBAEPJ/Knowledge Planet: https://t.zsxq.com/7F90AGraphic tutorial: https://t.zsxq.com/lNK8vThe workflow is very simple to use, and I have uploaded a tutorial on how to use it on YouTube. You can try it out and follow the tutorial and Civitai's workflow to easily reproduce the results. Thank you. If you have any other questions, please leave a comment in the comment sectionThis tutorial is very important, not watching it will surely lead to a lot of problems! Watch the video tutorial before trying !!!! Very important! Especially a key point at the end!
Flux2+ Dual-Image Editing Accelerated Edition V1 (Enhanced Version)
You can click on the link below and try it out directly. If the effect is good, you can deploy it locallyhttps://www.runninghub.cn/post/1993501397798895618/?inviteCode=rh-v1121Fan benefits, register to get 1000 points, daily login 100 points, play 4090! Experience the super power of 48G!B-site video: https://www.bilibili.com/video/BV1SrUeBAEPJ/Knowledge Planet: https://t.zsxq.com/7F90AGraphic tutorial: https://t.zsxq.com/lNK8vThe workflow is very simple to use, and I have uploaded a tutorial on how to use it on YouTube. You can try it out and follow the tutorial and Civitai's workflow to easily reproduce the results. Thank you. If you have any other questions, please leave a comment in the comment sectionThis tutorial is very important, not watching it will surely lead to a lot of problems! Watch the video tutorial before trying !!!! Very important! Especially a key point at the end!

Flux2+ Single Image Editing Accelerated Edition V2 (Enhanced Version)
You can click on the link below and try it out directly. If the effect is good, you can deploy it locallyhttps://www.runninghub.cn/post/1993501337226772482/?inviteCode=rh-v1121Fan benefits, register to get 1000 points, daily login 100 points, play 4090! Experience the super power of 48G!B-site video: https://www.bilibili.com/video/BV1SrUeBAEPJ/Knowledge Planet: https://t.zsxq.com/7F90AGraphic tutorial: https://t.zsxq.com/lNK8vThe workflow is very simple to use, and I have uploaded a tutorial on how to use it on YouTube. You can try it out and follow the tutorial and Civitai's workflow to easily reproduce the results. Thank you. If you have any other questions, please leave a comment in the comment sectionThis tutorial is very important, not watching it will surely lead to a lot of problems! Watch the video tutorial before trying !!!! Very important! Especially a key point at the end!
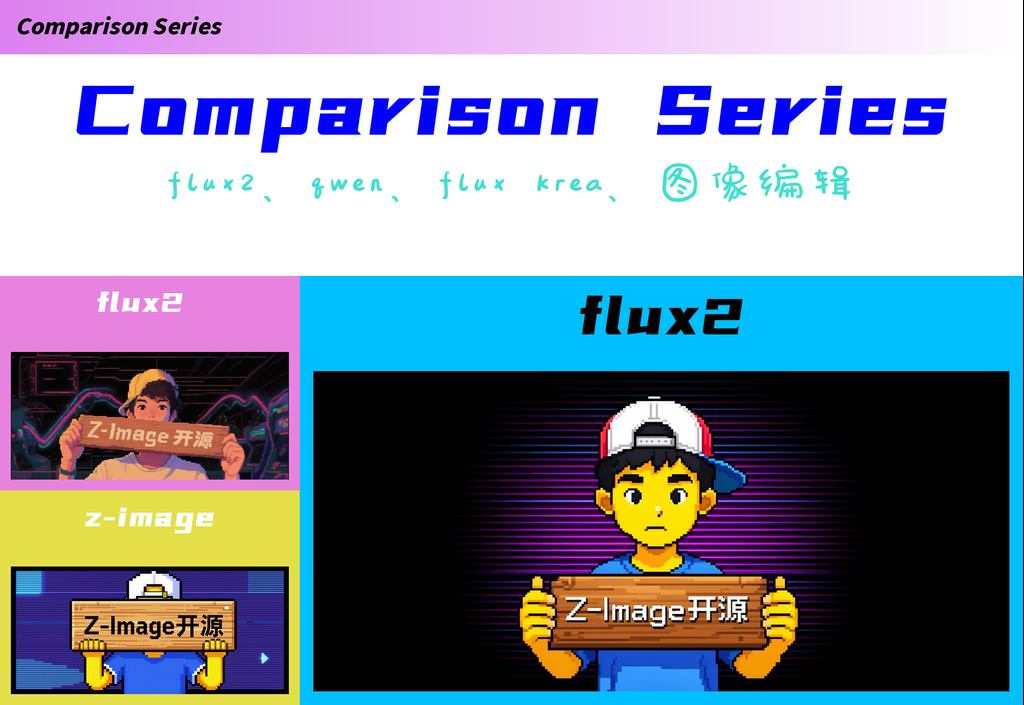
Comparison Series:flux2、z-image etc.
It can now be run online for free through:https://www.runninghub.ai/post/1994042108382298114/?inviteCode=rh-v1180,invitation code : rh-v1180,Register through the link or add the code to get 1000 RH coins, and 100 RH per day,Flux2 being crushed? I have something to say. Everything is in this workflow, and by comparing it, you can see the current state of several mainstream models. Come and give it a try!youtbe:
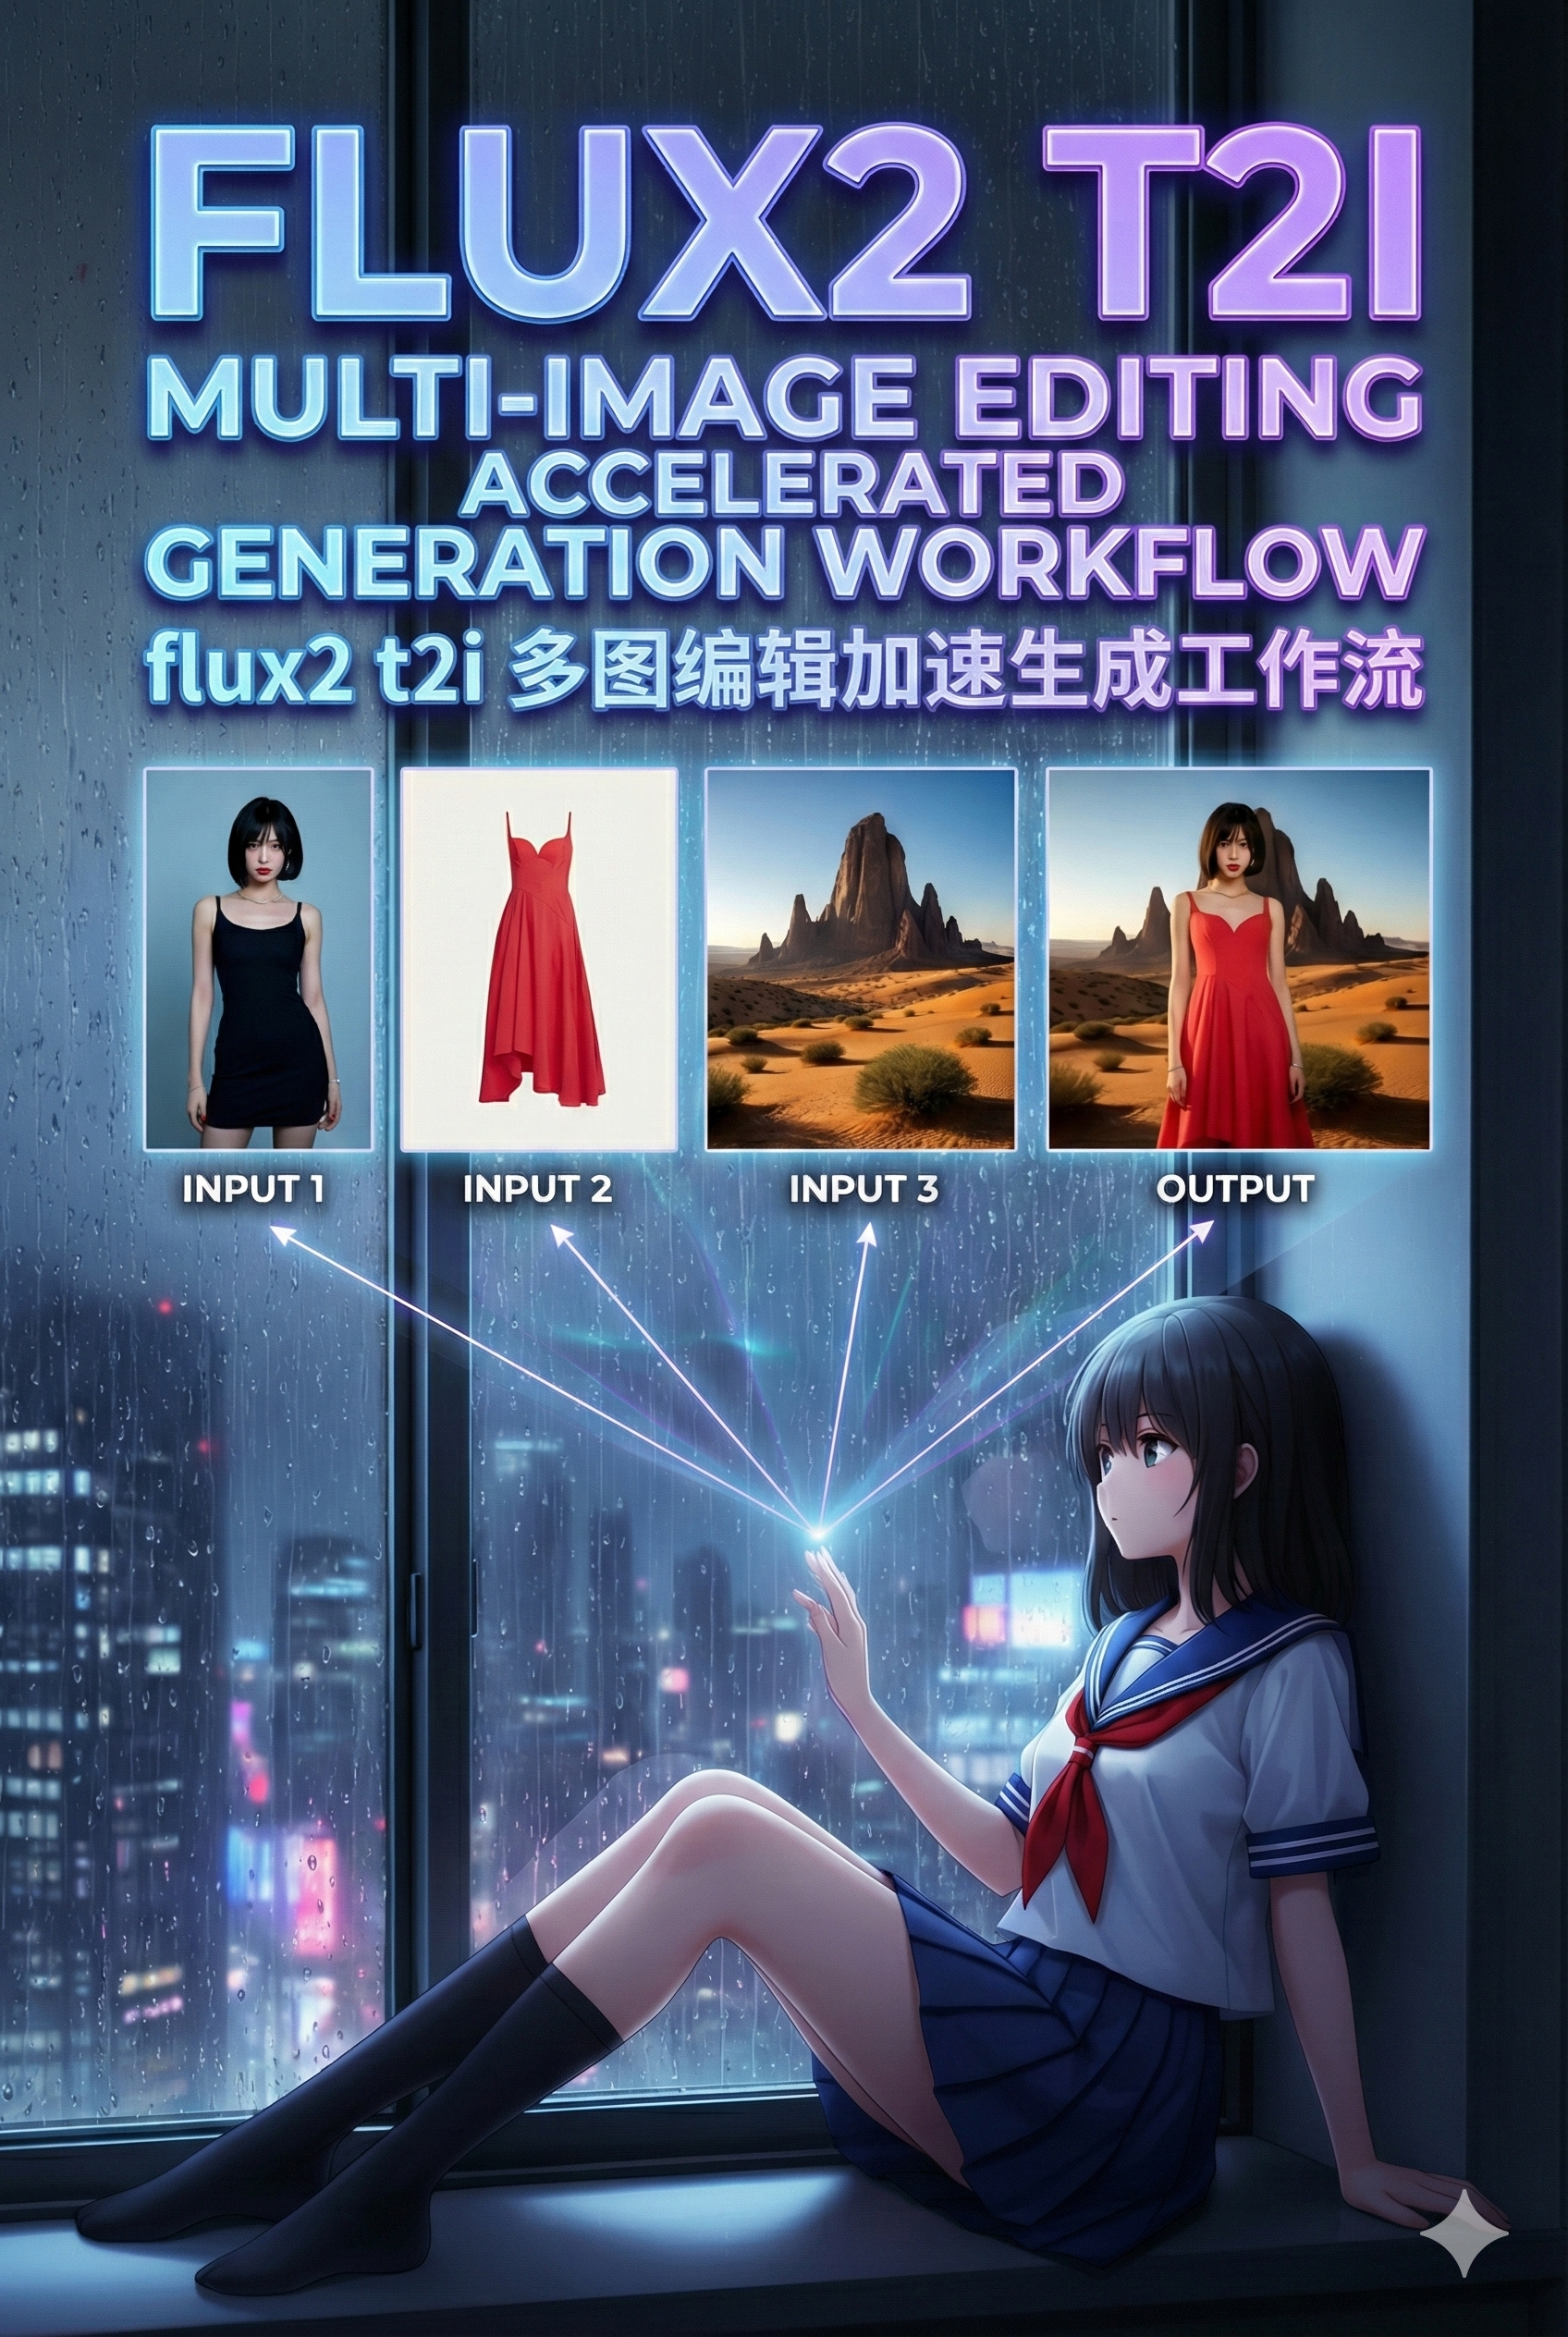
flux2 Multi-image editing & t2i accelerated generation workflow
v2:flux2 Multi-image editing & t2i accelerated generation workflowv1:FLUX2 t2i Multi-Image Editing Workflow You can experience it online directly by clicking the link below (no need to download the model). If the results are good, you can deploy it locally:https://www.runninghub.ai/post/1993539395059990530/?inviteCode=rh-v1315Sign up via this link claim 1000 RH Coins and generate tons of images/videos for FREE!My AI models/apps are on RH now! Try them out & support my work — every click counts. Thank you!Thank you all for your support. Your support is the motivation for me to update more interesting and useful workflows. Thank you so much!!!
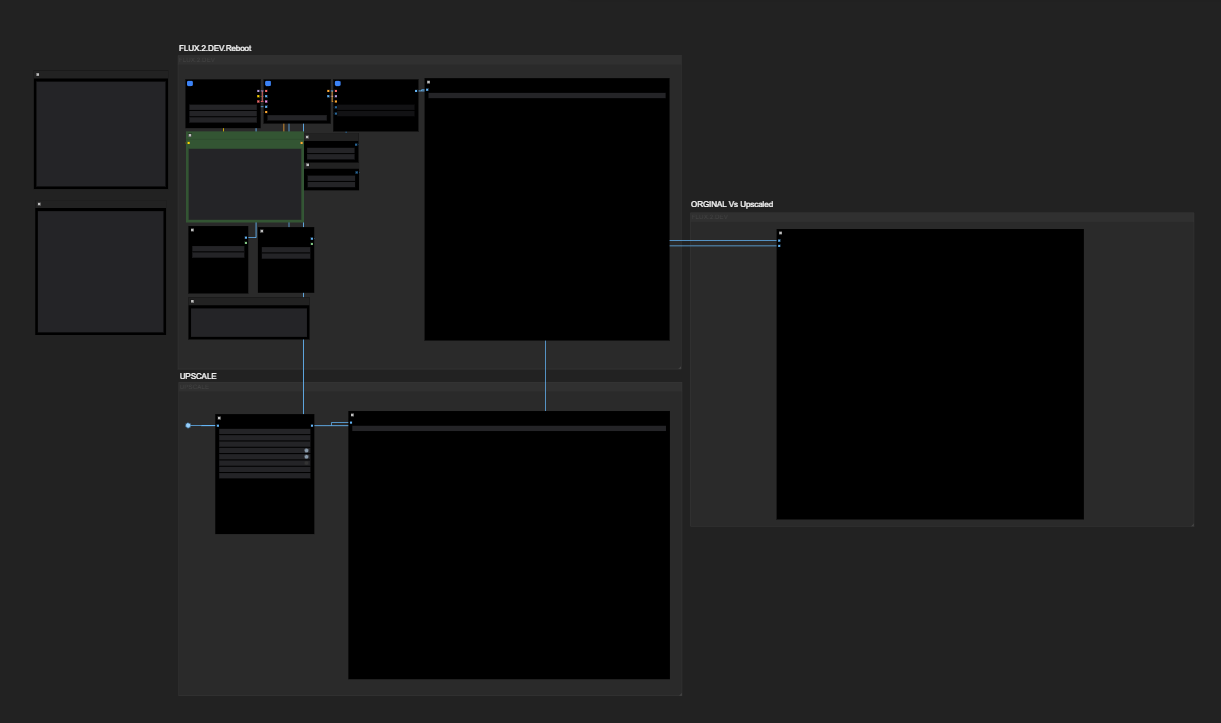
🌌 Flux Dev 2 Reboot Workflow + FlashVSR Upscaler
⚡ Minimal • Clean • Organized • Ready-to-Use A minimal, extremely clean ComfyUI workflow for FLUX.2-dev Reboot paired with a FlashVSR upscaler and an Original vs Upscaled comparison panel — designed for fast, professional image generation.📝 Description🔥 What this workflow doesThis workflow is built to give you a simple, non-cluttered way to generate images using FLUX.2-dev (Reboot) and instantly upscale them using FlashVSR — all inside one single neat setup.Most FLUX workflows become spaghetti…This one is clean, compact, and beginner-friendly while still being creator-grade.🔧 Pipeline Overview🟦 1. FLUX.2-dev Generation (Reboot Block)Uses FLUX.2-dev GGUF main modelExternal Mistral 3 Small Text EncoderExternal Flux VAEOrganized nodes for prompt, seed, settingsLarge dedicated preview for the base render🟪 2. FlashVSR Upscale BlockDirect upscale from Flux outputSupports 2× / 4× depending on VRAMClean routing with minimal node clutterPerfect for 4K-ready results🟨 3. Original vs Upscaled Preview (Side-by-Side)Built-in viewers for comparisonQuickly check detail, noise, sharpnessNo need to save & re-import images📦 Required Models🧠 Main FLUX.2-dev GGUF🔗 https://huggingface.co/orabazes/FLUX.2-dev-GGUF/tree/main✍️ Text Encoder (Mistral 3 Small for Flux)🔗 https://huggingface.co/Comfy-Org/flux2-dev/blob/main/split_files/text_encoders/mistral_3_small_flux2_fp8.safetensors🎨 Flux VAE🔗 https://huggingface.co/Comfy-Org/flux2-dev/tree/main/split_files/vae🔼 Upscaler✔ FlashVSR model + ComfyUI FlashVSR node(Download through ComfyUI Manager or GitHub repo)Please place models in correct folders based on your ComfyUI setup.🚀 How to UseOpen the workflow in ComfyUIEnter your prompt + negative promptChoose your resolution / stepsGenerate with Flux Dev 2The output is automatically sent to FlashVSRCompare results in the Original vs Upscaled panelExport sharp, clean images instantlySuper simple, super fast.💻 Recommended SettingsGPU: 10–12GB VRAM recommendedBase resolution: 1024×1024, 832×1216, or 1216×832Steps: 20–30 (ideal for Flux)FlashVSR:2× upscale → safe for all GPUs4× upscale → best quality, higher VRAM needed🎯 Best For✨ Concept art✨ Portraits✨ Thumbnails✨ Posters / Key Visuals✨ Fast client work✨ Clean templates for custom pipelines🙏 Credits🧩 FLUX.2-dev GGUF — orabazes🧠 Flux VAE + Text Encoder — Comfy-Org📈 FlashVSR — FlashVSR authors + ComfyUI integration🎨 Workflow assembly, optimization & layout — (Veonix)
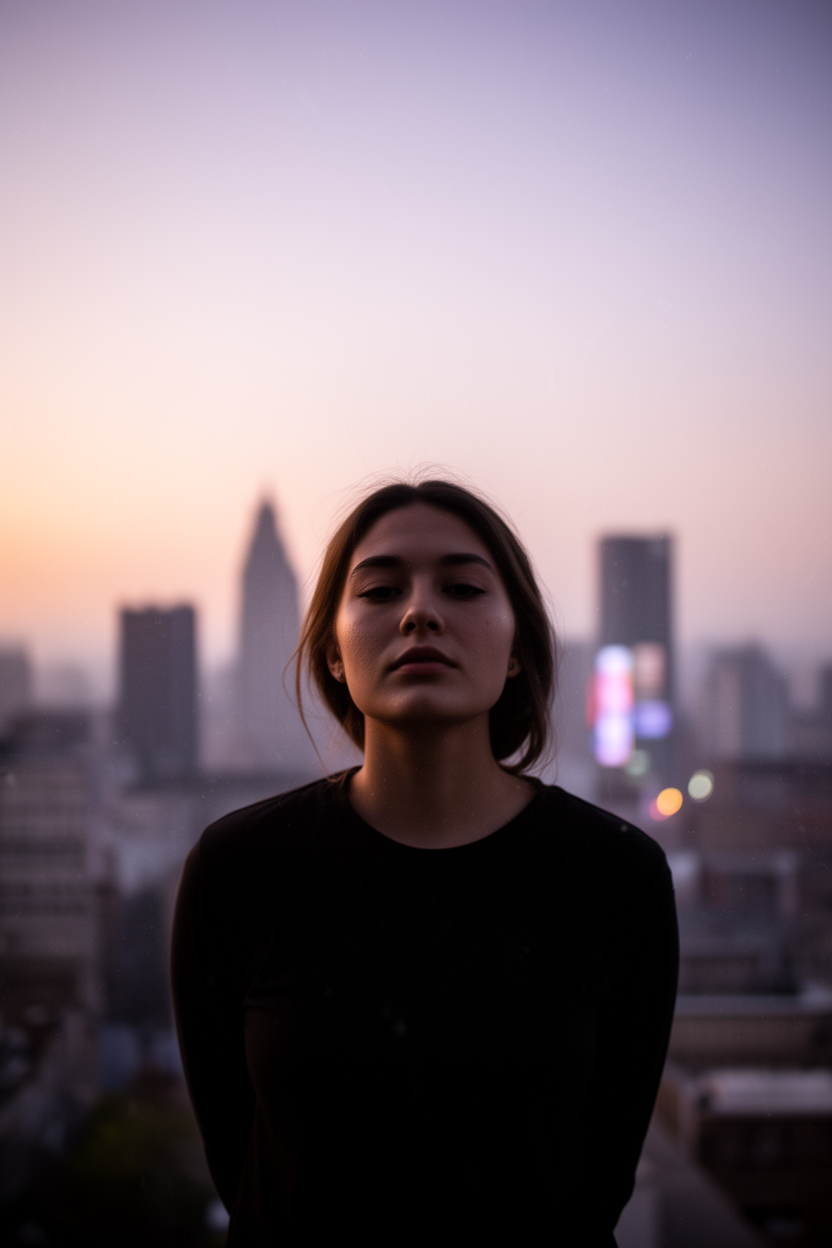
Flux2.Dev Text to Image with Qwen3-VL-Instruct
Workflow based on official ComfyUI Flux.2 workflow with Qwen3-VL-Instruct integrated to generate JSON prompts

Flux.2 txt2img Lora Multi
A simple but effective multi prompt or single prompt Flux.2 workflow. Need big vram! Unless you change out the model I have in place with a lower quant version!
Flux2+ Single Image Editing
You can click on the link below and try it out directly. If the effect is good, you can deploy it locallyhttps://www.runninghub.cn/post/1993502440953675777/?inviteCode=rh-v1121Fan benefits, register to get 1000 points, daily login 100 points, play 4090! Experience the super power of 48G!B-site video: https://www.bilibili.com/video/BV1H1UtBKEiP/Knowledge Planet: https://t.zsxq.com/7F90AGraphic tutorial: https://t.zsxq.com/lNK8vThe workflow is very simple to use, and I have uploaded a tutorial on how to use it on YouTube. You can try it out and follow the tutorial and Civitai's workflow to easily reproduce the results. Thank you. If you have any other questions, please leave a comment in the comment sectionThis tutorial is very important, not watching it will surely lead to a lot of problems! Watch the video tutorial before trying !!!! Very important! Especially a key point at the end!
Flux2+ Dual-Image Editor
You can click on the link below and try it out directly. If the effect is good, you can deploy it locallyhttps://www.runninghub.cn/post/1993501397798895618/?inviteCode=rh-v1121Fan benefits, register to get 1000 points, daily login 100 points, play 4090! Experience the super power of 48G!B-site video: https://www.bilibili.com/video/BV1H1UtBKEiP/Knowledge Planet: https://t.zsxq.com/7F90AGraphic tutorial: https://t.zsxq.com/lNK8vThe workflow is very simple to use, and I have uploaded a tutorial on how to use it on YouTube. You can try it out and follow the tutorial and Civitai's workflow to easily reproduce the results. Thank you. If you have any other questions, please leave a comment in the comment sectionThis tutorial is very important, not watching it will surely lead to a lot of problems! Watch the video tutorial before trying !!!! Very important! Especially a key point at the end!
Flux2 Text-to-Image
You can click on the link below and try it out directly. If the effect is good, you can deploy it locallyhttps://www.runninghub.cn/post/1993501337226772482/?inviteCode=rh-v1121Fan benefits, register to get 1000 points, daily login 100 points, play 4090! Experience the super power of 48G!B-site video: https://www.bilibili.com/video/BV1H1UtBKEiP/Knowledge Planet: https://t.zsxq.com/7F90AGraphic tutorial: https://t.zsxq.com/lNK8vThe workflow is very simple to use, and I have uploaded a tutorial on how to use it on YouTube. You can try it out and follow the tutorial and Civitai's workflow to easily reproduce the results. Thank you. If you have any other questions, please leave a comment in the comment sectionThis tutorial is very important, not watching it will surely lead to a lot of problems! Watch the video tutorial before trying !!!! Very important! Especially a key point at the end!

Flux 2 Dev - Basic Workflow (Text-to-Image + Reference Support)
Here is a starter workflow for the newly released Flux 2 Dev by the ComfyUI team.This workflow is designed to get you up and running quickly with the new architecture. It handles standard Text-to-Image generation but also includes a setup for Reference Image Conditioning (Multimodal input).Workflow Features:Standard Generation: calibrated for Flux 2 Dev.Reference Inputs: I have included ReferenceLatent nodes connected to LoadImage inputs. This allows you to prompt using images (similar to IP-Adapter/Variations) combined with text.Note: As written in the workflow notes, simply Bypass (Ctrl+B) the Reference nodes if you only want to do pure Text-to-Image.Resolution: Defaults set to 1024x1024.Required Models:To use this workflow without errors, ensure you have the following models (or their equivalents) in your ComfyUI models folder(model links are included in the workflow):UNET/Diffusion: flux2_dev_fp8mixed.safetensorsCLIP: mistral_3_small_flux2_fp8.safetensorsVAE: flux2-vae.safetensorsHow to use:Load the workflow.Ensure your checkpoints are selected in the Loaders.(Optional) Upload images to the "Load Image" nodes to test the reference capabilities, or mute them for standard prompting.Queue Prompt!Enjoy exploring Flux 2! Let me know if you run into any issues.
Flux 2.DEV Comfyui Workflow
My first Flux 2 workflow.It allows up to 4 reference images, and I experimented a bit with the base resolution. Unfortunately, high resolution is not possible in stage_1 again.However, 3-megapixel resolutions like 1280x2304 work without artifacts, while 4K no longer runs without errors.