ComfyUI Workflows
Browse real AI workflows from Flux, SDXL, Pony, ControlNet, video generation and commercial AI creators.

【HiDream】IMG to IMG
✨ HiDream — Image to Image — Simple WorkflowA clean, all-in-one HiDream image-to-image workflow built entirely with the UmeAiRT Toolkit for ComfyUI.Only 8 nodes. No spaghetti wires. Just load your model, write your prompt, and hit generate.⚠️ IMPORTANT — Nodes 2.0 RequiredThis workflow is built for the Nodes 2.0 (Vue) interface of ComfyUI. If you don't enable it, the workflow may have display problems.How to activate Nodes 2.0:Open ComfyUIGo to Settings (⚙️ icon, bottom-left)Find "Use Nodes V2 (Vue)" and toggle it ONRefresh the pageLoad the workflowIf you prefer the classic interface, check out my Legacy version of this workflow instead (link).🎯 FeaturesImage-to-Image generationAutomatic download of models in auto versionBuilt-in SeedVR2 upscaler — high-quality tiled upscaling (toggleable on/off) Slower than a classic upscaler, but significantly better qualityFull metadata embedding — your images are saved with all generation parameters, ready for online publishing and remixing3 LoRA slots — with individual on/off toggles and strength control and you can connect as many other lora modules to each other for as many LoRA as you want.📦 Custom Node RequiredOnly one custom node to install:👉 ComfyUI-UmeAiRT-ToolkitInstall via ComfyUI Manager (search "UmeAiRT") or use the UmeAiRT Auto-Installer.The Toolkit packages everything internally — upscaler, face detailer, metadata saver. No other custom nodes needed.📂 Files you need (in manual version)24 gb Vram : base16 gb Vram: Q8_012 gb Vram: Q5_K_S<12 gb Vram: Q4_K_SFor base versionModel : hidream_i1_dev_fp8.safetensorsin ComfyUI\models\diffusion_modelsFor GGUF versionGGUF_Model : hidream-i1-dev-QX_K_S.ggufin ComfyUI\models\unetVAE : ae.safetensorsin ComfyUI\models\vaeCLIP : clip_l_hidream.safetensors, clip_g_hidream.safetensors, t5xxl_fp8_e4m3fn_scaled.safetensors and llama_3.1_8b_instruct_fp8_scaled.safetensorsin ComfyUI\models\clip

【HiDream】TXT to IMG
✨ HiDream — Text to Image — Simple WorkflowA clean, all-in-one HiDream text-to-image workflow built entirely with the UmeAiRT Toolkit for ComfyUI.Only 8 nodes. No spaghetti wires. Just load your model, write your prompt, and hit generate.⚠️ IMPORTANT — Nodes 2.0 RequiredThis workflow is built for the Nodes 2.0 (Vue) interface of ComfyUI. If you don't enable it, the workflow may have display problems.How to activate Nodes 2.0:Open ComfyUIGo to Settings (⚙️ icon, bottom-left)Find "Use Nodes V2 (Vue)" and toggle it ONRefresh the pageLoad the workflowIf you prefer the classic interface, check out my Legacy version of this workflow instead (link).🎯 FeaturesText-to-Image generationAutomatic download of models in auto versionBuilt-in SeedVR2 upscaler — high-quality tiled upscaling (toggleable on/off) Slower than a classic upscaler, but significantly better qualityFull metadata embedding — your images are saved with all generation parameters, ready for online publishing and remixing3 LoRA slots — with individual on/off toggles and strength control and you can connect as many other lora modules to each other for as many LoRA as you want.📦 Custom Node RequiredOnly one custom node to install:👉 ComfyUI-UmeAiRT-ToolkitInstall via ComfyUI Manager (search "UmeAiRT") or use the UmeAiRT Auto-Installer.The Toolkit packages everything internally — upscaler, face detailer, metadata saver. No other custom nodes needed.📂 Files you need (in manual version)24 gb Vram : base16 gb Vram: Q8_012 gb Vram: Q5_K_S<12 gb Vram: Q4_K_SFor base versionModel : hidream_i1_dev_fp8.safetensorsin ComfyUI\models\diffusion_modelsFor GGUF versionGGUF_Model : hidream-i1-dev-QX_K_S.gguf in ComfyUI\models\unetVAE : ae.safetensorsin ComfyUI\models\vaeCLIP : clip_l_hidream.safetensors, clip_g_hidream.safetensors, t5xxl_fp8_e4m3fn_scaled.safetensors and llama_3.1_8b_instruct_fp8_scaled.safetensorsin ComfyUI\models\clip

ComfyUI beginner friendly HiDream 01 Text-to-Image Workflow with Easy Prompt Saver by Sarcastic TOFU
This is a very simple workflow that helps you to save your HiDream 01 Text to Image Generation Data into a human readable .txt file. This will automatically get and write your metadata to the .txt file. You will find all the saved prompt files that it generated with the images inside the Archive (.Zip) that has the workflow. Also with the Image Saver Simple node used here you may embed the workflow itself with each saved image or save the image and workflow for your work separately.HiDream.ai was founded in 2023 by Dr. Mei Jianxiong, a prominent Chinese AI researcher and former expert at Baidu and Kingsoft, with the goal of creating advanced generative AI models for design and creativity. The HiDream-O1-Image open-source models were just released on May 8, 2026. The HiDream 01 architecture functions as a multimodal generative model that interprets natural language text prompts and translates them into highly detailed visual assets. It utilizes deep diffusion network technology to iteratively refine random noise into structured images based on the semantic meaning of your instructions. By analyzing vast datasets of paired text and imagery, the system predicts exactly where pixels should align to match your desired style, composition, and lighting effects.You can download your necessary model file used in this workflow from HuggingFace and LORA from CivitAI (Details are mentioned below). Make sure you have latest enough ComfyUI installation and install any necessary nodes for for this workflow using ComfyUI manager and place the correct files in correct places. Also check out my other workflows for SD 1.5 + SDXL 1.0, Pony, WAN 2.1, WAN 2.2, MagicWAN Image v2, QWEN, HunyuanImage-2.1, HiDream E, Ernie Image, KREA, Chroma, AuraFlow, NoobAI, Illustrious, Lumina2, Z-Image Turbo, Flux.2 Klein 9B & 4B, Flux.1 Dev and Kandinsky Image 5 Lite (T2I & I2I) models. Feel free to toss some yellow Buzz on stuffs you like.How to use this -#1. Just select your desired HiDream 01 model files first and#2. set your desired image dimensions to start#3. then input your desired image prompt.#4. select how many images you want (Change the number besides the "Run" button)#5. select image sampling methods, CFG, steps etc. settings#6. finally press the run button to generate. That's it..** LORA usage for this workflow is optional you can use it without any LORAs, use with 1 or 2 or any other number of LORAs, to add new LORAs press the L button on top to lunch LORA Manager on a new tab find your LORA and if you want to use that LORA just click the upward Kite button.Required Files============### Download Link for HiDream 01 models -++++++++++++++++++++++++++++++++++This HuggingFace page has all the HiDream 01 model (base & dev) files. By design from very inception of HiDream 01, it's image generation/editing process uses just a single any of of these all in one checkpoint files.. so you may download and use just one file from here for this workflow. https://huggingface.co/Comfy-Org/HiDream-O1-Image/tree/main/checkpointsI have used the fp8 scaled safetensors file for the HiDream 01 base ( hidream_o1_image_fp8_scaled ) for this workflow which is perfect for any 8GB VRAM GPU, if you have 16 GB or higher VRAM GPU you may use the bigger bf16 file.Also, You may use any external prompt enhancer like ComfyUI's default examples for base & dev models have shown if you know how to modify ComfyUI workflows, but for simplicity I opted not to use any prompt enhancer.LORA used on generated images -+++++++++++++++++++++++++++HiDream O1 - noir lighting style -https://civitai.com/models/2647859/hidream-o1-noir-lighting-style?modelVersionId=2973135
iGEN ONE (ZImage, Ernie, FLUX1/2, Qwen, HiDream, Nunchaku)
iGEN ONE — Workflow Guide579+ nodes · 40 groups · 13 component subgraphs · 2 pipeline rows161 unique node types — 71% Eclipse nodesBuilt with ComfyUI_Eclipse custom nodesWhat Is This?iGEN ONE is a modular, all-in-one image generation and post-processing pipeline for ComfyUI. It supports a wide range of diffusion models — Flux, Stable Diffusion, HiDream, and more — and covers everything from initial image generation through face detailing, upscaling, and watermarking in a single workflow.The key design principle is modularity: every feature lives in its own group that can be independently enabled or disabled by simply muting or bypassing it. You never need to reconnect anything — the pipeline automatically adapts to whatever groups are active.How It Works — The BasicsLayoutThe workflow is arranged in two horizontal rows that you read left to right:Row 1 (27 groups) — Everything needed to generate an image: image inputs, prompts, model loading, and renderingRow 2 (13 groups) — Everything that happens after generation: refining, face swap, detailing, upscaling, watermarks, and savingBetween the two rows sits a routing banner — a strip of utility nodes that resolves shared resources (model, VAE, CLIP, prompts, image dimensions) so that every Row 2 group can find what it needs automatically.Toggling Features On and OffEach group has a Fast Mode Switcher panel — a small control panel that lets you mute or bypass individual sub-features within the group. Think of it like a row of toggle switches for that section's optional capabilities. To disable an entire group, you mute/bypass the group itself in the ComfyUI canvas.To mute/activate an entire group: right-click the group header → "Set Group Nodes to Never" (mute all) or "Set Group Nodes to Always" (activate all).When a group is muted/bypassed, downstream groups automatically skip it and pick up from the last active group. This works because of a priority-based fallback system: each group tries a list of possible input sources in order and uses the first one that's actually active.You can enable any combination of groups and the pipeline will always find the right data path. There is no need to manually reconnect anything.Data RoutingInstead of visible noodle connections between groups, iGEN ONE uses Set/Get nodes — named value channels that work like wireless connections. A SetNode in one group publishes a value (like "ref_image" or "model_init"), and a GetNode in another group retrieves it by name. This keeps the visual layout clean and makes it easy to rearrange groups.Row 1 — Generation PipelineImage Sources (Groups 1–3 + 5–9)The workflow offers four ways to get a starting image. Only one should be active at a time — the pipeline automatically picks whichever source is enabled. A loaded image can serve two purposes: as a visual reference for img2img generation, or simply as input for the Image to Prompt group (group 8) to generate a text description — you don't have to use it for img2img.You can also load an image and skip the Initial Render entirely — disable the Initial Render switch, and the loaded image goes straight to Row 2 for detailing, upscaling, face swap, or any other post-processing. This lets you bring in images from anywhere (other workflows, other tools, photographs) and run them through the full post-processing pipeline.1. Image LoadLoad a single image from disk. This is the simplest option — pick an image and go. It also extracts any embedded generation metadata (model name, prompt, sampler, seed) from the image, and can optionally override the workflow's settings with those extracted values. This is useful for "remix" workflows where you want to re-generate with the same settings that produced the original.2. Image Load from FolderBatch processing mode. Loads images one by one from a folder, with controls for sorting (by name or date) and subfolder traversal. Like Image Load, it can extract and apply metadata from each image. Great for re-processing an entire folder of images through the pipeline.Set the index to -4 for shuffle mode (random order, no repeats). The optional seed_input slot controls when special modes advance — connect a seed and keep it the same value to freeze the image selection while you tweak other settings. Change the seed value to advance to the next image.3. Input Video FrameExtracts a single frame from a video file, with a configurable frame skip offset. Useful when you want to use a video still as your starting image.4. Text-Only GenerationWhen none of the above are active, the workflow generates purely from text prompts using an empty latent. This is the default "txt2img" mode. Even when an image source is active, it only becomes img2img if you also enable one of the i2i sub-features in the Initial Render group (i2i Denoise, Flux Preproc, DiffSynth Qwen, etc.) — otherwise the loaded image is only used for reference purposes like Image to Prompt.After selecting a source, the image can pass through several optional processing steps:5. Remove BackgroundRemoves the background using BiRefNet, isolating the subject on transparency. Useful when the background would interfere with generation or when you want to focus on the subject only.6. Image Crop — AutoAutomatic subject-aware cropping. Uses SegmentAnything (SAM) to detect the main subject, centers the crop on it, and resizes to your target dimensions. Best for single-subject images where you want tight framing.7. Image Crop — CustomManual bounding-box cropping with pixel-level controls. For when auto-crop doesn't frame things the way you want.8. Preview Cropped ImageA preview checkpoint with a Stop node. Enable this to see the crop result and halt execution before proceeding — useful for verifying your crop settings.9. Resize ImageSimple resize to specific dimensions. Used when your input image doesn't match the target generation size.The image source chain has a built-in priority system: it checks from the last processing step backward (resize → crop_preview → crop_custom → crop_auto → rembg → video → folder → load) and uses the first active result. So you can stack processing steps and the last one wins.Prompt Construction (Groups 8, 18–23)There are multiple ways to build your prompt, and they can be combined:8. Image to PromptUses an AI vision model (Qwen 9B, Q4_K_M quantization) to analyze your reference image and generate a text description. Runs via Eclipse's Smart LM Loader with a "Detailed Description" task. The result feeds into the prompt assembly group as one of the possible prompt sources.18. RaffleRandom prompt generation from a curated tag system. Raffle builds prompts by randomly selecting tags from categories (subject, pose, clothing, etc.) with seed-controlled reproducibility. Includes a negative output filter for excluding unwanted content.19. Read Prompt from FilesReads prompts from external text files (one prompt per line). Uses index-based indexing to select which prompt to use. Good for working through a prepared list of prompts in sequence.Like Image Load from Folder, set the index to -4 for shuffle mode. Connect a seed to the seed_input slot and keep it fixed to freeze the prompt selection while tweaking other settings — change the seed value to advance to the next prompt.20. PromptThe central prompt assembly hub. This is where all prompt sources come together into the final positive and negative prompts.What's inside:Wildcard Processor — Template-based prompting with __wildcard__ placeholders for varietySmart Prompt v2 (Subject) — A structured subject builder with dropdowns for gender, age, hair, clothing, etc.Smart Prompt v2 (Settings) — Environment builder with dropdowns for location, time of day, weather, etc.Join nodes — Combines all active prompt inputs (from Image-to-Prompt, Raffle, file reader, manual text)String DeDuplicate — Automatically removes duplicate tags or phrases from the combined promptPrefix / Suffix — Optional quality tags (like "masterpiece, 8K") added before or after your promptNegative Prompt — A multiline text field for your negative promptEach prompt source has its own Mode Bridge toggle, so you can enable any combination: just the manual prompt, manual + raffle, image-to-prompt + files, or any other mix.The Prompt group has three sub-feature toggles that control other groups: enabling Image to Prompt activates the Image to Prompt group (you still need to manually enable an image source group like Image Load — follow the arrow from Image to Prompt back to find it), Raffle activates the Raffle group, and Read from Files activates the Read Prompt from Files group.21. Prompt StylerWraps your positive prompt in a style template. Uses Eclipse's Prompt Styler node to apply a consistent style (like "photo-hdr") to the prompt text.22. Prompt EditAI-powered prompt rewriting. Uses the same Qwen 9B model but with a "Rewrite Style" task — it takes your prompt and creatively rewrites it while preserving the core meaning. Good for generating variations or improving prompt quality.23. Save PromptsSaves the final combined prompt to a text file. Can append to an existing file, letting you build a collection of prompts over time.Model Loading & Enhancement (Groups 9–17)9. Folder / SizeThe configuration hub for the workflow. Sets:Output folder structure (with date-based subfolders)Image dimensions — default is 896×1152 (3:4 aspect ratio, good for portrait)Batch size — how many images to generate per runLatent type — SD3/Flux/Wan/HunyuanVideoVRAM purge behavior10. Model LoaderLoads the main checkpoint using Eclipse's Smart Model Loader. The default configuration loads Flux Kreamania fp16 in UNet mode with fp8_e4m3fn weight quantization and flash-attention2. Uses external CLIP models (ViT-L-14 + t5xxl_fp8) and an external VAE (flux_vae). The Smart Model Loader handles all the complexity of model configuration in one node. The usual main model is darkBeast Blitz8.The Smart Model Loader has a built-in template system — you can save your entire loader configuration (model, CLIP, VAE, sampler settings, etc.) as a named template and restore it later with one click. The workflow ships with pre-built templates, but those reference specific checkpoints you may not have. You can either download the matching model or load a shipped template and swap in your own checkpoint. Creating your own templates for your favorite models is the recommended approach.11. LoRAsDual LoRA Stack setup with two Lora Stack nodes feeding into a Lora Stack Apply. Supports both model-only and model+clip modes with up to 9 combined LoRA slots. Each slot has its own model path and strength controls.You can mix model-only LoRAs and LoRAs that also modify CLIP in the same stack — each slot independently selects its mode.12. Model PatcherA collection of 11 optional model modifications, each independently toggleable via a Fast Muter panel:ModelSamplingFlux — Flux-specific guidance parametersModelSamplingAuraFlow — AuraFlow sampling overrideDynamicThresholdingFull — CFG thresholding for better prompt adherencePerturbedAttentionGuidance (PAG) — Self-attention manipulation for more detailSelfAttentionGuidance (SAG) — Feature map attention enhancementDifferentialDiffusion — Mask-based selective denoisingCFGZeroStar — Alternative CFG guidance techniquePatchSageAttention — Memory-efficient attention (reduces VRAM usage)TorchCompileModel — JIT compilation for faster inferenceTeaCache — Token caching for speed improvementUNetTemporalAttentionMultiply — Temporal attention modificationMost of these are bypassed by default. Enable them one at a time to see their effect on your output.13. PuLID — FluxIdentity preservation using PuLID. Load a reference face photo and PuLID will guide the generation to maintain that person's facial features in the output. Uses pulid_flux_v0.9.0 with a configurable strength weight.14. PuLID — Flux NunchakuSame concept as PuLID Flux, but optimized for Nunchaku-quantized Flux models. Uses pulid_flux_v0.9.1 + EVA02_CLIP.15. Flux ReduxStyle transfer using Flux Redux. Load one or two style reference images and the workflow applies their visual style to your generation via CLIP Vision encoding and StyleModelApply. Supports blending two references at different strengths.16. PreprocessorImage preprocessing for ControlNet. Uses DepthAnything for depth map extraction. Only needed when the ControlNet group is active.This group is also needed when using Flux ControlNet LoRAs (like depth) or the DiffSynth Qwen LoRA — their sub-feature toggles are i2i (Flux Preproc) and i2i (DiffSynth: Qwen Lora) in the Initial Render group. You must activate the Preprocessor group manually when using either of these.17. ControlNetStructural conditioning with four toggleable modes:Standard ControlNet — xinsir union-promax (strength 0.75)Union Type — Select specific control type (depth, canny, etc.)Negative Zero — Zero-out negative conditioningDiffSynth Qwen/ZIT ControlNet — Alternative ControlNet using Z-Image-Turbo model (strength 0.65)Each mode has its own Mode Bridge toggle. You can use standard ControlNet for structure while also enabling negative zero-out, for example.Rendering (Groups 24–26)24. Initial RenderThe core generation step. Contains a component subgraph (42 internal nodes) that handles the actual sampling process.Sub-features controlled by individual toggles:Initial Render — The main txt2img or img2img sampling passSeed Enhancer — Adds noise variation to the seedNoise Injection — Additional noise patterns injected into the latent (strength 0.45)Detail Daemon — Micro-detail enhancement during samplingFlux Guidance — CFG control specifically for Flux modelsi2i (Denoise) — Standard img2img with configurable denoise strengthi2i (Flux Preproc) — Flux ControlNet LoRA pathway (e.g. depth) — requires the Preprocessor group to be activated manuallyi2i (DiffSynth: Qwen/ZIT) — Qwen-based img2img pathwayi2i (DiffSynth: Qwen Lora) — Qwen LoRA variant pathway — requires the Preprocessor group to be activated manuallyNegative Prompt — Enable/disable negative conditioningStop — Halt execution after this renderDefault sampler: euler / simple / 25 steps / cfg 3.5 / denoise 1.0 — configured via Smart Sampler Settings v2.25. Latent UpscaleSecond-pass latent-space upscaling. Takes the initial render's latent output, upscales it 1.25× with bicubic interpolation, and runs a second sampling pass using a ClownShark Sampler component (7 internal nodes from the RES4LYF pack). This is a more advanced sampler with detail boost, SDE, and sigma scaling options.Default sampler: dpmpp_2m / sgm_uniform / 36 steps / denoise 0.5. ClownShark sub-sampler: multistep/dpmpp_2m / beta / 11 steps / denoise 0.23.26. Initial Render — PreviewPreview and save checkpoint. Shows the generated image and optionally saves it with full metadata embedding (workflow JSON + generation data). Includes a Stop node so you can halt here before entering the post-processing pipeline in Row 2.This is the boundary between generation and post-processing. If you just want to generate and save without any post-processing, enable the Stop node here.Row 2 — Post-Processing PipelineThe second row handles everything after initial generation. A routing banner of ~39 ungrouped nodes sits above the row, resolving shared resources: latent dimensions, reference image, MODEL (with a 6-source priority chain), VAE, CLIP, conditioning, and string prompts.Each Row 2 group automatically picks up the image from whichever previous group was last active, so you can enable any combination and the pipeline chains them correctly.Refining1. Flux2/ZIT Refiner — 3rd PassA third-pass refinement using a dedicated checkpoint (darkBeast Klein2) via a component subgraph (17 internal nodes). Uses SamplerCustomAdvanced with wavelet color matching (strength 0.75) to preserve the original color palette while refining details. Low denoise (0.3) for subtle improvement without major changes.Face Swap2. Flux2: Face SwapDiffusion-based face replacement using a two-pass BFS architecture built entirely with Eclipse and core ComfyUI nodes — no third-party face swap package needed. Contains two component subgraphs — BFS_1ST (26 internal nodes) and BFS_2ND (22 internal nodes) — for progressive face re-generation.How it works:Smart Detection finds the face in the image using the Anzhc face segmentation modelThe face region is cropped and encoded to latentBFS_1ST re-generates the face region using a dedicated checkpoint (darkBeast Klein2) via SamplerCustomAdvanced with full denoise (1.0)BFS_2ND refines the result with a second sampling pass for seamless blendingAn Image Comparer shows before/after for quality checkingBecause it uses actual diffusion sampling rather than a face-swap model, the results respect the art style and lighting of the original image. The BFS subgraphs need a Flux2 model trained for face re-generation — darkBeast Klein2 works well, but any BFS-capable Flux2 checkpoint should work. There are also LoRAs that add BFS capability to a standard Flux2 model. If your main pipeline uses a different model, the BFS checkpoint must be loaded in the BFS model loader.Upscaling (Groups 3, 9, 10)3. Upscale ImageFirst upscale stage with three independently toggleable methods:Scale to Total Pixels — Resize to 2 megapixels using lanczos interpolationSmart Sharpen+ — 4-pass adaptive sharpening (strength 0.75)Upscale with Model — Neural network upscaler (4x AnimeSharp) — muted by defaultAn Image Comparer shows before/after.9. SeedVR2 UpscaleAI-powered upscaling using the SeedVR2 7B DiT diffusion model — a video upscaler repurposed for single images. Loads its own dedicated DiT model and VAE, processes in LAB color space for better color accuracy. Includes optional pre-resize and RAM cleanup controls. Bypassed by default (resource-heavy).10. Rescale ImageFinal size adjustment with three chained operations:Reinhard Color Match (strength 0.3) — Matches colors back to the original referenceBicubic Rescale at 1.25× with supersample enabled (on by default) — supersampling renders at a higher internal resolution then downscales for cleaner results. Can be turned off for a simpler resizeSmart Sharpen (2 passes) — Final sharpening passDetailing (Groups 4–8)All five detailer groups share an identical architecture built around a component subgraph (SEGS Detailer, 41 internal nodes each). Each detailer:Detects a specific region in the image (face, eye, mouth, etc.)Creates a precise mask using SAM2.1 + VITMatte for clean edgesInpaints just that region at a low denoise to enhance detail without changing the restCompares before/after so you can check the resultEach detailer can optionally load its own dedicated model (separate from the main pipeline), has its own LoRA stack, and its own sampler settings — making them fully independent. Sub-features (model loader, LoRAs, flux guidance, negative prompt, differential diffusion, CFG zero star) are individually toggleable via Mode Bridge controls.4. Detailer: FaceEnhances facial details. Uses Florence-2 VLM with "face" detection → SAM2.1 + VITMatte masking. Dedicated model: darkBeast Blitz6. Denoise: 0.2 (subtle refinement — just enough to sharpen features without changing the face).5. Detailer: EyeEnhances eye details. Same architecture, "eye" detection prompt. Denoise: 0.35 (slightly more aggressive than face to bring out iris detail and reflections).6. Detailer: MouthEnhances mouth/teeth details. "Mouth" detection prompt. Denoise: 0.4 (the most aggressive of the face-area detailers — teeth and lips benefit from more rework).7. Detailer: X-1Body region detailer using YOLO object detection instead of Florence-2. Denoise: 0.3.8. Detailer: X-2Specialized region detailer using YOLO detection. Denoise: 0.4.The detailers run in sequence: face → eye → mouth → X-1 → X-2. Each picks up the output of the previous one automatically. Disable any you don't need — the chain adapts.Watermarks & Save (Groups 11–13)11. Create Watermark — TextOverlays a text watermark ("© Eclipse") on the image. Configurable font, size, color, and position (default: bottom-right). Includes gradient effects (cyan→blue) and optional Drop Shadow + Outer Glow from LayerStyle.12. Create Watermark — LogoOverlays a logo image as a watermark. Loads a logo file, positions it bottom-right with blue gradient effects. Optional desaturation, resize, Drop Shadow, and Outer Glow.13. Save ImageThe final output node. Collects the finished image from the entire pipeline using a priority chain that checks all possible sources in reverse order:watermark_logo → watermark_text → rescale → seedvr2 → yolo2 → yolo1 → mouth → eye → face → upscale → bfs → refiner → init → ref_imageThis means it always saves the output from the last active processing stage, regardless of which groups are enabled. The image is saved with full embedded metadata — workflow JSON, generation data (all models, VAEs, and LoRAs collected from across the entire workflow, plus prompts, dimensions), and all relevant settings.This is the only group you should always keep active. Everything else is optional.Quick Start GuideSimplest Setup — Text to ImageMake sure the image input groups are bypassed (Image Load, Image Load from Folder, Input Video Frame)In the Prompt group, type your prompt in the Wildcard Processor text field (the main prompt input — set to fixed mode by default) and your negative prompt in the Negative Prompt fieldIn the Folder / Size group, set your desired image dimensionsMake sure Model Loader is active with your preferred checkpointMake sure Initial Render and Save Image are activeBypass everything else you don't needQueue the promptImage to ImageEnable Image Load and select your source imageEnable the Resize Image group so your image is resized to match the dimensions set in Folder / Size — this avoids issues with oversized images. You can skip this if your image already matches, but large images may cause problemsIn the Initial Render group, enable the i2i (Denoise) toggle and set your denoise strength (0.3–0.7 is typical)Queue the promptPost-Process an Existing Image (Skip Render)You can load any image and send it straight to Row 2 — bypassing the entire generation step:Enable Image Load and select your imageDisable the Initial Render switch to skip rendering entirelyEnable whichever Row 2 groups you want (Refiner, Detailer: Face, Upscale Image, Face Swap, etc.)Queue — the pipeline picks up your loaded image and runs it through the active post-processing chainThis is one of the most useful features of the workflow. You can bring in any image — from a different workflow, a different tool, or even a photograph — and run it through the full detailing, upscaling, and watermarking pipeline without generating anything.Adding Post-ProcessingGenerate your base image firstEnable the Row 2 groups you want (Refiner, Upscale Image, detailers, etc.)Re-queue — the pipeline will process through all active Row 2 groups automaticallyUsing DetailersEnable any detailer groups you want (Detailer: Face, Detailer: Eye, Detailer: Mouth, Detailer: X-1, Detailer: X-2)Each detailer auto-detects its target region — no manual masking neededCheck the Image Comparer in each group to verify the resultAdjust denoise strength if the changes are too subtle or too aggressiveTroubleshootingThe workflow stops halfway throughMany groups have a Stop toggle that halts execution after that group finishes. This is useful for checking intermediate results, but they are enabled by default in some groups. If the workflow stops unexpectedly, check the Stop toggles in these groups:Image source groups (Image Load, Image Load from Folder, Preview Cropped Image)Initial Render and Initial Render — PreviewEach detailer (Face, Eye, Mouth, X-1, X-2)Disable the Stop toggle in any group where you want execution to continue through to the end.If you queue the workflow and it seems to finish too early — before reaching Save Image — a Stop toggle is almost always the reason. Check the last group that produced output and disable its Stop switch.Toggles reset when activating a groupWhen you change a group's state (mute → active or bypass → active), all toggles in that group reset to their defaults — which means all enabled. This can turn on sub-features you didn't expect, including the Stop toggle. After activating a group, always review its toggle panel and disable anything you don't need.This is the most common source of confusion. If something behaves differently after you re-activate a group, check its toggles — they've all been reset to enabled.Custom Node Packages UsedPrimary (author's own):ComfyUI_Eclipse — The backbone of this workflow. Provides loaders, pipes, Set/Get routing, Mode Bridges, Mute/Bypass Repeaters, Smart Prompt, Smart Folder, Smart Detection, Smart LM Loader, Smart Sampler Settings, Save Images, Image Comparer, and many more.RES4LYF — ClownShark Sampler (advanced sampling with detail boost) — fork of ClownsharkBatwing/RES4LYFThird-party:Raffle — Random prompt generation from tag categoriespysssss Custom-Scripts — ShowText for prompt preview displayKJNodes — Image resize, PatchSageAttentionSeedVR2 VideoUpscaler — AI-powered upscalingNunchaku — Quantized model support and PuLID integrationImpact Pack — SEGSPreview for detailer visualizationLayerStyle — Drop shadow, outer glow, SAM2Ultra, MaskGrow, ImageAutoCrop, and moreLayerStyle Advance — Extended LayerStyle nodes (SAM2 Ultra V2, VITMatte)Advanced ControlNet — ACN_AdvancedControlNetApply_v2BiRefNet — Background removalVHS (VideoHelperSuite) — Video frame loadingIf you made it this far — you're a legend. Now go generate something beautiful. 🌒

HiDream Pro Grade Workflow (Full, Fast, GGUF)
Note: I spend a lot of time on these to make sure they are top notch. If you have ANY issues, I'm very responsive. hit me up and I'll resolve them for you.This is a V1 version. I do not know this model or how it gets used. Please let me know what you woudl liek to see or need, or better yet, what settings youa re used to using as I am clueless on this oneInstagram: https://www.instagram.com/synth.studio.models/Buy me a☕ https://ko-fi.com/lonecatoneThis represents many of hours of work. If you enjoy it, please 👍like, 💬 comment , and feel free to ⚡tip 😉也有中文说明This is an all in one workflow:I2I with prompt generationi2I manipulationStyle manipulationCan use the Full, Fast, or GGUF models without having to rewire or change anythingSage Attention: Speeds up productionAdvanced Clowshark KSamplerUltimate upscaler: For prescale and hi-res fixDetailers: Face, eyes, hand, expressionSeed VR2 Upscaler: Get up to 4k pics, even on low VRAMPost production suite: My pride and joy. Does everything.Does NSFWUses standard nodes so you don't have to download one that someone stole from Sam Shark (Res4lyf) and renamed.

HiDream-O1 Dev 2604 + Z-Image-Turbo (Refiner)
HiDream Meets ZITA dual pass workflow for HiDream-O1 Image Dev 2604 with a refinement pass of Z-Image-TurboREQUIRES:REBELS HiDream-O1 Custom Node Sethttps://github.com/RealRebelAI/Rebels_HiDream-01_Image_Dev_NODESHiDream-O1 Image Dev 2604 (GGUF)https://civitai.com/models/2611889/rebels-hidream-01-image-dev-dev-2604Z-Image-Turbo (bf16)https://civitai.com/models/2169770/rebels-z-image-turbo-fp8bf16Runs 38 steps on hidream and then the second pass of zit runs 4 steps at a denoise of 0.35 to refine details missing in the dev model and clean up artifacting.

Rebels HiDream-01 Image Dev + Dev 2604
USE VERSION 4! UPDATE NODES!SUPPORTS IMAGE DEV 2604 (Link Below)🚀 Key FeaturesMulti-Reference Editing: Inject up to 4 reference images to guide your generations.Integrated LoRA Stack: Manage up to 4 LoRAs with fingerprint-based no-op detection.Advanced Seam Smoothing: Built-in "Patch Model Smoothing" logic to fix bad tiling and textures.Expanded Sampler Support: Full flexibility with native ComfyUI samplers and schedulers.Seam Visualizer: Heatmap-based analysis to monitor and perfect generation consistency.To UPDATE the nodes (if you already have them):open a command prompt in the "Rebels_HiDream_01_Image_dev_NODES" folder.run the command "git pull" to update the nodes.then restart comfy and drag the workflow into comfy!Youtube video tutorial to UPDATE:https://youtu.be/iRo-S9oxGe8?si=tSBfVWDgEDqkeVfoREAD THE ENTIRE DESCRIPTION SO YOU DONT MISS A STEP.node set to run the HiDream-01 Image Dev GGUF from smthem and the comfy-org bf16 modelRebel HiDream-O1 Image Dev (bf16 and GGUF Nodes for ComfyUI)Created by Rebel AIThis repository provides custom ComfyUI nodes to run HiDream-O1-Image-Dev GGUF models locally.HiDream-O1 is a VAE-less, Pixel-Level Unified Transformer. Because it generates raw pixels token-by-token at massive resolutions, running it locally requires careful memory management. These nodes feature upfront dequantization (converting GGUF weights to native PyTorch tensors in system RAM during the load phase) to completely bypass NumPy single-threaded CPU bottlenecks during generation, allowing your GPU to run at maximum efficiency.📦 PrerequisitesBefore installing the custom nodes, you need the upstream model code and the weights.Clone the Upstream HiDream-O1 Repo:REQUIRED. NO EXCEPTIONS. WORKFLOW WILL NOT RUN.The nodes rely on the official pipeline logic. Clone this anywhere on your local system:git clone https://github.com/HiDream-ai/HiDream-O1-Image.gitNEW DEV 2604 MODEL (BF16 + GGUF)Download the bf16 OR gguf Model:https://huggingface.co/smthem/HiDream-O1-Image-Dev/tree/mainREGULAR IMAGE DEV FILESDownload the bf16 Model:https://huggingface.co/Comfy-Org/HiDream-O1-Image/tree/main/checkpointsPlace the bf16 file in CHECKPOINTS: ComfyUI/models/checkpoints/Download the GGUF Model:https://huggingface.co/smthem/HiDream-O1-Image-Dev/blob/main/HiDream-O1-Image-Dev-Q6_K.ggufPlace the .gguf file in DIFFUSION_MODELS: ComfyUI/models/diffusion_models/🛠️ InstallationOption 1: ComfyUI Windows PortableNote: Ensure your ComfyUI portable installation is located on a strict local system drive (e.g., C:\ or D:\). Do not install or run these nodes from a OneDrive-synced folder, as it will cause virtual environment and pathing errors.Open a command prompt and navigate to your portable custom nodes directory:cd \ComfyUI_windows_portable\ComfyUI\custom_nodesClone this repository:git clone https://github.com/RealRebelAI/Rebels_HiDream-01_Image_Dev_NODESInstall the requirements using the embedded Python environment:cd Rebels_HiDream_01_Image_Dev_NODES"..\..\..\python_embeded\python.exe" -m pip install -r requirements.txtOption 2: Desktop / Standard Python EnvironmentNavigate to your ComfyUI custom nodes directory and lone this repository:cd ComfyUI/custom_nodesgit clone https://github.com/RealRebelAI/Rebels_HiDream-01_Image_Dev_NODESActivate your ComfyUI virtual environment and install the requirements:cd Rebels_HiDream_01_Image_Dev_NODESpip install -r requirements.txt🧩 Node DocumentationRebel HiDream-O1 Loader (gguf)Loads the GGUF model and performs upfront dequantization.gguf_name: Select your .gguf model from the diffusion_models folder.tokenizer_path: Default is HiDream-ai/HiDream-O1-Image-Dev. It will automatically fetch the tokenizer config from Hugging Face.upstream_repo_path: The absolute local path to where you cloned the HiDream-O1-Image repository in the prerequisites (e.g., C:\Users\name\HiDream-O1-Image).device: Set to cuda for GPU acceleration.offload:aggressive: Heavily utilizes system RAM offloading (Recommended for 8GB VRAM cards like the RTX 3070).balanced: Standard memory splitting.minimal: Keeps most of the model in VRAM.Note: The loader will hang for a moment at 100% while it unpacks the uint8 GGUF bytes into native PyTorch tensors in your system RAM. This is normal and prevents the CPU from bottlenecking your GPU during the actual generation steps.Rebel HiDream-O1 SamplerConnect the model output from the Loader here.steps: 20-30 is the recommended sweet spot.cfg: Keep at 0.0 Higher CFG combined with heavy styling tags can cause "deep-fried" or crushed-shadow artifacts due to the literal pixel-rendering nature of the model.shift: keep at 1.0. Controls the timestep scheduling curve.scheduler_name:default: Standard sampling.flash: Injects specific noise profiles. Note: The noise_scale_start, noise_scale_end, and noise_clip_std parameters only apply if the scheduler is set to flash.⚠️ Known Limitations & BehaviorsResolution Snapping: HiDream-O1 enforces strict token sequence lengths based on its pre-trained position embeddings. If you input a lower resolution (like 512x512 or 1024x1024), the upstream pipeline will automatically "snap" and force the generation to 2048x2048.Compute Times: Because the model renders a raw 2048x2048 image pixel-by-pixel without a VAE, generation times will be significantly longer than standard latent models (like SDXL or Flux).Prompting Style: Avoid stacking heavy texture tags (e.g., "8k resolution, ultra-detailed, gritty textures") unless you want a heavily illustrated look. For photorealism, use clean, simple photographic terms.🧩 Node Documentation (BF16 / Safetensors)Rebel HiDream-O1 Loader (Safetensors)Loads the pure, uncompressed bfloat16 safetensors model directly, preserving 100% of the original mathematical precision to eliminate quantization artifacts.model_name: Select your .safetensors model from the models/checkpoints/ folder.tokenizer_path: Default is HiDream-ai/HiDream-O1-Image-Dev. It will automatically fetch the tokenizer config from Hugging Face.upstream_repo_path: The absolute local path to where you cloned the HiDream-O1-Image repository in the prerequisites (e.g., C:\Users\name\HiDream-O1-Image).device: Set to cuda for GPU acceleration.offload:aggressive: Heavily utilizes system RAM offloading (Recommended for 8GB VRAM cards like the RTX 3070).balanced: Standard memory splitting.minimal: Keeps most of the model in VRAM.Note: The loader will take a moment to memory-map the massive 16.4GB bfloat16 file and balance it across your system RAM and VRAM. Because this workflow uses the native uncompressed weights instead of heavily quantized blocks, the model is much more sensitive to guidance.Rebel HiDream-O1 SamplerConnect the model output from the Loader here.steps: 20-30 is the recommended sweet spot.cfg: Keep at 0.0 Higher CFG combined with heavy styling tags can cause "deep-fried" or crushed-shadow artifacts due to the literal pixel-rendering nature of the model.shift: Keep at 1.0. Controls the timestep scheduling curve, delaying fine-detail rendering to accommodate the massive canvas size.scheduler_name:default: Standard sampling.flash: Injects specific noise profiles. Note: The noise_scale_start, noise_scale_end, and noise_clip_std parameters only apply if the scheduler is set to flash.⚠️ Known Limitations & BehaviorsResolution Snapping: HiDream-O1 enforces strict token sequence lengths based on its pre-trained position embeddings. If you input a lower resolution (like 512x512 or 1024x1024), the upstream pipeline will automatically "snap" and force the generation to 2048x2048.Compute Times: Because the model renders a raw 2048x2048 image pixel-by-pixel without a VAE, generation times will be significantly longer than standard latent models (like SDXL or Flux).Prompting Style: Avoid stacking heavy texture tags (e.g., "8k resolution, ultra-detailed, gritty textures") unless you want a heavily illustrated look. For photorealism, use clean, simple photographic terms.

Rebels HiDream-01-Image
VERSION 3 (please read)🚀 Key FeaturesMulti-Reference Editing: Inject up to 4 reference images to guide your generations.Integrated LoRA Stack: Manage up to 4 LoRAs with fingerprint-based no-op detection.Advanced Seam Smoothing: Built-in "Patch Model Smoothing" logic to fix bad tiling and textures.Expanded Sampler Support: Full flexibility with native ComfyUI samplers and schedulers.Seam Visualizer: Heatmap-based analysis to monitor and perfect generation consistency.open a command prompt in the "Rebels_HiDream_01_Image_dev_NODES" folder.run the command "git pull" to update the nodes.then restart comfy and drag the workflow into comfy!Rebel HiDream-O1 Image (bf16 Nodes for ComfyUI)Created by Rebel AIThis repository provides custom ComfyUI nodes to run HiDream-O1-Image models locally.HiDream-O1 is a VAE-less, Pixel-Level Unified Transformer. Because it generates raw pixels token-by-token at massive resolutions, running it locally requires careful memory management. These nodes feature upfront dequantization (converting GGUF weights to native PyTorch tensors in system RAM during the load phase) to completely bypass NumPy single-threaded CPU bottlenecks during generation, allowing your GPU to run at maximum efficiency.📦 PrerequisitesBefore installing the custom nodes, you need the upstream model code and the weights.Clone the Upstream HiDream-O1 Repo:REQUIRED. NO EXCEPTIONS. WORKFLOW WILL NOT RUN.The nodes rely on the official pipeline logic. Clone this anywhere on your local system:git clone https://github.com/HiDream-ai/HiDream-O1-Image.gitDownload the bf16 Model:https://huggingface.co/Comfy-Org/HiDream-O1-Image/tree/main/checkpointsPlace the bf16 file in CHECKPOINTS: ComfyUI/models/checkpoints/🛠️ InstallationOption 1: ComfyUI Windows PortableNote: Ensure your ComfyUI portable installation is located on a strict local system drive (e.g., C:\ or D:\). Do not install or run these nodes from a OneDrive-synced folder, as it will cause virtual environment and pathing errors.Open a command prompt and navigate to your portable custom nodes directory:cd \ComfyUI_windows_portable\ComfyUI\custom_nodesClone this repository:git clone https://github.com/RealRebelAI/Rebels_HiDream-01_Image_Dev_NODESInstall the requirements using the embedded Python environment:cd Rebels_HiDream_01_Image_Dev_NODES"..\..\..\python_embeded\python.exe" -m pip install -r requirements.txtOption 2: Desktop / Standard Python EnvironmentNavigate to your ComfyUI custom nodes directory and lone this repository:cd ComfyUI/custom_nodesgit clone https://github.com/RealRebelAI/Rebels_HiDream-01_Image_Dev_NODESActivate your ComfyUI virtual environment and install the requirements:cd Rebels_HiDream_01_Image_Dev_NODESpip install -r requirements.txt🧩 Node DocumentationRebel HiDream-O1 Loader (Safetensors)Loads the bf16 model and performs upfront dequantization.safetensors file: your checkpoint (bf16 file)tokenizer_path: Default is HiDream-ai/HiDream-O1-Image-Dev. It will automatically fetch the tokenizer config from Hugging Face.upstream_repo_path: The absolute local path to where you cloned the HiDream-O1-Image repository in the prerequisites (e.g., C:\Users\name\HiDream-O1-Image).device: Set to cuda for GPU acceleration.offload:aggressive: Heavily utilizes system RAM offloading (Recommended for 8GB VRAM cards like the RTX 3070).balanced: Standard memory splitting.minimal: Keeps most of the model in VRAM.Note: The loader will hang for a moment at 100% while it unpacks the uint8 GGUF bytes into native PyTorch tensors in your system RAM. This is normal and prevents the CPU from bottlenecking your GPU during the actual generation steps.Rebel HiDream-O1 SamplerConnect the model output from the Loader here.steps: 50 is the recommended count.cfg: Keep at 5.0 Higher CFG combined with heavy styling tags can cause "deep-fried" or crushed-shadow artifacts due to the literal pixel-rendering nature of the model.shift: keep at 3.0. Controls the timestep scheduling curve.scheduler_name:default: Standard sampling.flash: Injects specific noise profiles. Note: The noise_scale_start, noise_scale_end, and noise_clip_std parameters only apply if the scheduler is set to flash.⚠️ Known Limitations & BehaviorsResolution Snapping: HiDream-O1 enforces strict token sequence lengths based on its pre-trained position embeddings. If you input a lower resolution (like 512x512 or 1024x1024), the upstream pipeline will automatically "snap" and force the generation to 2048x2048.Compute Times: Because the model renders a raw 2048x2048 image pixel-by-pixel without a VAE, generation times will be significantly longer than standard latent models (like SDXL or Flux).Prompting Style: Avoid stacking heavy texture tags (e.g., "8k resolution, ultra-detailed, gritty textures") unless you want a heavily illustrated look. For photorealism, use clean, simple photographic terms.
The One-Image Workflow: A Forge-Style Static Design for Wan Image, Z-Image, Qwen-Image, Flux2 & Others
Introducing the One-Image Workflow: A Forge-Style Static Design for Wan 2.1/2.2, Z-Image, Qwen-Image, Flux2 & OthersAuthor: Iory98Tested On: Windows 11, ComfyUI Version: v0.4.0 | Frontend Version: v1.33.13 A full Guide is included inside the Workflow.Introduction & Motivation: No More Noodle Soup!ComfyUI is a powerful platform for AI generation, but its graph-based nature can be intimidating. If you are coming from Forge WebUI or A1111, the transition to managing "noodle soup" workflows often feels like a chore. I always believed a platform should let you focus on creating images, not engineering graphs.I created the One-Image Workflow to solve this. My goal was to build a workflow that functions like a User Interface. By leveraging the latest ComfyUI Subgraph features, I have organized the chaos into a clean, static workspace.Why "One-Image"?This workflow is designed for quality over quantity. Instead of blindly generating 50 images, it provides a structured 3-Stage Pipeline to help you craft the perfect single image: generate a composition, refine it with a model-based Hi-Res Fix, and finally upscale it to 4K using modular tiling.While optimized for Wan 2.1 and Wan 2.2 (Text-to-Image), this workflow is versatile enough to support Qwen-Image, Z-Image, and any model requiring a single text encoder.Key Philosophy: The 3-Stage PipelineThis workflow is not just about generating an image; it is about perfecting it. It follows a modular logic to save you time and VRAM:· Stage 1 - Composition (Low Res): Generate batches of images at lower resolutions (e.g., 1088x1088). This is fast and allows you to cherry-pick the best composition.· Stage 2 - Hi-Res Fix: Take your favorite image and run it through the Hi-Res Fix module to inject details and refine the texture.· Stage 3 - Modular Upscale: Finally, push the resolution to 2K or 4K using the Ultimate SD Upscale module.By separating these stages, you avoid waiting minutes for a 4K generation only to realize the hands are messed up. The "Stacked" Interface: How to NavigateThe most unique feature of this workflow is the Stacked Preview System. To save screen space, I have stacked three different Image Comparer nodes on top of each other. You do not need to move them; you simply Collapse the top one to reveal the one behind it.· Layer 1 (Top) - Current vs Previous – Compares your latest generation with the one before it.Action: Click the minimize icon on the node header to hide this and reveal Layer 2.· Layer 2 (Middle): Hi-Res Fix vs Original – Compares the stage 2 refinement with the base image.Action: Minimize this to reveal Layer 3.· Layer 3 (Bottom): Upscaled vs Original – Compares the final ultra-res output with the input. The Control Panels (Subgraphs)The workflow is divided into 7 color-coded Subgraphs. Think of these as "Tabs" in a web browser. Expand them to change settings, then collapse them to keep your workspace clean.1. Wan_Main_Settings (The Dashboard)· Status: Always Expanded· Function: This is your home screen. It contains the parameters you change 90% of the time:o Prompts: Positive text input.o Generation Data: Seed, Sampler, Scheduler, CFG, and Steps.o Image Size: Set your base resolution here.o Toggle Switches: Quickly enable/disable the Refiner, Hi-Res Fix, or Upscaling stages without disconnecting wires.2. Wan_Model_Loaders (Changes Start Here)· Function: Handles loading your checkpoints.· Dual-Stage Loading: You can load a Main Model (High Noise) for structure and a Refiner Model (Low Noise) for details.· Format Freedom: Supports mixing GGUF and Safetensors. You can even load the GGUF version as Main and Safetensors as Refiner to test quantization differences.3. Wan_Model_Parameters (Advanced Tuning)· Function: Technical settings for the models.· Features:o Model Format Selection: Select model types (GGUF vs. Safetensors).o MagCache Optimization: Settings to manage VRAM usage and speed.o Default LoRA Stack: A bundle of 3 slots for "Always On" LoRAs (like Lightning or Turbo LoRAs).4. Wan_Unified_LoRA_Stack· Function: A centralized LoRA loader.· Logic: Instead of managing separate LoRAs for Main and Refiner models, this stack applies your style LoRAs to both. It supports up to 6 LoRAs. Of course, this Stack can work in tandem with the Default (internal) LoRAs discussed above.· Note: If you need specific LoRAs for only one model, use the external Power LoRA Loaders included in the workflow.5. Wan_NAG_Settings (Negative Prompting)· Function: Manages what you don't want in the image.· Feature: Includes NAG (Normalized Attention Guidance) settings, which often provides better adherence to negative prompts than standard methods. Also handles image filename prefixes and saving paths.6. Wan_HiResFix_Settings (Stage 2)· Function: Refines the image generated in Stage 1.· Recommendation: Use this to scale up your chosen "Draft" image. It uses a re-noising technique to add details that didn't exist in the lower resolution version.7. Wan_Upscaler_Settings (Stage 3)Function: The final polish; upscale the image beyond the model’s resolution capabilities.Module: Uses Ultimate SD Upscale.Logic: This allows for Tiled Upscaling, essential for going to 4K resolutions without running out of VRAM. You can feed either the original image or the Hi-Res Fixed image into this module. Requirements & InstallationTo use this workflow, you must have the ComfyUI Manager installed. When you load the workflow, click "Install Missing Custom Nodes".Key Custom Nodes Used:· rgthree-comfy: For the Mute switches and the Image Comparer nodes.· ComfyUI Impact Pack: For advanced workflow logic.· ComfyUI-Easy-Use: For streamlined parameter handling.· ComfyUI-KJNodes: For UI enhancements.· UltimateSDUpscale: For the Stage 3 upscaling.· ComfyUI-GGUF: Required if using GGUF quantized models.· Was Node Suite: For various I/O tasks. Quick Start Guide1. Load Models: Open the Model_Loaders subgraph and select your Wan 2.1 (or other) checkpoints.2. Set Resolution: In Main_Settings, set a fast preview resolution (e.g., 832x1216 or 1024x1024).3. Prompt: Enter your text in Main_Settings or in the connected Positive Prompt Field.4. Generate: Press Queue Prompt.5. Review: Look at the top Current vs Previous preview.6. Refine (Optional): If you like the seed, turn on "Enable Hi-Res Fix" in Main_Settings and generate again to polish the details. collapse the top preview to see the result.

ComfyUI beginner friendly instruct Pix2Pix HiDream Editor GGUF Workflow by SarcasticTOFU
This is a very simple ComfyUI beginner friendly instruct Pix2Pix HiDream Editor GGUF workflow that will work with a single HiDream Editor GGUF model. With this you can edit a very targeted portion of your image (say for example color of dress, hairstyle, background etc.) with a very specific targeted prompt. Make sure you install GGUF addon for ComfyUI using ComfyUI manager and place the correct files in correct places. Also check out my other workflows for SD 1.5 + SDXL 1.0, WAN 2.1 and Flux.How to use this -#1. Just select your desired HiDream Editor GGUF model and other models first and then load #2. the image you want to edit using a very specific targeted instruct Pix2Pix prompt#3. then input your prompt. Keep it brief and very specifically targeted, unlike regular HiDream model non-specific generic prompt will not produce good result. #4. select how many images you want (Change the number besides the "Run" button)#5. select image sampling methods, CFG, steps etc. settings. Too low or too high CFG will not produce good result.#6. finally press the run button to generate. That's it.. Enjoy!### To use this workflow you need to log into huggingface and download necessary files from there (I also included a text file on the archive that has the workflow file, in which you will find even more links for essential downloads for my other workflows) -## HiDream Models===============================================================================================================### Download Links for HiDream Editor Checkpointshttps://huggingface.co/ND911/HiDream_e1_full_bf16-ggufs/resolve/main/hidream_e1_full_bf16-Q2_K.ggufhttps://huggingface.co/QuantStack/HiDream-E1-1-GGUF/resolve/main/HiDream_E1_1_-Q2_K.gguf### Download Links for HiDream VAEhttps://huggingface.co/HiDream-ai/HiDream-I1-Dev/resolve/main/vae/diffusion_pytorch_model.safetensors### Download Links for HiDream Text Encodershttps://huggingface.co/Comfy-Org/HiDream-I1_ComfyUI/resolve/main/split_files/text_encoders/clip_g_hidream.safetensorshttps://huggingface.co/Comfy-Org/HiDream-I1_ComfyUI/resolve/main/split_files/text_encoders/clip_l_hidream.safetensorshttps://huggingface.co/Comfy-Org/HiDream-I1_ComfyUI/resolve/main/split_files/text_encoders/llama_3.1_8b_instruct_fp8_scaled.safetensorshttps://huggingface.co/bartowski/Meta-Llama-3.1-8B-Instruct-GGUF/resolve/main/Meta-Llama-3.1-8B-Instruct-IQ2_M.ggufhttps://huggingface.co/Comfy-Org/HiDream-I1_ComfyUI/resolve/main/split_files/text_encoders/t5xxl_fp8_e4m3fn_scaled.safetensors
![Flexi-Workflow [ ☠️ ]](https://image.civitai.com/xG1nkqKTMzGDvpLrqFT7WA/12b4e287-0549-4e4c-aa12-aaf01aaf16d4/original=true/91048628.jpeg)
Flexi-Workflow [ ☠️ ]
⚠️ NOTICE ⚠️This workflow has now morphed into the UniFlex-Workflow 9.0!!!
HiDream+Lanpaint Super Acceleration Complex External Expansion Workflow
B-site video: https://www.bilibili.com/video/BV1X7uHzXESF/Knowledge Planet: https://t.zsxq.com/7F90AGraphic tutorial: https://t.zsxq.com/lNK8vThe workflow is very simple to use, and I have uploaded a tutorial on how to use it on YouTube. You can try it out and follow the tutorial and Civitai's workflow to easily reproduce the results. Thank you. If you have any other questions, please leave a comment in the comment sectionThis tutorial is very important, not watching it will surely lead to a lot of problems! Watch the video tutorial before trying !!!! Very important! Especially a key point at the end!

Hi Dream Uncensored Workflow
Watch the Video to know more and all the links in the description of the video.
T5xxl-Unchained Lora + Workflow
Flux fix Update - 7/2/25 - evening:There was a bug with the Flux loader for t5xxl, so I jiggered it and got it working for todays evening push.Will likely need to do something similar for SD3 and SD35 as well.Workflow Release - 7/2/25 - morning:Current workflow requires the comfy-clip-shunts node addon. You don't NEED to use the shunts, but it comes with the clip loaders that support the t5-unchained.These loaders work BECAUSE they essentially replace the original sd function calls with function calls directly linking utilization.For the shunts, you can use standard bert uncased or bert cased, instead of beatrix but the results won't be as accurate.Shunt code with unchained.https://github.com/AbstractEyes/comfy-clip-shunts/tree/devFull untrained unchained model:https://huggingface.co/AbstractPhil/t5xxl-unchainedI have a ton of clips loaded here. The omega 24's are very good for this, since they're closer to the original vit-l-14 and laion vit-bigG.https://huggingface.co/AbstractPhil/clipsAugmented and improved by res4lyf, I would suggest installing it.https://github.com/ClownsharkBatwing/RES4LYFSpecial thanks to Kaoru8 for their base t5xxl-unchained conversion and repo. It doesn't have any additional training on top of the base T5, but it's converted and the training that I fed it with clearly works.https://huggingface.co/Kaoru8/T5XXL-UnchainedNot bad... a fair working sd35 prototype in a week.By this time next week I hope to have the Flux variation fully operational and the clip suite in prototype stages.I genuinely need some time to rest. This was very taxing on my mental health it seems, so I'm going to take some time to recover and regenerate.I'm going to take time to work on my tools and do smaller finetunes rather than full finetunes. These larger finetunes are expensive and very taxing on the body and mind when the programs don't function correctly.Yes this is a T5 lora. It's treated as though the T5xxl's lora_te3 is the "T5xxl" text encoder. I've extracted the lora_te3 layers from the original sd35 trained lora and resaved. Simple process really, no telling what sort of defectiveness it has. I doubt it'll load in anything but comfyui or forge, but here it is.You can have a conversation with the loaded T5xxl-unchained with the lora weights applied; using standard LLM inference if you like. It'll summarize pretty well.800 meg lora. The process is a lot easier than I thought it would be.https://huggingface.co/AbstractPhil/SD35-SIM-V1/tree/main/REFIT-V1from safetensors.torch import load_file, save_file # Load the safetensors model input_path = "I:/AIImageGen/AUTOMATIC1111/stable-diffusion-webui/models/Lora/test/sd35-sim-v1-t5-refit-v2-Try2-e3-step00003000.safetensors" output_path = "I:/AIImageGen/AUTOMATIC1111/stable-diffusion-webui/models/Lora/test/t5xxl-unchained-lora-v1.safetensors" model = load_file(input_path) # Filter out TE1 and TE2 tensors filtered = {k: v for k, v in model.items() if not (k.startswith("lora_te1") or k.startswith("lora_te2") or k.startswith("lora_unet")) } print(f"Filtered out {len(model) - len(filtered)} tensors.") print(f"Remaining tensors: {filtered.keys()}") # Save result save_file(filtered, output_path) print(f"✅ Saved cleaned model without TE1/TE2 tensors to:\n{output_path}") Rip them yourself if you want. The newest T5 is still training.Requires the correct tokenizer and config for the T5xxl and the T5xxl model weights to function.Without the base t5xxl-unchained, tokenizer, and correct dimensions configuration; you will receive a size mismatch error.You need the big ass T5xxl fp16 or fp8. It was trained in fp16 so you'll get better results from the finetune with it. You can probably just tell comfyui or forge to downscale it.https://huggingface.co/AbstractPhil/t5xxl-unchained/resolve/main/t5xxl-unchained-f16.safetensorsWhen the clip-suite is ready, it'll automatically scale in program and allow hardware-level quantization hot-conversion (Q2, Q4, Q8, etc) utilization, and saving within ComfyUI.At that point you'll only need one model and everything will just convert at runtime using the META C++ libs.https://huggingface.co/AbstractPhil/t5xxl-unchained/blob/main/config.jsonhttps://huggingface.co/AbstractPhil/t5xxl-unchained/blob/main/tokenizer.jsonTo modify Forge you can swap these files with the ones at the address; the only exception being the sd3_conds.py needing a direct modification to the template contained within code.Make a backup of the original configs if you want. It doesn't matter though. The t5xxl-unchained in it's vanilla form behaves identically to the original t5xxl.------------------------------------------------------------------------ configs ------------------------------------------------------------------------ modules/models/sd3/sd3_conds.py backend/huggingface/stabilityai/stable-diffusion-3-medium-diffusers/text_encoder_3 backend/huggingface/black-forest-labs/FLUX.1-dev/text_encoder_2/config.json backend/huggingface/black-forest-labs/FLUX.1-schnell/text_encoder_2/config.json ------------------------------------------------------------------------- tokenizers ------------------------------------------------------------------------- backend/huggingface/black-forest-labs/FLUX.1-dev/tokenizer_2/tokenizer.json backend/huggingface/black-forest-labs/FLUX.1-schnell/tokenizer_2/tokenizer.json backend/huggingface/stabilityai/stable-diffusion-3-medium-diffusers/tokenizer_3/tokenizer.json

HelloMeme+V5 Single Figure Style Transfer V1 (Customized Style)
B-site video: https://www.bilibili.com/video/BV1dWcpeUE4v/Knowledge Planet: https://t.zsxq.com/7F90AGraphic tutorial: https://t.zsxq.com/lNK8vThe workflow is very simple to use, and I have uploaded a tutorial on how to use it on YouTube. You can try it out and follow the tutorial and Civitai's workflow to easily reproduce the results. Thank you. If you have any other questions, please leave a comment in the comment sectionThis tutorial is very important, not watching it will surely lead to a lot of problems! Watch the video tutorial before trying !!!! Very important! Especially a key point at the end!

HiDream Modular WF (discontinued)
This workflow is now discontinued as I will focus on other AI models.I made a new worklow for HiDream, and with this one I am getting incredible results. Even better than with Flux!It's a txt2img workflow, with hires-fix, detail-daemon and Ultimate SD-Upscaler.HiDream is very demanding, so you may need a very good GPU to run this workflow. I am testing it on an L40s (on MimicPC), as it would never run on my 16Gb VRAM card.Also, it takes quite a bit to generate a single image (mostly because the upscaler), but the details are incredible and the images are much more realistic than Flux (no plastic skin, no flux-chin).For v.1.0: You can also use GGUF model files, just replace the "Load Diffusion Model" node at the beginning of the WF with the "Unet Loader (GGUF)" node. See below:In v.1.1 the two model-loader are both available, you can choose which one to use just selecting the standard model or the GGUF one in the "Model switch" node.On my RTX 4070 Ti Super with 16Gb Vram I can run the workflow with the Q8 GGUF model file. Results are excellent!HiDream E1 (image editing module) - for version 1.1Just load an image and write what you would like to change in the positive prompt (you can also add a negative prompt). Due to model limitation, the image will always be resized and cropped to a 768x768 image (larger images will show a terrible lateral shift) and then resized to 1024x1024. It can't run in the Ultimate SD Upscaler, since the HiDream E1 model would overcook the image during upscale (so do not activate the Upscale Module!).Results, for photo-realistic images are not that good, so do not expect any incredible output. But still, by using the right settings, you can achieve decent results.==========================================================⚡️ Buzz for the Best Images ⚡️Every weekend, I will reward some Buzz to the best image added to the Workflow's gallery!

ComfyUI — HiDream Advanced — Daemon +Meta
Hello there and thanks for checking out this workflow!—Purpose—Built to provide a first glimpse at the new open-source HiDream I1 model streamlining the most useful features with ease of use and modular versatility in mind.—Features—Full metadata; recognized by CivitAIGGUF supportLoRA loadersWildcard promptingInstallation and download guide for models and nodesMultiple passes with optional upscales— 1st : Detail Daemon Sampling— 2nd : Detail Daemon + UltimateSDUpscale— ADetailer— Inpainting—Custom Nodes—ComfyUI-Custom-ScriptsComfyUI-Detail-DaemonComfyUI-GGUFComfyUI-Image-SaverComfyUI-Impact-PackComfyUI-Impact-SubpackComfyUI-KJNodesComfyUI-mxToolkitComfyUI_Comfyroll_CustomNodesComfyUI_essentialsComfyUI_IPAdapter_plusComfyUI_UltimateSDUpscalecg-use-everywherergthree-comfywas-node-suite-comfyuiAll of which can be installed through the ComfyUI-Manager—Troubleshooting—If nodes show up red (failing to load), check the 'Install Missing Custom Nodes' tab of the ComfyUI Manager for the missing node packs and install them.Please check if all custom node packs load properly after installing, i.e. no (IMPORT FAILED) messages next to any of them in the console upon ComfyUI startup.Always reload/drag'n'drop the original, downloaded workflow file into ComfyUI to reload an intact version of the workflow.→ The last opened workflow that appears on startup only shows a cached version.—Thanks—The workflow would not be possible as is without these custom node packs. If you want to support the custom node creators, give them a ⭐ on their github repos! Thank you!Feel free to ask any questions, share improvements or suggestions in the comment section!Also let me know if you encounter any confusing points I can elaborate on and focus on improving for the next update!
HiDream Native Implementation of Comfyui Workflow
B-site video: https://www.bilibili.com/video/BV1dWcpeUE4v/Knowledge Planet: https://t.zsxq.com/7F90AGraphic tutorial: https://t.zsxq.com/lNK8vThe workflow is very simple to use, and I have uploaded a tutorial on how to use it on YouTube. You can try it out and follow the tutorial and Civitai's workflow to easily reproduce the results. Thank you. If you have any other questions, please leave a comment in the comment sectionThis tutorial is very important, not watching it will surely lead to a lot of problems! Watch the video tutorial before trying !!!! Very important! Especially a key point at the end!

Beating Flux, HiDreamVSFLUX Compare and Contrast to Accelerate Workflows
B-site video: https://www.bilibili.com/video/BV1dWcpeUE4v/Knowledge Planet: https://t.zsxq.com/7F90AGraphic tutorial: https://t.zsxq.com/lNK8vThe workflow is very simple to use, and I have uploaded a tutorial on how to use it on YouTube. You can try it out and follow the tutorial and Civitai's workflow to easily reproduce the results. Thank you. If you have any other questions, please leave a comment in the comment sectionThis tutorial is very important, not watching it will surely lead to a lot of problems! Watch the video tutorial before trying !!!! Very important! Especially a key point at the end!
EKKIVOK - HIDREAM I1 FULL GGUF BUNDLE
What’s HIDREAM?HIDREAM is an open-source image generation model that transforms your text prompts into jaw-dropping artwork. With 17 billion parameters, it’s got the brains to handle everything from quick sketches to masterpiece-level details. This workflow brings HIDREAM to life in ComfyUI, offering three versions and multiple CLIP configurations so you can tailor it to your vibe whether you’re after speed or stunning quality.Workflow Description :Choose Your HIDREAM ModeHIDREAM comes in three flavors, each with its own personality:Fast (Runner): Lightning-quick generation. Lower quality but perfect for rapid prototyping or weaker hardware. Ideal when speed trumps detail—think "instant art" vibes.Dev (Cool): The balanced all-rounder. Decent quality without taxing your system too hard. Great for most projects solid results, reasonable wait time.Full (Rocket): The king of quality. Delivers the most detailed, jaw-dropping images. Slowest of the bunch, but worth it for pros with beefy GPUs.Pick your mode based on your hardware and how much you value speed vs. perfection!CLIP Loaders: How Many Brains?CLIP models are the secret sauce that decode your text prompts for HIDREAM. More CLIPs = better understanding, but they’ll need more power. Here’s the breakdown:1 Clip (Dog): One CLIP model, fast and light. Best for simple prompts like "cat in a hat." Might miss the nuance in trickier ideas.2 Clips (Sunrise): Two CLIP models, sharper prompt reading. Handles stuff like "cat in a hat on a rainy street." A sweet spot for detail without too much lag.4 Clips (Robot): Four CLIP models, maximum precision. Perfect for epic prompts like "steampunk cat in a hat piloting a zeppelin." Resource-hungry but delivers the goods.Choose your CLIP count based on prompt complexity and your PC’s muscle!How to Use This WorkflowPick Your HIDREAM Mode: Fast, Dev, or Full—select your version via the LoaderGGUF node (e.g., hidream-i1-full-Q4_K_S.gguf for Full).Set Your CLIP Config: Choose 1 Clip (ClipLoaderGGUF), 2 Clips (DualClipLoaderGGUF), or 4 Clips (QuadrupleClipLoaderGGUF).Drop Your Prompt: Add your creative spark to the CLIPTextEncode nodes (e.g., "a car" or something wilder).Generate & Save: Hit run, let the KSampler and VAEDecode do their thing, and grab your masterpiece from the SaveImage node.Here is some exemple :FAST :DEV :FULL :Download Your ModelsYou’ll need these files to get rolling (all in GGUF format for VRAM efficiency):HIDREAM Models:Fast: https://huggingface.co/city96/HiDream-I1-Fast-ggufDev: https://huggingface.co/city96/HiDream-I1-Dev-ggufFull: https://huggingface.co/city96/HiDream-I1-Full-ggufVAE (Same as Flux): https://huggingface.co/second-state/FLUX.1-dev-GGUF/blob/main/ae.safetensorsText Encoders (T5XXL): https://huggingface.co/second-state/FLUX.1-dev-GGUF/tree/mainVision Encoder: https://huggingface.co/chatpig/llama-3.1-8b-encoder-ggufPro TipsLow on VRAM? Go Fast + 1 Clip for a smooth ride.Got a beast PC? Full + 4 Clips = gallery-worthy art.Prompt Game: Keep it simple for 1 Clip; go nuts with 4 Clips for complex ideas.Experiment! Mix and match modes and CLIPs to find your sweet spot.Crafted by EKKIVOK.Check out more of my work on Civitai (https://civitai.com/user/EKKIVOK) or join the crew on Discord (https://discord.gg/fW4zVnDaNx) for updates and chats. Let’s make some art, fam!This workflow’s got everything you need to harness HIDREAM’s power flexible, fun, and ready to roll. Download, tweak, and create something dope!
HiDream-E1-Workflow
HiDream-E1: Image Editing Model***it must start by the image if not u missing the update HiDream-E1 on Hugging FaceHiDream-E1 is an advanced image editing model based on HiDream-I1.🧠 HiDream Model Resources🦙 GGUF ModelsPrimary model source: HiDream (Civitai)Available quantizations:fp8Q3_K_LQ4_K_SOther GGUF variants:🔗 HuggingFace - ND911 HiDream e1 full bf16 GGUFs🎨 ComfyUI Integration (FP16)Model source for ComfyUI:🔗 Comfy-Org - HiDream-I1 for ComfyUI📁 Recommended File Structure📂 ComfyUI/ ├── 📂 models/ │ ├── 📂 text_encoders/ │ │ ├── clip_l_hidream.safetensors │ │ ├── clip_g_hidream.safetensors │ │ ├── t5xxl_fp8_e4m3fn_scaled.safetensors │ │ └── llama_3.1_8b_instruct_fp8_scaled.safetensors │ ├── 📂 vae/ │ │ └── ae.safetensors │ ├── 📂 diffusion_models/ │ │ └── hidream_e1_full_bf16.safetensors │ └── 📂 lora/ │ └── HiDream-E1-Full.safetensors ← Enhancement LoRA 🔤 Text Encodersclip_l_hidream.safetensorsclip_g_hidream.safetensorst5xxl_fp8_e4m3fn_scaled.safetensorsllama_3.1_8b_instruct_fp8_scaled.safetensors🧬 VAEae.safetensors🌌 Diffusion Modelhidream_e1_full_bf16.safetensors✨ Enhancement LoRAHiDream-E1-Full.safetensors(Place this in ComfyUI/models/lora/)

INPAINT simple workflow HiDream | UPSCALE | LORA | GGUF | CIVITAI Metadata
Resources you need:📂Files :24 gb Vram : base16 gb Vram: Q8_012 gb Vram: Q5_K_S<12 gb Vram: Q4_K_SFor base versionModel : hidream_i1_dev_fp8.safetensorsin ComfyUI\models\diffusion_modelsFor GGUF versionGGUF_Model : hidream-i1-dev-QX_K_S.ggufin ComfyUI\models\unetVAE : ae.safetensorsin ComfyUI\models\vaeCLIP : clip_l_hidream.safetensors, clip_g_hidream.safetensors, t5xxl_fp8_e4m3fn_scaled.safetensors and llama_3.1_8b_instruct_fp8_scaled.safetensorsin ComfyUI\models\clip📦Custom Nodes :ComfyUI-GGUFrgthree-comfyComfyUI-KJNodesComfyUI-mxToolkitComfyUI Image SaverComfyUI-Easy-UseComfyUI-Detail-DaemonComfyUI Upscaler TensorRT
Workflow - HiDream Full FP8 + Multistyler 370 Styles
Workflow - HiDream Full FP8 + Multistyler 370 StylesHow to install .csv fileCreate a Styles folder and insert the styles.csv file into it.Right-click on the fileCopy as PathIn ComfyUI open was_suite_config.json in NotepadComfyUI_windows_portable\ComfyUI\custom_nodes\was-node-suite-comfyui\was_suite_config.json"Paste path hereImportant! You have to write another slash"D:\Styles\styles.csv" - wrong"D:\\Styles\\styles.csv" - goodIn Notepad File and Save.Here's a video tutorial from Pixaroma. It is for Flux but this process is the same.STYLESIn the styles you will find styles from me and from Pixaroma.Examplesprompt: alien Ninja walking, hood, catana in his handPrompt: Ninja walking, hood, catana in his handstyle1: Sci-Fi | Xenomorphstyle2: Sci-Fi | Biomechanicalstyle3: Fantasy | Fantasy Watercolor DreamyPrompt: woman's face covered with a patternstyle1: Art | Newspaper Patternstyle2: Art | Analog BlurredPrompt: woman's face covered with a lettersstyle1: Typography | Typographystyle2: "Paint | Dark GhibliPrompt: "woman's faceStyle: Paint | TenebrismRecommended generation settingsThese recommended generation settings are different from those in the tutorial, but they work well for me.Samplerdeisuni_pcdpm_2Schedulerkl_optimalSteps25LINKSHiDream tutorialPIXAROMATHANK YOU to Pixaroma for his instructions and permission to use his csv file.

Cramped AF
This is a workflow that has a spot for Flux, HiDream, Pony, and SD3.5, PLUS an Upscaler. They aren't locked to those, I just made them into groups.So you'll want to collapse and open things as you use them otherwise things can get very cramped as it is pretty much full of the stuff, especially in the first group.For real though, you don't even have to leave that particular group because all the connections are there, you just have to disconnect and reconnect as you see fit.It really is fun to use if you're deranged.

HiDream-Full GGUF+FP8+WORKFLOW (Q4 for 12GB Q2 for 8GB)
The most useful versions of GGUF(+the FP8 version)EDIT:*GGUF Workflow, since i can't upload the .json here: https://www.kombitz.com/2025/04/17/simple-comfyui-workflow-for-hidream-i1-gguf/*missing nodes? run Comfy update\update_comfyui.bat*quality comparison here: https://artificialanalysis.ai/text-to-image/model-family/hidream#qualityLighter versions of the Full HiDream quantized by city96download and use locally. nodes here:https://github.com/city96/ComfyUI-GGUFvae and text encoders here:https://huggingface.co/Comfy-Org/HiDream-I1_ComfyUI/tree/main/split_files
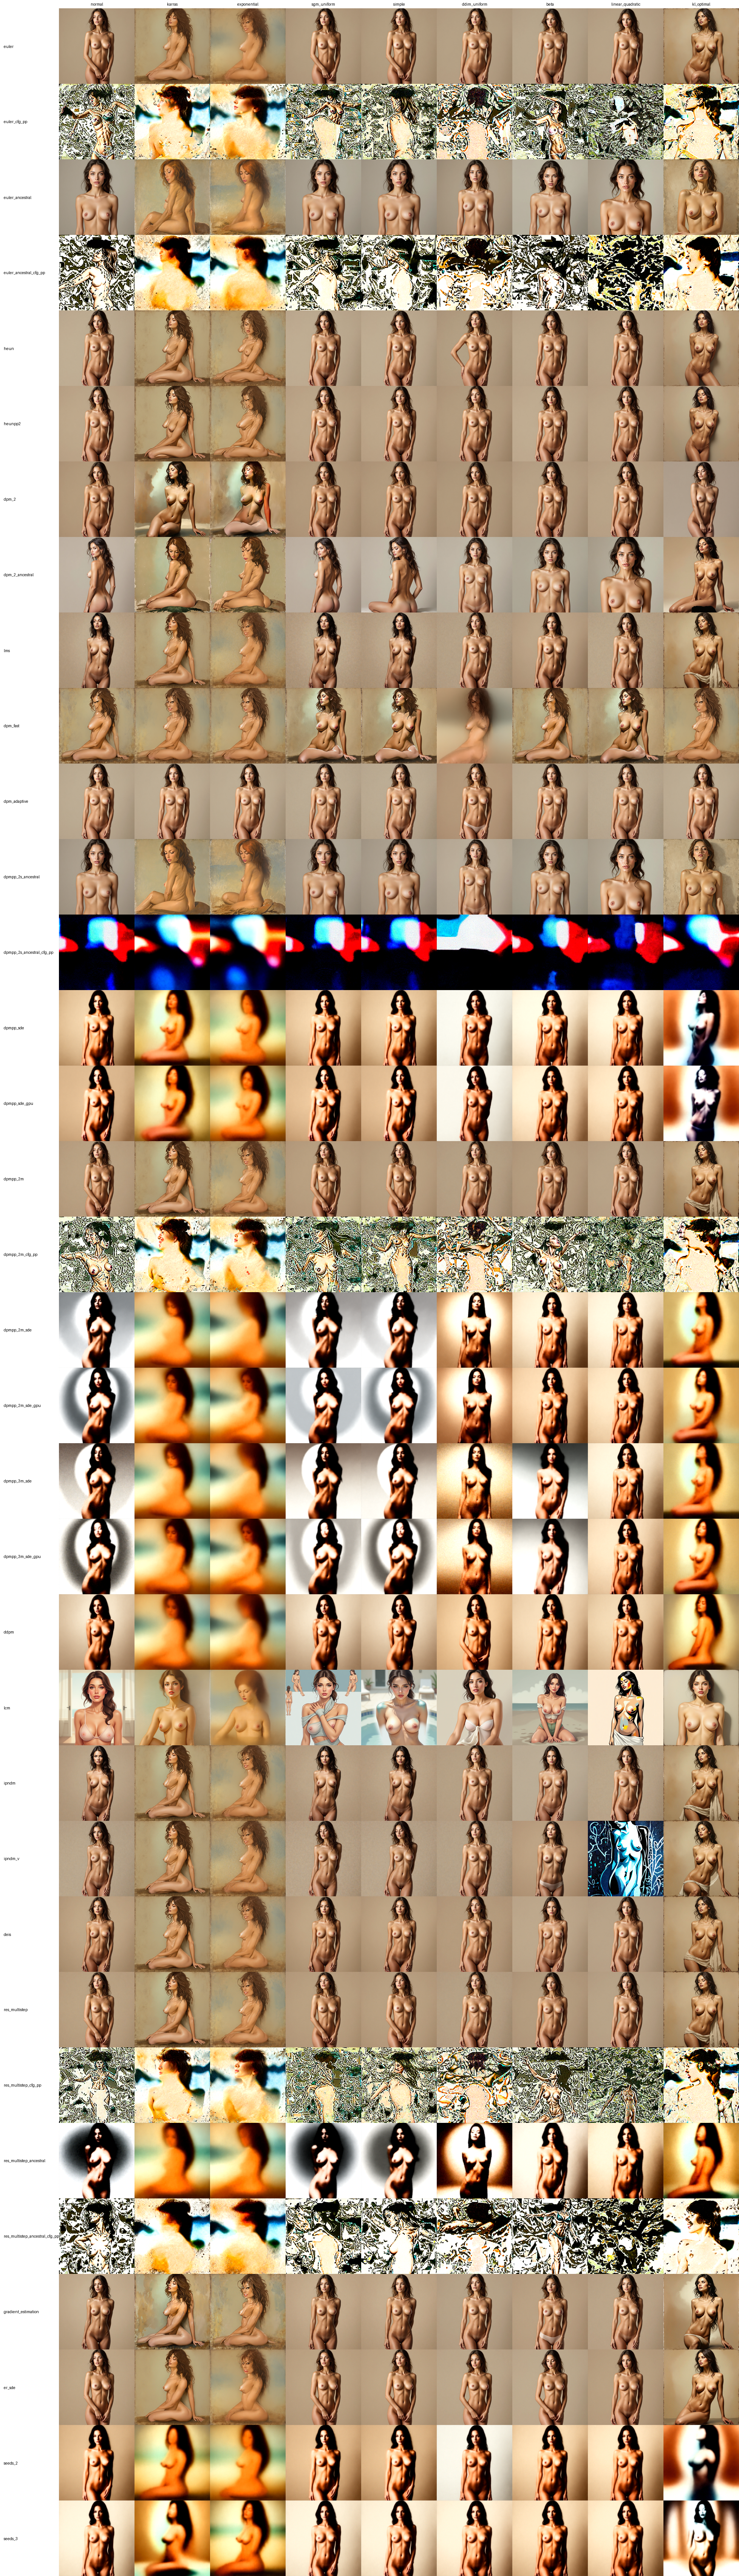
Hidream test all samplers with all schedulers
Execute the same positive prompt, negative prompt, steps, denoise and cfg with every possible combination of samplers and schedulers. 306 KSamplers in total.All images are saved into 306 different folders with this path format: output/hidream/sampler_scheduler/sampler_scheduler_number_.pngYou can use the python script to generate composite images like the ones shown as examples. Copy the combine.py into the output/hidream folder. Edit the python script and change the line "image_gen_number = "00001" to whatever the number of your generation is. Youll have to use pip to install some packages but i forgot which ones.Youll have to reopen the workflow after every use because comfyui changes all "int" nodes above 2048 to 2048. so you can only execute that workflow one time basically but its a not an issue since running the entire workflow takes 10 hours on a 5090.I recommend deactivating the hardware acceleration in your browser while executing this workflow or itll use a lot of vram.Also yes i realize theres better and easier ways of doing the exact same thing.

Hi Dream GGUF Workflow
Source (gguf): https://huggingface.co/city96/HiDream-I1-Full-gguf/tree/main from city96Source (fp8): https://huggingface.co/calcuis/hidream-gguf/tree/main from calcuisThe VAE and text encoders can be downloaded from Comfy-Org here!GGUF Custom node https://github.com/city96/ComfyUI-GGUF

HiDream Full FP8 Workflow + Styler
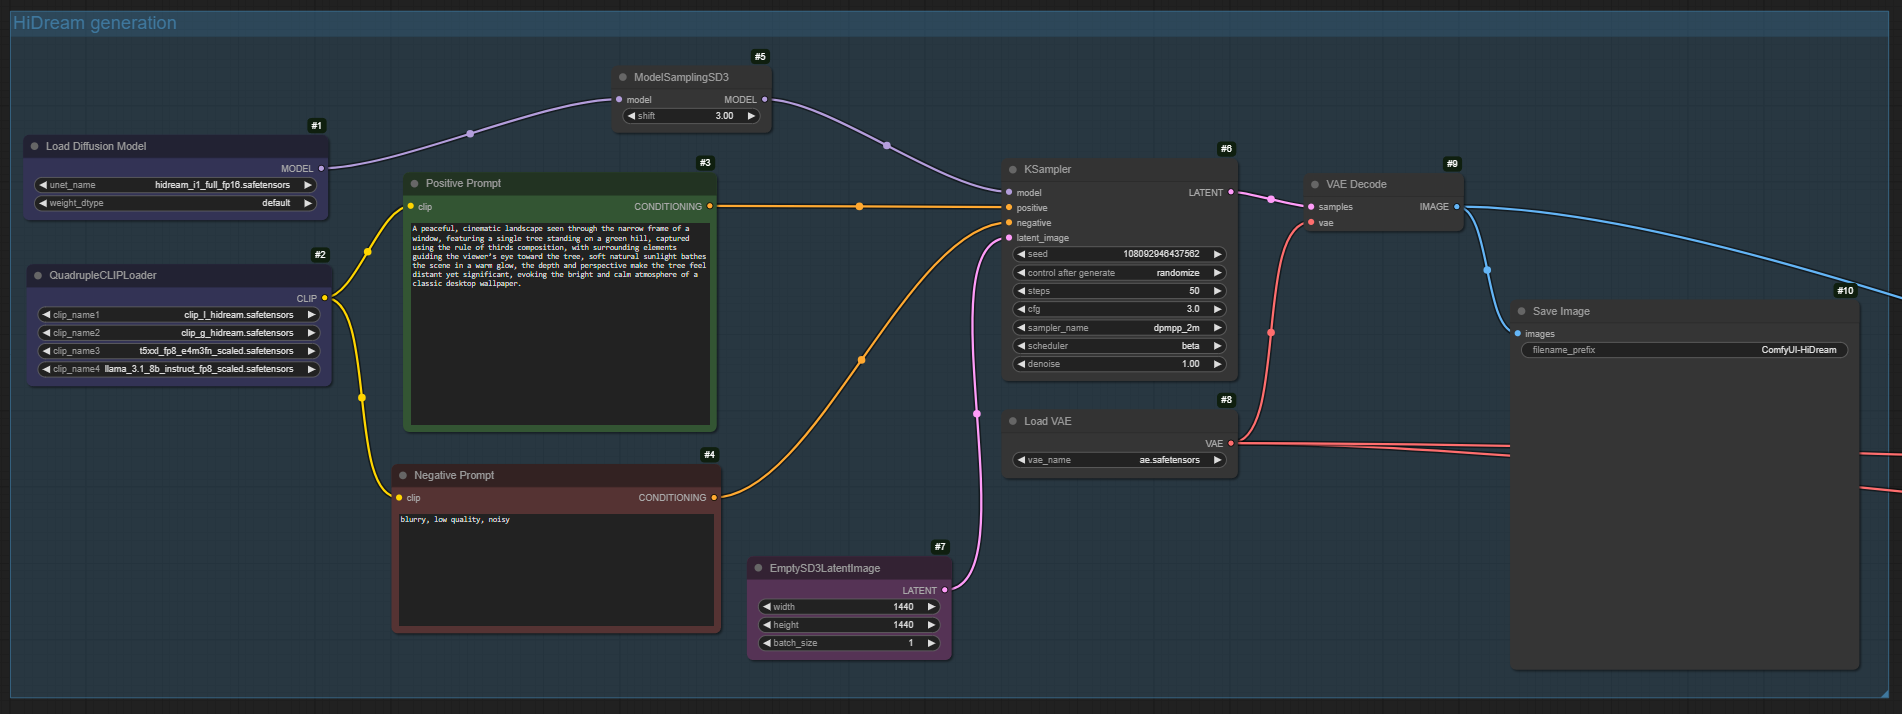
Workflow - HiDream Full FP8 + StylerRecommended generation settingsThese recommended generation settings are different from those in the tutorial, but they work well for me.Samplerdeisuni_pcdpm_2Schedulerkl_optimalSteps25HiDream tutorialThank you ZephyrKnight for correcting my English.
HID IMG2IMG
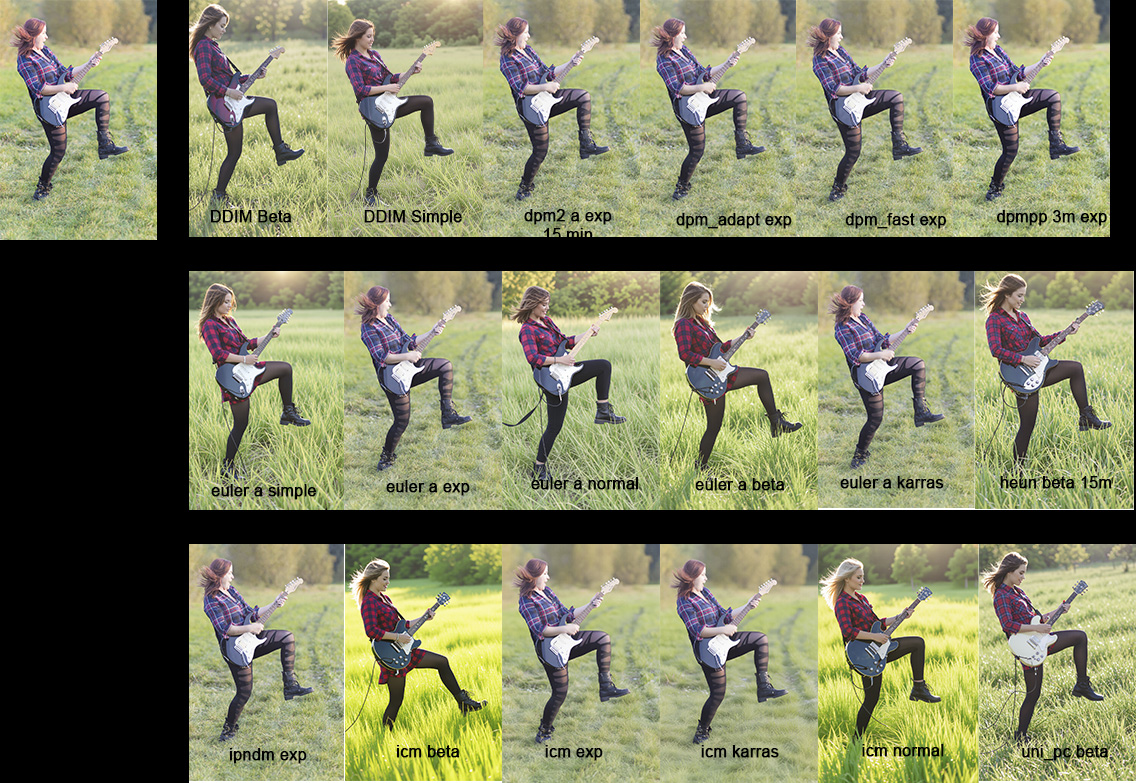
Img2Img fo HiDream
My personal basic HiDream Full + Flux.Dev refiner workflow
Basic HiDream + Flux workflow I use.
Hi-Dream
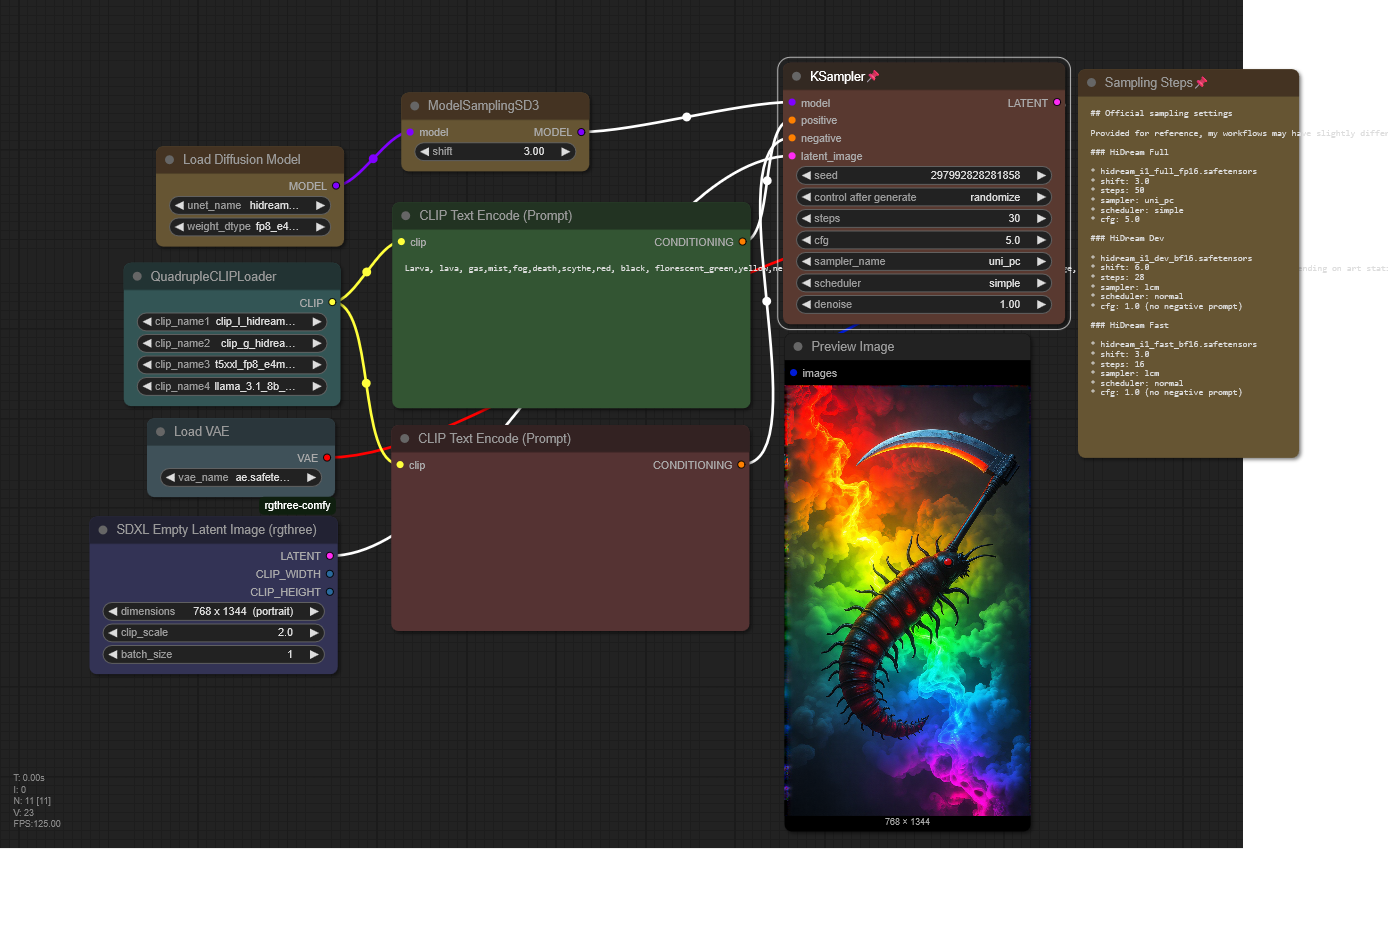
This is setup to work with the non gguf files. https://huggingface.co/Comfy-Org/HiDream-I1_ComfyUI/tree/main/split_files/diffusion_modelsSampling settings are on the workflow
HiDream IMG2IMG simple workflow
Simple IMG2IMG workflow using HiDream (hidream_i1_full_fp8).Results are pretty solid.Use a denoise value between 0.3–0.9.0.3 = more similarity to the original imageHigher values = more creative deviationIf you're going above 0.5 denoise, you’ll likely need more refined prompts. ChatGPT or another AI with image analysis capabilities can help with that.Tested on:GPU: 4060Ti (16GB VRAM)RAM: 32GBImage: 920x1344, 50 stepsGeneration time: ~5 minutesQuality is very good — though you might want to try lighter models if performance is an issue (or you are just impatient, lol)P.S. Only use this if you’re sure HiDream is installed and running properly on your machine. I’m not tech-savvy, so I won’t be able to help troubleshoot.

HiDream - A Successful Attempt
Just another HiDream workflow, though I feel it's a little more organized and all that.
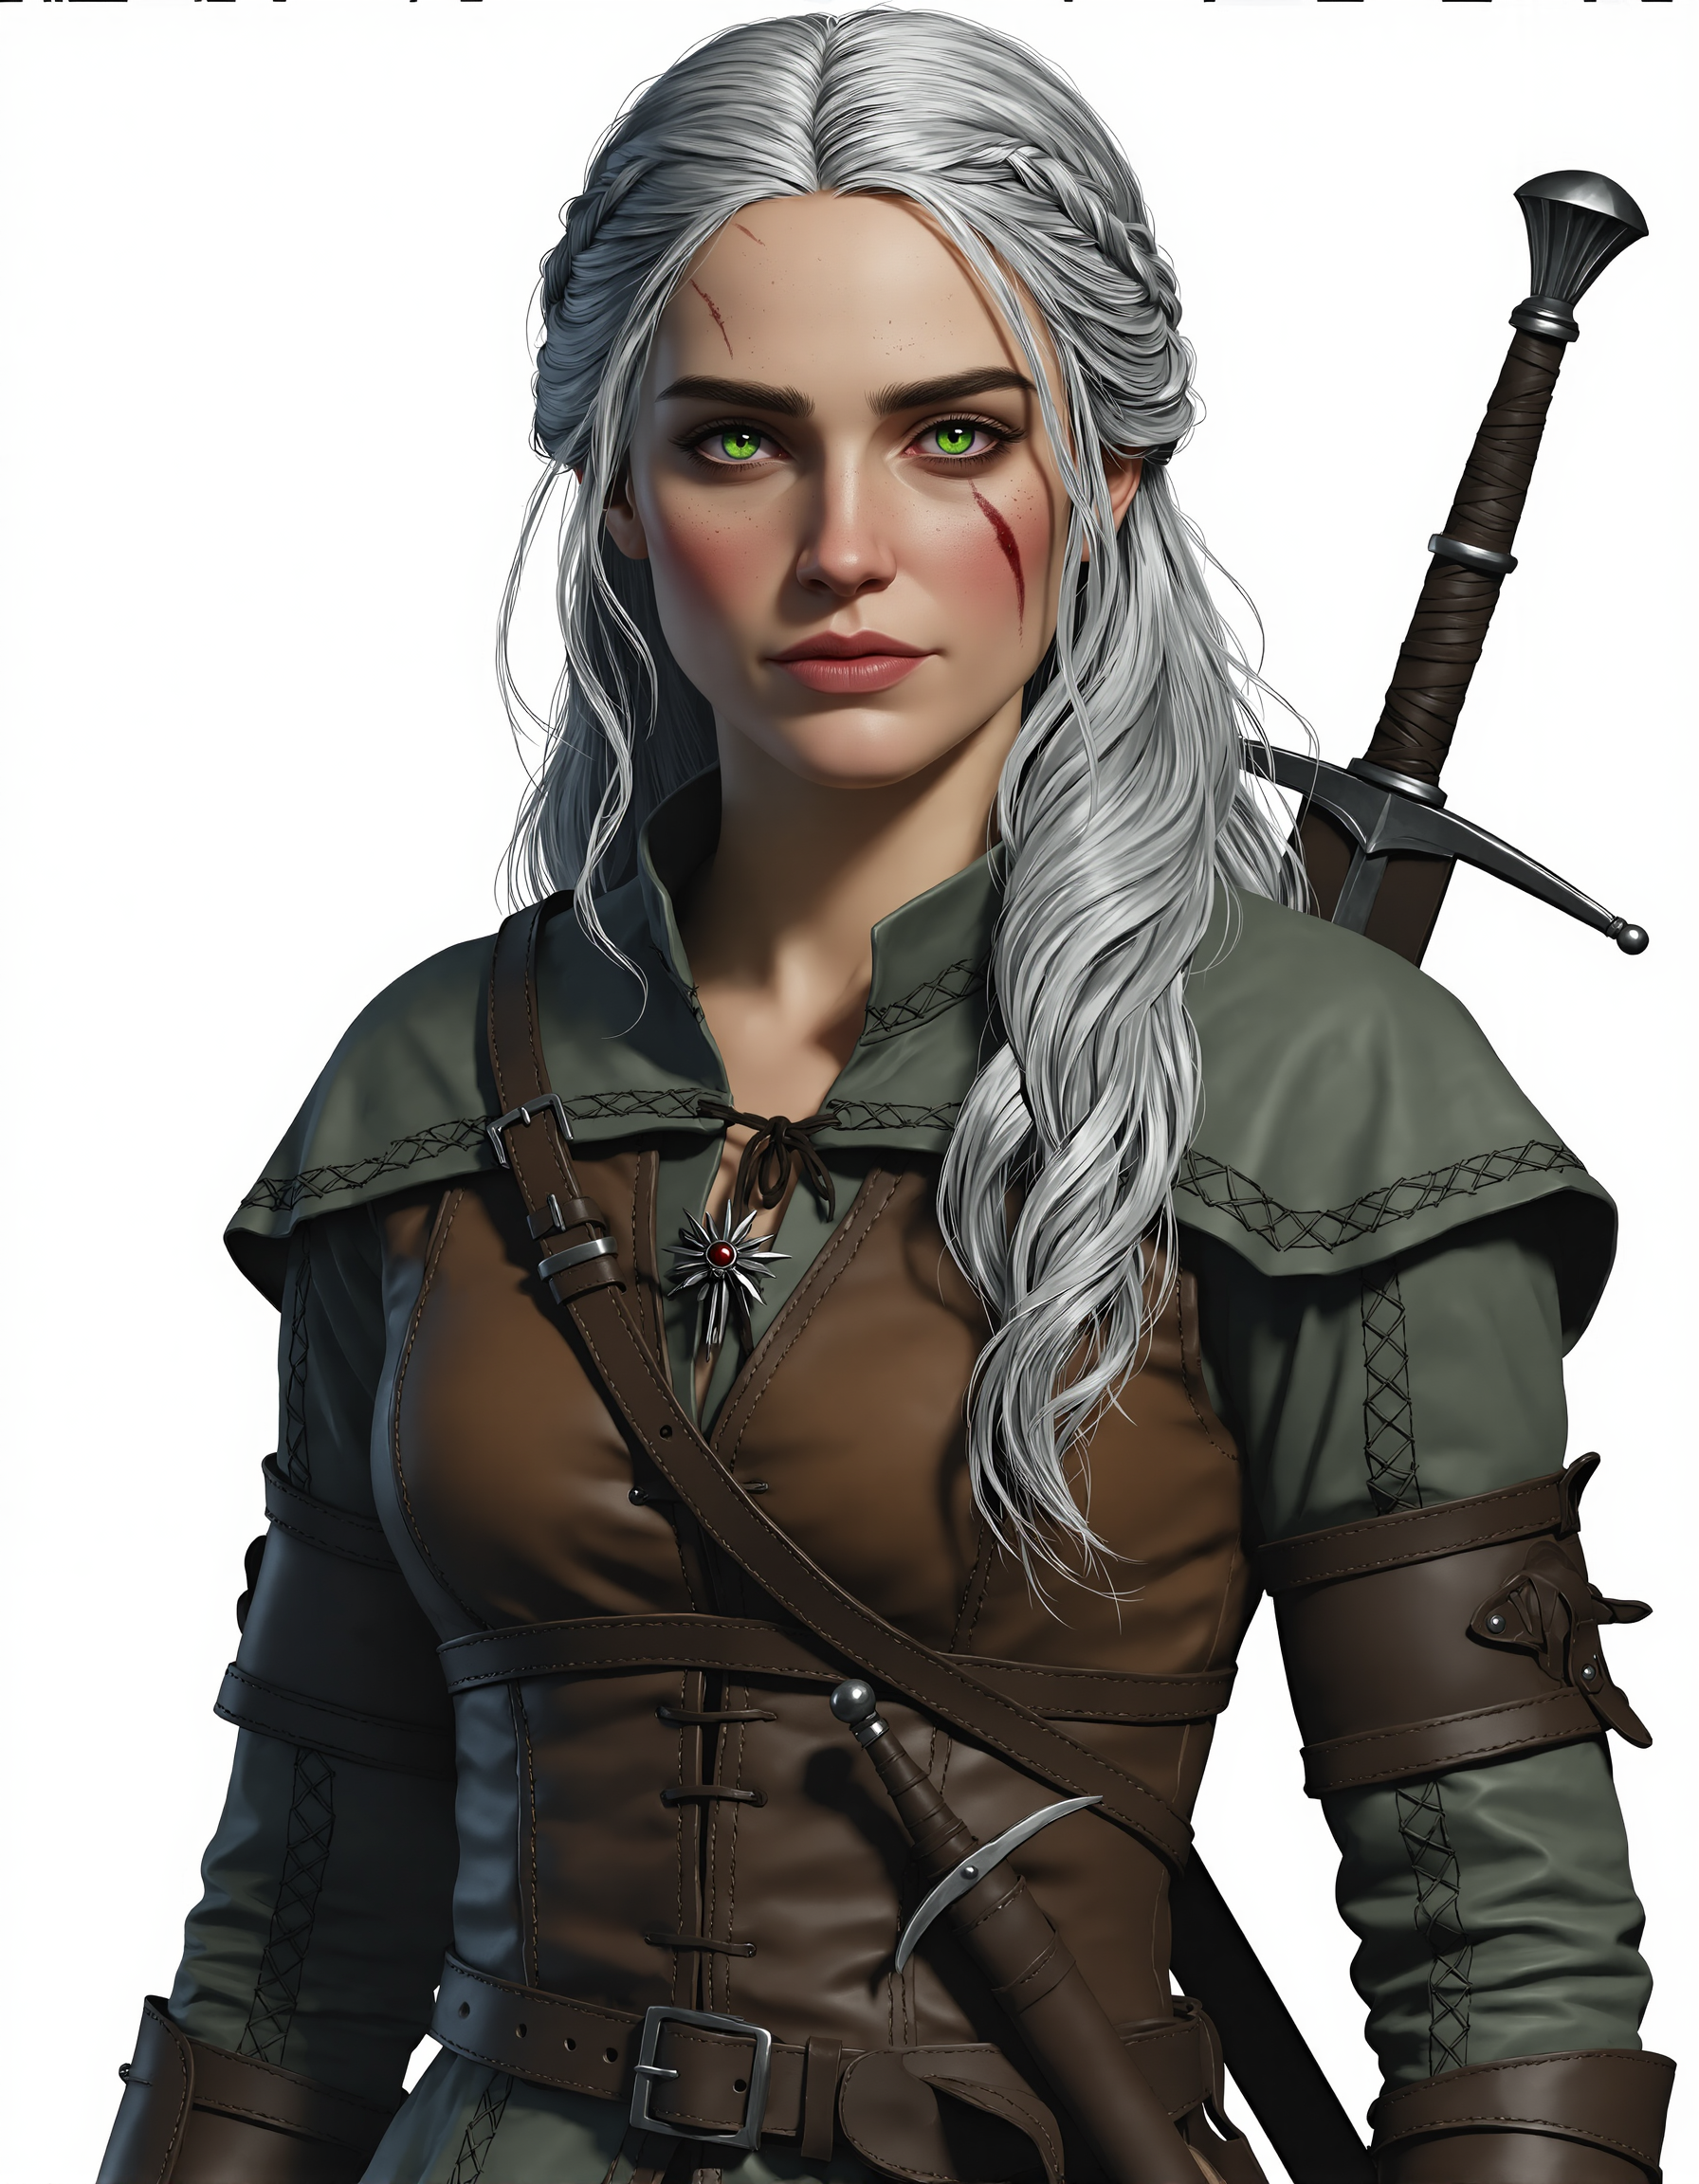
HiDream.Upscale.Detailers.I2I.Inpaint.SaveCivitMetadata
Last verified to work 17.08.2025 ComfyVer 0.3.50, frontend 1.25.8TL;DR: it's actually any checkpoint workflow, add your own profiles, mix em how you want.fp16 and fp8 https://huggingface.co/Comfy-Org/HiDream-I1_ComfyUI/tree/main/split_files/diffusion_modelsgguf https://huggingface.co/city96/HiDream-I1-Full-gguf/tree/mainclips https://huggingface.co/Comfy-Org/HiDream-I1_ComfyUI/tree/main/split_files/text_encodersvae (flux) https://huggingface.co/Comfy-Org/HiDream-I1_ComfyUI/blob/main/split_files/vae/ae.safetensorsSingle workflow with preconfigured profiles - no need to re-enter sampler parameters and jump between workflows.Existing profiles: Full, Dev and Fast fp8, Flux fp8, any single XL.Quickly create your own profiles - copy existing one and replace 2 or 3 values.Simple upscale, Iterative upscale, Face and Hand detailers, UltimateSD - it's possible to choose different checkpoint for them, for example generate with HiDream and upscale with your favourite XL checkpoint.I2I and Inpainting - toggle corresponding encoders, optionally resize input image.Save results with Civitai-compatible metadata.Every feature is toggleable with rgthree nodes.Shortcuts (keybindings) for quick navigation:1 - main area (select resolution, input prompts, toggle features, input upscale denoise)2 - optional checkpoint selector for post-work - upscale and detailers; upscales3 - detailers and UltimateSD4 - XL checkpoint selector and VAE override if not baked in5 - HiDream profiles
![HiDream I1 FULL [GGUF+FP8+F16] with ComfyUI workflow](https://image.civitai.com/xG1nkqKTMzGDvpLrqFT7WA/122b8b9b-434b-48fc-8aac-314450e85dbe/original=true/70151706.jpeg)
HiDream I1 FULL [GGUF+FP8+F16] with ComfyUI workflow
Source (gguf): https://huggingface.co/city96/HiDream-I1-Full-gguf/tree/main from city96Source (fp8): https://huggingface.co/calcuis/hidream-gguf/tree/main from calcuisThe VAE and text encoders can be downloaded from Comfy-Org here!This model can be used with the https://github.com/city96/ComfyUI-GGUF node!💪Train your own model: https://runpod.io?ref=gased9mt🍺 Join my discord: https://discord.com/invite/pAz4Bt3rqb
HiDream Image Model! NATIVE Full, GGUF, Fast, and Dev Workflows
Hey Everyone!HiDream is finally here for Native ComfyUI! If you're interested in demos of HiDream, you can check out the the video below. HiDream may not look better than Flux at first glance, but the prompt adherence is soo much better, it's the kind of thing that I only realized by trying it out.HiDream Models: https://huggingface.co/Comfy-Org/HiDream-I1_ComfyUI/tree/main/split_filesGGUF Models: https://huggingface.co/calcuis/hidream-gguf/tree/main