ComfyUI Workflows
Browse real AI workflows from Flux, SDXL, Pony, ControlNet, video generation and commercial AI creators.
NVIDIA PiD Flux1 — Smart 4× Detail Upscaler
A 1-click, 4-step upscaler built around NVIDIA's PiD (Pixel Diffusion) model on the Flux1 backbone. Feed it any image and it intelligently regenerates real, fine detail at 4× resolution — then supersamples it back down to a razor-sharp final image. An automatic captioner keeps the upscale faithful to your image's content, so you get crisp detail without hallucinated junk.✨ What makes this workflow differentWorks with ANY aspect ratio — 16:9, 9:16, square, anything. The input is auto-normalized to the model's native 1024px long-edge (e.g. a 1280×720 image becomes 1024×576), which is the #1 cause of broken/green-tinted PiD results. This is handled for you.Auto-prompting via Florence-2 — a vision model reads your image and writes a detailed caption automatically, guiding the upscaler to preserve the actual content. No manual prompting needed.Locked to the model's true 4× regime — PiD 1024→4096 is a fixed 4× model; this workflow targets exactly that for maximum sharpness (no blur from under/over-scaling).Supersampled final output — the 4096px result is Lanczos-downscaled back to 1024px, baking all 4× of generated detail into a clean, antialiased image with zero quality loss. You also get the full 4096px version saved.Side-by-side comparison — a built-in slider compares your original against the result.Fast — only 4 sampling steps (LCM).🔧 How to useInstall the 3 model files (links + folder layout below).Load the workflow, drop your image into the Load Image node.Hit Queue. That's it.Outputs:Full 4× image (e.g. 4096×2304) — saved via the first Save node.Supersampled 1024 image — crisp, detail-packed, saved via the second Save node.Tip: The PiD model is brightest/cleanest on near-square and landscape images. Extreme portrait crops can show mild color shifts — that's a known characteristic of the current distilled model, not the workflow.📥 Downloads Links Below:Gemma 2b: https://huggingface.co/Comfy-Org/PixelDiT/tree/main/text_encodersPiD models: https://huggingface.co/Comfy-Org/PixelDiT/tree/main/diffusion_modelsVAE: https://huggingface.co/Comfy-Org/z_image_turbo/tree/main/split_files/vae📂 ComfyUI/├── 📂 models/│ ├── 📂 text_encoders/│ │ └── gemma_2_2b_it_elm_bf16.safetensors│ ├── 📂 vae/│ │ └── ae.safetensors│ └── 📂 diffusion_models/│ └── pid_flux1_1024_to_4096_4step_bf16.safetensors📋 Required custom nodesComfyUI-Florence2 (auto-captioning)ComfyUI-Custom-Scripts (pythongosssss — ShowText / MathExpression)ComfyUI-easy-usergthree-comfy (Image Comparer)ComfyUI_Swwan (GetImageSizeAndCount)Requires a recent ComfyUI build with PixelDiT / PiD support. ~16GB VRAM recommended for the full 4096px pass.https://www.youtube.com/@AiMotionStudio

Optimized ComfyUI Flux Workflow for 8GBs of VRAM
A workflow designed for low-resource computers. I took an existing one and modified it in what I believe is the correct way to make it work. I'm sharing it for anyone who wants to use it.Original Workflow: https://civitai.com/articles/17080/simple-comfyui-sdxl-pony-illustrious-flux-workflow

Split Flux Basic (not GGUF)
How I do flux on a 3080ti without headaches.

Can Flux Color Manga? ComfyUI ControlNet for Flux (Manga Coloring Workflow)
Can Flux Color Manga? ComfyUI ControlNet for Flux (Manga Coloring Tutorial)The result is not that great
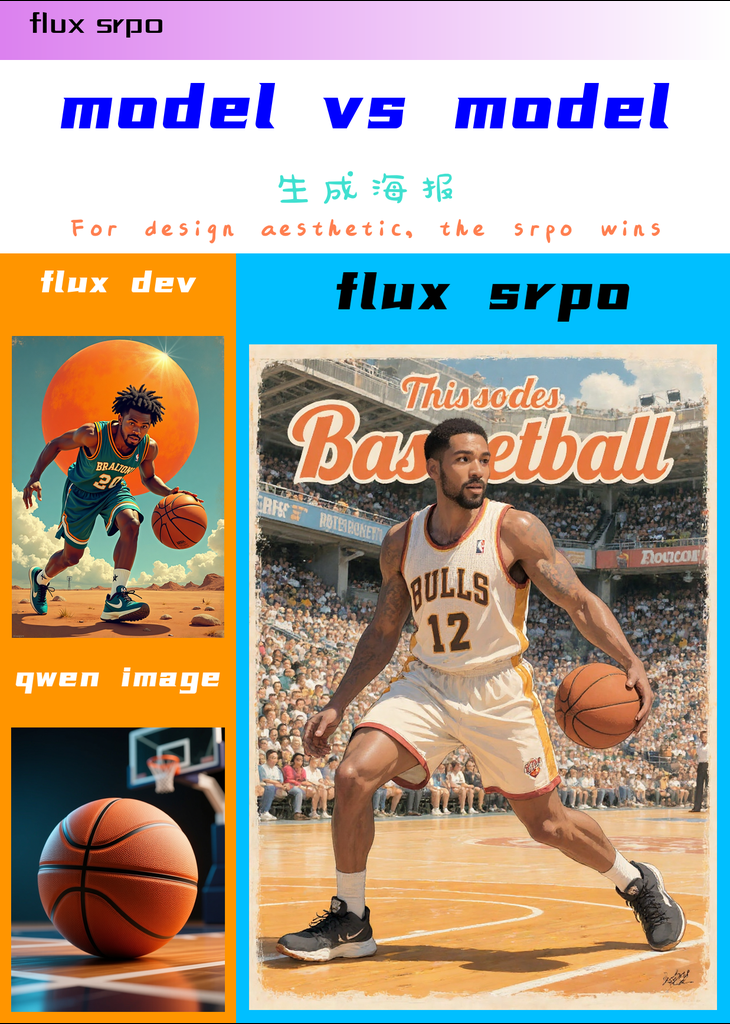
Flux+SRPO:Stronger design aesthetics
It can now be run online for free through:https://www.runninghub.ai/post/1966813111254704129/?inviteCode=rh-v1180,invitation code :rh-v1180,Register through the link or add the code to get 1000 RH coins, and 100 RH per day,flux srpo :Compared to qwen and flux, under the same prompt,srpo has a more outstanding design aesthetic and performs better in generating posters and scenes!And it belongs to the flux ecosystem, acceleration methods like fbcache can be used, and the actual measurement shows that 5090 takes about 40 seconds. Come and give it a try!
Flux Full Suite
Faster version of latentsync can be found here. GeekyGhost/ComfyUI-Geeky-LatentSyncWrapper: ComfyUI Wrapper for Latent Sync with some improvements.It is the 1.5 model with some optimizations done with the code. All Assets in this showcase currently were made with this workflow. I generated the initial image with Flux Krea, animated it with Wan LCM, added sound effects with MMAudio, created music with Ace Step, Used LatentSync with audio created with Kokoro TTS to create the LipSync, Put it all together in a video editor and exported it. Tried to show each asset that was created and layered together. Hello, this is my complete Flux Workflow. It uses a custom flux schnell model I made for general image generation, a group for flux kontext for img2img editing, and a group for inpainting and outpainting using flux dev fill, I use a quant version as the larger one is a bit to much for my laptop. I also have a face restore and swap group for images and video using reactor. You may have onnyx issues. Check the repo for support or you can delete these. Next is latentsync for Lipsync. It takes a video and audio input and generates a lipsync video. I have it set up so it takes the part of the video cut off from the lipsync process and adds it back at the end for a smooth transition. Next it goes through a face restore and or swap pass. I have added my kokoro TTS node incase you don't have a TTS of your own. If you don't need, just delete it. It includes a mini voice modifier node. I've added MMAudio to generate sound effects and other audio for videos using text input and video input.Added Wan for video generation. There's some gguf models that run pretty fast locally using 5 steps for decent quality.Added Ace Step for Music Generation and Stable Audio for more audio options.Added my Geeky Remb node.

GonzaLomo Flux Refiner Workflow
This workflow is intended to be used with the GonzaLomo Flux model to generate an image and then refine the image using the GonzaLomo v4.0 Unity SDXL model. Unity will provide the image with much better skin detail and anatomical features.Note that it's not required to use the GonzaLomo SDXL model as any photorealistic SDXL model should do a very good job at refining the Flux image.One other thing to note is the refining prompt that is being merged with the original prompt via the Conditioning Concat node. You can put anything into this prompt that you'd like to emphasize in the final image. I included things like "skin pores and blemishes" to give the skin a less plastic Flux look. You could also add freckles. The amount of effect that this prompt has is governed by the denoise. If you want only a light refining then keep the denoise between 0.1 and 0.2. Go higher than 0.2 to allow the SDXL model to fully refine the image. I like 0.35 myself but I think that's a personal preference.
![Mode [Flux,SD3,SDXL,AURA,HYD,SD1,SC]](https://image.civitai.com/xG1nkqKTMzGDvpLrqFT7WA/de1d64aa-cef7-4316-b007-6445a2fc2fe9/original=true/78111445.jpeg)
Mode [Flux,SD3,SDXL,AURA,HYD,SD1,SC]
系统根据模型通过5个特别优化的工作流程自动重新路由。编写prompt并加载模型。点击播放。就是这样。SD1、SDXL、SD3、FLUX、AURAFLOW、HUNYUANDIT和~eh Stable Cascade。您需要更新选择器节点https://github.com/exdysa/comfyui-selector(它们在ComfyOrg注册表中,而不是在CivitAI上)。Dev不会检测到Schnell。模块化绿松石组可以拖动,方便重新路由和诊断。采样器输入是彩色编码的。调度器、求解器和方向可以洗牌与模型兼容的设置。OLLAMA LLM prompt。输出端口已准备好进行升级和细节化。注意:这个项目已经被放弃。有人告诉我,像这样自动化ComfyUI是不可能的。不,但ComfyUI不适用于复杂的应用程序。超过300个节点填满了屏幕。系统跟不上。自动切换极难测试。这是不可持续的,但它可能会提供信息、动力和教育。探索ComfyUI的局限性。没有支持。我不知道它是否还能用。我不在乎。我现在在用扩散器。请期待它。˶𝞢⤬⫒ⵖsᐼ˶ ⠑⠭⠙⠽⠎⠁The system automatically reroutes according to the model through 5 specially optimized workflows. Write prompts and load the model. Click to play. That's it.SD1, SDXL, SD3, FLUX, AURAFLOW, HUNYUANDIT and ~eh Stable Cascade. You need to update the selector node https://github.com/exdysa/comfyui-selector (they are in the ComfyOrg registry, not on CivitAI). Schnell will not be detected from Dev.The modular turquoise group can be dragged, which is convenient for re-routing and diagnosis. The sampler input is color-coded. Schedulers, solvers and orientation can shuffle model-compatible settings. OLLAMA LLM Prompt. The output port is ready for upgrading and detailing.Note: This project has been abandoned.Someone told me that it is impossible to automate ComfyUI like this. No, but ComfyUI is not for complex applications. More than 300 nodes filled the screen. The system can't keep up. Automatic switching is extremely difficult to test. This is unsustainable, but it may provide information, motivation and education. Explore the limitations of ComfyUI.There is no support. I don't know if it can still be used. I don't care. I'm using diffusers now. Please look forward to it.˶Σ⤬⫒ⵖsᐼ˶ ⠑⠭⠙⠽⠎⠁
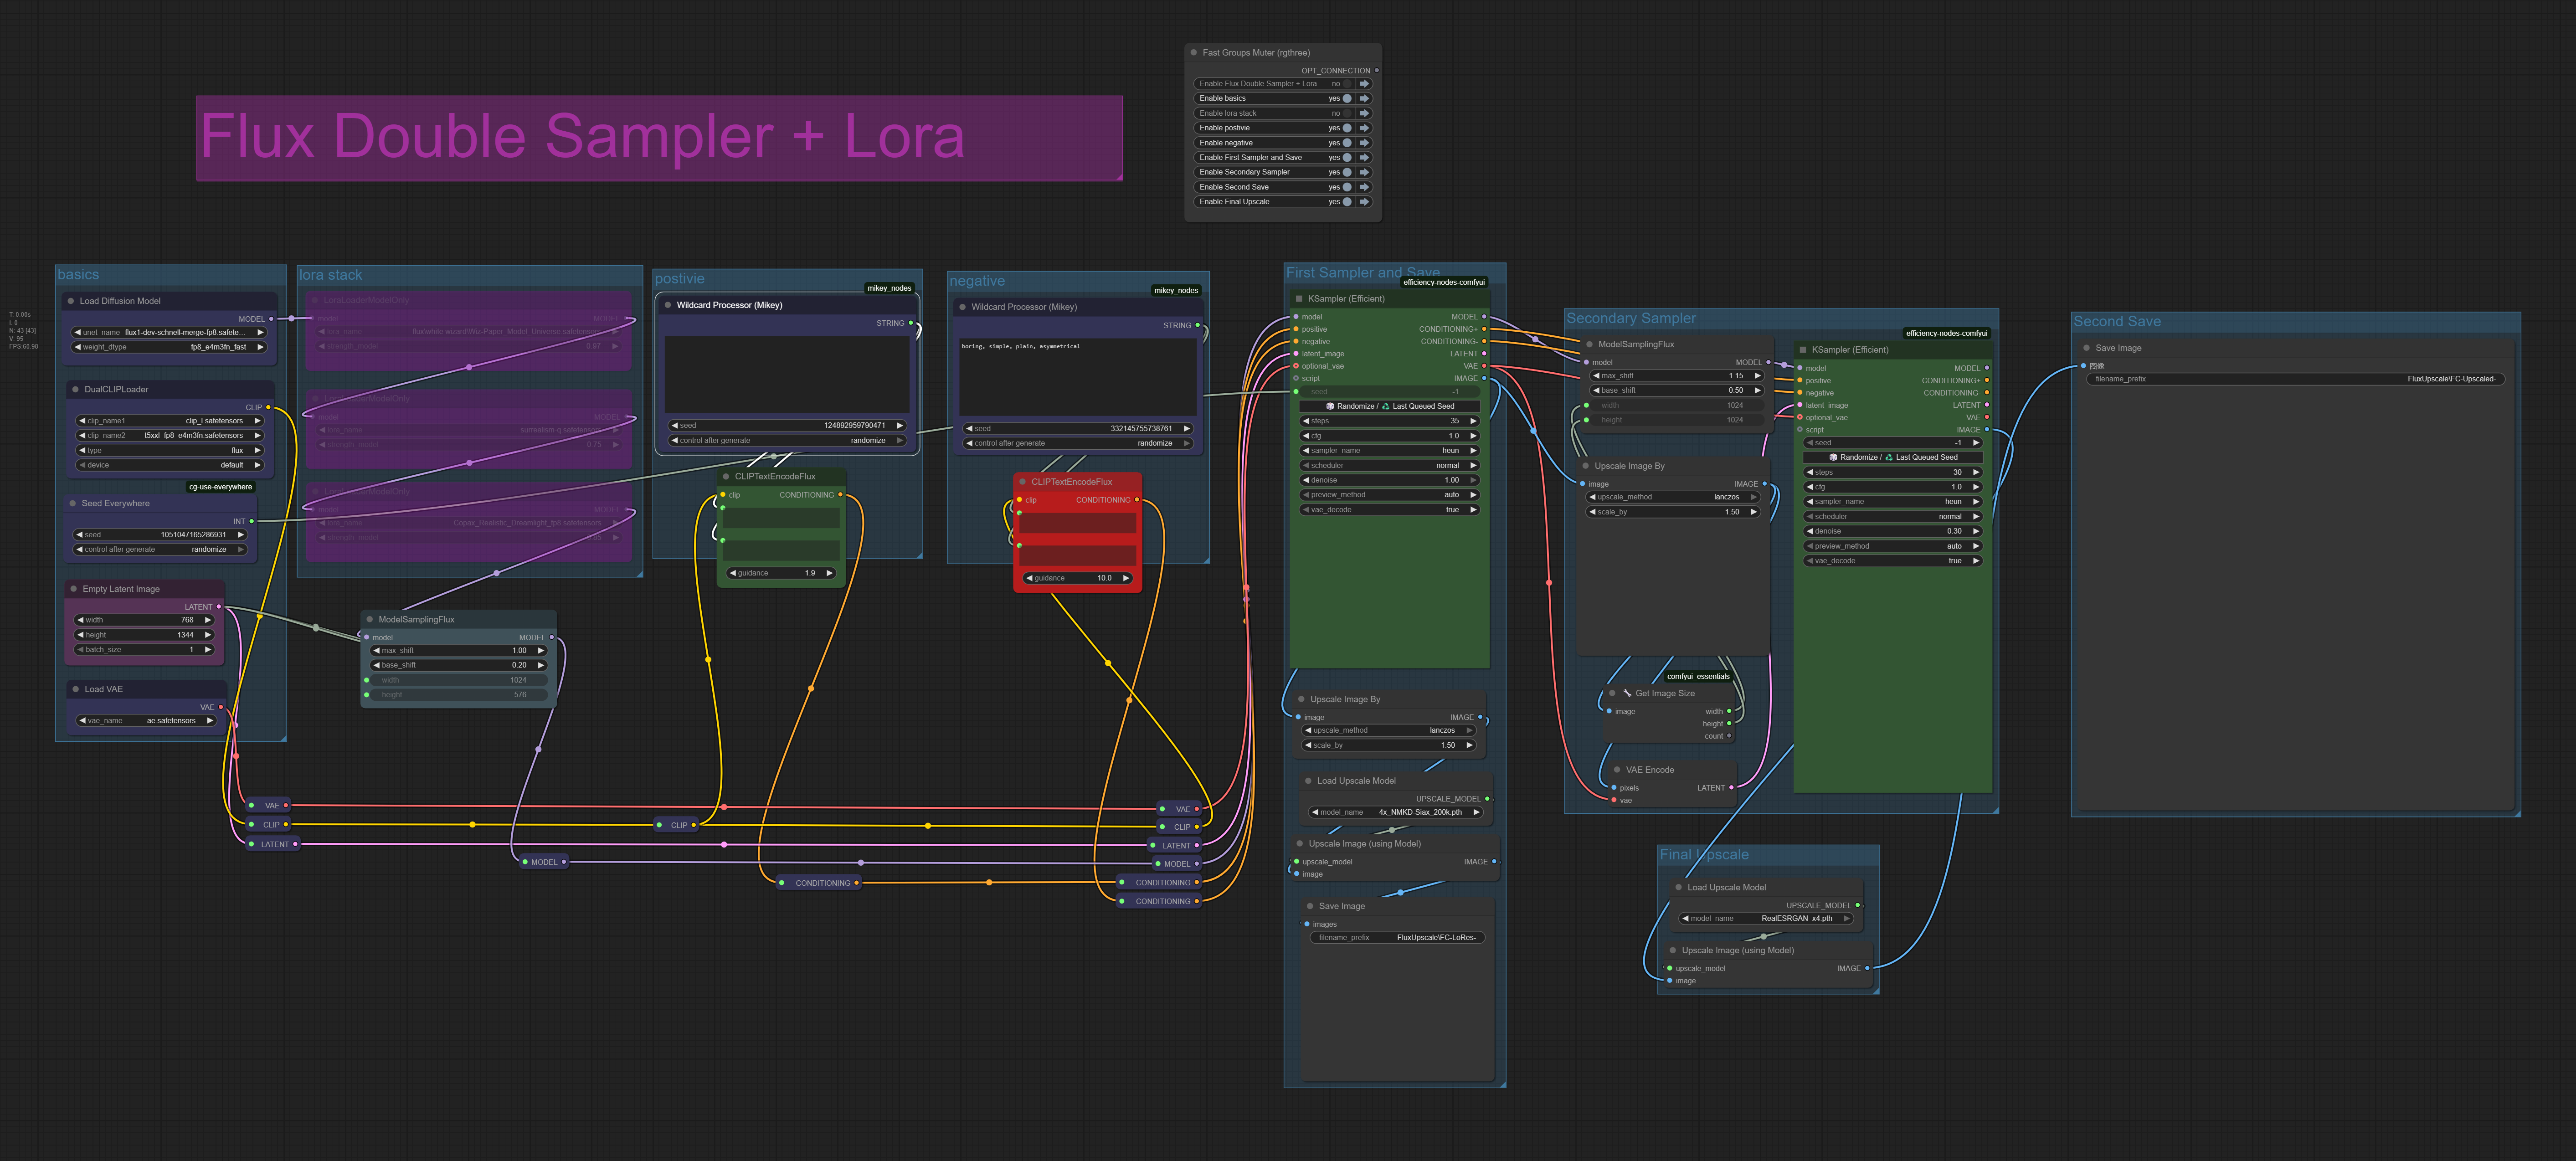
Flux + Lora + Second Sampler Upscale
Flux Worklfo that has 3 lora loaders plus a second sampler to improve output quality

Pixelwave Basic Workflow T2I
basic workflow for Pixelwave (Flux Schnell Finetune: https://civitai.com/models/141592?modelVersionId=1726219)

Shuttle 3.1 Artistic Sense Quantitative Modeling Workflow
B-site video: https://www.bilibili.com/video/BV1dWcpeUE4v/Knowledge Planet: https://t.zsxq.com/7F90AGraphic tutorial: https://t.zsxq.com/lNK8vThe workflow is very simple to use, and I have uploaded a tutorial on how to use it on YouTube. You can try it out and follow the tutorial and Civitai's workflow to easily reproduce the results. Thank you. If you have any other questions, please leave a comment in the comment sectionThis tutorial is very important, not watching it will surely lead to a lot of problems! Watch the video tutorial before trying !!!! Very important! Especially a key point at the end!

FLEX-workflow
Flex.2-preview Installation Guide for ComfyUI***Appreciate Your support if U cant u can drope the first image for pro workflowremember 👍(my experience the result i got from in-painting here https://civitai.com/models/1108146/fluxfill-devggufand controlnet herehttps://civitai.com/models/1488208/flux1-dev-controlnet-union-pro-20fp8more professional but this model have good features because its very flexible)Required Files and Installation LocationsDiffusion Model- Download and place flex.2-preview.safetensorshttps://civitai.com/models/1514080ComfyUI/models/diffusion_models/### Text EncodersPlace the following files in ComfyUI/models/text_encoders/:- CLIP-L: [clip_l.safetensors])- T5XXL Options:- Option 1 (FP8): [t5xxl_fp8_e4m3fn_scaled.safetensors]- Option 2 (FP16): [t5xxl_fp16.safetensors]VAE- Download link: [ae.safetensors]-ComfyUI/models/vae/Required Custom NodeTo enable additional FlexTools functionality, clone the following repository into your custom_nodes directory:cd ComfyUI/custom_nodesgit clone https://github.com/ostris/ComfyUI-FlexTools🛠️ FlexTools & OllamaGemini Setup Guide for ComfyUI📥 1. Clone Required Custom NodesNavigate to ComfyUI custom_nodes directorycd /path/to/ComfyUI/custom_nodesClone FlexTools for ComfyUIgit clone https://github.com/ostris/ComfyUI-FlexToolsClone OllamaGemini Extension for ComfyUIgit clone https://github.com/al-swaiti/ComfyUI-OllamaGemini.git🔑 2. API Key Setup### ✨ Obtaining API Keys- Gemini API Key → [Google MakerSuite](https://makersuite.google.com/app/apikey)- OpenAI API Key → [OpenAI Account](https://platform.openai.com/account/api-keys)- Anthropic Claude Key → [Anthropic Console](https://console.anthropic.com/)- Qwen API Key → [Qwen Official](https://qwen.aliyun.com/)- (Optional) Local Ollama URL → http://localhost:11434 (default)---### ⚙️ config.json1. Navigate into the OllamaGemini extension folder:cd /path/to/ComfyUI/custom_nodes/ComfyUI-OllamaGemini2. Create or edit config.json:```json{"GEMINI_API_KEY": "your_gemini_api_key","OPENAI_API_KEY": "your_openai_api_key","ANTHROPIC_API_KEY":"your_claude_api_key","OLLAMA_URL": "http://localhost:11434","QWEN_API_KEY": "your_qwen_api_key"}```3. Save the file.---🚀 You’re Ready!- Restart ComfyUI.- Verify in the UI that both FlexTools and OllamaGemini nodes are available.Enjoy enhanced functionality! 🎉Directory StructureComfyUI/├── models/│ ├── diffusion_models/│ │ └── flex.2-preview.safetensors│ ├── text_encoders/│ │ ├── clip_l.safetensors│ │ ├── t5xxl_fp8_e4m3fn_scaled.safetensors # Option 1 (FP8)│ │ └── t5xxl_fp16.safetensors # Option 2 (FP16)│ └── vae/│ └── ae.safetensors└── custom_nodes/└── ComfyUI-FlexTools/ # git clone https://github.com/ostris/ComfyUI-FlexTools

Shuttle 3 Diffusion Assessment Workflow
The workflow is very simple to use, and I have uploaded a tutorial on how to use it on YouTube. You can try it out and follow the tutorial and Civitai's workflow to easily reproduce the results. Thank you. If you have any other questions, please leave a comment in the comment sectionThis tutorial is very important, not watching it will surely lead to a lot of problems! Watch the video tutorial before trying !!!! Very important! Especially a key point at the end!
Wan2.1 Text to Vid FP8
Added image 2 vid Wan2.1 workflow that uses my simple flux workflow to generate an image to use. You can of course use your own load image node to use an existing image, or even use your own checkpoint to generate the image. Follow instructions found here for Wan2.1 models and associated downloads. Wan 2.1 Models | ComfyUI_examplesSimple Wan2.1 text to vid workflow using the FP8 model. Using a laptop with an RTX 4090 and generation was very slow. 61.15s/itused fp8 modelMake sure to update ComfyUI

Chroma Flux | ComfyUI Tweaked | Workflow
Basic ComfyUI workflow for Chroma DiffusionNecessary extension, put into "ComfyUI\custom_nodes" folder:https://github.com/lodestone-rock/ComfyUI_FluxModModels folder same as for Flux:"ComfyUI\models\unet""ComfyUI\models\clip"Chroma GGUF models run same as normal ones, use "Load Chroma Diffusion Model" and "Padding Removal" custom nodes with T5 text encoder only.Checkpoints for GPU's with high VRAM:https://huggingface.co/lodestones/Chroma/tree/mainCheckpoints for GPU's with medium VRAM:https://huggingface.co/silveroxides/Chroma-GGUF/tree/mainT5 text encoder (e4m3fn preferred for medium VRAM):https://civitai.com/models/497255?modelVersionId=568405Suggested parameters to use:I prefer euler ancestral with beta scheduler as it follows prompt better than just euler beta or other combinations as I experimented.It produces a lot of dots look like trypophobia hell and noise clusters at image edges. So "ModelSamplingFlux" with "max_shift" = 1.5 "base_shift" = 0.5 improves quality pretty much.Other parameters same as for Flux:good results at 25 steps with CFG 4.0-5.0, faster at 20 steps
Geeky Kokoro TTS and Sonic Lipsync maker
LatentSync and LTX version has LTX for video and LatenSync for Lip sync, fastest video and lip sync options. Other versions are more resource intensive but offer better quality using Sonic for Lip sync and Hunyuan or Wan for video. If you have a lower end gpu try the LTX and LatentSync version, Higher end cards try the other versions. if you downloaded the workflow previously, you may need to delete red nodes and re-add them.Kokoro TTS Custom Node, with Flux Schnell and Sonic to make Talking Head Style videos. pip install kokoro==0.8.4 to avoid the safe-pickle issue.Article for newest version. https://civitai.com/articles/12337/geeky-kokoro-tts-animation-station

text looper + flux
Description This workflow generates images using the Flux diffusion model with a text looping mechanism. It allows users to iterate over multiple text prompts, combine them, and produce a series of images based on the looped prompts. The workflow is divided into groups for better organization: Text Looper, Combining Prompt, Image FLUX Generator, and Image Preview. How to Use 1. Load the Flux Model: Ensure the Flux model (`flux1-schnell-fp8.safetensors`) is loaded using the "CheckpointLoaderSimple" node. 2. Set Up the Text Looper: Use the "Bjornulf_LoopTexts" node to define your text prompts and specify the number of iterations. 3. Combine Prompts: Use the "Bjornulf_CombineTexts" node to merge individual prompts into a single conditioning input. 4. Generate Images: Connect the combined prompts to the Flux generator workflow, which includes the "KSampler" and "VAEDecode" nodes. Tips: - Adjust the number of iterations in the "Bjornulf_LoopTexts" node to control the number of images generated. - Ensure the CFG scale is set to 1.0 since Flux does not support negative prompts. - Monitor resource usage, as Flux generation can be computationally intensive. Author Notes This workflow leverages the Flux diffusion model (`flux1-schnell-fp8.safetensors`) for image generation. The text looping mechanism is powered by the "TextLooper" extension. Thank you to the developers of Bjornulf custom nodes for enabling this functionality.
DNA Detaler schnell
This workflow is made for my model DNA schnell https://civitai.com/models/1354014/dna-schnell-0618

T5-XXL/Clip-L Flux Prompt Optimizer and Lora Autoloader by EnragedAntelope
This will take your prompt, enhance it and optimize it for the T5-XXL and CLIP-L text encoders that Flux uses.It will also automatically export the trigger word from a lora and include it into the separated prompts.Why did I make this?People keep asking if they should split their Flux prompts between encoders, and they ask HOW. Now you have a VERY easy way!The lora auto-trigger is a fun bonus; I really find it helpful.Have fun creating!
Geeky RemB
Newest version uses Dev branch for now. When code is finalized and testing is done I'll push to main branch. For now, to many bugs to work out. Better features, better output, but to many bugs. Use main branch for stability. Check out dev branch for new features and functions. # Geeky RemB: Advanced Background Removal & Animation Suite for ComfyUI## Latest Release: Geeky Remb Keyframes - 2025-03-12Geeky RemB is a sophisticated image processing and animation node suite for ComfyUI, bringing professional-grade background removal, lighting effects, and animation capabilities to your workflows.## Key Features### Background Removal & Masking- AI-powered background removal using multiple rembg models- Professional chroma keying with color selection and spill reduction- Advanced mask refinement with expansion, edge detection, and blur controls- Alpha matting for high-quality edge refinement- Small region removal for artifact cleaning### Animation System- 20+ animation types including bounce, travel, rotate, fade, zoom, and more- Keyframe-based animation for precise control- Customizable easing functions for natural motion- Support for multi-step and staggered animations- Frame-based animation control system for video workflows### Lighting & Shadows- Realistic directional lighting with intensity and color control- Dynamic shadow generation with perspective and distance fade- Normal mapping for 3D-like lighting effects- Specular highlights and ambient lighting- Kelvin temperature-based lighting for natural color### Compositing- Professional blend modes- Automatic alpha channel management- Support for images of different dimensions- Position, scale, and rotation control- Aspect ratio management## Setup Instructions1. Install via ComfyUI Manager:Can be found in ComfyUI Manager. The manager is the suggested install method.2. Install from GitHub:cd ComfyUI/custom_nodesgit clone https://github.com/GeekyGhost/ComfyUI-GeekyRemB.gitcd ComfyUI-GeekyRemBpip install -r requirements.txt

FLUX Trainer Workflow
Training FLUX in ComfyUI. A brief workflow, didn't add regularization image.v2.0 release note:Fix Flux-Trainer VisualizeLoss can't record global loss bug. v1.0 workflow just show current loop loss and can't auto flash loss data, so it always show first loop loss.v2.0 workflow fix this problem. But you should modify Flux-Trainer code. class VisualizeLoss: @classmethod ... # change output types RETURN_TYPES = ("NETWORKTRAINER", "IMAGE", "FLOAT",) RETURN_NAMES = ("network_trainer", "plot", "loss_list",) FUNCTION = "draw" CATEGORY = "FluxTrainer" def draw(self, network_trainer, window_size, plot_style, normalize_y, width, height, log_scale): ... # add code training_loop = network_trainer["training_loop"] network_trainer = network_trainer["network_trainer"] ... # It will make loss list become a list of all the same constants, I don't know how to modify it, temporarily shut down it. # # if window_size > 0: # loss_values = moving_average(loss_values, window_size) ... trainer = { "network_trainer": network_trainer, "training_loop": training_loop, } # change output return (trainer, image_tensor, loss_values,)
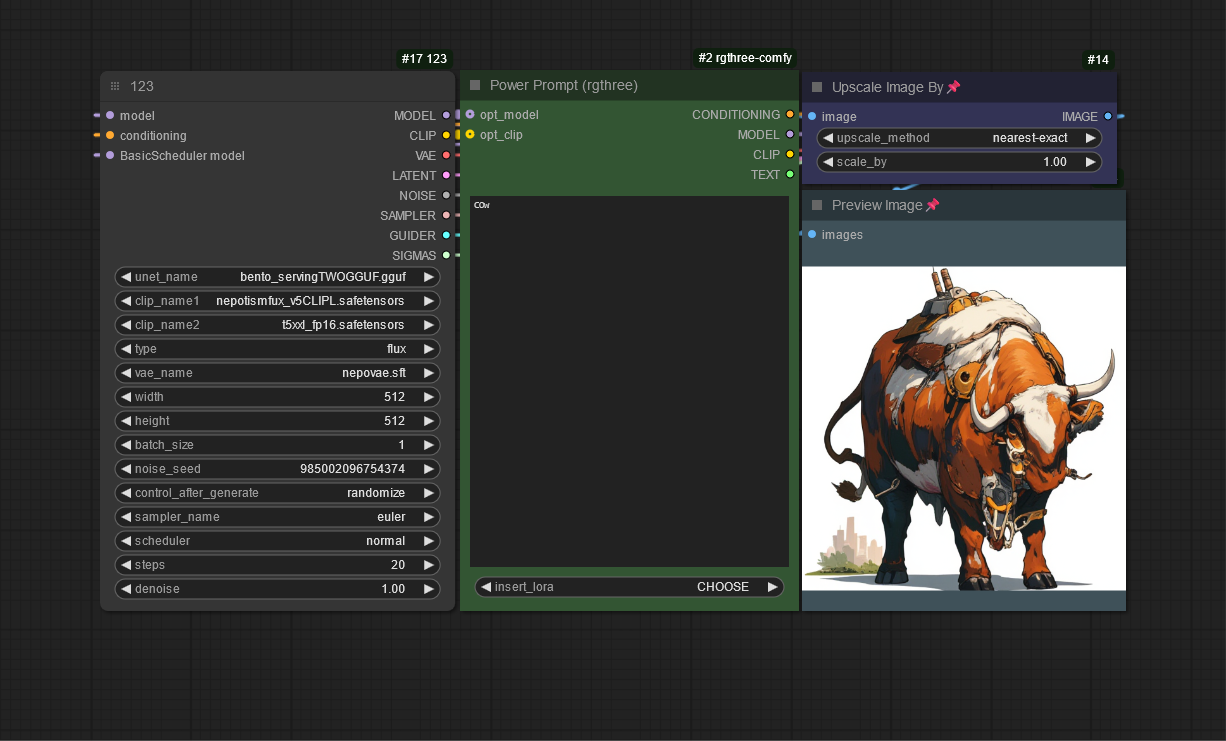
Flux Workflow w/Lora
This is my favorite workflow that I made for Flux. It has a power lora node where you can add as many LoRA's as you choose. I have an Nvidia RTX 4090 24gig and I can craft an image in 7 seconds.