ComfyUI Workflows
Browse real AI workflows from Flux, SDXL, Pony, ControlNet, video generation and commercial AI creators.

Architect's Toolkit: The Precision Wildcard System
Architect's Toolkit: The Precision Wildcard System"Stop fighting your model, start directing it."The Architect's Toolkit is not just a collection of wildcards—it is a modular, high-precision framework designed for users who value creative control over random output.Frustrated by "mushy" images, inconsistent results, and models ignoring your core prompts? This toolkit was built to solve the "prompt noise" problem. By stripping away redundant quality-fluff and technical ballast, it forces your model to focus on what actually matters: Composition, Scenario, and Intent.Key Features:Modular Architecture: Designed for logical, stacking prompts. Build your scene from the ground up, starting with core actions and scenarios rather than generic quality tags.Zero-Noise Design: Optimized for modern SDXL models (like Juggify). We have purged standard "masterpiece" and "8k" tags that clutter your token limit and dilute your prompt's impact.Action-Oriented Logic: Every wildcard is crafted to be an instruction, not just a description. This toolkit is optimized for users who want to define what happens in the frame.Consistent Output: By utilizing strict categorization, you achieve a higher success rate per generation. Stop wasting your VRAM on variations of a blurry mess.How to use it:The Architect's Toolkit works best with a clean, minimalist prompting style. Move away from long-string prompt spaghetti.Define the Scene: Use the Master Scenarios to set the atmosphere.Define the Action: Use the Action-Objects for narrative depth.Define the Composition: Use the Perspective views to frame your shot.This toolkit is for the intentional artist. It transforms your Stable Diffusion workflow from a chaotic lottery into a reliable, modular creative engine.Compatible with Stability Matrix / WebUI Forge.Note: Please note that I cannot guarantee full functionality on other systems. It works flawlessly on my setup with an RTX 3060 (12GB) and an i5-12400F.⚠️ Important Usage Warning: Keep it Focused!Avoid chaining multiple "Master" categories in a single prompt. While the toolkit is modular, the model's attention span is finite. Trying to combine too many complex "Master" scenarios at once will lead to conflicting instructions, diluted details, and a loss of visual coherence. Pick one primary scenario/perspective per generation to maintain high quality and narrative clarity.Example for a clean input: __MASTER_BDSM__, __MASTER_PERSPECTIVE_VIEW__, (dramatic interrogation scene:1.3), (cool blue edge light:1.2)P.S.: --- Please didnt use Prompt Magic

Easy Workflow for mass content creation
This is the workflow I made to completely automate content creation for creators.It's set up so that you just have to type in the words for the girl and hit generate once.Syntax:POSE | FACIAL EXPRESSION ~WIDTH~HEIGHTVideo Guide:

batch generation setup that executes two or more prompts simultaneously in a single run.
⚡ Unleash KSampler's Parallel Power: Crush Massive Prompt Queues at 2x+ SpeedAre you tired of manually hitting "Queue Prompt" hundreds of times just to test different character and scene combinations?Contrary to popular belief, ComfyUI's KSampler is fully capable of executing multiple distinct conditioning prompts in parallel, generating completely different images simultaneously. This sample workflow serves as a high-performance demonstration of how to harness this behavior to slice through massive generation queues at more than double your usual speed.🛑 REQUIRED CUSTOM NODESTo run this workflow without missing-node errors, you must install our extension package:Package Name: ComfyUI-Text-Driven-Workflows (Search via ComfyUI Manager)GitHub Repository: https://github.com/kanryu/ComfyUI-Text-Driven-Workflows🚀 The 5x5 Matrix: 25 Combinations, Accelerated Parallel ProcessingThis workflow is a practical demonstration of prompt de-coupling and dynamic batch execution:The Setup (5x5 Matrix): The workflow embeds 5 unique Character Data presets (managed via Text Line Selector) and 5 distinct Action/Staging Plans (sequenced via Prompt Line). This creates a creative matrix of up to 25 possible unique generation menus.True Parallel Execution Mechanic: When you set Max Lines to 2 or more on the Prompt Line node, it dynamically outputs multiple independent prompt streams. You can easily chain further text processing nodes—like Join Strings—after it to append assets or modifiers. KSampler then consumes these multiple independent prompts simultaneously, rendering 2 or more completely different images from separate prompts in a single execution run.Double the Efficiency: If you have a massive queue of different characters and directions to test, this parallel slicing technique allows you to clear your creative backlog more than twice as fast as standard one-by-one queue methods.Effortless Dimension Control (Resolution Selector): Forget about manually clicking and entering width/height values across multiple fields every time you change aspect ratios. The Resolution Selector node lets you instantly switch your output image dimensions with a single click from a simple combo dropdown menu.🛠️ How to Experience the 2x+ Speed DemonDownload this workflow .json and drag-and-drop it into your ComfyUI canvas.Install ComfyUI-Text-Driven-Workflows via the ComfyUI Manager and restart ComfyUI.Load your preferred SDXL checkpoint.Set Max Lines to 2 or more on the Prompt Line node, select your target dimensions via the Resolution Selector dropdown, hit Queue, and watch how ComfyUI simultaneously renders completely distinct prompt combinations in parallel.If this parallel prompt slicing workflow doubles your daily asset production efficiency, please consider leaving a review or dropping a ⭐ on our GitHub repository!

GonzaLomo SDXL Workflows
This is a simple workflow with refiner for the GonzaLomo and MoP SDXL models.

SDXL Workflow (Max Detail 5 Passes)
This workflow is designed to squeeze everything possible out of SDXL using a 5-pass quality refinement process. It’s easy to use, easy to read, and built for users who want the most polished SDXL output possible.Each phase adds controlled improvements to detail, clarity, and finish using res_2 samplers, Detail Daemon, FaceDetailer, HandDetailer, upscale, sharpening, and desaturation. Step-by-step preview outputs are included so you can compare every phase and see exactly where the quality gains happen.SDXL may not be the newest model on the block, but with the right workflow it can still produce beautiful, high-quality images and this setup is built to prove it.Features5-pass SDXL refinement workflowRes2 samplers for stronger fidelitySageAttention support for speedFaceDetailerHandDetailerDetail Daemon sampler + graph sigmasFoolhardy upscaleSharpeningDesaturationStep-by-step phase previews / comparisonNode packs used in this workflowrgthree-comfyPower Lora Loader (rgthree)Image Comparer (rgthree)GetNodeSetNodeComfyUI Impact PackFaceDetailerSAMLoaderUltralyticsDetectorProviderComfyUI KJNodesPatch Sage Attention KJDetail DaemonDetailDaemonSamplerNodeDetailDaemonGraphSigmasNodeImageCASharpening+ImageDesaturate+ResizeLongestToNodeCheckpointLoaderSimpleCLIPTextEncodeKSamplerSamplerCustomAdvancedVAEDecodeUpscale Model LoaderImageUpscaleWithModelPreviewImageSaveImageFoolhardy Remacri upscale modelUltralytics + SAM models for FaceDetailer / HandDetailerSageAttention for speed

My personal workflow for making furry images
This is my personal ComfyUI workflow for making those furry images. In my understanding I lean towards a middle point in which the workflow is not too simple and not too complex. Also without many of those organizer nodes besides group bypass, so the wires are dangling all around the canvas.My aim is to use comfy and still have metadata like A1111, that's why I make use of "Image-Saver" custom node and some other custom nodes.I also make use of https://civitai.com/models/661484/ai-image-metadata-editor to edit the metadata and make it more precise. I don't do this to every image, only to those I feel most proud of.

JAFFA's Custom Deforum Workflow MAY 2026 DPM++3M SDE Expo
This is a workflow that utilises Deforum Nodes in ComfyUI to create various images that convey a somewhat linear animation for the use of videos.I currently use this workflow to create backgrounds on my music channel on YouTubeI have a discord if you would like to join to discuss AI, the workflow, music, play games or whatever else you can join here; https://discord.gg/U5Ep2BTsfrOut of the box this model generates SFW images. Negative prompts include some NSFW terms to keep images SFW. But of course in your own hands you can change whatever you like and generate whatever you want with whatever checkpoints you want. Hurray, freedom!If you want to support myself or this model all I ask is that you throw a free subscription to my Unmonetized Music channel on YouTube. ♥This workflow can be used in conjunction with the following tools which you may find useful;https://civitai.com/articles/14641https://civitai.com/models/613826/sdxl-imagepath2vid-output-upscale-workflowChangelog:VERSION 15.0:Changed Scheduler to DPM++3M SDE Expo for better quality/coherence. VERSION 14.0:ComfyUI Desktop Migration Version.VERSION 13.0:Small August Update, small changes, nothing important, just an update.VERSION 12.0:Added a Custom Strength Schedule as explained here; https://civitai.com/articles/14641VERSION 11.0:Few Variation additions with small notes for guidance.Expanded Interpolation to 6 total frames instead of 4.Changed Hybrid Motion to Farneback for quality gain in interpolationVERSION 10.0:DPM++ 2M KarrasZavyChroma v.10Optimised for personal use.(TRANSLATE IS BROKEN on ALL versions. IF ANYONE KNOWS HOW TO FIX PLEASE SEND ME A MESSAGE)VERSION 8.0:SDXL 1.0Deforum Video Creation Workflow.DDPMVERSION 5.0 Onwards:SDXL 1.0Deforum Video Creation Workflow.DPM++ SDE KarrasPerfect for use with ZavyChromaXL Checkpoint.Strength is low due to reduce flickering.Optimum CFG is 5-7High detail, high depth.Added -2 Clip SkipAdded VAE loaderAdded Upscale Model LoaderAdded Lora CapabilityRefined Upscaler to use Ultimate SD Upscaler instead of default lanczos. Upscaler for 1920x1080 resolution (Can be bumped up to around 4k)Previous Versions have notes and the version number will have direct changes beside it)(Details may diminish over time with low Strength, recommend bumping to: 0.25-0.49 if you see detail disappear.) (When starting generation disable the Upscale node, Preview Image node and Save Image and Save Video node until one frame has been generated for the cache to pull from, after first generation enable all above nodes and all should be good!)If you want to save frames, use Save Image Extended, if you want to create video use Save Video.Working on this for the past 3 months. Finally got to a place I'm happy.Flickering is still present as Deforum is temperamental, until I find a different selection of nodes to achieve the same thing this is probably the best I can achieve with Deforum. But who knows, there may be future iterations of this workflow.Thanks for all the support on this journey and feel free to use and post anything you create with this workflow alongside the Gallery of this submission.Appreciate all the buzz and support and downloads.Thankyou! ♥This Deforum ComfyUI workflow is my test for generating backgrounds for YouTube videos over here.

CONFY UI TEXT TAG MIXER
Eae galera! 🇧🇷✨ BR fazendo presença aqui, vamos mostrar como somos! 🔥PTOrganizador de prompt modular para ComfyUI — separa embeddings, qualidade, personagem, pose, cenário, estilo e LoRA tags em campos independentes, mesclando tudo automaticamente no final. Remove quebras de linha e espaços entre vírgulas, já que o texto final não precisa ser legível — só precisa funcionar.ENModular prompt organizer for ComfyUI — separates embeddings, quality, character, pose, background, style and LoRA tags into independent fields, automatically merging everything at the end.Removes line breaks and spaces between commas, since the final text doesn't need to be readable — it just needs to work.

upscaleLab SDXL - UIltimate upscaling tools/detailers
Part 2 of my Lab series. Checkout my other workflows on my profile, they can all be used in conjunction!Sorry for the clutter! - subgraphs seem to break during upload (NSFW Update has the fixed version)⚡ Ultimate Adaptive Upscale & Detail WorkflowA professional-grade ComfyUI upscale pipeline built for every VRAM tier — from high-end workstations to mid-range rigs. No compromises, no separate workflows. One unified system that intelligently scales to your hardware while delivering exceptional output quality.🎯 Three-Tier VRAM Adaptive UpscalingForget juggling multiple workflows for different hardware. This pipeline gives you three battle-tested upscale paths under one roof:🔥 High VRAM — SeedVRFor those with the horsepower to match their ambitions. SeedVR delivers state-of-the-art upscaling with fine detail reconstruction that has to be seen to be believed. If your rig can run it, this is the gold standard.⚖️ Medium VRAM — Hybrid SeedVR / RealESRGAN 2xThe best of both worlds. A carefully tuned hybrid pipeline combines SeedVR's perceptual quality with RealESRGAN 2x's efficiency, giving mid-range GPUs results that punch well above their weight class. Smooth, detailed, and fast.💡 Low VRAM — 4x NOMOSNo high-end GPU? No problem. The 4x NOMOS path is optimised for memory-constrained systems without sacrificing the quality you came for. Clean upscales, full detail, minimal VRAM footprint.🔍 Intelligent Regional DetailingUpscaling alone isn't enough — this workflow goes further with a fully integrated regional detail pass powered by both BBox detection and SAM segmentation models. Target exactly what matters:Face — Reconstruct natural skin texture, pores, and subtle facial structure with dedicated face detailing promptsEyes — Crisp, lifelike eyes with catchlight preservation and iris detail that holds up at any resolutionHands — The historic weak point of AI generation, addressed directly with targeted hand correction and refinementEach region accepts its own prompt, giving you surgical control over how each area is enhanced independently of the rest of the image.🔄 Dual-Pass Base + Refiner PipelineQuality doesn't stop at upscaling. Every image runs through a full two-stage generation pass:Base model pass — Rebuilds and enhances the upscaled image with a full denoise pass, locking in coherent structure, lighting, and compositionRefiner pass — A dedicated high-frequency refinement stage that sharpens fine detail, corrects micro-artifacts, and elevates the final output to a level a single pass simply cannot matchThis dual-pass approach is what separates good upscales from exceptional ones.💼 Who Is This For?Artists who demand production-ready output at any scaleWorkflows that need hardware flexibility without quality sacrificeAnyone tired of soft, over-smoothed, or anatomically broken upscalesCreators who want prompt-driven control over every region of their imageDrop it into your ComfyUI workflows folder and let it do the heavy lifting. Your images deserve better than a single-pass upscale.

swapLab Flux 2 Klein
Part 3 of my Lab series. Checkout my other workflows on my profile, they can all be used in conjunction!Sorry for the clutter! - subgraphs seem to break during uploadUnpacked - removed all subgraphs since they glitched sometimes. Everything displayed on 1st layer canvas⚡ swapLab Flux 2 KleinThe Ultimate Dual-Image Characteristic Transfer Workflow for ComfyUILoad two images. Pick what to transfer. Watch the magic happen.SwapForge is a ComfyUI workflow that takes any two photos and seamlessly transfers faces, hair, clothes, and more from one person onto another — producing composites so clean they look like they were shot that way. No Photoshop. No manual masking. No fuss.🚀 Why swapLab is so effective⚡ Powered by Flux 2 Klein 9B — Fast Doesn't Mean CheapForget waiting minutes for mediocre results. swapLab runs on Flux 2 Klein 9B — one of the most advanced open-source image editing models on the planet. Klein's reference-guided architecture was built for exactly this kind of task, delivering cinema-quality swaps at speeds that will make your jaw drop. Iterate faster. Create more. Wait less.📐 Any Image. Any Size. Zero Prep.Got images from different cameras, different aspect ratios, different resolutions? Don't touch them. swapLab's intelligent autoscaling system reads your input dimensions and automatically calibrates every part of the pipeline — latent canvas, preprocessor resolution, generation size — all of it. Just drop your images in and go.🎯 You Stay In ControlswapLab works beautifully with zero prompt input — but when you want to get specific, the guided prompting system lets you steer the output with natural language. Want to preserve a particular detail? Emphasize something? Tweak the vibe? Just tell it. Your creative vision, turbocharged by AI.🔒 ReActor Face Lock — Identity That Actually SticksGenerative models drift. Faces shift. Not here. After every swap, swapLab runs a ReActor face reinforcement pass using your original source image — mathematically anchoring the final face to your reference identity. The person in the output is the person in your photo. No blending artifacts. No uncanny valley. Just a face that holds.🎛️ Swap ModesMode What Transfers👤 Face & Hair Facial features, expression, hairstyle👗 OutfitFull clothing transfer, accessories🧍 Full Body Complete person into new context✨ Custom You pick — any combo of face, hair, body, clothes, accessories, background🛠️ Under the Hood🧠 Flux 2 Klein 9B — reference-guided generation engine🎭 PersonMaskUltra V2 + SAM3 — surgical region detection and masking📏 Intelligent Autoscaling — universal image compatibility💬 Guided Prompting — natural language creative control🔐 ReActor — identity-locking face reinforcement pass

Ultimate Workflow Super Complete _ ComfyUI _ SDXL ILLU SD1.5 NOOBAI PONY ETC _ Crix _ Txt2Img&Img2Img Base, refiner, detailer, controlnet, remove background, prompt from image, styler, upscaler, saver for civitai!
Thanks to Darlene123 for asking me for a complete Workflow, making me learn so many new things and putting my knowledge to the test!Looking for a super-comprehensive workflow that creates a quality image with one click? This is for you!This workflow contains:BASE Txt2Img to create your images,REFINER to immediately obtain a good-quality image,DETAILER to obtain precisely detailed faces and bodies if you create people,CONTROLNET to control the structure of your image,UPSCALER to obtain a super-quality image,REMOVER (background) to obtain the characters you create as a base, without a background,PROMPTER (from image) to obtain good prompts from images you like,SAVER to save your images with the right information, ready for publication,NOTES to make the most of the workflow.V 2.0 ADD:Img2Img (change from Txt2Img in one click!)STYLER to create your own txt files with predefined styles or download them!Fix V1.0 Problem!V 3.0 NEWS/ADD (sooo many things)Changed the graphics, putting some reroutes to make it nice and pleasant,Upgrade the UPSCALER, now is better for vram and for doing upscale,added the ability to use separate VAE and V-PRED models,Improved the graphics of the INPUT, Prompt, so that it is easier and more intuitive to use the workflow,Possibility of setting a Multi Prompt, which changes automatically between one generation and the next!Once you have added bookmarks, you can simply press "1", "2", "3", "4" to switch between the different parts of the workflow, conveniently,The DETAILER has been completely changed, now you can use it for bodies, hands, face, eyes, clothes and penis/vagina (preview for all),Added COMPARER to be able to compare before detailer and after detailer images,Improved the SAVER, so you can choose what to save with one click!It has custom nodes, to use it you need to install them through "Manage custom node"Not interested in everything? NO PROBLEM!Each of these things can be disabled so that the workflow can work even when you don't need "Prompt from image", "controlnet", etc etc!!!If something doesn't work, you have questions, or you need help, message me! I'm happy to help!

JAFFA's Custom Deforum Workflow - v14 (ComfyUI Dsktp Mgrtn
This is a workflow that utilises Deforum Nodes in ComfyUI to create various images that convey a somewhat linear animation for the use of videos.I currently use this workflow to create backgrounds on my music channel on YouTubeI have a discord if you would like to join to discuss AI, the workflow, music, play games or whatever else you can join here; https://discord.gg/U5Ep2BTsfrOut of the box this model generates SFW images. Negative prompts include some NSFW terms to keep images SFW. But of course in your own hands you can change whatever you like and generate whatever you want with whatever checkpoints you want. Hurray, freedom!If you want to support myself or this model all I ask is that you throw a free subscription to my Unmonetized Music channel on YouTube. ♥This workflow can be used in conjunction with the following tools which you may find useful;https://civitai.com/articles/14641https://civitai.com/models/613826/sdxl-imagepath2vid-output-upscale-workflowChangelog:VERSION 14.0:ComfyUI Desktop Migration Version.VERSION 13.0:Small August Update, small changes, nothing important, just an update.VERSION 12.0:Added a Custom Strength Schedule as explained here; https://civitai.com/articles/14641VERSION 11.0:Few Variation additions with small notes for guidance.Expanded Interpolation to 6 total frames instead of 4.Changed Hybrid Motion to Farneback for quality gain in interpolationVERSION 10.0:DPM++ 2M KarrasZavyChroma v.10Optimised for personal use.(TRANSLATE IS BROKEN on ALL versions. IF ANYONE KNOWS HOW TO FIX PLEASE SEND ME A MESSAGE)VERSION 8.0:SDXL 1.0Deforum Video Creation Workflow.DDPMVERSION 5.0 Onwards:SDXL 1.0Deforum Video Creation Workflow.DPM++ SDE KarrasPerfect for use with ZavyChromaXL Checkpoint.Strength is low due to reduce flickering.Optimum CFG is 5-7High detail, high depth.Added -2 Clip SkipAdded VAE loaderAdded Upscale Model LoaderAdded Lora CapabilityRefined Upscaler to use Ultimate SD Upscaler instead of default lanczos. Upscaler for 1920x1080 resolution (Can be bumped up to around 4k)Previous Versions have notes and the version number will have direct changes beside it)(Details may diminish over time with low Strength, recommend bumping to: 0.25-0.49 if you see detail disappear.) (When starting generation disable the Upscale node, Preview Image node and Save Image and Save Video node until one frame has been generated for the cache to pull from, after first generation enable all above nodes and all should be good!)If you want to save frames, use Save Image Extended, if you want to create video use Save Video.Working on this for the past 3 months. Finally got to a place I'm happy.Flickering is still present as Deforum is temperamental, until I find a different selection of nodes to achieve the same thing this is probably the best I can achieve with Deforum. But who knows, there may be future iterations of this workflow.Thanks for all the support on this journey and feel free to use and post anything you create with this workflow alongside the Gallery of this submission.Appreciate all the buzz and support and downloads.Thankyou! ♥This Deforum ComfyUI workflow is my test for generating backgrounds for YouTube videos over here.

Ultra photo-realistic workflow | refiner, upscaling, FaceDetailer (+index elements), inpainting, controlnet, Civitai Metadata (NOOBAI-XL/ILLUSTRIOUS/SDXL) ComfyUi
STEPS BASE (after this value the refiner kicks in) should never exceed the value of TOTAL STEPS unless you want to use only the first KSampler.I like 10:14, increase total steps for realism, these are set for models in suggested resources, Uncanny valley and Fabled Illusion XXXL - (N/SFW), I really recommend downloading them, both are the best I found for their respective roles, feel free to comment your best values!The main appeal of this workflow is using illustrious/noobai-xl model to setup complex poses or characters and refine it with an sdxl photorealistic checkpoint.Version 5.5 has additional 1080p version file.I don't make new versions for small quality of life updates, download the file for the latest version.

CyberRealistic SDXL ComfyUI Workflow
Join The Tinkerer on Whop to get early releases, private pages, and the Tinkerer Discord role - all in one place. 👉 Join on WhopFuture updates and beta versions are available via the public Whop page:https://whop.com/cyberdelia-ai-lab/comfy-ui-workflows-sdxl-kqDPsVNQLvm9be/app/V4 is a cleaner and more simplified version of the workflow, with fewer unnecessary nodes and a more focused structure. Some heavier extra processing steps were removed, making the setup easier to follow while keeping the core generation, ControlNet, detailing, and final post-processing intact.This workflow also requires the ComfyUI Image Metadata Extension custom node. I forked it and made several fixes and compatibility improvements, especially for Civitai. It works as a drop-in replacement for the standard Save Image node and embeds clean A1111/Forge-compatible metadata directly into the PNG.Custom node:https://github.com/cyberdeliaAI/revived_comfyui_image_metadata_extensionInstallOpen your ComfyUI custom_nodes folder and run:git clone https://github.com/cyberdeliaAI/revived_comfyui_image_metadata_extension.gitRestart ComfyUI afterwards.Skin Enhancer:File: 1xSkinContrast-High-SuperUltraCompacthttps://openmodeldb.info/models/1x-SkinContrast-High-SuperUltraCompactBy popular demand, here’s the ComfyUI workflow I use when I’m (rarely) not on Forge. This setup covers upscaling, a face detailer, and a hand detailer. I’ve also included all the metadata you’ll need to upload straight to Civitai.If you see anything that could be better, let me know! I’m always up for suggestions.

comfyui anime to realism upscaling
This i2i workflow was originally uploaded by Levpat but they seem to have disappeared. The workflow uses an SDXL realism checkpoint with a tile controlnet to upscale the image in pieces. Don't be intimidated by the huge spaghetti nightmare. Just set the input image on the left and ignore the rest. I recommend using IntoRealism SDXL by enzino and no prompts. Also a semireal model for the input image works best. It's not a super intelligent workflow (no regional prompting) but its beautiful and fast.

IMG2IMG SDXL Workflow with Auto Resize + META
IntroductionHi everyone! I wanted a simple IMG2IMG workflow that saves Metadata and uses LoRA Manager. I also wanted one that could handle resizing images because I hate fiddling with resolutions. I found an old workflow by Postpos and incorporated some genius Comfy spaghetti from Legendaer to get all the strings to arrange themselves into both the metadata and the conditioning ... and this simple workflow is the result. Presented as-is, if it doesn't work let me know but I might not be able to help you. This workflow should take any SDXL base checkpoint, including Pony and Illustrious. Seems to have no problem going from Anime to Realism and back. Remember to set your Denoise setting (~.5 for stronger image adherence, ~.7 for more creativity)Base Workflow FeaturesShortcuts by rgthreeSave metadata and LoRAs in a way that is CivitAI compatibleToggle auto-resizing on or offNatural Language and Tags promptingLoRA Manager for ease-of-useWorkflow Embedding (toggle)Before/After Image ComparerCustom Node Requirements:rgthreeImpact PackKJNodesEasy-UseComfyMathComfyUI Image SaverComfyUI-LoRA-ManagerCG Use Everywhere - for Anything EverywhereEfficiency-NodesDynamic ThresholdingSkimmed_CFGComfyroll StudioComfyUI_essentialsDerfuu_ComfyUI_Modded NodesComfyUI Impact SubpackComfyUI-mxToolkit - for the slidersComfyUI_MiraI realize the number of nodes is increasing as the version number increases. This is still a fairly basic workflow and should not be overwhelming, and still remains very much like previous versions.New with Version 3.0I wanted to keep the workflow simple and at the same time, provide a little more detailer power. This workflow gives us previews of the SEGS, rather than the complexity of the SEGS filtering you simply get a preview image and can change the prompts based on the image. The colors of the preview/prompts alternate so you don't get mixed up. I added a hands detailer because we know we're gonna need it with AI. One new custom node, Everywhere, for the Anything Everywhere node.I added a LoRA slot specifically for each detailer that will hopefully really bring things into focus. However this simple node is inserted without a connection to your existing Lora stack. If this is interfering with your generation, get rid of it or connect the Model output of the LoRA loader to the input of this node, depending on what you hope to accomplish.New with Version 3.1SEGS Detailer arrays upgraded to Module 1.1 (same as my Text2Img workflow): Replaced Image Previews with Image Comparer nodes.New with Version 3.4Color Matching after Upscaler, to counteract the tendency of upscalers to cause greening or yellowing slightly. Works great, no need to mess with it.CFG Controls - CFG Skimming and Dynamic Thresholding, great nodes for allowing more flexibility in your CFG setting. Generally improves the overall output.New With Version 4.0Changed the layout somewhat, creating an upper left-to-right workflow area and putting the utilities below.Implemented sliders and put most of the most important controls up front in the Input section. You may still want to tweak the detailer prompts etc in those areas.New With Version 5.0Bringing my workflows up to speed and into alignment so that they work and handle similarly, many small changes were made to ensure the two workflows handle as a pair. Banners were added for the detailers and upscaler to improve user orientation, and the LoRA blockers now work with toggles instead of spaghetti strings. The Spaghetti zone was moved out of the left-right flow, and the subgraph for resizing images was repackaged. The checkpoint loader now loads directly, allowing you to download a checkpoint and slap it into the native ComfyUI node without rebooting your server.General:Using Img2Img is fun and now with THIS workflow, you have complete control over what faces look like what. You may not be able to get the face detailer to work on all furries but you can still get a lot done with this workflow. Due to the way that the face detailer works, it really only makes sense to use it for I2I workflows. I2I approaches can obliterate the vanishing point effect that Illustrious can create. It can give you a predictable structure and framework and the results .. well, you might just be surprised!Whereas before, you were at the mercy of randomness and checkpoint biases, with this detailer you can get ethnicity and expression right on the first shot. Details in the workflow!
![APEX FLOW [Highres Fix, SeedVR2, FaceDetailer, ControlNet, Inpainting]](https://image.civitai.com/xG1nkqKTMzGDvpLrqFT7WA/5a65df7f-16b4-436f-9c16-24b1b1914994/original=true/125773841.jpeg)
APEX FLOW [Highres Fix, SeedVR2, FaceDetailer, ControlNet, Inpainting]
This is the workflow that was made with Lustify V8 model in mind, although other models would obviously work with it. Please, read all the notes I've left in the workflow!WARNING! If you use DMD2 workflow, you'll need to do a little bit of manual tweaking, as it utilizes NAG (Normalized Attention Guidance) node for negative prompts to work. And the node hasn't been maintained by it's author for some time already. It's not hard to fix it:1) If you don't have the node installed yet, open your ComfyUI\custom_nodes. Open terminal there and do "git clone https://github.com/ChenDarYen/ComfyUI-NAG.git"2) In the file "custom_nodes\ComfyUI-NAG\chroma\layers.py", change line 5 to: from comfy.ldm.flux.layers import DoubleStreamBlock, SingleStreamBlock3) That's it, the node is now working.NON-DMD2 Workflow: My personal favorite. It’s slower, and you really need to use most of the custom tools I added to the workflow to get it right. But honestly? It gives the absolute highest quality and most creative results.DMD2 Workflow: Super fast (6-8 steps) and actually supports negative prompts thanks to NAG. The downside? DMD2 has its own specific visual style, and you do lose a bit of diversity in faces, backgrounds, and textures. Some people prefer this purely for the speed and the vibe.

Multi-LoRA Workflow for Stable Multi-Character Images
This is a simple workflow for chaining multiple LoRAs in text-to-image to produce stable multi-character images with clean faces and controlled style.It uses LoRA Loader (Block Weights) from the COMFYUI Inspire Pack.You can chain multiple LoRAs like a sequence:Checkpoint -> LoRA 1 (Character 1) -> LoRA 2 (Character 2) -> ... -> LoRA N (Style, if needed) -> KSampler Key Tips:Model weight flow is important: use a descending strength approach to avoid overbaked shading and face distortion.Block weights control how strongly a LoRA affects each layer of the network:Example:LoRA 1 (Character 1): 1,1,1,1,0,0,0,0,0,0,0,0LoRA 2 (Character 2): 0,0,0,0,1,1,1,0,0,0,0,0Style LoRAs usually get higher values in later blocks to preserve the artistic style without affecting the face.Following this workflow ensures:Multi-character images without bleedingClean, stable facesControlled style and shading

Production Grade 4k Tiled Upscaler ( VRAM optimized ).
{ "1": { "class_type": "CheckpointLoaderSimple", "inputs": { "ckpt_name": "sd_xl_base_1.0.safetensors" } }, "2": { "class_type": "CLIPTextEncode", "inputs": { "text": "masterpiece, cinematic lighting, 8k resolution, highly detailed" } }, "3": { "class_type": "EmptyLatentImage", "inputs": { "width": 1024, "height": 1024, "batch_size": 1 } }, "4": { "class_type": "KSampler", "inputs": { "seed": 12345, "steps": 25, "cfg": 7.0, "denoise": 1.0, "model": ["1", 0], "positive": ["2", 0], "negative": ["5", 0], "latent_image": ["3", 0] } }, "5": { "class_type": "CLIPTextEncode", "inputs": { "text": "blurry, low quality, distorted, watermark" } }, "6": { "class_type": "UpscaleModelLoader", "inputs": { "model_name": "4x-UltraSharp.pth" } }, "7": { "class_type": "UltimateSDUpscale", "inputs": { "image": ["8", 0], "upscale_by": 2, "upscale_model": ["6", 0], "mode_type": "Chess", "tile_width": 512, "tile_height": 512, "mask_blur": 8, "upscale_workflow": "tiled" } }, "8": { "class_type": "VAEDecode", "inputs": { "samples": ["4", 0], "vae": ["1", 2] } }, "9": { "class_type": "SaveImage", "inputs": { "images": ["7", 0] } }}

DriftPixel Simple Workflow | ComfyUI | No Custom Nodes | Beginner Friendly
Text-to-Image Workflow (ComfyUI) by DriftPixelThis workflow is a simple and efficient text-to-image pipeline designed for use in ComfyUI. It focuses on ease of use while still providing flexibility for different models and setups.Target Audience:Suitable for all users, including complete beginners who are just getting started with ComfyUI.VRAM Requirements:Approximately 6–8 GB of VRAM, depending on the model and settings used.Model Compatibility:Compatible with a wide range of models. The workflow is optimized for SDXL, but can be used with other checkpoints as well.

线稿上色—Lora+IP-Adapter Advanced
*线稿画面改变过大可调高controlnet强度(*Lora Loader和IP-Adapter Advanced 暂时无法从Fast Groups Muter快捷启停 需使用组内Fast Bypasser加入Lora Loader (LoraManager) 快捷选择Lora模型加入IP-Adapter Advanced 快速风格迁移 可能加入并行分支对比预览对比单Lora和IP-Adapter效果 可能加入多个IP-Adapter一次生成多种风格进行对比 如果有人用的话(

Shima 2.0
Shima 2 is the complete rework of Shima from a couple years ago. Basically, life got hectic and I needed to step away...but I'm back and I've spent months rebuilding Shima from the ground up---from a workflow that used to rely on many node packs, to one that so far has only 2 dependencies (Use Everywhere and the Impact Pack for SEGs) because I favored rolling my own wherever it makes sense. BUT that isn't all. It now has a companion, Shima.wf , a new website for sharing, organizing, and even monetizing your workflows. As always, I am committed to offline generation---you don't need to be connected to use anything here except to initially and occasionally sync your organized workflows from the cloud. Shima.wf 's login is via Discord, and I store nothing else beyond your Discord username, and I never see anything you generate because that is YOUR business, not mine.This has been a labor of love, and I'd like it very much if people can help get it back off the launchpad. Over the course of the next week I'll be making videos, and I've been making tutorial workflows that explain some of the new tools like the OmniJog, the bypassers, the new reroutes (worth the free price of admission) and more. The site has a few workflows loaded already. So grab Shima from Github , join the discord at https://discord.gg/vggNspQC3h and make cool stuff.

✨ CATHRIN — SDXL LoRA · High-Fashion Editorial Portrait Generator | Full ComfyUI Workflow Included
# 🌟 CATHRIN — SDXL LoRA · High-Fashion Editorial Portrait Generator> Vogue-cover quality portraits. Every single time.Cathrin is a meticulously trained SDXL LoRA that generates hyper-realistic,high-fashion editorial portraits — flawless skin, sharp expressive eyes,cinematic lighting. A complete ComfyUI workflow with 4×-UltraSharp upscalingpipeline is included. Just import the JSON and start generating.---## ⬇️ DOWNLOAD CATHRIN — SDXL LoRA→ https://civitai.com/models/2462382---## ⚙️ Recommended Settings| Setting | Value ||----------------|--------------------|| Sampler | dpmpp_2m || Scheduler | karras || CFG Scale | 7.0 || Steps | 30 || LoRA Weight | 0.8 (range 0.6–1.0)|| Base Resolution| 1024 × 1024 || After Upscale | 2048 × 2048 || Seed (start) | 42 |---## 🔑 Trigger Word — Always RequiredStart every prompt with: <s0><s1>---## 📁 Required Files & Placementcathrin.safetensors → ComfyUI/models/loras/cathrin_emb.safetensors → ComfyUI/models/embeddings/sd_xl_base_1.0.safetensors → ComfyUI/models/checkpoints/4x-UltraSharp.pth → ComfyUI/models/upscale_models/---## ✍️ Prompt Examples[Fashion]<s0><s1> woman, high fashion editorial, Vogue cover,dramatic rembrandt lighting, couture outfit,dark gradient background, 8K, masterpiece[Portrait]<s0><s1> woman, close up beauty portrait,soft studio lighting, neutral background,flawless skin, sharp eyes, 8K, masterpiece[Outdoor]<s0><s1> woman, outdoor portrait,golden hour sunlight, bokeh background,natural expression, 8K, masterpiece[Business]<s0><s1> woman, professional headshot,business attire, clean white background,confident pose, 8K, masterpiece---## 💡 Tips for Best Results✦ Keep LoRA weight between 0.6 – 1.0✦ Add "masterpiece, best quality" to every prompt✦ Use CFG 6–8 for natural, realistic results✦ Seed 42 is a great starting point✦ Upscale output is 2048px — print-ready quality✦ Complete ComfyUI JSON workflow included — import directly---🔗 Download CATHRIN — SDXL LoRAhttps://civitai.com/models/2462382Created with ♥ — Share your results on CivitAI

Granny's SDXL Upscale Detailer
The workflow rediffuses part of given image to gain better details using SDXL models.The workflow is tested on recent ComfyUI version and recent versions of nodes with configuration PyTorch 2.9.0+Cu130, Python 3.13.11, RTX5090, Windows 11.How to use:1) Upload image2) Specify (or leave default) Denoise strength3) Specify (or leave default) Scale4) Select mask area in Mask Editor to rediffuse that part of image5) Specify the prompt to guide diffuser.Optional:6) Using a lora you can do an inpaintPS. Maintain Scale parameter to give resolution <= 2048. Bigger can do a mess.

ComfyUI beginner friendly SDXL 1.0 AIO Text-to-Image Workflow with Easy Prompt Saver by Sarcastic TOFU
This is a very simple workflow that helps you to save your SDXL Text to Image Generation Data into a human readable .txt file. This will automatically get and write your metadata to the .txt file. You will find all the saved prompt files that it generated with the images inside the Archive (.Zip) that has the workflow. Also with the Image Saver Simple node used you may embed the workflow itself with each saved image or save the image and workflow for your work separately. In this way a readable .txt file for each run of this workflow will be generated (matching Automatic1111 / EasyDiffusion's .txt outputs).As you can see from the screenshot of the output format this is very much readable and ideal for easy reference reuse if you want to reuse the prompt on a different tool like WebUI Forge or Easy Diffusion or something else. This saves both the weights of LORAs along with one or multiple positive & negative embedding(s) with the prompt. For SDXL 1.0 (or SD 1.5 or any other models based on SD 1.5 / SDXL 1.0) having at least one positive embedding and one negative embedding is crucial to have quality output, you may not wanna skip them, this workflow makes it easier to neatly manage and track usage of both embeddings and LORAs. I have provided a more detailed lists of all the LORAs and embeddings for all different kinds of generation examples I have given inside the Archive (.Zip) that has the workflow; look for "Prompt_Helpers_List.txt".Note that with proper selection of matching files (model + encoder + VAE or an AIO model, properly matched LORAs & positive/negative embeddings) you can repurpose this workflow for SD 1.5, Pony & Illustrious too.. just as it is or performing very minimal modification. You can download your necessary SDXL 1.0 AIO model (with baked in text encoder & VAE), LORAs & embeddings used from CivitAI (Details are mentioned below). Make sure you have latest enough ComfyUI installation and install any necessary nodes for for this workflow using ComfyUI manager and download and place correct files (SDXL 1.0 AIO model, LORAs, embeddings etc) in correct places using the LORA Manager (yes! the LORA Manager is simply not just for LORA management, it can also handle Model files and embeddings too). Also check out my other workflows for SD 1.5 + SDXL 1.0, Pony, WAN 2.1, WAN 2.2, MagicWAN Image v2, QWEN, HunyuanImage-2.1, HiDream, KREA, Chroma, AuraFlow, NoobAI, Illustrious, Lumina2, Z-Image Turbo, Flux.2 Klein (4B & 9B), Flux.1 Dev and Kandinsky Image 5 Lite (T2I & I2I) models. Feel free to toss some yellow Buzz on stuffs you like.How to use this -#1. Just select your desired SDXL 1.0 AIO model and embeddings first and now#2. set your desired image dimensions to start#3. then input your desired image prompt.#4. select how many images you want (Change the number besides the "Run" button)#5. select image sampling methods, CFG, steps etc. settings#6. finally press the run button to generate. That's it..** LORA usage for this workflow is optional you can use it without any LORAs, use with 1 or 2 or any other number of LORAs. to add new LORAs press the L button on top to lunch LORA Manager on a new tab find your LORA and if you want to use that LORA just click the upward Kite button. For many Pony models it is vital to select that model's recommended positive & negative embeddings but can of course disable or bypass these. Same thing can be said for your usage of positive or negative embeddings using "Load Embeddings by Name" nodes, on these if you start typing the name of your desired embedding (once installed in correct path) it will automatically try to locate and link the correct one to your positive/negative prompt. You don't need to disorganizedly and incorrectly put them inside the positive/negative prompt itself.Required Files===============### Download Link for SDXL 1.0 AIO Model-----------------------------------------RealVisXL V3 (BAKED VAE) -https://civitai.com/models/139562?modelVersionId=268861**I deliberately used V3 because this one has the most useful matching v3 Inpainting model also with baked VAE. This allows seamless, fast & good quality inpainting tasks.### Download Links for all LORAs & Embeddings used---------------------------------------------------Inside the Archive (.Zip) that has the workflow; look for "Prompt_Helpers_List.txt". This will have a detailed long list of download links for all LORAs & Embeddings used with clear reference to in which example image(s) they are used.

PH's Archviz x AI ComfyUI Workflow (SDXL + FLUX)
ACTUAL VERSION 0.43 from 260223The workflow has 2 main functions, it is designed to 1) enhance renderings and 2) creates highres architectural images (tested 12288x8192) from lowres outputs of any kind of rendering software (tested 1536x1024) and tries to keep details throughout its process of "staged generation": a first stage with sdxl, a second stage for detailing first stages output with flux, a third stage upscaling the seconds stages output with flux again. If you have 3d people in your image, it will autodetect them and enhance them too. You can generate additional people with flux to your image by painting a mask.More infos here:and here:original reddit threadHistory:v0.43_260223- In case you get "Missing Nodes" messages with "If ANY retrn A else B [Microscope Icon]", "Float [Microscope Icon]", "Compare [Microscope Icon]", "Int [Microscope Icon]" -> On ComfyUI_windows_portable (recommended) install/update ComfyUI-Logic nodes (https://github.com/theUpsider/ComfyUI-Logic) through the Manager. Please be aware that these nodes have been ARCHIVED by the author.- due to comfyui's node 2.0 implementation and incompatibility with rgthree FAST GROUP BYPASSER, this workflow works best with classic node (settings -> comfy -> Nodes 2.0 -> Modern Node Design (Nodes 2.0) -> "off"), otherwise groups have to be bypassed manually- quality of life updates ensuring compatibility with latest ComfyUI (0.4.12)- replaced with core nodes to reduce external dependencies - sipherxyz/comfyui-art-venture - melMass/comfy_mtb - jamesWalker55/comfyui-various- removed - experimental section including automated inpainting, realtime sdxl previz stage and posed character control - optional preprocessors for depth, canny and pose alternatives/edited 260223v0.37 actual, tested on Comfyui 0.3.68 and frontend v1.28.8 - removed deprecated nodes, quality of live updates/edited 251105v0.30 - last versions broke due recent ComfyUI update and issues with mtb-nodes (node+)/edited 250326v0.27 recommended - v0.23 of this Model unfortunately stopped working as soon as Mixlabs Nodes are installed or have been installed before (SDXLAspectRatioSelector/art-venture and some preprocessors stop working)/edited 241102I assumed, people who are interested in this whole project, will a) find a quick way or already know how to use a 3d environment like e.g. 3dsmax, blender, sketchup, etc. to create the outputs needed, b) adopt some of the things they see here into their own workflows and/or modify everything to their needs, if they want to use this kind of stuff the way I do.Control over the desired outcome is mainly gained through controlnets in first stage and the help of a masked detail transfer for your base image, where you define the mask by a prompt (e.g. “house, facade, etc. - wherever your details are that you want to transfer/keep throughout the stages you activated). And if you for example have an area where you placed a person with the MaskEditor, the mask gets edited within the process to prevent detail being blended onto that person from your mask. Basically, I’m using various models in a row to add detail in each step or bypass stages that I don’t want while using the workflow, it is only in some cases a straightforward process, still for example I am cherrypicking first stages outputs with a preview chooser before passing it to the next stage.Depending on the models you use, it imagines photorealistic images from renderings like a "per-polygon-unique-colored-mesh" or some kind of outlines/wireframe-meshes/etc. through one or two (or how many you would add) controlnets. Anything that a sdxl controlnet-preprocessor or your controlnet directly will understand, can be used. In advance you can control the amount of the detail transfer and most of the basic functions with sliders and switches (no, I am not a UI or UX designer). Your Prompt then defines the general output, I like to keep it separated to quickly adjust things in the generation, but it just gets concatenated at the end. You may have to edit your 3d output/base image before generation, for example I painted some vertical tiling lines for my facade directly onto the normalpass renderelement in photoshop.In addition, you can change the base settings to have an img2img workflow with one button, keeping its functionality if you already have some kind of more or less photorelistic rendering in the base image input. You may want to denoise that at lower values in first stage, then let flux add details in stage 2 & 3. Most of its additional features, e.g. activating “people generation” and using a MaskEditor paintbrush for placing a flux generated person onto your scene, are considered to be a proof of concept as you can see from the examples.This workflow is:A potential replacement to many paid services like image enhancement and upscalingA “tool” developed for myself to assist my daily doings as a technical artist according to my needs from previsualisation to a final image, in general is based on my best intention, latest findings and limited knowledge of AI itself. I still use my 3d environment and additional rendering software and for example still often postprocess my images manually :)Therefore, this workflow unfortunately is NOT:a masterpiece comfyUI workflow never seen by mankind before - some might have guessed thatultimate magic technology that every time you start generation with, makes you receive an award winning image - not yet, but I promise I’ll let you know asap when I have it. I may not will give it away for free thenThis workflows output in any case will depend on:Your base image input, precisely in context to the purpose of this workflow: your skills in your favourite 3d environment for base image creation. I have not tested this thing with any other stuff besides architecture related imageryYour ability to describe what you want as a prompt/prompting in generalYour Hardware (basically if you can run flux.dev, you can run this, optimization may follow, tested on gf rtx 4090, use more performant models and reduce resolution to make this work on lower hardware)Your creativity to use/edit/adopt something like this, in a way that fit your needsYour understanding of how comfyui and controlnets work and knowledge of which exact settings may work for your scenarioBonuscontent:Because at the moment i cant use "mixlabs screen share" due some display bugs, this workflow is part of the release too, you find it on the right under "Experimental" (may have to pan a little to see it). Replace the Load image node with mixlabs screen share and turn on autoqueue in comfyui to use it as shown in the video. You may want to bypass everything else then.To use the experimental "Flux inpaint by Mask" feature, connect a mask to the respective node in the "mask area" (yellow typo), enable this process on the base cfg and use a prompt for what you want to see - this feature is real experiment and does not give always the desired results.Models used:flux.dev gguf Q8_0.ggufrealVisXL_4.0.safetensorsrealVisXL40_Turbo.safetensorsclipt5-v1_1-xxl-encoder-Q8_0.ggufclip_l.safetensorsip-adapterCLIP.ViT-H-14-laion2B-s32B-b79K.safetensorsip-adapter-plus_sdxl_vit-h.safetensorscontrolnetdiffusers_xl_depth_full.safetensorsdiffusers_xl_canny_full.safetensorsthibaud_xl_openpose.safetensors (optional, to be re-implemented with openpose-editor for posed people in future release)sam2/florence2sam2_hiera_base_plus.safetensorsFlorence2-baseupscale4x-UltraSharp.pthRecommended models to try: CrystalClearXL, RealVisXL, ProtoVision XL,Customnodes used (yes, ressource heavy, even may be edited/added in future, recommended to install ONE-BY-ONE and restart comyui in between to prevent errors):GitHub - ltdrdata/ComfyUI-ManagerGitHub - ltdrdata/ComfyUI-Impact-PackGitHub - Fannovel16/comfyui_controlnet_auxGitHub - jags111/efficiency-nodes-comfyuiGitHub - WASasquatch/was-node-suite-comfyuiGitHub - EllangoK/ComfyUI-post-processing-nodesGitHub - BadCafeCode/masquerade-nodes-comfyuiGitHub - city96/ComfyUI-GGUFGitHub - pythongosssss/ComfyUI-Custom-ScriptsGitHub - ssitu/ComfyUI_UltimateSDUpscaleGitHub - Suzie1/ComfyUI_Comfyroll_CustomNodesGitHub - cubiq/ComfyUI_IPAdapter_plusGitHub - sipherxyz/comfyui-art-ventureGitHub - evanspearman/ComfyMath: Math nodes for ComfyUIGitHub - jamesWalker55/comfyui-variousGitHub - Kosinkadink/ComfyUI-Advanced-ControlNetGitHub - theUpsider/ComfyUI-LogicGitHub - rgthree/rgthree-comfyGitHub - cubiq/ComfyUI_essentialsGitHub - chrisgoringe/cg-image-filterGitHub - kijai/ComfyUI-KJNodesGitHub - kijai/ComfyUI-DepthAnythingV2GitHub - kijai/ComfyUI-Florence2GitHub - kijai/ComfyUI-segment-anything-2GitHub - shadowcz007/comfyui-mixlab-nodesGitHub - palant/image-resize-comfyuiGitHub - yolain/ComfyUI-Easy-UseAll of the above nodes are outstanding work and highly recommended. IF YOU WANT TO SUPPORT MY WORK DIRECTLY you can donate at https://ko-fi.com/paulhansen

IntoRealism Ultra Workflow
Hi everyone!I've had this question asked a lot, so here's a workflow for using the Ultra model on Comfyui.📢 Join The CommunityWe're building a friendly space to chat, share creations, and get support.👉 Click here to join the DiscordYou can visit my Ko-fi page if you appreciate my work for a small donation, orders, etc.

MoP Mix Workflows
These are recommended workflows for the MoP Mix checkpoints.

Img2Img _ Base + Refiner + Detailer _ ComfyUI _ SDXL ILLU NOOBAI PONY SD1.5 Etc _ Crix
Workflow I use when I want to create precisely, starting from an image.This is an Img2Img Workflow to have your images already optimized with just one Workflow!This workflow contains:BASE Img2Img to create your images,REFINER to immediately obtain a good-quality image,DETAILER to obtain precisely detailed faces and bodies if you create people,UPSCALER to obtain a super-quality image,SAVER to save your images with the right information, ready for publication,NOTES to make the most of the workflow.It has custom nodes, to use it you need to install them through "Manage custom node"Not interested in everything? NO PROBLEM!Each of these things can be disabled so that the workflow can work even when you don't need "refiner", "detailer", etc etc!!!If something doesn't work, you have questions, or you need help, message me! I'm happy to help!

Ultimate Cinematic Character Creator: SDXL + IPAdapter + FaceDetailer
This workflow is designed for high-end cinematic character creation with a focus on consistency and realism. It leverages IPAdapter Plus for precise style and character transfer, combined with ControlNet for structural integrity. The facial features are refined using FaceDetailer (Impact Pack) and finished with an Ultimate SD Upscale for a professional 4K output.Key Features:Base Model: Optimized for Juggernaut XL v9.Style Transfer: Dual IPAdapter setup for background and character consistency.Realism: Advanced FaceDetailer settings for life-like eyes and skin textures.Output: High-resolution finish using 4x-UltraSharp upscaler.Nods List:ComfyUI-ManagerComfyUI-Impact-PackComfyUI_IPAdapter_plusComfyUI_Custom_Nodes_AIGODLIKEUltimate SD UpscaleSuggested SettingsCheckpoint: Juggernaut XL v9.Latent Size: $1080 \times 1920$ Upscale Model: 4x-UltraSharp.Recommended Checkpoint: Juggernaut XL v9

Random photorealistic prompt
This was inspired by PromptGeek's YouTube video and eBook so all credits goes to them. Please go and show them some love: Creating Photorealistic Images With AI: Using Stable DiffusionThis workflow builds a random prompt with keywords from the eBook mentioned above following this pattern (also from the eBook): [STYLE OF PHOTO] photo of a [SUBJECT], [IMPORTANT FEATURE], [MORE DETAILS], [POSE OR ACTION], [FRAMING], [SETTING/BACKGROUND], [LIGHTING], [CAMERA ANGLE], [CAMERA PROPERTIES],in style of [PHOTOGRAPHER]In the "Inputs here" group, you set a seed, select a checkpoint and image size. To the right, you set your subject, and optionally a negative prompt. The generated positive prompt can be seen in the console.In the "Random parameters" group, you can add and remove keywords. You may also want to edit the output path.I use two custom node packs. The first one, was-node-suite-comfyui, is a must. It's apparently retired but works fine: https://github.com/WASasquatch/was-node-suite-comfyuiThe other one, cg-use-everywhere, just keeps things neat. You can connect seed, model, clip, vae, and latent manually if you don't want to install it: https://github.com/chrisgoringe/cg-use-everywhereHave fun.

SDXL 1.0 Inpaint + ControlNet
About this workflow:This is an advanced Inpaint + ControlNet workflow designed for high-quality image editing. It provides precise control over changes, allowing you to seamlessly modify specific areas while preserving the overall style and composition.It is ideal for detailed anatomical correction and editing of NSFW content, providing realistic skin texture and natural blending.The workflow setup guide is built-in. For more drastic changes, increase Denoise and lower Strength (setting Strength to 0 disables ControlNet).context_from_mask_extend_factor affects speed and environmental awareness. It determines the area the model 'sees' around the selection. Feel free to experiment—every generation requires a unique approach!You can write the prompt in any language; Google's automatic translator is built in.How to use:Load Image: Upload your base image into the Load Image node.Masking: Right-click the image and select "Open in Mask Editor" to paint over the area you want to change.Prompting: Enter a descriptive prompt for the new content (and a negative prompt to avoid artifacts).ControlNet: Ensure you have the correct Inpaint ControlNet model selected for your base checkpoint.Generate: Click "Queue Prompt" and enjoy the result!

ComfyUI-NebulaPromptManager-SDXL
DescriptionNebula Prompt Manager is a ComfyUI custom node designed to manage prompts and variables for SDXL workflows.It allows saving, loading, and reusing prompt setups as project files.FeaturesPositive Prompt managementNegative Prompt management5 typed variables (string / int / float)Project-based storageJSON prompt memory systemSeparate outputs for workflowsOutputsPositiveNegativeVariable_1Variable_2Variable_3Variable_4Variable_5InstallationCopy into:ComfyUI/custom_nodes/Restart ComfyUIProject Storage<ComfyUI Root>/Nebula-Image-Manager/UsageAdd Nebula Prompt Manager nodeCreate new projectSave prompts and variablesLoad anytimeConnect outputs to SDXL pipelineGitHubhttps://github.com/Konohamaru04/ComfyUI-NebulaPromptManager

Simple ComfyUi DMD2 workflow
A simple workflow with as few nodes as possible while still containing metadata for automatic processing by civitai. Generate images at blazing speeds without sacrificing quality (when configured correctly).Nodes:EasyUservtoolsimage saver

ZIT Refiner workflows - SDXL v1
A 4 stage workflow (1) generating a base image using a different base model (the model I used can be found in the version description), (2) refining the image with Z-Image-Turbo to add realism to the image, (3) detailing the image using detailer subgroups, and (4) upscaling and refining the image.The final step in stage 4 (enhance and sharpen) requires the ImageMagick binaries to be installed. They are available for download here: https://imagemagick.org/script/download.php.

いつも使っているワークフロー / MyDailyDriverWorkflow
English instructions are below the Japanese ones.私が普段から愛用しているComfyUIのワークフローです。ご自由にカスタマイズしてお使いください。このワークフローは、テキストからの画像生成(t2i)をベースに、ControlNet Cannyによるディテールアップ、アップスケール、そしてHires. fixを組み合わせることで、元画像から高精細な画像を生成します。前提条件ComfyUIとComfyUI-Managerがインストールされている。カスタムノード以下のカスタムノードを使用しています。comfyui_controlnet_auxComfyUI-CrystoolsComfyUI-Custom-ScriptsComfyUI Image SaverComfyUI_UltimateSDUpscaleefficiency-nodes-comfyuirgthree-comfy動作確認をしたバージョンComfyUI 0.3.57ComfyUI-Manager 3.0.1comfyui_controlnet_aux 1.1.0ComfyUI-Crystools 1.27.3ComfyUI Image Saver 1.15.2ComfyUI_UltimateSDUpscale 1.3.3efficiency-nodes-comfyui 1.0.8rgthree-comfy 1.0.2509092031このワークフローの使い方上部にある「Fast Groups Muter (rgthree)」ノードは、各グループの有効/無効を切り替えるのに便利です。例えば、リトライする場合などに活用してください。「->」ボタンをクリックすると、そのグループにジャンプできます。グループごとの設定方法Settingsグループこのグループでは、以下の項目を設定します。CheckpointCLIP Set Last Layer(CLIP Skip)SamplerSchedulerStepsCFG画像サイズPromptsグループプロンプトを入力します。プロンプトが複数に分かれているのは、SDWebUIのBREAK構文と同様に、75トークン制限を回避し、プロンプトの効果を高めるためです。Generateグループここでは、「Seed (rgthree)」ノードでSeed値を設定します。「KSampler (Efficient)」ノードのSeedは使用されません。(任意)Save t2i Imageグループ生成されたt2i画像の保存設定を行います。「Image Saver」ノードが2つあります。左側のノード: プロンプトが埋め込まれたPNG形式と、ワークフローがJSON形式で切り離されたファイルを保存します。右側のノード: プロンプトやワークフローが埋め込まれていないJPEG形式で画像を保存します。t2i画像の生成が目的の場合、以降のステップの実行は必要ありません。ControlNetグループt2i画像をControlNetで再処理してからHires.fixへ送る場合に有効にします。※このグループが無効な場合、t2i出力が直接Hires.fixへ接続されます。このグループは複数のステップに分かれています。ステップ1: 「Load ControlNet Model」ノードにCannyモデルを設定します。モデルをお持ちでない場合は、Hugging Faceからdiffusion_pytorch_model.fp16.safetensorsをダウンロードしてください。ファイル名をCannyモデルだと分かるようにリネームしておくと管理が楽になります。※Cannyモデル以外のモデル(Soft Edgeなど)を使用したい場合は、ワークフローを組み替えてください。ステップ2: ディテールアップを行うためのプロンプトを入力します。ステップ3: 「Canny Edge」ノードのパラメーターを調整してください。設定が分からない場合は、デフォルトのままで問題ありません。ステップ4: 「Apply ControlNet (Advanced)」ノードのstrengthを調整します。数値が大きいほどControlNetの効きが強くなります。これも設定が分からない場合は、デフォルトのままで構いません。ステップ5: 「KSampler (Efficient)」ノードでSteps、CFG、Sampler、Scheduler、Denoiseを設定します。Denoiseが大きいほど、元画像(t2i)からの変化が大きくなります。筆者は通常、0.65を使用しています。Hires. fixグループこのグループも複数のステップに分かれています。ステップ1: 「Load Upscale Model」ノードに使用するアップスケーラーを設定します。筆者はイラスト生成が多いため、RealESRGAN_x4plus_anime_6Bをよく使います。ステップ2: 「Ultimate SD Upscale」ノードにSteps、CFG、Sampler、Scheduler、Denoiseを設定します。Denoiseが大きいと、元画像からの変化が大きくなります。筆者は通常、0.20を使用しています。※Seedは固定・ランダムどちらでも構いません。ただし、Seedを固定しておくと、Hires. fixのリトライ時にアップスケールが再度実行されないため、時間を節約できます。ステップ3: 「KSampler (Efficient)」ノードでSteps、CFG、Sampler、Scheduler、Denoiseを設定します。Denoiseが大きいと元画像(Ultimate SD Upscaleで生成された画像)からの変化も大きくなります。筆者は通常、0.35を使用しますが、画像が破綻する場合は0.20に下げます。Save Imageグループ生成された画像の保存設定を行います。「Image Saver」ノードが2つあります。左側のノード: プロンプトが埋め込まれたPNG形式と、ワークフローがJSON形式で切り離されたファイルを保存します。右側のノード: プロンプトやワークフローが埋め込まれていないJPEG形式で画像を保存します。筆者は、PNGはCivitaiや画像公開サイトに、JPEGはSNS投稿に使い分けています。最終ステップ最後に、ワークフローを実行して画像を生成します。ポイントワークフローは最初から最後まで一気に実行しても構いませんが、「Fast Groups Muter (rgthree)」ノードでグループの有効/無効を切り替えながら、一つずつ試すことをお勧めします。良い結果が得られた段階でシードを固定する方法を取ると、リトライがしやすくなります。サンプル画像についてサンプル画像では、以下の方法で元の画像(t2i)に手を加えています。「ControlNetグループ」のプロンプトに「Realistic lighting, Realistic texture」を追加し、リアルな質感を少しだけ加えています。This is my daily driver ComfyUI workflow that I use regularly. Feel free to customize it to your liking.This workflow generates high-resolution images from a base image by combining text-to-image (t2i) generation with ControlNet Canny for detail enhancement, upscaling, and Hires. fix.PrerequisitesComfyUI and ComfyUI-Manager are installed.Custom nodesThe following custom nodes are used.comfyui_controlnet_auxComfyUI-CrystoolsComfyUI-Custom-ScriptsComfyUI Image SaverComfyUI_UltimateSDUpscaleefficiency-nodes-comfyuirgthree-comfyConfirmed Working VersionsComfyUI 0.3.57ComfyUI-Manager 3.0.1comfyui_controlnet_aux 1.1.0ComfyUI-Crystools 1.27.3ComfyUI Image Saver 1.15.2ComfyUI_UltimateSDUpscale 1.3.3efficiency-nodes-comfyui 1.0.8rgthree-comfy 1.0.2509092031How to Use the ComfyUI WorkflowThe "Fast Groups Muter (rgthree)" node at the top is useful for enabling and disabling each group. For example, you can use it when you need to retry a generation. Click the "->" button to jump to that specific group.Settings for Each GroupSettings GroupIn this group, you'll set the following items:CheckpointCLIP Set Last Layer(CLIP Skip)SamplerSchedulerStepsCFGImage sizePrompts GroupEnter your prompts here. The prompts are divided into multiple sections to avoid the 75-token limit and enhance the effect of the prompts, similar to the BREAK syntax in SDWebUI.Generate GroupSet the Seed value using the "Seed (rgthree)" node. The seed in the "KSampler (Efficient)" node is not used.(Optional) Save t2i Image GroupConfigure the settings for saving the generated images. There are two "Image Saver" nodes.The left node: Saves the workflow as a JSON file and the image as a PNG with the prompts embedded.The right node: Saves the image as a JPEG without any embedded prompts or workflow data.If your goal is only to generate T2I images, you do not need to proceed with the subsequent steps.ControlNet GroupEnable this to process the t2i image through ControlNet before Hires.fix.Note: If this group is disabled, the t2i output will be connected directly to Hires.fix.This group is divided into multiple steps.Step 1: Set the Canny model in the "Load ControlNet Model" node. If you don't have the model, you can download diffusion_pytorch_model.fp16.safetensors from Hugging Face. It's a good idea to rename the file to make it easily identifiable as a Canny model.Note: You don't have to use a Canny model. If you want to use a different model like Soft Edge, you can modify the workflow.Step 2: Enter the prompts for adding detail.Step 3: Adjust the parameters of the "Canny Edge" node to your liking. If you're not sure, the default settings are fine.Step 4: Adjust the strength of the "Apply ControlNet (Advanced)" node. A higher value increases the effect of ControlNet. The default setting is okay if you're unsure.Step 5: Set the Steps, cfg, Sampler, Scheduler, and Denoise in the "KSampler (Efficient)" node. A higher Denoise value results in a greater change from the original image (t2i). I typically use 0.65.Hires. fix GroupThis group is also divided into multiple steps.Step 1: Set the upscaler model in the "Load Upscale Model" node. The choice depends on the purpose of your image, but since I often generate illustrations, I frequently use RealESRGAN_x4plus_anime_6B.Step 2: Set the Steps, CFG, Sampler, Scheduler, and Denoise in the "Ultimate SD Upscale" node. A higher Denoise value will result in a greater change from the original image. I typically use 0.20.Note: You can set the seed to be either fixed or random. However, fixing the seed saves time, as the upscaling process won't be re-executed when you retry the Hires. fix step.Step 3: Set the Steps, CFG, Sampler, Scheduler, and Denoise in the "KSampler (Efficient)" node. A higher Denoise value also results in a greater change from the original image (Generated by the Ultimate SD Upscale node). I typically use 0.35, but I lower it to 0.20 if the image starts to look distorted.Save Image GroupConfigure the settings for saving the generated images. There are two "Image Saver" nodes.The left node: Saves the workflow as a JSON file and the image as a PNG with the prompts embedded.The right node: Saves the image as a JPEG without any embedded prompts or workflow data.I use the PNG format for platforms like Civitai and other image-sharing sites, and the JPEG format for social media posts.Final StepFinally, execute the workflow to generate your image.PointYou can run the entire workflow from start to finish, but I recommend testing it step by step by enabling and disabling groups using the "Fast Groups Muter (rgthree)" node.If you get a good result, you can lock the seed at that point, which makes it easier to retry and make further adjustments.About the Sample ImageThis sample image was modified from the original (t2i) using the following methods:The prompts "Realistic lighting, Realistic texture" were added to the "ControlNet group" to give it a slightly more realistic texture.The English translation of this workflow description was created with the help of Gemini.

SDXL Controlnet Compact
This is a Controlnet focused workflow for SDXL, designed to be visually compact and simplified for ease of use.This workflow utilizes CLIP G and CLIP L, which most people don't even realize is the actual way you're supposed to use SDXL. This is a dual positive prompt system. Technically you'd want to prompt each clip differently, but most people just use the same prompt for both CLIP models. CLIP L is generally better at handling keywords and subject details, while CLIP G is better at natural language and composition. Prompting differently between them can potentially get better results.This workflow utilizes Kohya Deep Shrink HiRes Fix, an infinite LoRA loader, and is geared toward DMD2 acceleration and LCM sampling settings out of the box. If you are not using a checkpoint that has DMD2 built in, you will have to use the DMD2 LoRA. HiRes Fix should ideally be used at a block number of 4-32. The downscale factor has a range of 1-9, but can generally be left at default. HiRes Fix can be used at 1024x1024, but generally you want to use it when you generate at resolutions higher than that.I find using HiRes Fix at 1500x1500 to be a good bump in image quality while maintaining coherence. I'd experiment with enabling/disabling HiRes Fix or removing the CLIP models node and plugging clip directly into the checkpoint loader, or just prompting the CLIP G field only if you're not getting the results you want.Negative prompt is hidden by default, as CFG 1 ignores negative prompt anyways. If you modify the workflow to utilize negative prompt for non-DMD2 generation or DMD2 generation with a CFG slightly above 1, it will be a dual negative prompt system._________Required models:CLIP L: https://huggingface.co/comfyanonymous/flux_text_encoders/resolve/main/clip_l.safetensors?download=trueCLIP G: https://huggingface.co/second-state/stable-diffusion-3.5-large-GGUF/resolve/main/clip_g.safetensors?download=trueDMD2 LoRAs:FP32: https://huggingface.co/tianweiy/DMD2/resolve/main/dmd2_sdxl_4step_lora.safetensors?download=trueFP16: https://huggingface.co/tianweiy/DMD2/resolve/main/dmd2_sdxl_4step_lora_fp16.safetensors?download=trueSDXL ControlNet models:https://civitai.com/models/136070/controlnetxl-cnxlRecommended ControlNet models:ControlNet Union: https://civitai.com/models/136070?modelVersionId=655749ControlNet Union ProMax: https://civitai.com/models/136070?modelVersionId=655836

Anime to Realism Multi-Stage Workflow
Anime → Realism Convergence is a multi-stage ComfyUI workflow designed to start with anime or stylized checkpoints (IL, Pony, etc.) and progressively refine the image into high-quality realism using low-denoise, and staged transitions.The key feature of this workflow is style preservation across checkpoints — you can use the same prompt across all stages, allowing the original anime/cartoon design language to carry through as the image resolves into realism. It also utilizes face detaiing and hand detailing as separate stages for further polishing.It works with virtually any:Anime / illustration base (IL, Pony, similar) as stage 1.Final realistic XL checkpoint (UltraRealistic, RealDream, or comparable) as stage 2.By gradually lowering denoise and transitioning checkpoints via latents instead of hard-switching, the workflow avoids common issues like identity loss, composition drift, or style snapping.Best use cases:Anime → photorealistic character conversionStylized concept art refined into realismPreserving anime facial structure, outfit design, and color language in realistic rendersNo prompt rewriting required — just set your models, seed, and let the stages do the work.Designed for users who want anime aesthetics without sacrificing realistic finish quality.

Generate-ControlNet-aDetailer-HiRes
Старался создать максимально простой и доступный в управлении процесс. Для тех у кого мало VRAM, прогоните процесс для прогрузки моделей, после в шумогенераторе выберете предыдущее семя и запустите ещё раз. КАЖДАЯ ПРАВКА ЗАПРОСА повторяет процесс загрузки!

TXT2SVG
Requested asset pipe, as named. Minimal Text to SVG

15 step workflow
An optimized merged workflow, 4 steps of lcm, sgm_uniform at cfg 0.1, followed by 11 steps of dpmpp_3m_sde_gpu, kerras at cfg 3.6 and .61 denoise.

lcdxl
Using any sdxl based models.4 steps of Lcm bring the pixels together into a base form. Locking down angle and character position/pose first. 8+ steps of refining are free to create the finer details focusing almost exclusively on the main subject. Fine details like bark and fur look amazing but faces and hands could use some aftercare. If you don't ask for colors and set LCM to 1 step, 8 steps total, you get coloring book pages.I still have a ton more experiments to do.
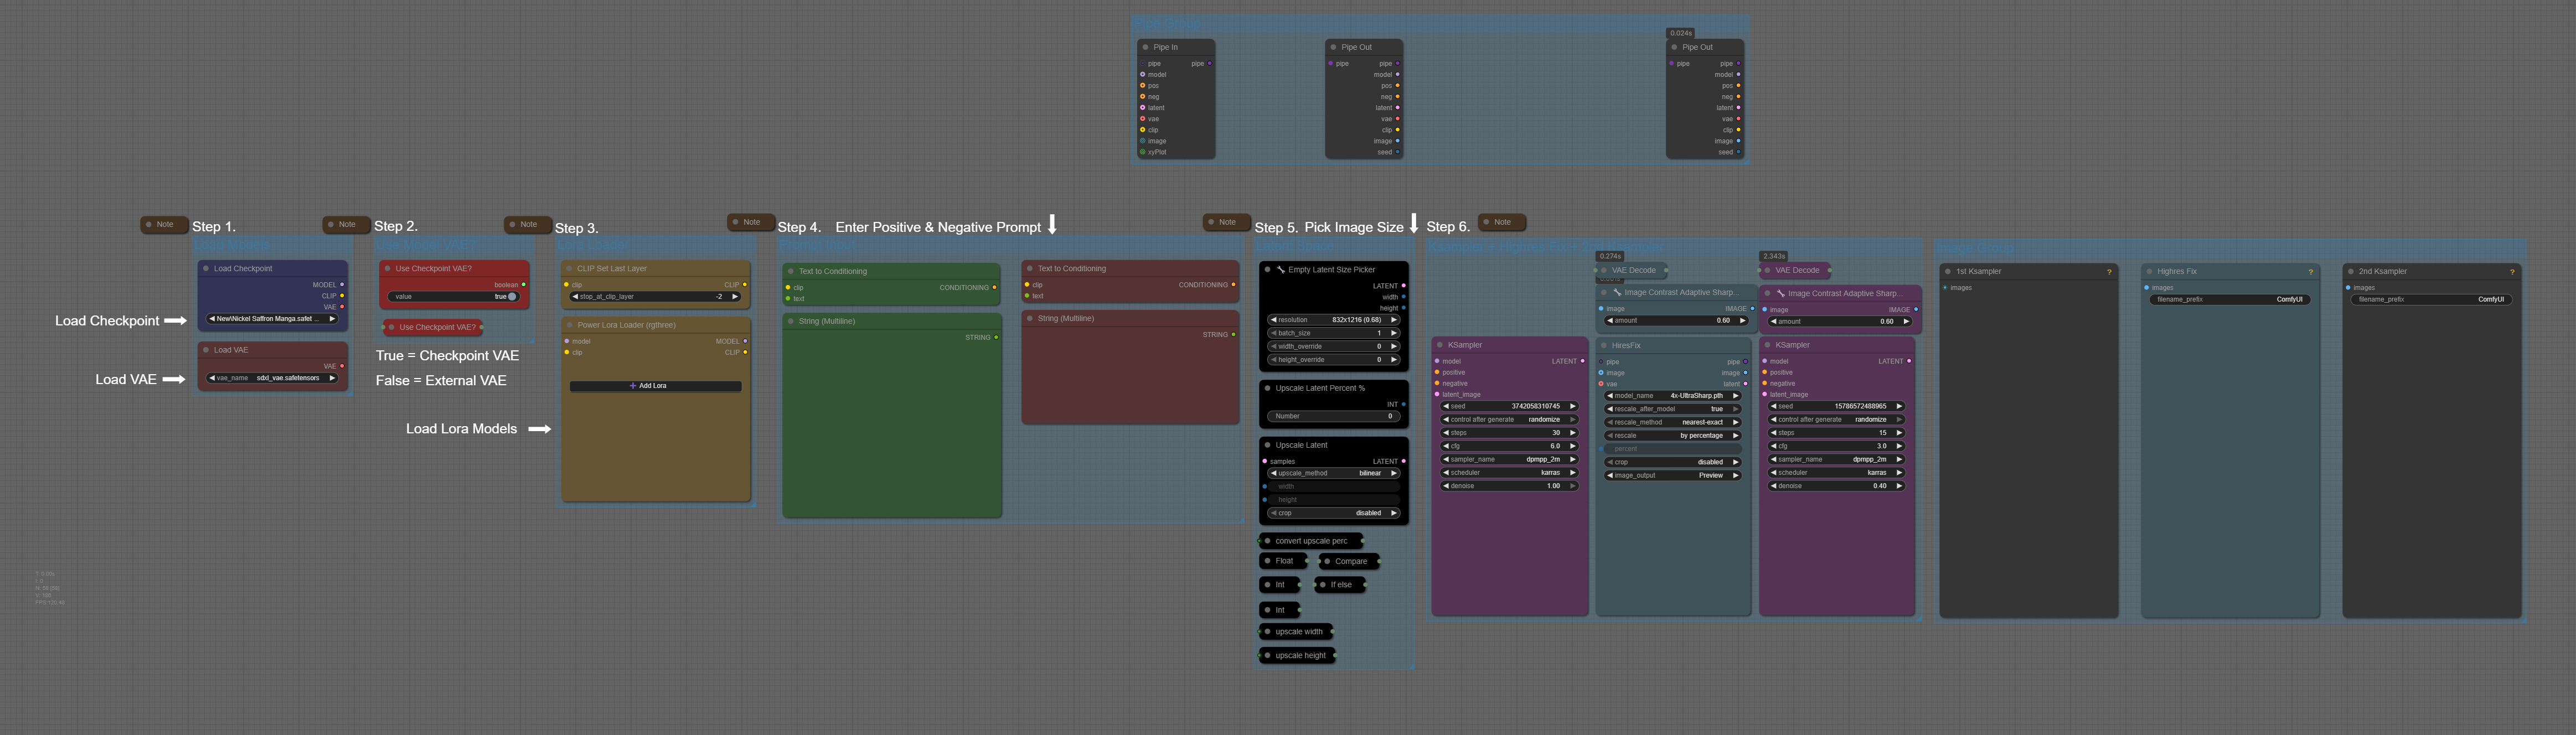
Sexiam - Basic 2-Stage Txt2Img
Sexiam - Beginner Friendly Txt2Img WorkflowList of custom nodes used:ComfyUI-Custom-Scriptsrgthree-comfyComfyUI-Easy-UseComfyUI_essentialsComfyLiteralsWAS Node SuiteIf you’re new to ComfyUI and not sure where to start, this workflow is meant to give you a reliable foundation. It focuses on a simple, standard text-to-image setup that helps you get clean, polished results while you learn how ComfyUI works.Step 1: Load your checkpoint and VAE modelsThe checkpoint is basically the brains of the model. It’s where all the learned knowledge lives — things like style, anatomy, lighting, and how your prompt gets interpreted.The VAE is what takes that invisible latent data and turns it into an actual image you can see. Think of the latent space as a compressed blueprint, and the VAE as the translator that converts it into real pixels. A different VAE won’t change what the model creates, but it can subtly affect how the final image looks, especially in color, contrast, and fine detail.Step 2: Use the built in Checkpoint VAE or an external VAE?Most of the time, the built-in checkpoint VAE works just fine — that’s why it’s the default. But if an image looks wrong in subtle ways, like odd colors or flat contrast, swapping to an external VAE is an easy way to rule out decoding issues. Think of it as a safety switch you probably won’t need, but you’ll be glad it’s there when you do.Step 3: Skip clip last layer & Lora LoaderThink of CLIP Skip as how literally the model “listens” to your prompt. Skipping the last layers softens that interpretation just a bit, which often leads to better composition and fewer weird edge cases.If you’re not sure what to use here, don’t overthink it — leave CLIP Skip at -2 and move on.Load your LoRA models using the Power LoRA Loader by clicking “Add LoRA.” Once a LoRA is loaded, you can right-click on it and select “Show Info” to see its trigger words, example images, and a direct link to its Civitai page.This makes it much easier to understand how and when to use each LoRA in your prompt.Step 4: Entering in your Positive and Negative PromptThis is where you tell the model what you want and what you don’t want.The green prompt box (Positive Prompt) describes what should appear in the image. This includes the subject, style, clothing, pose, lighting, and any LoRA trigger words you’re using.The red prompt box (Negative Prompt) tells the model what to avoid. This is where you list common problems like bad anatomy, artifacts, unwanted styles, watermarks, or anything you consistently don’t want showing up.Both prompts are converted into conditioning using the Text to Conditioning nodes, which is how the model actually understands your instructions. The positive and negative prompts work together — the model is constantly balancing both when generating the image.A few practical tips:You don’t need to write perfect sentences. Comma-separated keywords work great.Put important concepts earlier in the prompt — they tend to carry more weight.If a LoRA isn’t doing anything, double-check that its trigger words are included here.The negative prompt is just as important as the positive one. A strong negative prompt can dramatically clean up results.If you’re new, start simple. Get a clean result first, then slowly add detail. This workflow is built so you can experiment safely without everything falling apart.Step 5: Pick image size with the Latent Space groupThis section controls how big your image is, but it does so before anything becomes pixels. Everything here happens in latent space, which is cheaper to compute and gives the model more room to think before details are locked in.Here’s what each part is doing and why it’s set up this way:Empty Latent Size PickerThis is where you choose your base resolution.The selected size (for example, 832×1216) defines the initial canvas the first KSampler works on.Think of this as the starting blueprint.Bigger isn’t always better — SDXL is happiest when the base image stays reasonably sized.Aspect ratio matters more than raw resolution at this stage.Upscale Latent Percent %This value controls how much the latent space is upscaled before the first KSampler runs.0 = no upscale (use the base resolution)50 = upscale the latent by 50%75 = upscale the latent by 75%This gives you a simple, human-friendly way to say “make it bigger” without manually calculating widths and heights.Upscale LatentThe Upscale Latent node resizes the latent before it’s ever turned into an image. At this stage the latent is just noise, but resizing it still matters because it changes the canvas and structure of that noise before the model starts sampling.This node does not add detail. It only gives the KSampler a larger (or smaller) latent space to work with.Even though the latent starts as noise, the way that noise is interpolated affects how stable the first pass is and how clean the refinement will be later.Upscale methods (how they affect raw latent)bilinear (default)Smooth, neutral interpolationProduces evenly blended noiseMost stable option and the safest default for anime and stylized modelsLets the KSampler decide style instead of forcing one earlynearest-exactCopies noise values without blendingPreserves harder transitions in the latentCan help very flat or cel-shaded anime stylesMore likely to introduce blocky structure that needs cleanup laterbicubicSharper interpolation with more curve fittingCan subtly distort noise patternsSometimes over-smooths or introduces ringing artifactsareaAverages surrounding noise valuesCan flatten the latent too muchGenerally better for downscaling than upscalingbislerpSpherical interpolation in latent spaceMore experimental and less predictableCan change the “feel” of the generation in subtle but inconsistent waysCropCrop is disabled here to preserve the full composition. Cropping latent space can silently cut framing or anatomy and is rarely desirable in a refinement workflow.Math Nodes (The Safety Net)This is the part that quietly prevents quality problems.The math nodes:Convert your upscale percentage into a multiplierCalculate the resulting width and heightCompare the final resolution against a safe thresholdIf the upscale would push the image too large, the workflow automatically caps the refinement size so the second KSampler doesn’t go past roughly 2 megapixels.Why this matters:SDXL models tend to lose coherence when refining images that are too largeGoing over ~2MP during refinement often causes:Mushy detailsWashed-out texturesAnatomy driftInstead of letting that happen, the workflow intentionally scales back the second passYou don’t have to think about any of this while generating — the math handles it for you.Step 6: Two-Stage Sampling with UpscalerThis part of the workflow is where most of the polish comes from. Instead of trying to do everything in one pass, the image is built in three clear phases:Sampler 1 → High-Res Fix → Sampler 2.This approach is called two-stage sampling, and it’s especially effective with SDXL.Sampler 1: The Base PassThe first KSampler is responsible for the big decisions:Overall compositionPose and framingMajor shapes and lightingInterpreting your prompt and LoRAsHere, the denoise is set to 1.0, which means the model starts from pure noise and fully generates the image. This pass is not about perfection — it’s about getting a strong, coherent base.Think of this as blocking in a sketch.High-Res Fix: Making Room for DetailOnce the base image exists, it is decoded and lightly sharpened, then upscaled before refinement.The sharpen step matters because High-Res Fix works in pixel space. A light sharpen increases local edge contrast (eyes, hairlines, fabric edges), which helps the upscaler preserve structure instead of slightly blurring it. This gives the second KSampler cleaner structure to refine.High-Res Fix then upscales the pixel image produced by the first KSampler and prepares it for refinement.It increases resolution using an upscaler modelIt preserves composition while giving the model more pixels to work withIt does not invent new details by itselfIn this workflow, High-Res Fix is set to Upscale by Percentage, meaning the image is scaled relative to its current size instead of being forced to a fixed resolution.That percentage value is not hard-coded. It’s routed through math nodes earlier in the workflow, which automatically adjust the upscale amount to keep the refinement pass under roughly 2 megapixels. In practice, the values are clamped between 35% and 50%, preventing SDXL from degrading during the second KSampler pass.In other words, you still choose how large you want to go — but the workflow quietly steps in if that choice would push the refine pass beyond what the model handles well.This is different from Upscale Latent, which resizes the latent canvas before the first KSampler runs. High-Res Fix happens after generation, in pixel space, and exists specifically to give the second KSampler more resolution to refine without sacrificing stability.Sampler 2: Refinement Pass (after High-Res Fix)The second KSampler is the refinement pass. It takes the upscaled result from High-Res Fix and improves it without rebuilding the image from scratch. The key setting here is denoise.What denoise controls (in this pass)Denoise is basically: “How much is the sampler allowed to change the image?”Because this is a refine pass, you usually want denoise low, so the model:keeps the composition and identity from Sampler 1tightens details, textures, and small errorsWhy you’d adjust denoiseYou adjust denoise based on what you’re seeing:Lower denoise (around 0.20–0.35):Use this when you like the image and only want small improvements (sharper details, cleaner edges, minor artifact cleanup).Too low can make the second pass do almost nothing.Middle denoise (around 0.35–0.50 — your workflow uses 0.4):The “sweet spot” for most SDXL refine passes.Strong refinement without major drift.Higher denoise (0.50+):Use this only when the base image has bigger problems (bad hands, messy clothing, broken anatomy) and you’re okay risking changes.Too high can cause drift: face changes, pose shifts, details rewriting.So the reason to adjust denoise is simple:If you want more fixing, raise it. If you want more stability, lower it.Where the sharpen node fits (and what it does NOT do)After Sampler 2, the result is decoded to a pixel image and then sharpened with ImageCASharpening+ before saving. That sharpen node is connected to the Save Image output, not back into the sampler.Meaning:Sharpening affects the final saved/preview imageIt does not influence what Sampler 2 is generating (Samplers operate on latents)That’s why sharpening is treated as final polish, not part of the sampling loop.Example Images:I included a handful of example images with the workflow. Just drag and drop any of the images to load the workflow in Comfyui or drag and drop the .json file if you want a clean wokflow without a promt. Each image is from one of my own models.Electrum Cinnamon (Beta)Obsidian AniseRusty Iron PepperCopper ThymeNickel Saffron

ArchViz Workflow
Enchances the realism and overall feel of architectural renders.

Modern Easy SDXL (2026 Base for Flux & Z-Image)
Watch the full Video Tutorial here: https://youtu.be/he2lkOzZ2IoThis workflow has been designed to combine maximum artistic control with a clean, high-performance interface. It serves as a stable foundation for SDXL generations and follows the same logic as our upcoming Flux and Z-Image modules.Core Components & ArchitectureCentral Subgraph System: All complex calculations are offloaded into subgraphs (groups) to avoid "spaghetti node" layouts. The main control is handled via a clear dashboard.Prompt Management:Portrait Master v2: Precise control over pose, facial features, and lighting.Foocus Styler: Integration of over 100 style presets for instant artistic looks.Prompt Mixer & Concat: A logic unit to combine standard prompts and styler outputs, including weight control (order determines influence).Sampling & Detail Control:Lying Sigma Sampler: Specialized fine-tuning of detail depth (recommended correction values: down to -0.06 for SDXL).Start/End-Percent Logic: Allows precise temporal control over when specific sampler settings influence the generation.LoRA Management:Integrated LoRA Manager: Direct connection to local folder structures.Trigger-Word Auto-Fill: Automatic import of tags (compatible with CivitAI metadata).Multi-LoRA Support: Cascaded setup for multiple LoRAs without loss of quality.Performance OptimizationAny Switch & Bypasser Logic: Utilizing rgthree-nodes for quick deactivation of unused paths. Controlled via a global fast bypasser for groups or individual nodes.Hardware Efficiency: Optimized for systems ranging from 8GB VRAM (e.g., RTX 3070 Mobile) to high-end workstations. Render times for SDXL are approximately 3–5 seconds (depending on the system).Installation & RequirementsBase: ComfyUI (Portable or App version).Required Custom Nodes: * rgthree-comfyComfyUI-Impact-PackComfyUI-Custom-Scripts (pysssss)Portrait MasterModels: Compatible with all SDXL 1.0 / Turbo / Lightning checkpoints.Note: This workflow is modular. Extensions for Image-to-Image as well as connections to LLMs (Qwen/Florence2) can be toggled via the provided interfaces at any time.DE: Dieser Workflow ist ein Geschenk an die Community. Ihr könnt ihn frei nutzen, modifizieren und eure Ergebnisse (Bilder) kommerziell verwenden. Ein Credit/Link zu unserem Kanal ist kein Muss, hilft uns aber enorm, weiterhin kostenlose Workflows für euch zu erstellen. Bitte verkauft diesen Workflow nicht 1:1 weiter – Keep it free for everyone!EN: This workflow is a gift to the community. Feel free to use and modify it, and use your generated images for commercial purposes. While crediting our channel is not mandatory, it is highly appreciated and helps us keep creating free resources for you. Please do not resell this workflow as your own – keep it free for everyone!

2-Phase + Detailer + LoRA Manager + Auto Metadata + Memory Optimized Workflow
Dual-Phase + Detailer + LoRA Manager + Auto Metadata + Memory Optimized WorkflowOverviewThe Dual-Phase + Refiner is a ComfyUI workflow designed for producing exceptionally detailed, high-quality images through a sophisticated two-stage refinement process with integrated LoRA Manager support and automatic metadata embedding. This workflow gives you complete control over your image generation pipeline, allowing you to create professional-grade outputs while maintaining efficient memory management for large batch processing. Visual LoRA selection, automatic A1111-compatible metadata embedding, and strategic memory optimization ensure streamlined workflow operation, perfect reproducibility, and crash-free batch processing at scale.Model CompatibilitySkill Level: This is an ADVANCED workflow designed for users who are comfortable with ComfyUI's node-based interface and understand concepts like samplers, schedulers, denoise strength, and model loading. If you're new to ComfyUI, consider starting with simpler single-phase workflows before tackling this production system.Optimized For: This workflow has been extensively tested and performs best with SDXL, Pony, Illustrious, and NoobAI base models. The creator has achieved 98% success rates across these model families with the current settings and model configurations.Important - Switching Base Models: The workflow comes pre-configured with KSampler settings optimized for the default base model. If you swap to a different base model (especially between model families like SDXL→Pony or Pony→Illustrious), you will need to adjust the KSampler parameters (steps, CFG scale, sampler type, scheduler) in both Phase 1 and Phase 2 to match that model's optimal settings. Different models have different sweet spots - what works perfectly for one checkpoint may produce poor results with another.SD 1.5 Models: This workflow has not been tested with SD 1.5 base models, though some SD 1.5 LoRAs may work when used with SDXL-based checkpoints.Flux Models: This workflow is not designed for Flux-based models. A separate dedicated Flux workflow is currently in development for those workloads.Recommendation: For best results, use SDXL-family checkpoints (including Pony, Illustrious, and NoobAI derivatives) with this workflow. Be prepared to tune KSampler settings when experimenting with different base models.Key FeaturesAutomatic Metadata Embedding SystemOne of the workflow's most powerful professional features is complete automatic metadata capture and embedding:A1111-Compatible Format - Every image generated includes full metadata in Auto1111-compatible format, ensuring seamless compatibility with CivitAI and other platforms. No manual data entry required - ever.Complete Provenance Tracking - The Debug Metadata (LoraManager) nodes automatically capture:All generation parameters (steps, CFG, sampler, scheduler)Complete LoRA information with weightsModel/checkpoint detailsPrompt and negative promptSeed values for perfect reproducibilityImage dimensions and technical settingsProfessional Workflow Benefits:Zero documentation overhead - Every successful generation is self-documentingPerfect reproducibility - Always know exactly what created each imageCivitAI optimization - Proper metadata improves discoverability and search indexingClient/collaboration ready - Share exact settings without manual transcriptionPortfolio quality - Demonstrates technical professionalism with complete provenanceBusiness Intelligence - When processing 200-400 images in batches, automatic metadata rofessional-grademeans you can identify your best performers and know exactly what settings created them, without detective work or guesswork.Integrated LoRA Manager SystemFull LoRA Manager integration transforms how you work with LoRAs:Visual LoRA Selection - Instead of scrolling through endless lists of cryptic filenames, LoRA Manager displays thumbnail previews of each LoRA's effect. This visual approach is dramatically faster and more intuitive, especially for users who remember images better than text (a common trait in AuDHD/ADHD individuals).Seamless Metadata Integration - LoRA Manager works hand-in-hand with the automatic metadata system, ensuring every LoRA you select is properly documented in your final images with correct weights and identifiers.Per-Phase LoRA Management - Each phase has independent LoRA Manager support, allowing you to visually select and configure different LoRA sets for each refinement stage.Advanced Memory ManagementOne of the workflow's critical production features is its intelligent resource management system, designed to handle large batch processing without crashes:Model Unloaders - These specialized nodes automatically remove AI models from your graphics card's memory (VRAM) after they're no longer needed. Think of them as cleanup crew members who clear the stage between acts of a performance.RAM Cleaners - These nodes clear your computer's main system memory, preventing the buildup of temporary data that can slow down or crash your system during long batch runs.Strategic Placement - Memory management nodes are positioned at critical transition points in the workflow, ensuring optimal performance throughout the entire generation process.Production-Scale Capability - Process 200-400+ images in single batches without VRAM exhaustion or system crashes. Run overnight generations with confidence.Dual-Phase ArchitectureThis workflow separates image generation into two distinct phases, each capable of operating independently or in sequence:Flexibility in Model Selection:Use the same base model in both phases for ultra-refined, hyper-detailed results that push a single model to its limitsUse different base models in each phase to combine the strengths of multiple checkpoints, creating unique hybrid effects or achieving specialized refinementsEach phase can be completely disabled when not needed, giving you maximum workflow flexibilityLoRA Independence:Apply the same LoRAs across both phases to intensify specific effects and detailsUse completely different LoRA sets in each phase to layer multiple artistic styles or technical enhancementsMix and match LoRAs strategically between phases for creative experimentationPhase Control SystemEach major section of the workflow can be enabled or disabled independently:Phase 1 - Initial image generationPhase 2 - Secondary refinement with optional model swapFaceDetailer Groups - Specialized facial enhancement passesUpscaling Sections - Resolution enhancement stagesThis modular design lets you customize the workflow for different projects, from quick previews (Phase 1 only) to maximum quality renders (all phases enabled).Workflow ComponentsModel Loading NodesCheckpointLoader - This is your starting point, loading the main AI model (checkpoint) that will generate your images. Think of this as loading the "brain" that understands how to create art.LoraLoader - These nodes load additional specialized training files (LoRAs) that modify your base model's behavior. LoRAs are like giving your AI specific skills or artistic styles. You can stack multiple LoRA loaders to combine effects. When integrated with LoRA Manager, these nodes include visual preview capabilities for easy selection.LoRA Manager Integration - Provides visual thumbnail previews of LoRA effects, making selection intuitive and fast. Instead of remembering cryptic filenames like "detail_enhancer_v2_final_ACTUALLY_FINAL.safetensors," you simply recognize the visual style you want. This is especially valuable for neurodivergent users who excel with visual memory.VAELoader - Loads the VAE (Variational AutoEncoder), which is responsible for converting between the AI's internal representation and actual pixels you can see. A high-quality VAE ensures your final images have proper colors and sharpness.Generation Control NodesKSampler - The heart of the image generation process. This node controls how the AI "dreams up" your image through a step-by-step refinement process. It takes your text description and gradually transforms random noise into a coherent image.Critical Note: The workflow includes KSampler nodes in both Phase 1 and Phase 2. These are pre-configured for optimal performance with specific base models. When switching between different base models (especially across model families), you must adjust the KSampler settings - including steps, CFG scale, sampler type (like dpm_2, euler_a, dpmpp_3m_sde), and scheduler (like karras, simple, normal) - to match your chosen model's requirements. Each model family has its own optimal parameters.EmptyLatentImage - Creates the initial blank canvas that your image will be generated on. The size you set here determines your base image dimensions.CLIPTextEncode - Converts your text prompts into a mathematical language the AI can understand. You'll have separate nodes for positive prompts (what you want) and negative prompts (what you want to avoid).Seed Node (easy seed) - Controls the random number generator that determines the uniqueness of each generated image. Using the same seed with identical settings produces identical results (perfect for reproducibility), while randomizing the seed creates variations. Essential for batch processing where you want diverse outputs or for A/B testing specific parameter changes while keeping other variables constant.Wildcard Nodes - Enable dynamic prompt variation by randomly selecting from predefined lists of options. Instead of manually changing prompts between generations, wildcards let you define categories (like different poses, lighting scenarios, or style variations) and the workflow automatically randomizes selections for each image. This is essential for generating diverse content in large batches without manual intervention - perfect for maintaining variety across hundreds of images while keeping core elements consistent.Refinement NodesFaceDetailer - A specialized tool that finds faces in your image and regenerates them with enhanced detail. This workflow uses FaceDetailer twice (once in each phase when enabled) for maximum facial quality. Each pass can use different detection settings and models.Configured Settings: The workflow uses carefully tuned FaceDetailer parameters including 0.35 denoise strength, 20 steps, DPM_2 sampler with Karras scheduler, and 0.93 detection threshold. These settings have proven highly reliable across 98% of SDXL-family base models tested.ImageUpscaleWithModel - Increases your image resolution using AI upscaling models. Unlike simple stretching, these models add intelligent detail as they enlarge your images.Configured Model: The workflow uses ESRGAN_4x.pth for upscaling, which provides excellent detail enhancement while maintaining image coherence. This upscaler works consistently well across SDXL, Pony, Illustrious, and NoobAI model families.Detection and Segmentation NodesUltralyticsDetectorProvider - Provides the AI models that can identify specific objects in images (like faces, hands, or bodies). This is what helps FaceDetailer know where faces are located.Configured Model: Uses segm/skin_yolov8n-seg_800.pt for segmentation detection. This model excels at identifying skin regions and facial boundaries, which is critical for accurate FaceDetailer operations.SAMLoader - Loads the Segment Anything Model (SAM), which can precisely outline objects in images. This helps isolate areas for detailed refinement.Configured Model: Uses sam_vit_b_01ec64.pth with AUTO mode. This balanced SAM model provides excellent segmentation accuracy without excessive VRAM usage, making it ideal for batch processing workflows.SegmDetectorSEGS - Uses segmentation models to identify and separate different regions of your image for targeted enhancement. Works in conjunction with the SAM and Ultralytics models to create precise masks for refinement.Image Processing NodesVAEDecode - Converts the AI's internal image representation back into regular pixels you can view and save.VAEEncode - Does the opposite - converts a regular image into the AI's internal format for further processing.ImageScale - Resizes images to specific dimensions. Useful for preparing images between workflow phases.Output and Organization NodesSaveImage - Saves your generated images to disk. This workflow has multiple save points, allowing you to capture results at different quality stages.Subdirectory Node (PrimitiveString) - Allows you to organize saved images into custom subdirectories/folders. Instead of all images dumping into one folder, you can route different phases or image types to organized subfolders (like "Phase1_Base", "Phase2_Refined", "Final_Upscaled"). Critical for managing large batch outputs and keeping your production organized - especially valuable when processing hundreds of images across multiple projects.Debug Metadata (LoraManager) - Captures and stores all the generation settings, LoRAs used, and other metadata within your images in A1111-compatible format. This is crucial for:Tracking what settings produced specific resultsEnsuring compatibility with image sharing platforms like CivitAIMaintaining complete reproducibility of your best generationsAutomatic LoRA information embedding without manual data entryProfessional workflow documentationThis node is what enables the seamless integration between LoRA Manager's visual selection system and the final image metadata, ensuring you never lose track of successful configurations.Routing and Organization NodesReroutePrimitive - Acts like a junction box, allowing you to send data from one node to multiple destinations without cluttering your workflow with crossing wires. These keep the workflow organized and readable.Bypass Switches - Special nodes that let you toggle entire sections of the workflow on or off without disconnecting anything.Memory Management NodesSoftModelUnloader - Intelligently removes AI models from VRAM after they've been used, freeing up graphics card memory for the next phase of processing.easy clearCacheAll - Performs comprehensive memory cleanup, clearing both VRAM and system RAM caches to prevent memory buildup during batch processing.Workflow StagesPhase 1: Base Image GenerationThe workflow begins with your chosen checkpoint model and LoRAs creating the initial image. This phase includes:Text prompt processingInitial image generation at your specified resolutionFirst FaceDetailer pass (optional)Initial image save pointTransition BridgeBetween phases, the workflow includes:Model unloading nodes to clear VRAMImage format conversion if neededOptional checkpoint swap preparationPhase 2: Super RefinementThe second phase takes your base image and pushes it to the next level:Loading of Phase 2 model (can be same or different)Loading of Phase 2 LoRAs (can be same or different)Image-to-image refinement at higher detailSecond FaceDetailer pass (optional)Final upscaling passFinal image savesCleanup StageAfter all generation is complete:Comprehensive memory cleanupFinal model unloadingCache clearing to prepare for next batchUse CasesVisual LoRA Experimentation ModeLeverage LoRA Manager's visual previews to rapidly test different LoRA combinations. Perfect for users who think visually or have AuDHD/ADHD - recognize effects instantly without parsing filenames. The automatic metadata capture means every successful experiment is perfectly documented for future use.Maximum Detail ModeEnable all phases with the same model and LoRAs in both phases. Perfect for extracting every ounce of detail from a single checkpoint.Hybrid Enhancement ModeUse different models in each phase - for example, generate the base with a general-purpose model, then refine with a photorealism specialist.Style Blending ModeApply artistic style LoRAs in Phase 1, then switch to technical enhancement LoRAs in Phase 2 for stylized but technically perfect results.Batch Production ModeUse strategic phase disabling to find your optimal quality-to-speed ratio for producing large volumes of images.Memory EfficiencyThe strategic placement of memory management nodes throughout this workflow allows you to:Process large batches (50-200+ images) without running out of VRAMPrevent system crashes from RAM exhaustionMaintain consistent performance across extended generation sessionsRun high-resolution workflows on mid-range hardwareThe workflow achieves this by clearing memory at every major transition point, ensuring each phase starts with maximum available resources.Technical AdvantagesAutomatic Metadata System - Complete A1111-compatible metadata embedding eliminates manual documentation overhead. Every image is self-documenting with full provenance tracking, ensuring perfect reproducibility and professional CivitAI compatibility. Never lose track of successful configurations or waste time on manual parameter transcription.Visual LoRA Management - Integrated LoRA Manager support eliminates the cognitive load of filename-based LoRA selection. Visual previews make experimentation faster and more intuitive, especially valuable for neurodivergent users who excel with visual memory over text-based recall. Seamless integration with metadata system ensures all LoRAs are properly documented.Production-Grade Memory Optimization - Strategic model unloaders and RAM cleaners enable reliable batch processing of 200-400+ images without crashes. Run overnight generations with confidence, knowing your workflow won't exhaust VRAM or system memory mid-batch.Modularity - Every major section can be independently enabled or disabled without breaking the workflow logic.Scalability - Whether you're generating a single image or batches of hundreds, the memory management ensures consistent performance.Flexibility - Swap models, LoRAs, and settings between phases without rebuilding the entire workflow.Quality Control - Multiple save points let you compare results at different refinement stages to dial in your perfect settings.Metadata Preservation - Full generation information is embedded in your saved images for reproducibility and platform compatibility.Best PracticesUnderstand Your Base Model - Before diving in, familiarize yourself with your chosen base model's optimal KSampler settings. Check the model's documentation or community recommendations for steps, CFG, sampler, and scheduler values. The workflow's default settings may not be optimal for every model.Leverage Visual LoRA Selection - Use LoRA Manager's thumbnail previews to quickly identify effects rather than memorizing filenames. This dramatically speeds up experimentation and reduces cognitive load.Start Simple - Begin with Phase 1 only to test your prompt and settings before enabling full refinement. This lets you verify your base generation quality before investing time in dual-phase processing.Monitor Memory - Watch your VRAM usage to determine if you need to disable optional stages for your hardware.Experiment with Models - Try the same checkpoint in both phases first, then experiment with different combinations to discover unique effects. Remember to adjust KSampler settings when switching models.Layer Your LoRAs Strategically - Use broad, general-purpose LoRAs in Phase 1 and specialized detail-enhancement LoRAs in Phase 2. The visual preview system makes it easy to build effective combinations.Trust the Metadata System - The automatic metadata embedding means you never need to manually document successful settings. Every image is self-documenting.Batch Processing - The memory management system shines during batch operations - let it run overnight for maximum productivity.ConclusionThe Production Dual-Phase Refiner represents a professional-grade approach to AI image generation, built on three core pillars: visual LoRA management, automatic metadata embedding, and production-scale memory optimization. Whether you're creating single masterpiece images or running production batches, this workflow delivers exceptional results with professional reliability.LoRA Manager integration transforms the LoRA selection experience from text-based filename hunting into fast, visual recognition - especially valuable for neurodivergent users who excel with visual memory. Automatic A1111-compatible metadata embedding ensures every image is self-documenting with complete provenance tracking, eliminating manual documentation overhead and providing perfect reproducibility. Strategic memory management enables crash-free batch processing at scale, with proven capability for 200-400+ image batches in single overnight runs.Combined with flexible dual-phase architecture (supporting same or different models/LoRAs between phases) and complete modular control, this workflow adapts to virtually any creative or production scenario. From hobbyist experimentation to professional content creation with platforms like CivitAI, the Production Dual-Phase Refiner delivers quality, reliability, and an intuitive user experience that scales with your ambitions.Battle-Tested Configuration: The workflow comes pre-configured with carefully tuned settings (ESRGAN_4x upscaling, optimized FaceDetailer parameters, balanced SAM/YOLO detection models) that have achieved 98% success rates across SDXL, Pony, Illustrious, and NoobAI model families. These aren't theoretical settings - they're production-proven configurations refined through extensive real-world batch processing.

ILL-to-REAL-Depth-2Pass
You don't have to pay EA as you may just drop any of my samples into ComfyUI window. But if you enjoy this workflow please consider the small BUZZ donation. Thanks in advance.IntroThis workflow showcases the effective approach to make realistic dataset pare (image + caption) from any Anime-ish checkpoint. With minimal modifications you can implement a hybrid workflow that combines any different checkpoint architectures in one pipeline. You can convert anime into realistic image (as I did) or make a reverse, realistic images into anime. You can replace the Illustrious prefab checkpoint with Flux or Qwen Image or Z-Image (if you have enough of VRAM) and use realistic SDXL checkpoint to amplify the textures and improve colors and lighting.Quick startModify the primary prefab prompt in "ANIME. PONY / ILL T2I POSITIVE PROMPT." box.Modify shared negative prompt in "ANIME. PONY / ILL T2I POSITIVE PROMPT." box.Modify the realism style and quality prompt in "Realism. Quality / Style prompt" box.Select the proper checkpoints for prefab and realistic render.Press run.You can also tune the KSampler and ControlNet parameters according to selected models and desirable degree of anime-realism conversion rate.How it worksRealistic render stage starts with ControlNet driven drafting. I used the Depth controlnet as it works better than Lineart or SoftEdge controlnets. Be aware that Depth driven conversion is not 100% stable. Sometimes Depth reconstruction breaks the anatomy especially in a very complex multi-character compositions, but it works much much better than lineart. You can also try Normal driven ControlNet conversion.So, realistic 1PASS is a draft which is also a Text-to-Image. I don't use the prefab anime-ish image as input for realistic draft pass as even with denoise 1.0 cartoonish colors and style affects too much the drafting result. You can use draft image as input for realistic draft if, for ex., you replaced the Illustrious model with Flux or other checkpoint that gives realistic colors. Then you might also need to adjust the denoise of the 1st pass of realistic stage KSampler. Please experiment and give a feedback.Second pass in realistic stage is boring. It is basically an I2I HiRes pass that fixes the anatomy and improves the textures.PS: [AD] In this workflow I use my latest CinEro NoiceAI checkpoint (R7j RC2) as I tried hard to make it render a super realistic textures and details. Give it a try and tell me if it works or not for you. Constructive feedback is welcome and desirable. [/AD]

Wildcard Prompt Generator
A semi-random prompt generator that uses wildcards.Can mix 5 wildcard lists with each other.Fill in the Green text fields with your wildcard lists. It is possible to mix up to 5 wildcard lists to generate semi-random image prompts, e.g. for memes or samples and send it as String to the CLIP Text Encoder.The output audibility depends on LoRA or the base model you used!* Prompt_StringsOutputs all 5 Wildcard-Prompts in Order as array. (i never used it this way)* StringMerges all prompts into a single string and outputs it as a single promptPrompt-Output:['Wildcard 1', 'Wildcard 2', 'Wildcard 3', 'Wildcard 4', 'Wildcard 5']The first four wildcard slots are each filled with over 50 very generic basic wildcard words (subject, details, setting, and style) and can be expanded as needed.The fifth slot can be filled with your own wildcards, e.g., with desired trigger words if you want to test the output of a newly trained Lora or checkpoint.Optionally, it is possible to use the Draw Text node to display the prompt text used at the bottom of the image.Attention! Uses nodes from various extensions:- rgthree- comfy-custom-scripts- comfy-easy-use- comfy_prompt_wildcardsThese may need to be installed separately.
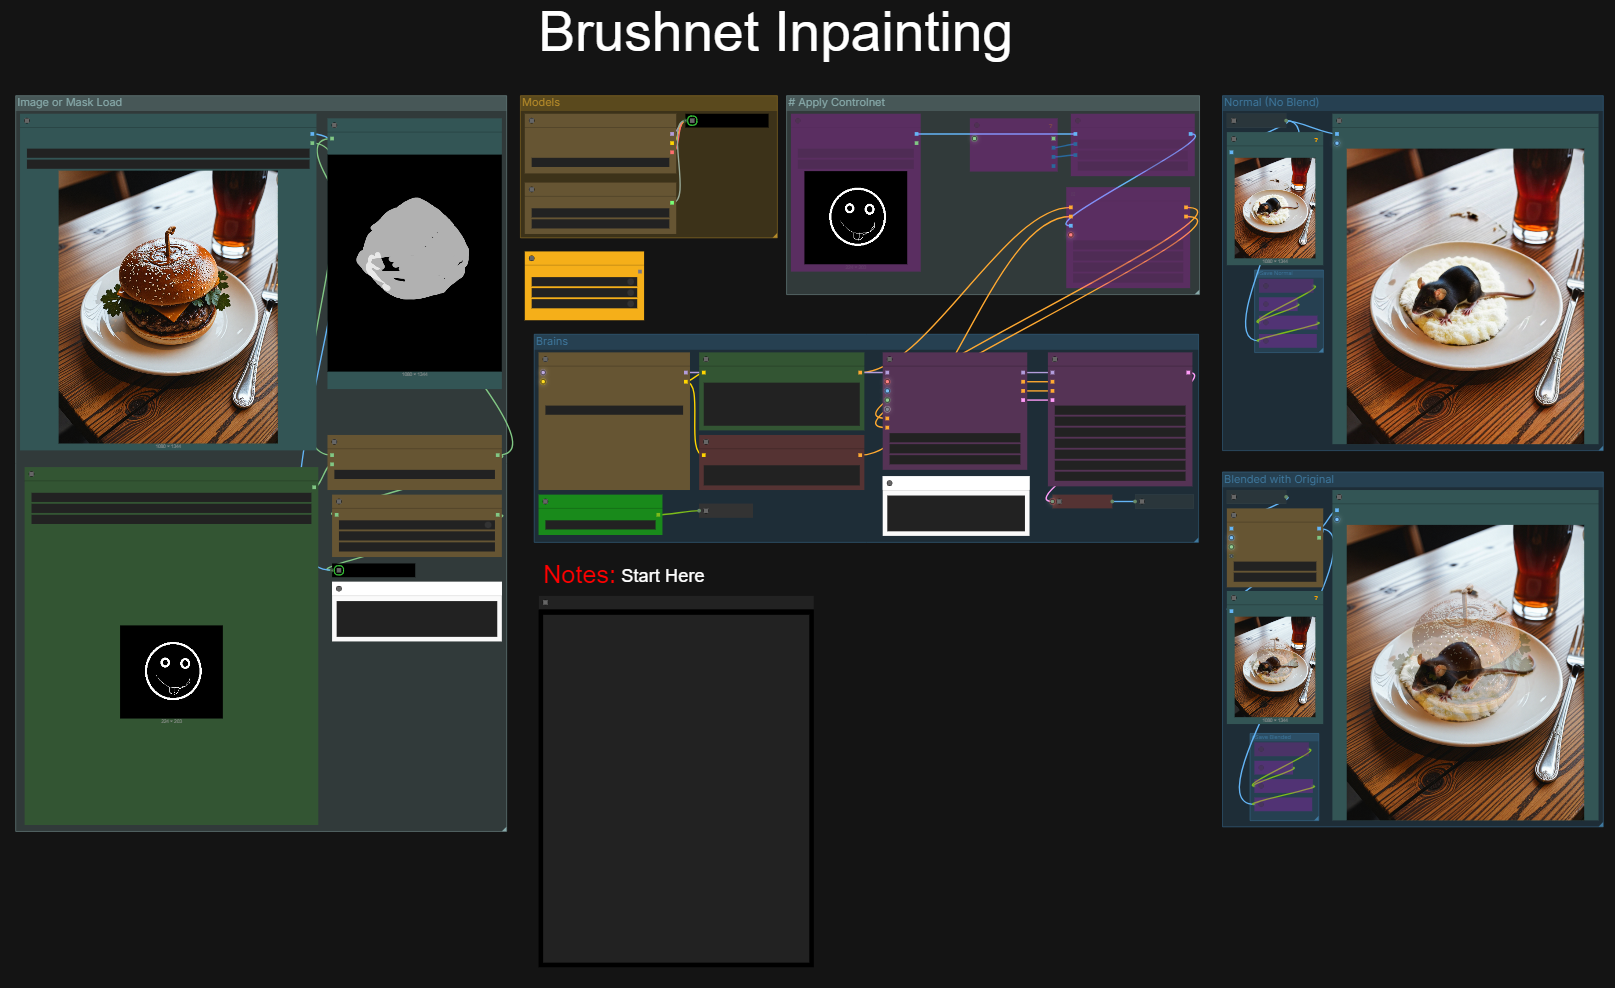
Brushnet Inpaint SFW/NSFW
Advanced Inpaint SFW/NSFWUse mask editor or your own maskRemove clothing and make other..umm...modifications.Controlnet OptionsCan use Loras and NSFW modelsSeveral different options to get different resultsNot really meant for face swap (i.e. deepfake), but will change the face of someone.

Dual Checkpoint LoraManager Studio Workflow with FaceDetailer + Upscale
Dual Checkpoint Image Generation with Face Detailer & UpscalingComfyUI workflow featuring dual checkpoint architecture, multi-LoRA management, and progressive enhancement pipelineThis workflow uses a three-stage processing approach: base generation, face enhancement, and neural upscaling.🚀 Quick Installation GuideRequired Custom Node PacksComfyUI-Impact-PackProvides: FaceDetailer, UltralyticsDetectorProviderComfyUI-LoraManagerProvides: Lora Loader, Debug Metadata, TriggerWord Togglergthree-comfyProvides: Fast Groups Muter, Power Prompt - SimpleComfyUI-Custom-ScriptsProvides: ShowText|pysssss, CheckpointLoader|pysssssComfyUI-KJNodesProvides: JoinStringMulti, ImageResizeKJv2ComfyUI-Studio-Nodes (Optional)Provides: AspectRatioImageSizeRequired ModelsDetection Model:bbox/face_yolov8m.pt - Face detection modelAuto-downloads to: ComfyUI/models/ultralytics/bbox/Upscale Model:4x-AnimeSharp.pth or 4x-UltraSharp.pthDownload from: OpenModelDB or Upscale WikiPlace in: ComfyUI/models/upscale_models/Checkpoint Models: (User provided)Base checkpoint(s)Refinement checkpoint(s)LoRA Models: (User provided)LoRAs as needed for your generationInstallation MethodsOption 1: ComfyUI Manager (Recommended)Install ComfyUI-ManagerLoad the workflow in ComfyUIUse "Install Missing Custom Nodes" buttonRestart ComfyUIOption 2: Manual Installationcd ComfyUI/custom_nodes git clone https://github.com/ltdrdata/ComfyUI-Impact-Pack.git git clone https://github.com/Suzie1/ComfyUI-LoraManager.git git clone https://github.com/rgthree/rgthree-comfy.git git clone https://github.com/pythongosssss/ComfyUI-Custom-Scripts.git git clone https://github.com/kijai/ComfyUI-KJNodes.git git clone https://github.com/comfyuistudio/ComfyUI-Studio-nodes.git cd ComfyUI-Impact-Pack python install.py Additional Python DependenciesSome nodes may require additional Python packages:Impact Pack: ultralytics, segment-anything, mmdetKJNodes: May need numba for some operationsNotes:Core ComfyUI nodes are included with base ComfyUISome nodes install their own dependencies on first runThe workflow will show red/missing nodes if dependencies are missing🏗️ Workflow ArchitectureThree-Stage Processing PipelineStage 1: Base GenerationInitial image generationDual checkpoint supportMulti-LoRA managementPrompt processing and conditioningStage 2: Face EnhancementFace detection using YOLOv8Targeted inpainting and refinementUses secondary checkpointAdaptive denoisingStage 3: Neural UpscalingAI model-based upscalingTile-based processingEdge preservationMultiple save points with metadata📦 Main Node Types UsedModel LoadingCheckpointLoader|pysssssLoads checkpoint modelsOutputs: MODEL, CLIP, VAEEnhanced checkpoint loader with metadata featuresVAELoaderLoads VAE models separatelyAllows VAE selection independent of checkpointPrompt ProcessingPower Prompt - Simple (rgthree)Prompt input and processingSupports prompt weighting syntaxOutputs: CONDITIONING and TEXTCLIPTextEncodeConverts text prompts to CLIP embeddingsSeparate nodes for positive and negative promptsJoinStringMultiCombines multiple text stringsUsed for merging trigger words with promptsShowText|pysssssDisplays text outputUseful for debugging promptsLoRA ManagementLora Loader (LoraManager)Manages multiple LoRA modelsIndividual strength controls for each LoRASeparate model and CLIP strength settingsAutomatically extracts trigger wordsToggle system to enable/disable LoRAsTriggerWord Toggle (LoraManager)Manages trigger words from active LoRAsFilters based on enabled LoRAsGroup mode for batch managementDimension ManagementAspectRatioImageSizeCalculates dimensions for generationPreset aspect ratios availableEnsures VAE-compatible dimensions (divisible by 8)EmptyLatentImageCreates initial latent tensorSupports batch generationSamplingKSamplerCore generation nodeConfigurable samplers (DPM++, Euler, DDIM, etc.)Configurable schedulers (Karras, exponential, simple, etc.)Adjustable steps, CFG scale, and denoise strengthFace Detection and EnhancementUltralyticsDetectorProviderProvides YOLOv8 face detection modelGenerates bounding boxes for detected facesFaceDetailerEnhances detected face regionsPerforms targeted inpaintingUses separate model for face processingConfigurable denoise, crop factor, featheringSupports SAM model integrationProcesses faces at higher resolutionImage ProcessingVAEEncodeConverts pixel images to latent spaceVAEDecodeConverts latent tensors to pixel imagesImageResizeKJv2Resizes images with multiple interpolation methodsMaintains aspect ratiosDivisibility enforcement for model compatibilityUpscaleModelLoaderLoads neural upscaling models (ESRGAN, etc.)ImageUpscaleWithModelApplies neural upscaling to imagesTile-based processing for large imagesUtilitiesLazySwitchKJRoutes connections based on boolean switchUsed for conditional workflow pathsWildcardPromptFromStringProcesses wildcard syntax in promptsDebug Metadata (LoraManager)Tracks generation parametersOutputs metadata for documentationSaveImageWithMetaDataSaves images with embedded metadataConfigurable file naming and organizationMultiple instances for different pipeline stages🔧 Workflow StructureThe workflow uses:2 Checkpoint Loaders - Dual checkpoint architecture2 VAE Loaders - Separate VAE selection2 KSamplers - Base generation and refinement1 LoRA Loader - Multi-LoRA management1 FaceDetailer - Face enhancement2 Upscale nodes - Neural upscaling4 Save nodes - Multiple output points4 Debug Metadata nodes - Parameter trackingTotal: 36 nodes in the workflow⚙️ Key FeaturesDual Checkpoint SupportLoad different checkpoint models for base generation and face refinement, allowing specialized models for different stages.Multi-LoRA ManagementLoraManager system allows:Loading multiple LoRAs simultaneouslyIndividual strength control per LoRAToggle activation without reloadingAutomatic trigger word extraction and filteringFace Enhancement PipelineYOLOv8 detection → FaceDetailer inpainting:Automatic face detectionHigher resolution processing for facesSeparate model for face refinementConfigurable enhancement strengthProgressive EnhancementThree-stage approach:Generate base imageEnhance detected facesUpscale final resultMetadata TrackingDebug Metadata nodes throughout pipeline track:Generation parametersLoRA configurationsModel settingsFor reproducibility and documentation📋 Workflow GroupsThe workflow organizes nodes into functional groups:Prompt CreationModel Loaders - Base ImageModel Loaders - Face DetailBase Image generation and saveFace Detailer settings and saveCore Image Upscale and saveFinal Upscale and saveSubdirectory configurationBase Resolution settings💾 Output ManagementMultiple save points capture different stages:Post-base generationPost-face enhancementPost-first upscalePost-final upscaleEach save node:Embeds metadataCustomizable file namingSubdirectory organizationConfigurable output format🎯 UsageLoad checkpoint modelsLoad LoRA models (optional)Configure prompts (positive and negative)Set generation parameters (steps, CFG, sampler, scheduler)Set resolution via AspectRatioImageSizeConfigure face enhancement settingsSelect upscale modelQueue and generateThe workflow saves outputs at multiple stages, allowing comparison of results throughout the pipeline.This workflow provides a complete pipeline from initial generation through face enhancement to final upscaling with comprehensive parameter control and metadata tracking.

SDXL Refiner, Detailer and Upscaler with LoraManager
SDXL Refiner WorkflowA streamlined SDXL Image to Image refinement workflow featuring integrated LoRA management, checkpoint refinement, and intelligent face/skin detailing.Core FeaturesLoRA Manager IntegrationThe workflow includes a comprehensive LoRA management system with trigger word control:TriggerWord Toggle - Enables selective activation/deactivation of individual LoRA trigger wordsTrigger word filtering - Dynamically filters active trigger words based on toggle stateMultiple LoRA support with independent trigger word managementDirect integration with CLIP conditioning for consistent prompt applicationRefiner Checkpoint SystemDedicated refiner checkpoint loading with independent model control:Uses a separate checkpoint loader specifically for the refiner passVAE routing system for consistent encoding/decoding across the pipelineSupports SDXL refiner checkpoints (example: fluxRefiner_v11.safetensors)Independent MODEL, CLIP, and VAE outputs for flexible workflow routingFaceDetailer IntegrationIntelligent facial and skin detail enhancement using Impact Pack nodes:Face Detection - UltralyticsDetectorProvider with face_yolov8n_v2.pt for precise facial bounding boxesSkin Segmentation - Segmentation detector using skin_yolov8n-seg_800.pt for targeted skin areasSAM Integration - SAMLoader (sam_vit_b_01ec64.pth) for advanced masking and detail isolationCombined bbox detection and segmentation for comprehensive facial enhancementDirect integration with the refiner pass for seamless detail processingWorkflow StructureThe workflow processes images through a sequential refinement pipeline:Initial Processing - Image resize and VAE encoding preparationLoRA Application - Trigger word filtering and LoRA weight applicationRefiner Pass - Dedicated checkpoint refinement with conditioningDetail Enhancement - Face/skin detection and targeted detail improvementOutput - Dual save points for refiner output and upscaled resultsTechnical SpecificationsImage Resize Node - ImageResizeKJv2 with configurable dimensions (1024x1024 default)Upscale Support - Integrated upscale model loader with post-refiner upscalingMetadata Preservation - SaveImageWithMetaData nodes maintain full generation parametersVAE Management - Centralized VAE routing using ReroutePrimitive for consistencyOutput OptionsThe workflow provides two distinct save points:Refiner Output - Direct refined results at base resolutionRefiner Upscale - Enhanced upscaled version with preserved detailsBoth outputs include complete metadata embedding for reproducibility and workflow tracking.Usage NotesThis workflow is designed for refinement of existing images or latent spaces. The LoRA manager provides granular control over trigger word activation, allowing you to fine-tune which style elements are applied during the refinement pass. The integrated detailer specifically targets facial features and skin areas for enhanced realism and detail without affecting the overall composition.

ComfyUI 5-Phase SDXL + Refiner Workflow
ComfyUI 5-Phase SDXL + Refiner WorkflowUltimate Multi-Stage Image Generation with SDXL Refiner IntegrationAuthor: DarthRidonkulousVersion: 1.0Release Date: December 2025Status: Production Ready🌟 OverviewThe 5-Phase SDXL + Refiner workflow is a layered image construction system that builds images through five sequential transformation phases, each serving a specific function in the creative pipeline. Rather than simple refinement passes, each phase contributes distinct elements - form, correction, style evolution, and final polish - allowing you to combine model strengths and LoRA effects in ways impossible with single-pass generation.You don't have to use all 5 phases. The workflow includes complete bypass control - disable any phase to match your needs. Some images only need 2 phases to achieve the desired style and quality; others benefit from the full pipeline. Start with fewer phases and add more only if needed.What Makes This Workflow SpecialFive Functional Phases - Each phase serves a specific purpose: foundation, correction, style evolution, final layering, and refiner polishUse Only What You Need - Bypass any phase; some images need 2 phases, others need all 5Sequential Model Layering - Use different checkpoints per phase as "macro LoRAs" for broad stylistic controlControlled LoRA Distribution - Instead of fighting 12+ LoRAs in one pass, distribute 2-3 LoRAs across phases for precise controlPer-Phase LoRA Control - Manage trigger words and LoRA effects independently across all phasesStrategic Detailers - Each phase's detailer targets different elements based on what needs fixing at that stageTrue Refiner Support - Phase 5 uses actual SDXL Refiner models for final coherenceComplete Bypass Control - Disable any phase or feature group for testing or production🔑 Key FeaturesPhase 5 SDXL Refiner IntegrationUnlike standard multi-phase workflows that just re-run base models, Phase 5 is specifically designed for SDXL Refiner models:Uses KSampler (Advanced) with proper refiner step configurationAccepts Phase 4 output and applies final refinement passSeparate checkpoint loader for dedicated refiner model (e.g., sd_xl_refiner_1.0.safetensors)Configurable "start at step" control for refiner transition pointProduces the final polished outputMulti-Phase ArchitecturePhase 1: Foundation (The Sketch)Establishes shape, form, poses, basic lightingUse minimal LoRAs - just enough to get your base structureChoose a model strong in composition (anime models excel at dynamic poses)Default denoise = 0.8Phase 2: Correction & DetailMay fix Phase 1 issues: hands, disconnected elements, anatomical problemsAdds detail and enhances lightingHigher denoise (0.4 to 0.6) gives this phase authority to make correctionsSelect LoRAs based on what Phase 1 needsIndependent LoRA triggersPhase 3: Style EvolutionShifts aesthetic direction while preserving established structureCan introduce different model aestheticsLower denoise (0.25) preserves the corrected foundationIndependent LoRA triggersPhase 4: Final Base LayerLast opportunity for style and detail influence before refinerSubtle adjustments building on all previous phasesDefault denoise = 0.25Independent LoRA triggersPhase 5: SDXL RefinerFinal coherence and polishFace and hair often need attention here (common casualties of multi-phase transformation)Dedicated refiner model for cleanupSeparate upscale and save optionsLoRA Management SystemThe core philosophy: Generating a good image with 12+ LoRAs active simultaneously is difficult. Generating a great image with 2-3 carefully chosen LoRAs is much easier. This workflow lets you distribute your LoRAs across phases for precise control.Each phase has its own complete LoRA control:LoRA Loader (LoraManager) - Visual LoRA selection per phaseTriggerWord Toggle - Enable/disable individual trigger wordsCarryover TriggerWord Toggle - Control trigger inheritanceJoin String Multi - Combine selected triggersWildcard Prompt from String - Inject triggers into promptsThis means you can:Use minimal LoRAs in Phase 1 to establish clean formAdd corrective/detail LoRAs in Phase 2 based on what Phase 1 producedLayer style LoRAs in Phases 3-4 for progressive aesthetic shiftsPrevent trigger cross-contamination between phasesComprehensive Save SystemEvery processing stage can save independently:Phase 1-4: Image Save, Upscale Save, Detailer SavePhase 5 Refiner: Refiner Save with Metadata, Refiner Upscale SaveAll saves include full metadata embedding (A1111 format for CivitAI)Memory ManagementStrategic VRAM optimization for stable operation:Model Unload between major phasesCache clearing nodesFaceDetailer bypass capability per phaseUpscale bypass for VRAM-constrained systems📦 InstallationRequired Custom NodesInstall these via ComfyUI Manager or manually:ComfyUI-Impact-PackComfyUI-LoRA-ManagerComfyUI-Easy-Usergthree's ComfyUI Nodespysssss Custom ScriptsWAS Node SuiteComfyUI-KJNodesCustom Nodes (Included with Workflow)This workflow requires 4 custom Python nodes. Save these files to your ComfyUI/custom_nodes/ folder:1. SDXL Image Settings Controller (4 Phase)File: sdxl_image_settings_controller_4phase.pyCentralized control for all workflow settings:Resolution presets (organized by aspect ratio)Seed control (fixed/increment/decrement/randomize)Per-phase KSampler settings (steps, CFG, sampler, scheduler, denoise)Batch size controlEmpty latent generation2. Multi-Phase Prompt Manager (4 Phase) V2File: multi_phase_prompt_manager_4phase_v2.pyAdvanced prompt management with:Phase 1 as base prompt for inheritancePer-phase mode control: Use Base, Use Previous, Unique, Append to Base, Append to PreviousPositive AND negative prompt management per phaseLoRA trigger injection (at beginning of prompt)Automatic duplicate trigger removalMetadata output for debugging3. Integer Input SwitchFile: integer_input_switch.pySimple utility for routing integer values:4-input selectorUsed for step routing to refiner4. VAE SelectorFile: vae_selector.pyThis node gives you the ability to switch from the baked VAE in the Checkpoint model to an external VAE easily. You can change this for every model in phases 1 - 4. Installation StepsDownload the workflow JSON fileInstall custom node packs via ComfyUI Manager:Open ComfyUI ManagerInstall Missing Custom NodesRestart ComfyUIInstall included Python nodes: Copy all .py files to: ComfyUI/custom_nodes/Restart ComfyUI completely (not just browser refresh)Load the workflow:Drag JSON onto ComfyUI canvas, orUse Load button and select the JSON fileVerify all nodes loaded (no red "missing node" errors)🚀 Quick Start GuideStep 1: Configure Global SettingsFind the SDXL Image Settings Controller (4 Phase) node in the CENTER of the workflow. The workflow is arranged so that the most adjusted settings and the output is in the center of the workflow for easy/quick adjustments as you are tweaking settings to get the desired output. All of the nodes are grouped so that you are able to move groups around without affecting functionality if you don't like the way I have everything arranged.Settings:subdirectory Your project folder name. This will change the subdirectory of all the save nodes in the workflow to ComfrUI/<Subdirectory>resolution_preset seed You can input your starting seed. This changes the seed in all of the KSamplers in phases 1 - 4. seed_control fixed, randomize, decrement, incrementcontrol_after_generate Seed control: fixed, randomize, decrement, incrementbatch_size Uses the same prompt and changes seed according to your control after generate settings and does not unload or reload models for the duration of the batch. Step 2: Choose Your Phases and Configure SettingsFirst, decide how many phases you need:You don't have to use all 5 phases. Some images achieve the desired style and quality with just 1-2 phases; others benefit from the full pipeline. Start with fewer phases and add more only if you're not getting the results you want.Use the Fast Bypass node to enable/disable Phase 2, Phase 3, Phase 4, and Phase 5 RefinerDisable Model Loader Groups for Phases you are bypassing. If you don't, they will load into VRAM when you start the generation.Set the Phase Steps to Refiner selector to match the last enabled phase (this routes the correct step count to the refiner if using Phase 5)Phase Settings in the SDXL Image Settings Controller:Start with the default settings, then adjust to get desired results. Samplers and schedulers can behave unexpectedly in Phase 3 and Phase 4 - you may need to try different combinations that aren't the "recommended" ones for your model. LCM sampler with karras scheduler works reliably (~90%) in any phase with any model and is a good fallback if you're getting strange results.Step 3: Load Your ModelsConfigure checkpoint loaders based on their function in the pipeline:Key concept: Each model acts like a broad-effect "macro LoRA" - you're layering model strengths sequentially to achieve effects impossible in single-pass generation. An anime model in Phase 1 for pose → semi-realistic in Phase 2→ realistic model in Phase 3-4 for detail. Step 4: Configure Phase 5 RefinerFind the Phase 5 SDXL Refiner group:Choose you refiner model for final detail and refinement. You can use SDXL refiner models that are made for that specific purpose or you can use any other checkpoint model for the final touches. Often, using the same checkpoint as you used in Phase 4 will give you the desired results, but sometimes using a semi-real model for refinement after using realistic model in Phase 4 can sharpen up the image in a more desired way. The Steps field is automatically populated from the Phase Steps to Refiner node, which pulls the step count from whichever phase you selected in the phase selector.Refiner Start at Step: This should be set to the Steps value minus 5 to 10. For example, if your selected phase has 25 steps, set Start at Step to 15-20. Lower values = more refiner influence, higher values = less refiner influence.Step 5: Set Your PromptsFind the Multi-Phase Prompt Manager (4 Phase) V2 node:Enter your main prompt in phase_1_positive_promptEnter negative prompt in phase_1_negative_promptConfigure Phase 2-4 modes (default: "Append to Base" works well)Add phase-specific custom text or embeddings in the appropriate prompt nodes for each phase. Step 6: Configure LoRAsFor each phase you want LoRAs:Open the LoRA Loader (LoraManager) for that phaseSelect your LoRAsUse TriggerWord Toggle to enable/disable specific triggersCheck ShowText nodes to verify trigger combinationsStep 7: Enable/Disable FeaturesFind the Fast Bypass node (rgthree Fast Groups Bypasser) to enable or disable:Phases and Model LoadersDetailers (per phase)Image Save, Detailer Save and Upscale Saves (per Phase)Remember: You don't need all phases for every image. Disable phases you don't need - this speeds up generation and sometimes fewer phases produce better results for your specific style/model combination.Step 8: Run the WorkflowClick Queue PromptWatch progress through each phaseCheck ShowText nodes for debuggingFinal outputs appear in your configured subdirectory💡 Tips for Best ResultsModel Selection StrategyStart simple: Enable Phase 1 first, get the basic result you want, then enable Phase 2 and mess with settings and LoRAs to get the results you want, then Phase 3, then Phase 4, Then refine. You can save only the Detailer Image or Upscale image or no images and just rely on the image previews in the center-left of the workflow.Functional Approach (when using multiple phases):Phase 1: Model with strong composition/poses and loras that define basic shape and lighting. Phase 2: Model with good corrective ability and detail. Start working on lighting here. Phases 3-4: Models that move toward your target aestheticPhase 5: SDXL Refiner for final coherenceExample - Anime Pose to Realistic Result:Phase 1: Anime model (great action poses)Phase 2-3: Transition modelsPhase 4: Realistic modelPhase 5: Refiner for cleanupResult: Dynamic pose you couldn't get from realistic model alone, with realistic final styleSame Model Throughout:Use when you want the model's native aestheticStill benefits from the multi-phase LoRA distributionEach phase still serves its function (foundation → correction → detail → polish)Remember that the workflows in ComfyUI are embedded in the images and videos. If you want to see how I have created one of my images, you can download the image and drag it onto the canvas of ComfyUI and it will populate the workflow with my settings and prompts. Denoise ConsiderationsThe workflow defaults use decreasing denoise values across phases (0.8 → 0.4 → 0.25 → 0.25):Phase 1 (0.8): High denoise for initial generation from the latentPhase 2 (0.4): Higher denoise gives this phase authority to fix issues from Phase 1Phases 3-4 (0.25): Lower denoise preserves the corrected foundation while allowing style evolutionPhase 2's higher denoise is intentional - it needs room to fix hands, reconnect elements, and make corrections when using the same checkpoint models for Phase 1 and 2. It also will enable a large change in styles if you are using different models. Sometimes you may want .45 to .55 for this. LoRA Distribution StrategyThe key insight: Don't load all LoRAs in Phase 1. Distribute them based on phase function:Phase 1: Minimal LoRAs - just what you need for basic form/posePhase 2: Add LoRAs for correction and detail, chosen based on what Phase 1 producedPhases 3-4: Layer in style LoRAs for aesthetic directionKeep each phase to 2-3 active LoRAs for controllable resultsThis gives you the effect of 12+ LoRAs in the final image, but with the control of only managing a few at a time.Phase 5 Refiner SettingsThe refiner steps are automatically pulled from your selected phase via the Phase Steps to Refiner node. Set Start at Step to your step count minus 5-10 (e.g., if 25 steps, use 15-20 for start). The refiner model is loaded via the Phase 5 Checkpoint Loader - use an SDXL Refiner model (e.g., sd_xl_refiner_1.0.safetensors) or a compatible checkpoint.🔧 TroubleshootingMissing Nodes ErrorSymptom: Red nodes after loading workflowSolution:Install missing node packs via ComfyUI ManagerVerify all 4 custom Python files are in custom_nodes/ folderRestart ComfyUI completely (not just browser refresh)Check console for Python import errorsOut of VRAMSymptom: Workflow crashes mid-generationSolution:Reduce batch_size to 1Disable FaceDetailer phases (bypass the groups)Disable upscale savesUse smaller resolution presetEnable only 2-3 phases instead of all 5Ensure Model Unload nodes are active (not bypassed)Phase 5 Refiner Not WorkingSymptom: Refiner phase produces unexpected resultsSolution:Verify Phase 5 Checkpoint is an actual SDXL Refiner modelCheck "Refiner Start at Step" valueVerify image routing from Phase 4 to Phase 5Ensure KSampler (Advanced) is configured correctlyImages Not SavingSymptom: Workflow completes but no outputsSolution:Check subdirectory setting in Settings ControllerVerify Save Image nodes aren't bypassedCheck folder permissions in ComfyUI output directoryReview console for file write errorsPrompt IssuesSymptom: Output doesn't match prompt expectationsSolution:Check ShowText nodes to see actual prompts per phaseVerify Phase 2-4 modes are set correctlyReview TriggerWord Toggle settingsCheck for duplicate or conflicting triggers📋 System RequirementsMinimum RequirementsGPU: NVIDIA with 10GB+ VRAM (RTX 3080 or equivalent)RAM: 16GB+ system memoryStorage: SSD recommendedComfyUI: Latest versionRecommended RequirementsGPU: NVIDIA with 12GB+ VRAM (RTX 4080/4090)RAM: 32GB+ system memoryStorage: NVMe SSDComfyUI Manager: For easy custom node installationOptimal RequirementsGPU: 24GB VRAM (RTX 4090)RAM: 64GB+ system memoryFeatures: Can run all phases with FaceDetailer and upscaling enabled🔄 Version InformationCurrent Version: 1.0Release Date: December 2025Compatibility: ComfyUI 2025+ buildsFeatures in V1.05-phase architecture with dedicated SDXL Refiner integrationPer-phase model loading (5 separate checkpoints)Complete LoRA management per phaseFaceDetailer integration for all phasesComprehensive save system with metadataStrategic memory managementFull bypass control📄 License & CreditsWorkflow Design: DarthRidonkulousCustom Nodes: Developed in collaboration with Claude (Anthropic)Testing: Production testing with SDXL/Pony/Illustrious/NoobAI model familiesUsage TermsFree to use and modify for personal and commercial projectsCredit appreciated but not requiredShare your results on CivitAI!Custom nodes may be used in other workflowsSupport the CreatorIf you find this workflow valuable:⭐ Leave a review on CivitAI🖼️ Share your generated images💬 Help other users in comments☕ Consider supporting future development📞 Support & CommunityQuestions? Check troubleshooting section first, then:Review ShowText nodes for debugging infoSearch comments for similar issuesPost detailed question with workflow screenshotsFound a bug? Report with:Workflow version numberComfyUI versionError messages from consoleSteps to reproduce🎉 Thank you for using the 5-Phase SDXL + Refiner workflow!This workflow enables layered image construction - combining model strengths and distributing LoRA effects across phases to achieve results impossible with single-pass generation.Happy generating! 🚀Workflow Version: 1.0 | Documentation Version: 1.0 | Last Updated: December 2025

txt2glb
My first Comfy workflow. More Just4Fun than a serious workflow. Your prompt generates an image, which is then converted into a 3D object in GLB format. There are probably better ways to do this, but it's quite useful for experimenting with different checkpoints for the images.Version 1.5Changes:Workflow completely revised and simplified.3D/GLP:Now uses the Simplified Subgraph workflow from hunyuan3D to simplify the entire flow.Image:Keep the object simple and the prompt short.PLAIN WHITE BACKGROUND!!! LowPoly works best for me.The 1:1 ratio delivered the best results. 512x512 or 784x784 (recommended)

SeedVR2 Image upscale with generation and detailers
Simple workflow for basic image generation, detailer, and SeedVR2 upscale. Nothing particularly complicated. It does use a number of custom-nodes that are all available within the ComfyUI-Manager.
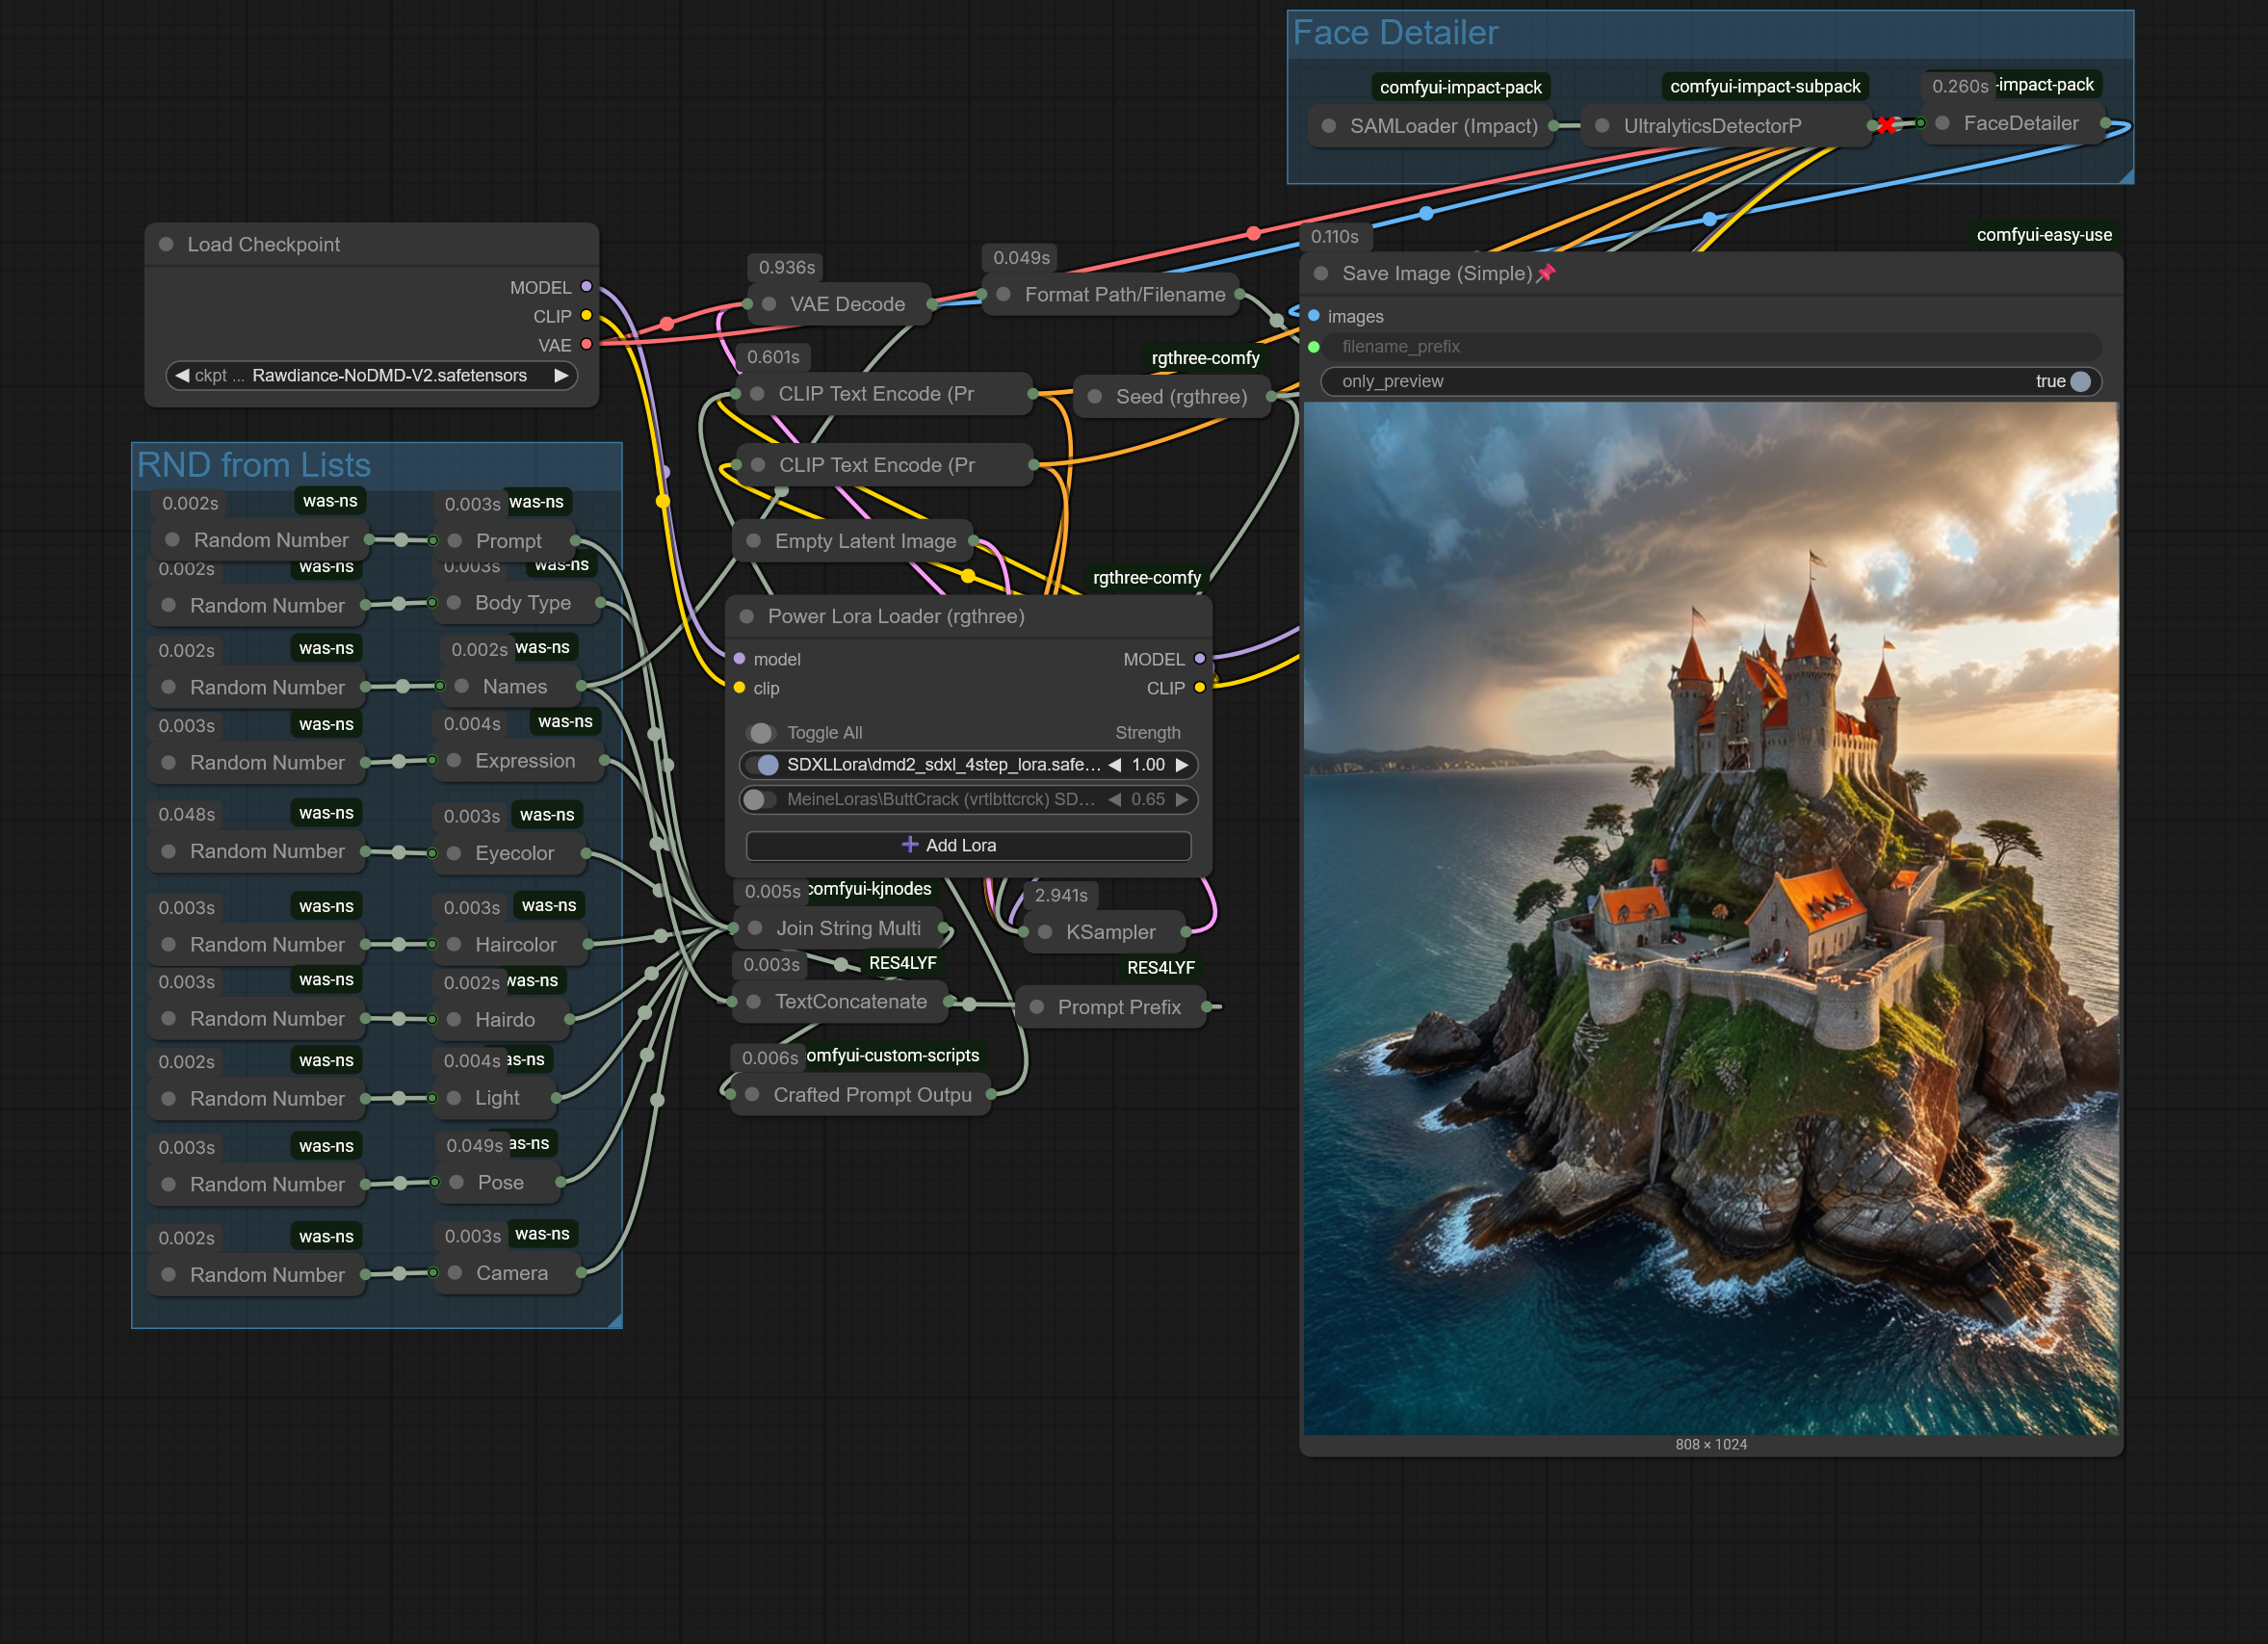
Jukebox (Random Prompt/Gens)
Simple ComfyUI workflow to generate nearly endless random prompts and images out of 10 easy editable lists for styles, hairs, lights and so on.Never was easier and faster to generate AI slop.Installation:Copy Jukebox folder from zip to ComfyUI\user\default\Import WorkflowAdjust your checkpointIf you add/edit the lists make sure you adjust the range of the RND node. The end number represents the number of lines of a list.V2:Added Face Detailer (switchable)Much better and bigger Prompt.txtAdd Prompt Prefix - its put in front of prompt, like (((nude))) or (((black skinned))). Use () to force attention.Make sure you overwrite lists (.txt) in \Jukebox folder.
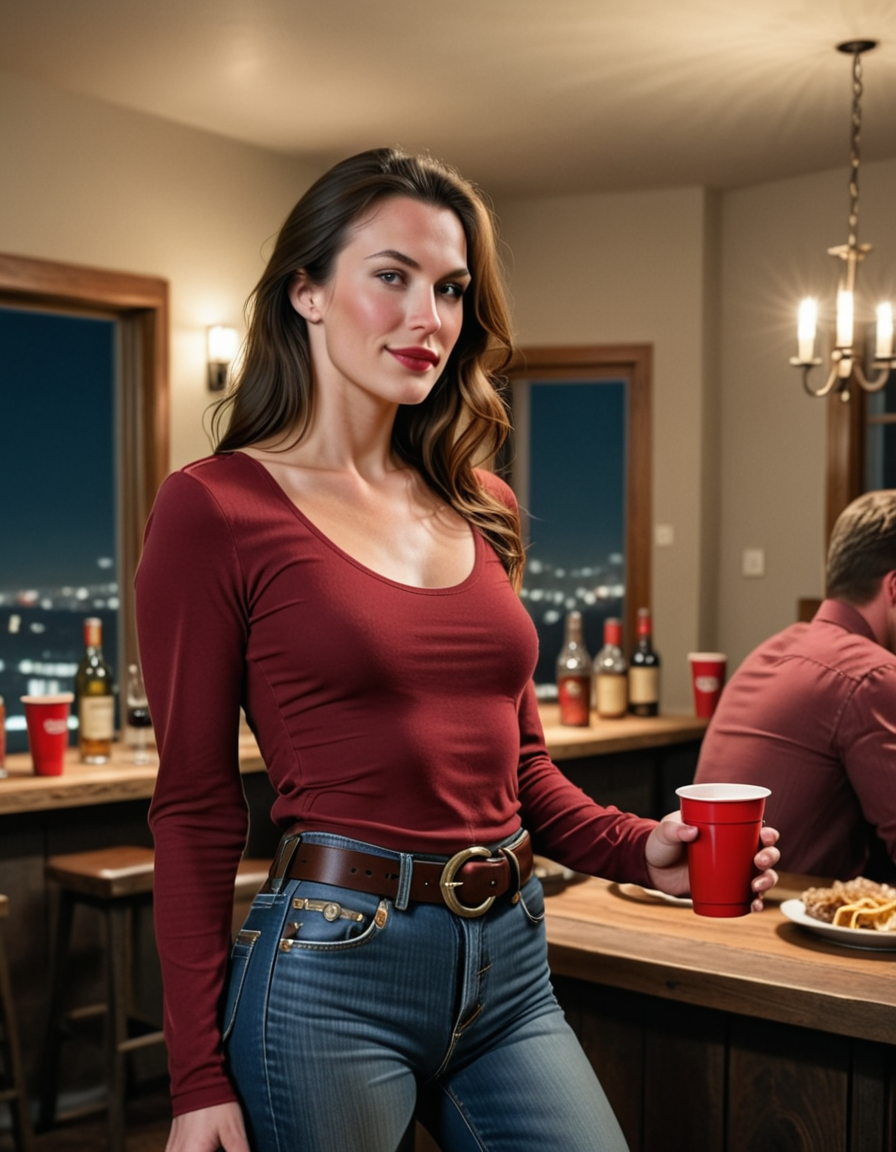
Basic Two Step Generation Workflow
As I've been posting more, I've felt motivated to start to tidy up and share some of my go-to ComfyUI workflows. This is my "basic" for most offsite generations: a two step workflow that combines an illustration/anime model that provides good prompt adherence and interesting compositions with a realistic model that transforms the image to an aesthetic that I usually prefer.I make no pretense that any of this is particularly groundbreaking, original, or advanced, and I think many others have better techniques than me. However, perhaps some users will find it useful. It uses minimal custom node dependencies (impact pack only, for some nice quality of life nodes).
ComfyUi Workflow Hires+Detailers+Loras+Upscale+Style filter for 4k gens fast and easy with SD 1.5 and XL
I wanted to share a ComfyUi simple workflow i reproduce from my hours spend on A1111 with a Hires, Loras, Multiple detailers and a last upscaler + a style filter selector. I use it to gen 16/9 4k photo fast and easy.For beginners on ComfyUi, start with Manager extension from here and install missing Custom nodes should works fine ;)I used my model for images.Detection and Upscaler models can be found in Zip folders.For more detailed images and a more advanced WF, I recommend you take a look here.

Auto-triggers-LoRA-workflow
This model automatically applies trigger words for LoRA.

Sexiam - Img2img with Upscale
Img2Img Workflow (ComfyUI)This workflow lets you take a base image and combine it with a secondary image (like a nebula, fractal, or other abstract texture) to generate new compositions that text-to-image alone wouldn’t produce. Instead of only relying on prompts, this setup uses the “driving image” to push the model into unexpected poses, angles, and layouts, while still respecting your text prompt and style settings.This is especially useful when you want:More dynamic posing (without manually inpainting or posing tools).Unique layouts and camera angles.A way to push your characters or scenes into new territory, while staying consistent.What It’s ForGenerating new compositions from an existing base image.Keeping your characters consistent while experimenting with different layouts.Using abstract images (nebulae, textures, fractals, clouds, etc.) as latent drivers for creativity.High-Res Fix and Upscaling are built-in — this ensures the outputs stay sharp, detailed, and production-ready.Step-by-Step Breakdown1. Load Your Driver ImageStart by loading the image you want to use as a guide — this could be a nebula, a fractal, a painting, or anything with interesting shape and color flow. This image will shape how your final result is composed.Nodes will automatically take the width and height of your input image and apply it to the generation.For best results, a standard SDXL size is recommended for input images with img2img. Be sure to crop your image to around 1 million pixels. The following sizes can be used as a guide:1:1 - 1024×1024 - Square3:2 - 1216×832 - Landscape4:3 - 1152×896 - Landscape16:9 - 1344×768 - Widescreen9:16 - 768×1344 - Vertical2:3 - 832×1216 - Portrait3. Add Your PromptNow it’s time to describe what you want to see — your subject, the style, the lighting, etc. You can also write a negative prompt to avoid things like blurry faces, extra limbs, or text.The SDXL base model and VAE are loaded, and LoRAs can be added if you want to steer the style further.4. Sampling and Upscaling – Build and Refine the ImageThis step handles both the base composition and the detail refinement. It’s made up of two sampling passes and a built-in upscale between them.In the first sampling pass, the KSampler uses your latent input and prompt to create a strong composition. A denoise setting around 0.6–0.7 is used here — that’s strong enough to change the image significantly, but still preserve the flow and layout.Next, the image is upscaled by 50%. This isn’t just a resize — the model intelligently adds detail using High-Res Fix. It sharpens the image and gives it more pixels to work with.Finally, a second KSampler refines the image using a lower denoise value (around 0.4). This keeps the structure but adds texture and small fixes.Labels and Prompt TemplateThis workflow is fully labeled for ease of use. Each section includes notes explaining what the node does, how it works, or what settings to change. This makes it easier to troubleshoot or customize without needing to reverse-engineer anything.A prompt template is also included in the workflow to help guide your text inputs. It covers subject, mood, lighting, and style, giving you a strong starting point for consistent and well-structured prompts.Here are some image for you to try with the workflow: Images are sized either 832x1216 or 1216x832

ReActor Workflows
A set of three workflow for the ReActor face swap system:- ReActor Face Model Trainer - create and save face models from multiple input images- ReActor Multi-FaceSwap - Swap several faces in the same image in a single workflow- ReActor v2v FaceSwap - swap faces in videos