ComfyUI Workflows
Browse real AI workflows from Flux, SDXL, Pony, ControlNet, video generation and commercial AI creators.

Wan 2.2 i2v Storyboard
ComfyUI Workflow (for testing)requires eclipse 3.5.36setup is nsfw sorry if that bother you xdthe workflow is a merge from @taek75799

Image to Image Video With Alpha Layer (WEBM format, wan2.2)
The Git Repo is here: https://github.com/therealkove-wq/img2imgVideoTransparency# img2img Transparent Video — ComfyUI WorkflowGenerates videos with a transparent background (WEBM + alpha channel) from a start and end frame using Wan 2.2 I2V with LightX2V LoRAs and rembg AI background removal.---## How it works1. You provide a start frame and an end frame (PNG images)2. The model generates the in-between frames3. rembg AI strips the background from every frame4. Output is a WEBM file with a real alpha channel, ready for compositing---## Required ModelsAll models are from [Comfy-Org/Wan_2.2_ComfyUI_Repackaged](https://huggingface.co/Comfy-Org/Wan_2.2_ComfyUI_Repackaged) on HuggingFace.| File | Destination folder ||------|--------------------|| wan2.2_i2v_high_noise_14B_fp8_scaled.safetensors | ComfyUI/models/diffusion_models/ || wan2.2_i2v_low_noise_14B_fp8_scaled.safetensors | ComfyUI/models/diffusion_models/ || wan2.2_i2v_lightx2v_4steps_lora_v1_high_noise.safetensors | ComfyUI/models/loras/wan/ || wan2.2_i2v_lightx2v_4steps_lora_v1_low_noise.safetensors | ComfyUI/models/loras/wan/ || umt5_xxl_fp8_e4m3fn_scaled.safetensors | ComfyUI/models/text_encoders/ || wan_2.1_vae.safetensors | ComfyUI/models/vae/ |> The workflow will show download buttons for missing models directly in ComfyUI.---## Custom Node SetupTwo custom node packages are required.### 1. wan_alpha_nodes (this repo)Provides the SaveWebmWithAlpha node used to export the final video.Copy the two files from this repo into ComfyUI:```ComfyUI/custom_nodes/wan_alpha_nodes/├── wan_alpha_nodes.py└── init.py```### 2. ComfyUI-rembgProvides the RembgBackgroundRemover node used for AI background removal. Install it via ComfyUI Manager or clone it into ComfyUI/custom_nodes/.---## Using the Workflow1. Open ComfyUI and load kove_img_to_img_transparent.json2. In the Start Frame node, upload your starting image3. In the End Frame node, upload your ending image4. Edit the Positive Prompt (see Prompting section below)5. In the WAN I2V Conditioning node, set width, height, and length (frame count)6. In the Save node, set your output filename and frame rate7. Click QueueThe output WEBM file will appear in ComfyUI/output/.---## Key Parameters| Parameter | Node | Notes ||-----------|------|-------|| Width / Height | WAN I2V Conditioning | Resolution of the output video. Default: 1024×1024 || Length | WAN I2V Conditioning | Number of frames. 61 frames @ 30 FPS ≈ 2 seconds || Filename | Save | Output file name. Existing files with the same name are overwritten without warning. || Frame Rate | Save | Playback FPS of the output WEBM || Codec | Save | VP8 (faster) or VP9 (better compression) || Quality | Save | 0–100. Default 20 is a good starting point |---## PromptingAlways include this phrase in the positive prompt:> "The character is isolated against a transparent background."Without it, rembg has less context and background removal quality drops.The negative prompt is pre-filled with blurry, distorted, low quality, static, no motion — leave it as-is unless you have a specific reason to change it.### Example promptsIdle character animation```The character is isolated against a transparent background.The lighting is constant and even throughout the sequence.The character breathes gently and sways slightly from side to side.Hair and clothing move subtly with the sway.The character does not speak. Slow movements. Idle animation.```Floating object```The character is isolated against a transparent background.A glowing orb floats gently up and down. Soft pulsing light. Smooth looping motion.```Abstract effect```The character is isolated against a transparent background.Colorful particles swirl and drift slowly. Ethereal. Cinematic quality.```---## TroubleshootingNodes missing after loading the workflow- Confirm both custom node packages are installed and ComfyUI has been restarted- Check the ComfyUI console for import errorsBackground not fully removed- Make sure the transparent background phrase is in your positive prompt- Try a different rembg model in the RembgBackgroundRemover node (e.g. isnet-anime for illustrated characters)CUDA out of memory- Reduce width/height or frame count- The two diffusion models are large (14B fp8); 16GB+ VRAM recommendedOutput file is overwritten unexpectedly- Change the filename in the Save node before each runWEBM won't play in browser/editor- Switch codec to VP9 in the Save node for broader compatibility
iGEN ONE (ZImage, Ernie, FLUX1/2, Qwen, HiDream, Nunchaku)
iGEN ONE — Workflow Guide579+ nodes · 40 groups · 13 component subgraphs · 2 pipeline rows161 unique node types — 71% Eclipse nodesBuilt with ComfyUI_Eclipse custom nodesWhat Is This?iGEN ONE is a modular, all-in-one image generation and post-processing pipeline for ComfyUI. It supports a wide range of diffusion models — Flux, Stable Diffusion, HiDream, and more — and covers everything from initial image generation through face detailing, upscaling, and watermarking in a single workflow.The key design principle is modularity: every feature lives in its own group that can be independently enabled or disabled by simply muting or bypassing it. You never need to reconnect anything — the pipeline automatically adapts to whatever groups are active.How It Works — The BasicsLayoutThe workflow is arranged in two horizontal rows that you read left to right:Row 1 (27 groups) — Everything needed to generate an image: image inputs, prompts, model loading, and renderingRow 2 (13 groups) — Everything that happens after generation: refining, face swap, detailing, upscaling, watermarks, and savingBetween the two rows sits a routing banner — a strip of utility nodes that resolves shared resources (model, VAE, CLIP, prompts, image dimensions) so that every Row 2 group can find what it needs automatically.Toggling Features On and OffEach group has a Fast Mode Switcher panel — a small control panel that lets you mute or bypass individual sub-features within the group. Think of it like a row of toggle switches for that section's optional capabilities. To disable an entire group, you mute/bypass the group itself in the ComfyUI canvas.To mute/activate an entire group: right-click the group header → "Set Group Nodes to Never" (mute all) or "Set Group Nodes to Always" (activate all).When a group is muted/bypassed, downstream groups automatically skip it and pick up from the last active group. This works because of a priority-based fallback system: each group tries a list of possible input sources in order and uses the first one that's actually active.You can enable any combination of groups and the pipeline will always find the right data path. There is no need to manually reconnect anything.Data RoutingInstead of visible noodle connections between groups, iGEN ONE uses Set/Get nodes — named value channels that work like wireless connections. A SetNode in one group publishes a value (like "ref_image" or "model_init"), and a GetNode in another group retrieves it by name. This keeps the visual layout clean and makes it easy to rearrange groups.Row 1 — Generation PipelineImage Sources (Groups 1–3 + 5–9)The workflow offers four ways to get a starting image. Only one should be active at a time — the pipeline automatically picks whichever source is enabled. A loaded image can serve two purposes: as a visual reference for img2img generation, or simply as input for the Image to Prompt group (group 8) to generate a text description — you don't have to use it for img2img.You can also load an image and skip the Initial Render entirely — disable the Initial Render switch, and the loaded image goes straight to Row 2 for detailing, upscaling, face swap, or any other post-processing. This lets you bring in images from anywhere (other workflows, other tools, photographs) and run them through the full post-processing pipeline.1. Image LoadLoad a single image from disk. This is the simplest option — pick an image and go. It also extracts any embedded generation metadata (model name, prompt, sampler, seed) from the image, and can optionally override the workflow's settings with those extracted values. This is useful for "remix" workflows where you want to re-generate with the same settings that produced the original.2. Image Load from FolderBatch processing mode. Loads images one by one from a folder, with controls for sorting (by name or date) and subfolder traversal. Like Image Load, it can extract and apply metadata from each image. Great for re-processing an entire folder of images through the pipeline.Set the index to -4 for shuffle mode (random order, no repeats). The optional seed_input slot controls when special modes advance — connect a seed and keep it the same value to freeze the image selection while you tweak other settings. Change the seed value to advance to the next image.3. Input Video FrameExtracts a single frame from a video file, with a configurable frame skip offset. Useful when you want to use a video still as your starting image.4. Text-Only GenerationWhen none of the above are active, the workflow generates purely from text prompts using an empty latent. This is the default "txt2img" mode. Even when an image source is active, it only becomes img2img if you also enable one of the i2i sub-features in the Initial Render group (i2i Denoise, Flux Preproc, DiffSynth Qwen, etc.) — otherwise the loaded image is only used for reference purposes like Image to Prompt.After selecting a source, the image can pass through several optional processing steps:5. Remove BackgroundRemoves the background using BiRefNet, isolating the subject on transparency. Useful when the background would interfere with generation or when you want to focus on the subject only.6. Image Crop — AutoAutomatic subject-aware cropping. Uses SegmentAnything (SAM) to detect the main subject, centers the crop on it, and resizes to your target dimensions. Best for single-subject images where you want tight framing.7. Image Crop — CustomManual bounding-box cropping with pixel-level controls. For when auto-crop doesn't frame things the way you want.8. Preview Cropped ImageA preview checkpoint with a Stop node. Enable this to see the crop result and halt execution before proceeding — useful for verifying your crop settings.9. Resize ImageSimple resize to specific dimensions. Used when your input image doesn't match the target generation size.The image source chain has a built-in priority system: it checks from the last processing step backward (resize → crop_preview → crop_custom → crop_auto → rembg → video → folder → load) and uses the first active result. So you can stack processing steps and the last one wins.Prompt Construction (Groups 8, 18–23)There are multiple ways to build your prompt, and they can be combined:8. Image to PromptUses an AI vision model (Qwen 9B, Q4_K_M quantization) to analyze your reference image and generate a text description. Runs via Eclipse's Smart LM Loader with a "Detailed Description" task. The result feeds into the prompt assembly group as one of the possible prompt sources.18. RaffleRandom prompt generation from a curated tag system. Raffle builds prompts by randomly selecting tags from categories (subject, pose, clothing, etc.) with seed-controlled reproducibility. Includes a negative output filter for excluding unwanted content.19. Read Prompt from FilesReads prompts from external text files (one prompt per line). Uses index-based indexing to select which prompt to use. Good for working through a prepared list of prompts in sequence.Like Image Load from Folder, set the index to -4 for shuffle mode. Connect a seed to the seed_input slot and keep it fixed to freeze the prompt selection while tweaking other settings — change the seed value to advance to the next prompt.20. PromptThe central prompt assembly hub. This is where all prompt sources come together into the final positive and negative prompts.What's inside:Wildcard Processor — Template-based prompting with __wildcard__ placeholders for varietySmart Prompt v2 (Subject) — A structured subject builder with dropdowns for gender, age, hair, clothing, etc.Smart Prompt v2 (Settings) — Environment builder with dropdowns for location, time of day, weather, etc.Join nodes — Combines all active prompt inputs (from Image-to-Prompt, Raffle, file reader, manual text)String DeDuplicate — Automatically removes duplicate tags or phrases from the combined promptPrefix / Suffix — Optional quality tags (like "masterpiece, 8K") added before or after your promptNegative Prompt — A multiline text field for your negative promptEach prompt source has its own Mode Bridge toggle, so you can enable any combination: just the manual prompt, manual + raffle, image-to-prompt + files, or any other mix.The Prompt group has three sub-feature toggles that control other groups: enabling Image to Prompt activates the Image to Prompt group (you still need to manually enable an image source group like Image Load — follow the arrow from Image to Prompt back to find it), Raffle activates the Raffle group, and Read from Files activates the Read Prompt from Files group.21. Prompt StylerWraps your positive prompt in a style template. Uses Eclipse's Prompt Styler node to apply a consistent style (like "photo-hdr") to the prompt text.22. Prompt EditAI-powered prompt rewriting. Uses the same Qwen 9B model but with a "Rewrite Style" task — it takes your prompt and creatively rewrites it while preserving the core meaning. Good for generating variations or improving prompt quality.23. Save PromptsSaves the final combined prompt to a text file. Can append to an existing file, letting you build a collection of prompts over time.Model Loading & Enhancement (Groups 9–17)9. Folder / SizeThe configuration hub for the workflow. Sets:Output folder structure (with date-based subfolders)Image dimensions — default is 896×1152 (3:4 aspect ratio, good for portrait)Batch size — how many images to generate per runLatent type — SD3/Flux/Wan/HunyuanVideoVRAM purge behavior10. Model LoaderLoads the main checkpoint using Eclipse's Smart Model Loader. The default configuration loads Flux Kreamania fp16 in UNet mode with fp8_e4m3fn weight quantization and flash-attention2. Uses external CLIP models (ViT-L-14 + t5xxl_fp8) and an external VAE (flux_vae). The Smart Model Loader handles all the complexity of model configuration in one node. The usual main model is darkBeast Blitz8.The Smart Model Loader has a built-in template system — you can save your entire loader configuration (model, CLIP, VAE, sampler settings, etc.) as a named template and restore it later with one click. The workflow ships with pre-built templates, but those reference specific checkpoints you may not have. You can either download the matching model or load a shipped template and swap in your own checkpoint. Creating your own templates for your favorite models is the recommended approach.11. LoRAsDual LoRA Stack setup with two Lora Stack nodes feeding into a Lora Stack Apply. Supports both model-only and model+clip modes with up to 9 combined LoRA slots. Each slot has its own model path and strength controls.You can mix model-only LoRAs and LoRAs that also modify CLIP in the same stack — each slot independently selects its mode.12. Model PatcherA collection of 11 optional model modifications, each independently toggleable via a Fast Muter panel:ModelSamplingFlux — Flux-specific guidance parametersModelSamplingAuraFlow — AuraFlow sampling overrideDynamicThresholdingFull — CFG thresholding for better prompt adherencePerturbedAttentionGuidance (PAG) — Self-attention manipulation for more detailSelfAttentionGuidance (SAG) — Feature map attention enhancementDifferentialDiffusion — Mask-based selective denoisingCFGZeroStar — Alternative CFG guidance techniquePatchSageAttention — Memory-efficient attention (reduces VRAM usage)TorchCompileModel — JIT compilation for faster inferenceTeaCache — Token caching for speed improvementUNetTemporalAttentionMultiply — Temporal attention modificationMost of these are bypassed by default. Enable them one at a time to see their effect on your output.13. PuLID — FluxIdentity preservation using PuLID. Load a reference face photo and PuLID will guide the generation to maintain that person's facial features in the output. Uses pulid_flux_v0.9.0 with a configurable strength weight.14. PuLID — Flux NunchakuSame concept as PuLID Flux, but optimized for Nunchaku-quantized Flux models. Uses pulid_flux_v0.9.1 + EVA02_CLIP.15. Flux ReduxStyle transfer using Flux Redux. Load one or two style reference images and the workflow applies their visual style to your generation via CLIP Vision encoding and StyleModelApply. Supports blending two references at different strengths.16. PreprocessorImage preprocessing for ControlNet. Uses DepthAnything for depth map extraction. Only needed when the ControlNet group is active.This group is also needed when using Flux ControlNet LoRAs (like depth) or the DiffSynth Qwen LoRA — their sub-feature toggles are i2i (Flux Preproc) and i2i (DiffSynth: Qwen Lora) in the Initial Render group. You must activate the Preprocessor group manually when using either of these.17. ControlNetStructural conditioning with four toggleable modes:Standard ControlNet — xinsir union-promax (strength 0.75)Union Type — Select specific control type (depth, canny, etc.)Negative Zero — Zero-out negative conditioningDiffSynth Qwen/ZIT ControlNet — Alternative ControlNet using Z-Image-Turbo model (strength 0.65)Each mode has its own Mode Bridge toggle. You can use standard ControlNet for structure while also enabling negative zero-out, for example.Rendering (Groups 24–26)24. Initial RenderThe core generation step. Contains a component subgraph (42 internal nodes) that handles the actual sampling process.Sub-features controlled by individual toggles:Initial Render — The main txt2img or img2img sampling passSeed Enhancer — Adds noise variation to the seedNoise Injection — Additional noise patterns injected into the latent (strength 0.45)Detail Daemon — Micro-detail enhancement during samplingFlux Guidance — CFG control specifically for Flux modelsi2i (Denoise) — Standard img2img with configurable denoise strengthi2i (Flux Preproc) — Flux ControlNet LoRA pathway (e.g. depth) — requires the Preprocessor group to be activated manuallyi2i (DiffSynth: Qwen/ZIT) — Qwen-based img2img pathwayi2i (DiffSynth: Qwen Lora) — Qwen LoRA variant pathway — requires the Preprocessor group to be activated manuallyNegative Prompt — Enable/disable negative conditioningStop — Halt execution after this renderDefault sampler: euler / simple / 25 steps / cfg 3.5 / denoise 1.0 — configured via Smart Sampler Settings v2.25. Latent UpscaleSecond-pass latent-space upscaling. Takes the initial render's latent output, upscales it 1.25× with bicubic interpolation, and runs a second sampling pass using a ClownShark Sampler component (7 internal nodes from the RES4LYF pack). This is a more advanced sampler with detail boost, SDE, and sigma scaling options.Default sampler: dpmpp_2m / sgm_uniform / 36 steps / denoise 0.5. ClownShark sub-sampler: multistep/dpmpp_2m / beta / 11 steps / denoise 0.23.26. Initial Render — PreviewPreview and save checkpoint. Shows the generated image and optionally saves it with full metadata embedding (workflow JSON + generation data). Includes a Stop node so you can halt here before entering the post-processing pipeline in Row 2.This is the boundary between generation and post-processing. If you just want to generate and save without any post-processing, enable the Stop node here.Row 2 — Post-Processing PipelineThe second row handles everything after initial generation. A routing banner of ~39 ungrouped nodes sits above the row, resolving shared resources: latent dimensions, reference image, MODEL (with a 6-source priority chain), VAE, CLIP, conditioning, and string prompts.Each Row 2 group automatically picks up the image from whichever previous group was last active, so you can enable any combination and the pipeline chains them correctly.Refining1. Flux2/ZIT Refiner — 3rd PassA third-pass refinement using a dedicated checkpoint (darkBeast Klein2) via a component subgraph (17 internal nodes). Uses SamplerCustomAdvanced with wavelet color matching (strength 0.75) to preserve the original color palette while refining details. Low denoise (0.3) for subtle improvement without major changes.Face Swap2. Flux2: Face SwapDiffusion-based face replacement using a two-pass BFS architecture built entirely with Eclipse and core ComfyUI nodes — no third-party face swap package needed. Contains two component subgraphs — BFS_1ST (26 internal nodes) and BFS_2ND (22 internal nodes) — for progressive face re-generation.How it works:Smart Detection finds the face in the image using the Anzhc face segmentation modelThe face region is cropped and encoded to latentBFS_1ST re-generates the face region using a dedicated checkpoint (darkBeast Klein2) via SamplerCustomAdvanced with full denoise (1.0)BFS_2ND refines the result with a second sampling pass for seamless blendingAn Image Comparer shows before/after for quality checkingBecause it uses actual diffusion sampling rather than a face-swap model, the results respect the art style and lighting of the original image. The BFS subgraphs need a Flux2 model trained for face re-generation — darkBeast Klein2 works well, but any BFS-capable Flux2 checkpoint should work. There are also LoRAs that add BFS capability to a standard Flux2 model. If your main pipeline uses a different model, the BFS checkpoint must be loaded in the BFS model loader.Upscaling (Groups 3, 9, 10)3. Upscale ImageFirst upscale stage with three independently toggleable methods:Scale to Total Pixels — Resize to 2 megapixels using lanczos interpolationSmart Sharpen+ — 4-pass adaptive sharpening (strength 0.75)Upscale with Model — Neural network upscaler (4x AnimeSharp) — muted by defaultAn Image Comparer shows before/after.9. SeedVR2 UpscaleAI-powered upscaling using the SeedVR2 7B DiT diffusion model — a video upscaler repurposed for single images. Loads its own dedicated DiT model and VAE, processes in LAB color space for better color accuracy. Includes optional pre-resize and RAM cleanup controls. Bypassed by default (resource-heavy).10. Rescale ImageFinal size adjustment with three chained operations:Reinhard Color Match (strength 0.3) — Matches colors back to the original referenceBicubic Rescale at 1.25× with supersample enabled (on by default) — supersampling renders at a higher internal resolution then downscales for cleaner results. Can be turned off for a simpler resizeSmart Sharpen (2 passes) — Final sharpening passDetailing (Groups 4–8)All five detailer groups share an identical architecture built around a component subgraph (SEGS Detailer, 41 internal nodes each). Each detailer:Detects a specific region in the image (face, eye, mouth, etc.)Creates a precise mask using SAM2.1 + VITMatte for clean edgesInpaints just that region at a low denoise to enhance detail without changing the restCompares before/after so you can check the resultEach detailer can optionally load its own dedicated model (separate from the main pipeline), has its own LoRA stack, and its own sampler settings — making them fully independent. Sub-features (model loader, LoRAs, flux guidance, negative prompt, differential diffusion, CFG zero star) are individually toggleable via Mode Bridge controls.4. Detailer: FaceEnhances facial details. Uses Florence-2 VLM with "face" detection → SAM2.1 + VITMatte masking. Dedicated model: darkBeast Blitz6. Denoise: 0.2 (subtle refinement — just enough to sharpen features without changing the face).5. Detailer: EyeEnhances eye details. Same architecture, "eye" detection prompt. Denoise: 0.35 (slightly more aggressive than face to bring out iris detail and reflections).6. Detailer: MouthEnhances mouth/teeth details. "Mouth" detection prompt. Denoise: 0.4 (the most aggressive of the face-area detailers — teeth and lips benefit from more rework).7. Detailer: X-1Body region detailer using YOLO object detection instead of Florence-2. Denoise: 0.3.8. Detailer: X-2Specialized region detailer using YOLO detection. Denoise: 0.4.The detailers run in sequence: face → eye → mouth → X-1 → X-2. Each picks up the output of the previous one automatically. Disable any you don't need — the chain adapts.Watermarks & Save (Groups 11–13)11. Create Watermark — TextOverlays a text watermark ("© Eclipse") on the image. Configurable font, size, color, and position (default: bottom-right). Includes gradient effects (cyan→blue) and optional Drop Shadow + Outer Glow from LayerStyle.12. Create Watermark — LogoOverlays a logo image as a watermark. Loads a logo file, positions it bottom-right with blue gradient effects. Optional desaturation, resize, Drop Shadow, and Outer Glow.13. Save ImageThe final output node. Collects the finished image from the entire pipeline using a priority chain that checks all possible sources in reverse order:watermark_logo → watermark_text → rescale → seedvr2 → yolo2 → yolo1 → mouth → eye → face → upscale → bfs → refiner → init → ref_imageThis means it always saves the output from the last active processing stage, regardless of which groups are enabled. The image is saved with full embedded metadata — workflow JSON, generation data (all models, VAEs, and LoRAs collected from across the entire workflow, plus prompts, dimensions), and all relevant settings.This is the only group you should always keep active. Everything else is optional.Quick Start GuideSimplest Setup — Text to ImageMake sure the image input groups are bypassed (Image Load, Image Load from Folder, Input Video Frame)In the Prompt group, type your prompt in the Wildcard Processor text field (the main prompt input — set to fixed mode by default) and your negative prompt in the Negative Prompt fieldIn the Folder / Size group, set your desired image dimensionsMake sure Model Loader is active with your preferred checkpointMake sure Initial Render and Save Image are activeBypass everything else you don't needQueue the promptImage to ImageEnable Image Load and select your source imageEnable the Resize Image group so your image is resized to match the dimensions set in Folder / Size — this avoids issues with oversized images. You can skip this if your image already matches, but large images may cause problemsIn the Initial Render group, enable the i2i (Denoise) toggle and set your denoise strength (0.3–0.7 is typical)Queue the promptPost-Process an Existing Image (Skip Render)You can load any image and send it straight to Row 2 — bypassing the entire generation step:Enable Image Load and select your imageDisable the Initial Render switch to skip rendering entirelyEnable whichever Row 2 groups you want (Refiner, Detailer: Face, Upscale Image, Face Swap, etc.)Queue — the pipeline picks up your loaded image and runs it through the active post-processing chainThis is one of the most useful features of the workflow. You can bring in any image — from a different workflow, a different tool, or even a photograph — and run it through the full detailing, upscaling, and watermarking pipeline without generating anything.Adding Post-ProcessingGenerate your base image firstEnable the Row 2 groups you want (Refiner, Upscale Image, detailers, etc.)Re-queue — the pipeline will process through all active Row 2 groups automaticallyUsing DetailersEnable any detailer groups you want (Detailer: Face, Detailer: Eye, Detailer: Mouth, Detailer: X-1, Detailer: X-2)Each detailer auto-detects its target region — no manual masking neededCheck the Image Comparer in each group to verify the resultAdjust denoise strength if the changes are too subtle or too aggressiveTroubleshootingThe workflow stops halfway throughMany groups have a Stop toggle that halts execution after that group finishes. This is useful for checking intermediate results, but they are enabled by default in some groups. If the workflow stops unexpectedly, check the Stop toggles in these groups:Image source groups (Image Load, Image Load from Folder, Preview Cropped Image)Initial Render and Initial Render — PreviewEach detailer (Face, Eye, Mouth, X-1, X-2)Disable the Stop toggle in any group where you want execution to continue through to the end.If you queue the workflow and it seems to finish too early — before reaching Save Image — a Stop toggle is almost always the reason. Check the last group that produced output and disable its Stop switch.Toggles reset when activating a groupWhen you change a group's state (mute → active or bypass → active), all toggles in that group reset to their defaults — which means all enabled. This can turn on sub-features you didn't expect, including the Stop toggle. After activating a group, always review its toggle panel and disable anything you don't need.This is the most common source of confusion. If something behaves differently after you re-activate a group, check its toggles — they've all been reset to enabled.Custom Node Packages UsedPrimary (author's own):ComfyUI_Eclipse — The backbone of this workflow. Provides loaders, pipes, Set/Get routing, Mode Bridges, Mute/Bypass Repeaters, Smart Prompt, Smart Folder, Smart Detection, Smart LM Loader, Smart Sampler Settings, Save Images, Image Comparer, and many more.RES4LYF — ClownShark Sampler (advanced sampling with detail boost) — fork of ClownsharkBatwing/RES4LYFThird-party:Raffle — Random prompt generation from tag categoriespysssss Custom-Scripts — ShowText for prompt preview displayKJNodes — Image resize, PatchSageAttentionSeedVR2 VideoUpscaler — AI-powered upscalingNunchaku — Quantized model support and PuLID integrationImpact Pack — SEGSPreview for detailer visualizationLayerStyle — Drop shadow, outer glow, SAM2Ultra, MaskGrow, ImageAutoCrop, and moreLayerStyle Advance — Extended LayerStyle nodes (SAM2 Ultra V2, VITMatte)Advanced ControlNet — ACN_AdvancedControlNetApply_v2BiRefNet — Background removalVHS (VideoHelperSuite) — Video frame loadingIf you made it this far — you're a legend. Now go generate something beautiful. 🌒
Wan 2.2 T2V/ I2v With Audio
Note: If you have ANY issues with nodes not downloading, read the notes or reach out. There's nothing that special about any of them that aren't core modules.⛔⚠️🛑✋ Read the notes completly before using. Most common install and node problems are listed in the directionsThis is a High Vram workflow. If you have less than 12Gb VRAm, I encourage you to try my Low VRAM Workflow: https://civitai.com/models/2236782/wan-22-1080p-on-low-vram-up-to-4k也有中文说明V4.0 Added an Image Ratio feature where you can either crop the image to the size you want, or adjust it so taht the aspect ratio remains the sameAdded sampler and scheduler selectorsReplaced math nodes with Linux friendly versionsSlight rework of the main areaV3.0I deceided to launch the seperatly from my Base Wan 2.2 as it is very different and is not for low VRAMAll in 1 workflow:It does T2V and I2VEasy resize of imagesLora LoadersSeed VR2MMAudioRife VFI InterpolationThorough notes and links.也有中文说明Instagram: https://www.instagram.com/synth.studio.models/Buy me a☕ https://ko-fi.com/lonecatoneThis represents many hours of work. If you enjoy it, please 👍like, 💬 comment , and feel free to ⚡tip 😉

【WAN2.2】IMG to VIDEO
✨ WAN2.2 — Image to video — Simple WorkflowA clean, all-in-one WAN image-to-video workflow built entirely with the UmeAiRT Toolkit for ComfyUI.Only 12 nodes. No spaghetti wires. Just load your model, write your prompt, and hit generate.⚠️ IMPORTANT — Nodes 2.0 RequiredThis workflow is built for the Nodes 2.0 (Vue) interface of ComfyUI. If you don't enable it, the workflow may have display problems.How to activate Nodes 2.0:Open ComfyUIGo to Settings (⚙️ icon, bottom-left)Find "Use Nodes V2 (Vue)" and toggle it ONRefresh the pageLoad the workflowIf you prefer the classic interface, check out my Legacy version of this workflow instead (link).🎯 FeaturesText-to-Image generationAutomatic download of models in auto versionBuilt-in SeedVR2 upscaler — high-quality tiled upscaling (toggleable on/off) Slower than a classic upscaler, but significantly better qualityFull metadata embedding — your images are saved with all generation parameters, ready for online publishing and remixing3 LoRA slots — with individual on/off toggles and strength control and you can connect as many other lora modules to each other for as many LoRA as you want.📦 Custom Node RequiredOnly one custom node to install:👉 ComfyUI-UmeAiRT-ToolkitInstall via ComfyUI Manager (search "UmeAiRT") or use the UmeAiRT Auto-Installer.The Toolkit packages everything internally — upscaler, face detailer, metadata saver. No other custom nodes needed.📂 Files you need (in manual version)For base versionI2V Model : wan2.2_i2v_high_noise_14B_fp8_scaled.safetensors and wan2.2_i2v_low_noise_14B_fp8_scaled.safetensorsIn models/diffusion_modelsCLIP: umt5_xxl_fp8_e4m3fn_scaled.safetensorsin models/clipFor GGUF versionI2V Quant Model : wan2.2_i2v_high_noise_14B_QX.gguf and wan2.2_i2v_low_noise_14B_QX.ggufIn models/unetQuant CLIP: umt5-xxl-encoder-QX.ggufin models/clipFor speed versionlightning LoRA : Wan2.2-Lightning_I2V-A14B-4steps-lora_HIGH_fp16.safetensors and Wan2.2-Lightning_I2V-A14B-4steps-lora_LOW_fp16.safetensorsFor AIO versionI2V FAST AIO Model : wan2.2-i2v-rapid-aio.safetensorsIn models/checkpointVAE: wan_2.1_vae.safetensorsin models/vaeANY upscale model:Realistic : RealESRGAN_x4plus.pthAnime : RealESRGAN_x4plus_anime_6B.pthin models/upscale_models

LOWEST-VRAM_ULTIMATE_WAN2.2-TripTrap-v11-ENDLESS-or-LOOP-workflow
``` OPTIMIZED - minimal VRAM _ Max quality balance 🎧 ULTIMATE_WAN2.2-TripTrap-v11-ENDLESS-or-LOOP-Workflow 🎧 Experimental Pop / Glitch Artist & AI Alchemist Every video born from this workflow carries a frequency. You're not just generating — you're translating noise into signal. ──────────────────────────────────────────── 🎵 HEAR THE VISION ──────────────────────────────────────────── ▶ YouTube — TripTrap Music YouTube - TripTrap Music ▶ Spotify — TripTrap Artist Spotify - TripTrap Artist ▶ Apple Music — TripTrap Apple Music - TripTrap ──────────────────────────────────────────── 🎨 WEAR THE FREQUENCY ──────────────────────────────────────────── ▶ TripTrapCreations — Etsy Store TripTrapCreations - Etsy Store ──────────────────────────────────────────── 📱 FOLLOW THE SIGNAL ──────────────────────────────────────────── ▶ Facebook Facebook ──────────────────────────────────────────── ⚡ BUILT WITH BLOOD, SWEAT, AND CUDA CORES ⚡ This workflow is free, open, and yours to use. If it sparked something in you — pass the signal along. Subscribe. Stream. Share. The algorithm is just another latent space waiting to be shaped. — TripTrap ```

【WAN2.1】IMG to VIDEO
✨ WAN2.1 — Image to video — Simple WorkflowA clean, all-in-one WAN image-to-video workflow built entirely with the UmeAiRT Toolkit for ComfyUI.Only 12 nodes. No spaghetti wires. Just load your model, write your prompt, and hit generate.⚠️ IMPORTANT — Nodes 2.0 RequiredThis workflow is built for the Nodes 2.0 (Vue) interface of ComfyUI. If you don't enable it, the workflow may have display problems.How to activate Nodes 2.0:Open ComfyUIGo to Settings (⚙️ icon, bottom-left)Find "Use Nodes V2 (Vue)" and toggle it ONRefresh the pageLoad the workflowIf you prefer the classic interface, check out my Legacy version of this workflow instead (link).🎯 FeaturesText-to-video generationAutomatic download of models in auto versionBuilt-in SeedVR2 upscaler — high-quality tiled upscaling (toggleable on/off) Slower than a classic upscaler, but significantly better qualityFull metadata embedding — your images are saved with all generation parameters, ready for online publishing and remixing3 LoRA slots — with individual on/off toggles and strength control and you can connect as many other lora modules to each other for as many LoRA as you want.📦 Custom Node RequiredOnly one custom node to install:👉 ComfyUI-UmeAiRT-ToolkitInstall via ComfyUI Manager (search "UmeAiRT") or use the UmeAiRT Auto-Installer.The Toolkit packages everything internally — upscaler, face detailer, metadata saver. No other custom nodes needed.📂 Files you need (in manual version)For base versionI2V Model : 480p or 720pIn models/diffusion_modelsFor GGUF versionI2V Quant Model :- 720p : Q8, Q5, Q3- 480p : Q8, Q5, Q3In models/unetCommon files :CLIP: umt5_xxl_fp8_e4m3fn_scaled.safetensorsin models/clipCLIP-VISION: clip_vision_h.safetensorsin models/clip_visionVAE: wan_2.1_vae.safetensorsin models/vaeSpeed LoRA: 480p, 720pin models/lorasANY upscale model:Realistic : RealESRGAN_x4plus.pthAnime : RealESRGAN_x4plus_anime_6B.pthin models/upscale_models

Wan 2.2 - SVI2Pro w/ NAG - I2V for 12GB VRAM (Different Loras Per Stage)(Optimized for Speed)
WAN 2.2 / SVI Pro 2 / I2V for 12GB VRAMV2.1 - small fix, I accidentally removed the required SVI Low LoRa in Stage 2.Obviously an easy fix but for beginners it might be easy to miss.check my Aerith video (3rd video in the list) at the top. (Download Video then drag n' drop it into comfyui) it's a perfect example video of NAG negative prompts working correctly. Note the settings changing per stages. Sometimes nag_scale 8 has to be used with weighted prompts for it to work correctly. This is using all 7 stages and a good example of the many things you can do at CFG 1.V2.0 - Adds about 30 seconds to generation time, due to NAG and Inject Latent Noise nodes.SamplerCustomWithNAG replaced the old Custom Samplers. If you do not need Negative prompts and want faster gen times, stick with v1.31.There is a lot of new stuff to this, so expect some trial and error.Added CFG High and Low to the settings.Shift is still 9 for better prompting but if you want to retain more face detail use Shift 5. It's a good trade off though.Upscale Model:RealESRGAN_x2plus.pthplease report any BUGS!Pro Tip!Mix and Match High/Low Checkpoints:For example: Try using Smooth Mix High and Dasiwa's Low. I got some interesting results!Inject Latent NoiseReduces prompt bleeding/carry over to next stage.SamplerCustomWithNAGOpen CMD: navigate to ComfyUI/custom_nodes folder.Run: git clone https://github.com/BigStationW/ComfyUI-NAGIf it fails to install correctly (node not showing up):File 1: ComfyUI/custom_nodes/ComfyUI-NAG/chroma/layers.pyLine 5:Change:from comfy.ldm.chroma.layers import DoubleStreamBlock, SingleStreamBlockTo:from comfy.ldm.flux.layers import DoubleStreamBlock, SingleStreamBlockFile 2: ComfyUI/custom_nodes/ComfyUI-NAG/chroma/model.pyLines 9–14:Change to:from comfy.ldm.flux.layers import DoubleStreamBlock, SingleStreamBlockfrom comfy.ldm.flux.layers import timestep_embeddingfrom comfy.ldm.flux.layers import (DoubleStreamBlock,SingleStreamBlock,)from comfy.ldm.chroma.model import Chromaafter, close comfyui (don't restart).v1.31 - QoL Update and change to Shift Values.576x832, This is the resolution I've had the most success with.overlap frames added from subgraph. Recommended to not touch unless you understand what you are changing.Added Preview Animation and Control Random Seed to each sampler instead of a subgraph in the beginning, this way you can preview each clip as they finish, and let the generation continue endlessly if you're doing batches. Just remember to change it from Fixed -> Randomize. Also, don't forget to change it back to Fixed when happy with generation, otherwise it will just start at Sample 1 again.Also, use Shift 9.0, it seems much better than 5.0. Don't forget when using ANY video LoRa, especially High LoRas, start them at 0.5-0.6, the low can usually stay safe at 1.0. This will avoid a lot jittery, jelly animations.If you ever think you lost a seed... just drag the video into Comfyui workspace, and it will always have the seed number it used.If you dont want endless 'preview animation' -> right-click Preview Window and select 'Reload Node', this can be done during generating as well. Or, you can CTRL+B before generation to disable it. This is a QoL update.v1.2 - Please update to this version.Seed per Sample - fixed.Seed arrangement were out of order. (I'm not sure how this slipped through.)Added labels on seed per sample.Tested each seed on each clip and changed seed to make sure its working correctly.Added a preview image after Resize Image so you can check and compare your image to the original.For 832x1216 Images use 576x832 resolution if you're using the crop option on resize.Modified version of [SVI Pro 2.0 for Low VRAM (8GB)]And [Wan2.2 SVI Pro Example KJ]7 Stage Sample Setup, with each Stage having their own Loras, combined with Sage Attention Cuda for faster speeds.Can save each stage clip if needed.Final Output w/ Upscaler + RIFE for smooth 60FPS.Fast Group Bypasser - for quick access.### Required Models & LoRAsGGUF Main Models:* [DaSiWa-Wan 2.2 I2V] or* [Smooth Mix Version] or* [Enhanced NSFW Camera Prompt Adherence]> Note: Use a suitable quantization (e.g., Q4 or Q5) based on your available VRAM. I highly recommend DaSiWa-Wan high/low Models, as the Lightning Loras are BAKED in, leaving you only with SVI Loras being required.SVI PRO LoRAs (Wan2.2-I2V-A14B):* Both Required[SVI PRO - HIGH (Rank 128)][SVI PRO - LOW (Rank 128)]Text Encoders:[WAN UMT5] or[NSFW WAN UMT5]VAE:[Wan 2.1 VAE]The following is for Speed Boosts for nVidia Cards - If its already working then skip this!Patch Sage Attention Node (sageattn_qk_int8_pv_fp16_cuda) + Model Patch Torch Settings Node (Faster Speed Times):Prompt executed in 136.56 seconds <- Sage Attention Disable/FP16 Accumulation = Disable/Allow Compile = FalsePrompt executed in 104.38 seconds <- Sage Attention Enabled/FP16 Accumulation = Enabled/Allow Compile = FalsePrompt executed in 96.26 seconds <-- Sage Attention Enabled/FP16 Accumulation = True/Allow Compile = TrueWith this setup you can save a massive 40+ seconds just for one Stage!If Sage Attention is not working/crashing comfyui then do the following or use (CTRL+B to bypass the nodes but I highly recommend getting it working for massive speed boost):The following is for Comfyui_windows_portable, do not do it this way if you are using a different setup!Step 1 — Check your PyTorch + CUDA versionOpen CMD in your ComfyUI Portable folder (SAME directory as run_nvidia_gpu.bat) and run the following command:.\python_embeded\python.exe -c "import torch; print(torch.__version__, torch.version.cuda)"output = 2.9.1+cu130 13.0check Python embeded version:.\python_embeded\python.exe -Voutput = Python 3.13.9Which Means:Python: 3.13 (embeded)PyTorch: 2.9.1CUDA: 13.0Warning! If you are unsure how to proceed with the following steps, then paste your error code into Grok/ChatGPTfor a more detailed analysis.Pick the wheel that matches your Python + PyTorch + CUDA output from Step 1.That means the correct SageAttention wheel for your setup would be something like this:sageattention-2.2.0.post3+cu130torch2.9.0-cp313-cp313-win_amd64.whldownload the correct wheel for your setup from:[List of Wheels]It matches Python 3.13 (cp313-cp313), PyTorch 2.9.x, and CUDA 13.0.The slight difference in patch version (2.9.1 vs 2.9.0) is fine — this wheel works with PyTorch 2.9.x.Step 2 — Install Wheel (make sure the file is in \ComfyUI_windows_portable, same directory as run_nvidia_gpu.bat)Open CMD in your ComfyUI Portable folder and run with the correct wheel file (example below):.\python_embeded\python.exe -m pip install "sageattention-2.2.0.post3+cu130torch2.9.0-cp313-cp313-win_amd64.whl"Step 3 — How to check if it works:Open CMD in your ComfyUI Portable folder and run:.\python_embeded\python.exe -c "import sageattention; print('SageAttention import successful!'); print(dir(sageattention))"You should see:SageAttention import successful!['__builtins__', '__cached__', '__doc__', '__file__', '__loader__', '__name__', '__package__', '__path__', '__spec__', '_fused', '_qattn_sm80', '_qattn_sm89', '_qattn_sm90', 'core', 'quant', 'sageattn', 'sageattn_qk_int8_pv_fp16_cuda', 'sageattn_qk_int8_pv_fp16_triton', 'sageattn_qk_int8_pv_fp8_cuda', 'sageattn_qk_int8_pv_fp8_cuda_sm90', 'sageattn_varlen', 'triton']Step 4 — confirm if triton attention mode is available:Open CMD in your ComfyUI Portable folder and run:.\python_embeded\python.exe -c "import sageattention; print('SageAttention import successful!'); print('Triton mode available:' , hasattr(sageattention, 'sageattn_qk_int8_pv_fp16_triton'))"You should see:SageAttention import successful!Triton mode available: Trueif any triton errors run this command:.\python_embeded\python.exe -m pip install tritonStep 5 - now you should be able to use "sageattn_qk_int8_pv_fp16_cuda" with Patch Sage Attention + Model patch Torch Settings Nodes properly.

Wan 2.2 - All in Wan I2V (I2V, F2LF, SVI with optional F2LF, NAG, LTX for V2A, Pulse of Motion, Lora Optimizer, CFG-Ctrl, 4 modes, ...)
If you are having trouble finding some nodes, here are some of the repos of the nodes people are having trouble finding:Pulse of Motion: https://github.com/akashzeno/ComfyUI-PulseOfMotion/tree/mainThe fpsframedrop is one I made to solve the problem of potentially having different FPS when combining 2 videos to keep the same speed, I added it to comfy registry but apparently that doesn't work (yet?), here it is:https://github.com/dailydoseofaiart/ComfyUI-FPSFrameDrop/blob/main/README.mdSVI with FLF:https://github.com/Well-Made/ComfyUI-Wan-SVI2Pro-FLF(only relevant for v1:) PrismAudio: https://github.com/richservo/ComfyUI-PrismAudio.gitIt was a bit of a pain to install for me, I had AI help me.v2.1 Release:Some important bug fixes, including:The workflow no longer cuts off 4 frames at the beginning of every video (only SVI now, as it should)Fixed an issue causing the same video to be resized to different sizes, preventing generation in SVIv2 Release:A complete visual and functional overhaul, the features now include:- Regular I2V- F2LF (I2V but with a chosen end frame)- Video extension with SVI 2.0 Pro- Adding audio to an existing video or a just-generated video using LTX-2.3- NAG (Negative Attention Guidance) to be able to use a negative prompt even with CFG 1.0 (though it also works with higher CFG)- CFG-Ctrl/SMC-CFG (A node for potentially better prompt-following)- Pulse of Motion to automatically adjust the speed of the video to a natural-looking one (but also manual FPS control)- LoRA optimizer node for better combination of LoRAs (separate from regular LoRA loader so you can choose whatever works better)v1:This workflow is configured so that you can use it like a normal I2V workflow, indicated by red nodes. Additional features are indicated with cyan nodes.I also added notes everywhere to explain everything. I always dislike big workflows where I don't know where to even look and tweak or not, so I tried to make it intuitive with the coloring and explaining it all.The highlights of this workflow that make it different from the standard Wan 2.2 I2V workflow are these:- Ability to crop images easily in here and stitch 2 images together easily in case you need that- By default: Uses "Pulse of Motion" to automatically determine the best framerate for a natural real time video speed. You can override it if it doesn't work well for a video. The workflow also interpolates the video at that speed.- Audio Generation using PrismAudio. Uses the video prompt by default, but I recommend overriding it with a custom prompt for the audio as described in the note by the node.- Lora optimizer node. If you have multiple loras, this node optimizes them to work well together. More on that in the notes in the subgraph. Turned off by default.- Cfg-ctrl node. This improves prompt adherence when you use cfg. Turned off by default. You shouldn't use the lightx2v on the high noise when activating this.I'm thinking of including SVG and NAG in the next version as well. Let me know if you want that. Maybe I will just do NAG because I don't really know how to integrate SVG without making it a completely separate section, in which case I might as well just make a different workflow.

Simple Video Combiner Workflow For Extending Videos
Just a simple tool i use to make longer generations without having a super complicated workflow. I got tired of dowloading all the big giant crazy workflows, having them oom, not work, or explode after 45 minutes of genrating. and just wanted a super simple solution to making longer videos.. So.. boom... this!!!basically Just take your existing video generation workflow.after the Vae Decode (before video combine) add a get last frame node. from the get last frame node attach a save image node. use that very last frame to generate your next video.. Then Open this tool. upload video 1upload video 2push run.. Boom longer smooth video with no degradation!(instructions included in workflow)

Wan2.2_I2V_infinity_video_part_by_part(PPP)_max_consistency_FaceReactor_1.0
This is my very first workflow. It's based on Wan2.2 and can create videos of unlimited length. It generates 5-second videos at a time, but these fit together perfectly. This allows you to build a video piece by piece. If you like a segment, you can keep it and expand upon it. If you don't like it, it's regenerated. All the segments you have can be assembled later.Furthermore, the workflow is designed for maximum consistency and uses ReActor.V1.4 is still not perfect, but it works quite well. Since I am currently working on another project, I am making my current version available to you here. It is not quite finished yet, but it produces good results.Info: The best results when extending videos are obtained by assigning the same seed to all extensions as the original video.Info: If ComfyUI cannot find the saved latent, you need to adjust the path in the "Latent Save" group.- fix scale for Video extention- fix upscale for Endframe in Landscape- fix bug color correktion without video extention- some minior fixes and improvements- removed colorcorrect after decode (not needed, Color Match is much better)- some little changes in settings- Videos with more than 81 frames can now be loaded for expansion.- Color Match sets color now after Decode too, for maximum results.- add Latent Save after video generation- add Load latent for video extension with better transitions and prevents plastic look- add Load and Save with Name- add automatik save to input folder- add smooth video extention via prompt shifting- add face detailer for testing- add latent noise between sampler for better details and textures.- add Fast mode switch (Generate 41 frames instead of 81 and interpolate them.)- experimental Face detailer (can be enabled if needed)(Due to time constraints, the documentation was not updated.)

Spinoff of Yet another workflow
My small adjustments from Yet another workflow:1. I extracted the last image, for when I want to extend the video.2. I kept the filename from the incoming file and copied this name to the video, the first image, and the last image. I usually put the video parts together and upscale them using Davinci Resolve.3. I made a new node to keep my prompts. I tend to reuse prompts, and wanted a way to combine them using on/off switches. Or rather, two prompts that go together. One with the prompts and one with the on/off switches. This is my first attempt at a prompt.4. I put the things that I usually change in a box of their own on top. I rarely make changes below. I never use T2V, since I have never gotten any good results from that, and I just got stuck with the Clownshark sampler since I imagined that it was the best one. I can't remember why now.You will need the extra node, which is in the article here: A spinoff on "Yet another workflow v0.39", a new node, and a prompt revelation | Civitai
📜 DaSiWa Hybrid Workflows | I2V | FLF2V | I2V2V | Audio | APP 📜
My ComfyUI APP workflowsThis workflows are used by me to create my art.They are optimized for my checkpoints and created of my latest knowledge to enhance the outcome. "If this workflow leveled up your day, I'd purr-eciate a like! 😻"Versions & Information👇👇👇👇👇👇👇👇👉 Please read below and the file descriptions "About this version" for more info's.💡Some WAN 2.2 versions use high+low checkpoints, other like LTX23 use only a single checkpoint - make sure to read the descriptions and use the correct checkpoints.💯 This is compatible with ComfyUI APP-Mode and Nodes 2.0👇👇👇👇👇👇👇👇What you get from the comfy workflows:♨️ Easy controls✅ As less as possible dependencies🪧 Detailed documentation⛓️ Highly automatic logic✨ Optimized results🎬 Fully automated resolution logic🔖 Bookmark-Shortcuts with number keysTypes of workflowsDeepDream C-WLTX🖼️➡️🎥 I2V (WAN22)🖼️🖼️🎥 FLF2V (WAN22)🖼️➡️🎥➡️🎥 I2V2V (Image-to-Video-to-Video | WAN22 + LTX23) + Audio🧩 Automatic aspect‑ratio calculation and fitting✨ Multiple UpscalersTorchlanc (very fast, color correct, low VRAM)Upscale with Model (additional detail, high quality)RTX Super Resolution (ultra fast, very accurate)🤝 Video resolution matching - Fully automatic scaling and resolution calculations🕠 Length automation - Fully automatic calculation of frame count🔊 Add audio through LTX23 (V2V)🫥 Watermark option📢 Soundmark option🧮 Color match feature👾 MiniMeme feature - Create small gif's🚫 NAG - Negative prompting with CFG1🎞️ Double FPS (latent) feature🪄 Interpolation feature🩻 Known issues and advice's⚠️ Some workflows may set on webp av1 encoding (VHS node) - If your computer/setup missing drivers use any other like H265 or H264!Install ffmpeg!Update Comfyui and custom_nodes!Update pytorch 2.9+cu128 or higherMake sure to read where files/models should be placed inside the workflowCheck if the filepath for model/clip/vae match your system like Linux/WindowsThe plugin ComfyUI-DD-Translation can break node connection (avoid)All older Versions are available inside my GitHub Repo.YOU are responsible for outputs as always! If you make ToS violating content and I get aware I WILL report this.

Wan 2.2 i2v Comfyui Workflow :: SVI FFLF with Latent Saving and Loading
- This is a SVI workflow that enables first-frame-last-frame for continued smooth videos.- What is special about this workflow is that it uses my own custom nodes to save the latent as a file, and then loads the latent into the workflow so you can freely manage what video clip you want to tinker with.- These two custom nodes are provided along with the workflow; just drag the bvga_nodes folder into your custom nodes folder.- It's very convenient to use, as you're able to easily adjust prompts, motion loras, etc, for each stage of the video. You can keep experimenting before you move onto the next segment. And can even start back from previous segments by loading the old files!Credit to https://civitai.com/models/2232205?modelVersionId=2820076, whose workflows finally got SVI FFLF working for me, and I learned a lot from.You will need the following SVI LoRAs:High: https://huggingface.co/Kijai/WanVideo_comfy/blob/main/LoRAs/Stable-Video-Infinity/v2.0/SVI_v2_PRO_Wan2.2-I2V-A14B_HIGH_lora_rank_128_fp16.safetensorsLow: https://huggingface.co/Kijai/WanVideo_comfy/blob/main/LoRAs/Stable-Video-Infinity/v2.0/SVI_v2_PRO_Wan2.2-I2V-A14B_LOW_lora_rank_128_fp16.safetensorsv1.1 features various fixes and improvements.Notably:There are now 2 separate workflows provided:- 3-k-sampler workflow to get as much quality as possible out of the steps.- MoE-k-sampler workflow, which automatically optimizes the scheduling.Updated the latent saving and loading custom nodes:- v2 nodes better capture the full latent data, to ensure quality is retained.(Both the v1 and v2 nodes are included in the new folder. You can simply replace the old bvga_nodes folder with the new one)Fixed:- SVI nodes are no longer used in the starting video segment(which in certain situations degraded quality)- latents are no longer trimmed in segments that don't require it(which was reducing video length unnecessarily)

Wan 2.2 animate workflow
This is what i used before LTX to sync a videoWan 2.2 animate Wrapper versionThis uses wan animate and wan video wrapper to make long form lip synced videos. It does well for what it does. But it has limits and some issues.Issues1. Wan wrapper does not let me load GGUF, so scaled fp8 are used. 2. This is not set up to inpaint. I could have sworn inpainting worked but i cant connect a mask set to the mask input without error. - trying to make a native comfy flow that does inpaint later. Either im going crazy or the wrapper cant inpaint?3. This cant do complex stuff. This is an talking avitar copier. Dont try to do anything difficult.4. The smaller you make the video, the worse the ref image copy will be. 480p seems smallest you can go without loosing the subject. Unless its a close up face shot.Enable the options you want, you dont need pose, face, or a ref image. Just 1 works or any combo of them depending how much of the video you want to copy.If you use pose it will make a video following the movementIf you use use face video it will make a video copying the face movementIf you use a ref image it will copy the image subject and background and make a video from it.I actually find it works best with just a face video and ref image used as a start frame with no pose info. Prompting what you want the movement to be.

Wan 2.2 image to video
Wan 2.2 image to videoThis is strait image to video with extending from the last frame. Made this a year ago, still works great.Notes in the flowEnjoy :)

Another WAN2.2 workflow - 4steps (I2V/FLF/T2V)
There are far more WAN 2.2 workflows than I realized, but it's too late now :) Maybe someone will find it useful.RTX 3060 12gb | Ryzen 5 3600 | 32gb RAM | 45-98gb Page File(With models loaded, 5 second vid)I2V & T2V: Around 6 minutes+MMAudio: Around 8 minutesI set the res to 480 but you can change it using Resolution Master's presets. I considered adding an upscaler, but I couldn't notice a difference and it added an extra minute.Downloads:---I don't recommend this WF if you don't want to download both the I2V and T2V models. If you want to try it still for some reason, add dummy files in your WAN checkpoint folder and use them as the undownloaded models to prevent an error.Base models & VAE: https://huggingface.co/QuantStack/Wan2.2-T2V-A14B-GGUF/tree/main & https://huggingface.co/QuantStack/Wan2.2-I2V-A14B-GGUF/tree/mainModel-2: https://civitai.red/models/2456413/dasiwa-wan-22-i2v-14b-boundbite-v10-or-lightspeed-or-gguf?modelVersionId=2763939I use Q5. You only need one VAE from either of the first links. Model-2 doesn't need the Lightx2v models below.CLIP (UMT5): Download with ComfyUI Manager!Lightx2v: https://huggingface.co/lightx2v/Wan2.1-I2V-14B-480P-StepDistill-CfgDistill-Lightx2v/tree/main/lorasMMAudio: Links are in v3's workflow. If you're coming from LTX, MMAudio is okay, but it can't do speech and is very basic.---For I2V, you can use Florence and leave your prompt empty unless you want something specific.To show video previews, turn on "Display animated previews when sampling" in VHS' settings.If you want FLF for anything other than perfect loops, use the different image switch.The NSFW switch was made to work with CubeyAI's NSFW lora. In v3, it only switches the MMAudio model from the NSFW one to the regular one.Delete all the filename stuff near VAE Decode if you don't want them.
Wan 2.2 LoRA Tutorial: The Easiest Way to Use LoRAs in ComfyUI

ZRune Motion
ZRune Motion 是一张基于Wan2.2 I2V的工作流,主要用于角色动作展示、镜头推进和三段式视频生成。发布的内容仅供分享、学习,不是零依赖可复现整合包。适用方向:- 角色动作视频- 三段式镜头组织- I2V 人物演示- 风格化动作展示核心特点:- 基于 Wan2.2 I2V high / low 双分支- 适合角色动作和镜头连续性表达- 适合在 ComfyUI 中继续替换输入图、提示词和 LoRA 进行二次创作核心依赖:- Wan2.2 I2V A14B high/low 基座- wan2.2_i2v_high_noise_14B_Q8_0.gguf- wan2.2_i2v_low_noise_14B_Q8_0.gguf- Wan2_1_VAE_bf16.safetensors- umt5_xxl_fp8_e4m3fn_scaled.safetensors- SVI_v2_PRO_Wan2.2-I2V-A14B_HIGH_lora_rank_128_fp16.safetensors- SVI_v2_PRO_Wan2.2-I2V-A14B_LOW_lora_rank_128_fp16.safetensors- wan2.2_i2v_A14b_high_noise_lora_rank64_lightx2v_4step_1022.safetensors- wan2.2_i2v_A14b_low_noise_lora_rank64_lightx2v_4step_1022.safetensors- wan2.2_wugong_i2v_high.safetensors- wan2.2_wugong_i2v_low.safetensors- zr_cine_high_s600.safetensors- zr_cine_low_s600.safetensors自定义节点依赖:- rgthree-comfy- comfyui-kjnodes- ComfyUI-GGUF- ComfyUI-Custom-Scripts- ComfyUI-Frame-Interpolation注意事项:- 这是 Wan2.2 I2V 工作流,不适配 T2V 或 T2I LoRA- 本次分享不包含zr_cine_high_s600.safetensors和zr_cine_low_s600.safetensors两个特定人物形象风格的LoRA模型,导入工作流后请先禁用或替换这两个 LoRA- 最低配置要求为24G显存。

WanApp (wan2.2) EASY APP MODE for Wan2.2
WanApp is my APP Mode versionusing the original models from Comfyuiit comes with many optionsToggle Options:1. Video Quality Toggle : HIGH or LOW2. 15fps / 10fps Toggle 3. x2 Upscaler Toggle4. Test Mode Toggle ( it drops the low diffusion denoising to one step instead of too, reducing the time to generate but also reducing quality, good to test new prompts in LOW Quality Mode for faster iterations. )5. Load one image directly, or load one or more images from a folder.etc.
WAN2.2 14B GGUF (I2V,T2V) Low-Vram Workflow
Coming SoonInfinite talkMMaudioLastframefirstframeUltimate VersionSupported WorkflowsWan2.2 T2V (Text‑to‑Video) 14B Wan2.2 I2V (Image‑to‑Video) 14BWan2.2 TI2V‑5B (Hybrid Text/Image‑to‑Video) (old version)Nodes Used (Install via ComfyUI Manager or links below)🔗 WanVideoWrapper🔗 KJNodesModel Downloads + VAE*these are conversions from the original models to run on less VRAM.🔗 WAN2.2 14B T2V🔗 WAN2.2 14B I2VAll these GGUF conversions are done at the moment by:https://huggingface.co/city96https://huggingface.co/bullerwinshttps://huggingface.co/QuantStack*If you cant find the model you are looking for check out there profiles!Additional Required Files🔗 CLIP Vision, Text Encoder🔗 Loras (i2v,T2v)(low and high required)https://huggingface.co/lightx2v
Wan2.2_Animate视频面部细节修复及换脸工作流。Video FaceDetailer & FaceSwap Workflow
基于Wan2.2_Animate的视频面部细节修复及换脸工作流。AI生成视频人脸会有模糊畸变,眼睛变形,瞳孔闪烁乱飘的现象。此工作流先将人脸区域截取出来,使用Wan2.2_Animate高清重绘,再把修复的人脸替换原视频人脸。此工作流不仅可以高清修复人脸,还可以人脸替换和保持人脸一致性。(在工作流中绿色节点旁给出参数设置的说明。观察人脸识别是否正确,如果错误需要修改识别阈值,如果没有识别出人脸,把数值改为0.3。如果面部替换不彻底,边缘有原脸的痕迹,可以尝试修改人脸合成里遮罩的模糊半径,比如从10修改为5。)AI-generated videos often suffer from facial blurring, distortion, deformed eyes, and flickering or drifting pupils. This workflow addresses these issues by first cropping the facial area and performing high-definition (HD) repainting using Wan2.2_Animate. The repaired faces are then seamlessly composited back into the original video.Beyond high-definition restoration, this workflow also supports Face Swapping and ensures strong facial consistency throughout the video.(Please refer to the parameter descriptions next to the green nodes in the workflow. Check if the face recognition is accurate; if not, you may need to adjust the detection threshold. If no face is detected, try lowering the value to 0.3. If the face replacement is incomplete and the edges of the original face are still visible, you can try adjusting the mask blur radius in the face fusion settings—for example, changing it from 10 to 5.)

Simple WAN workflow
This workflow is a piece of a workflow, that was previously posted by DarkSideWalker and later replaced/splited into multiple more complicated ones. Posting this as an answer for people, who whant to know, what I used to generate videos and how I do it. For more specific information about my methods see posts with videos themselves, as there is usually a description there.
Wan 2.2 Painter Long Video with Sound!
Note: If you have ANY issues with nodes not downloading, read the notes or reach out. There's nothing that special about any of them that aren't core modules.⛔⚠️🛑✋ Read the notes completly before using. Most common install and node problems are listed in the directionsThis is a High Vram workflow. If you have less than 12Gb VRAM, I encourage you to try my Low VRAM Workflow: https://civitai.com/models/2236782/wan-22-1080p-on-low-vram-up-to-4k也有中文说明I deceided to launch the seperatly from my Base Wan 2.2 as it is very different and is not for low VRAMAll in 1 workflow:Uses painter nodes to extend the video to any length you want. Easy resize of imagesLora LoadersSeed VR2MMAudioRife VFI InterpolationThorough notes and links.也有中文说明Instagram: https://www.instagram.com/synth.studio.models/Buy me a☕ https://ko-fi.com/lonecatoneThis represents hundreds of hours of work. If you enjoy it, please 👍like, 💬 comment , and feel free to ⚡tip 😉
Wan 2.2 Video Upscale
Workflow for video upscale with Wan 2.2 Low-Noise model
Smooth SVI Pro Workflow
UPDATE: WAN 2.2 Smooth SVI Pro Workflow V.2 (03/25/2026)Updated the workflow to use the ComfyUI-NAG. I tried to give more control over every video/extension so each could be costumized freely. You should have a lot of control now. Make sure to fully update your Comfyui and the extensions.There are detailed notes now. Make sure to read them. :)Download the videos on the Showcase and drag to ComfyUI for their full worklfow. I tried some different setups: 32 fps with no interpolation, 24 fps with interpolation, euler/simple and uni_pc/sgm_uniform... These are just examples on how you can mess and have fun with the setup. ^^You can turn on and off Video Interpolation for each extension. Make sure your setup can handle Interpolation of longer videos.I tried to make everything easy to find or change using very simple subgraphs. If you want to add or change something it should not be hard to do so.Added a simple Node for saving the last frame of each video/extension. Some suggested this for helping with their video editing and creation.The videos on the showcase used the following Model and Loras:Models: Smooth Mix Wan 2.2 I2V v2Light Loras:HIGH - wan2.2_i2v_A14b_high_noise_lora_rank64_lightx2v_4step_1022.safetensorsLOW - lightx2v_T2V_14B_cfg_step_distill_v2_lora_rank128_bf16.safetensorsSVI Pro Loras:HIGH - SVI_v2_PRO_Wan2.2-I2V-A14B_HIGH_lora_rank_128_fp16.safetensorsLOW - SVI_v2_PRO_Wan2.2-I2V-A14B_LOW_lora_rank_128_fp16.safetensorsUsed extensions:ComfyUI-Adaptive PromptsComfyUI-MTBrgthree-comfyComfyUI-WanVideoWrapperComfyUI-VideoHelperSuiteComfyUI-VFIComfyUI-KJNodesComfyUI-Easy-UseComfyUI-NAGComfyUI_Comfyroll_CustomNodesComfyUI-GGUFComfyUI-mxToolkitHave fun!======================================================WAN 2.2 Smooth SVI Pro WorkflowIts a big workflow. Make sure to fully update your Comfyui and the extensions.Used extensions:ComfyUI-VideoHelperSuitergthree-comfyComfyUI-GGUFComfyUI-KJNodesComfyUI-Easy-UseComfyUI-mxToolkit==========================================================Its divided in sections to make it easy to navigate.MODEL SETUPHere you select and set up your High and Low Models (safetensors or GGUF), your Light Loras, the SVI Pro Lora, your Shift for model Sampling, the Scheduler and Sigma and finally Clip, VAE and your prefered Sampler.The videos on the showcase used the following Model and Loras:Models: Smooth Mix Wan 2.2 I2V v2Light Loras:HIGH - wan2.2_i2v_A14b_high_noise_lora_rank64_lightx2v_4step_1022.safetensorsLOW - lightx2v_T2V_14B_cfg_step_distill_v2_lora_rank128_bf16.safetensorsSVI Pro Loras:HIGH - SVI_v2_PRO_Wan2.2-I2V-A14B_HIGH_lora_rank_128_fp16.safetensorsLOW - SVI_v2_PRO_Wan2.2-I2V-A14B_LOW_lora_rank_128_fp16.safetensorsThere is a Note on the workflow with suggestion for values for Shift, Sheculer and Sigma. Be sure to check it!VIDEO SETTINGSSet your Starting Image and the video resolution. Its set to 720x480 as default.VIDEO EXTENSIONSSet how many times you want to extend your video. You can extend up to 5 times! Thats more than enough for 99% of people. More advance users will known how to go even further.FIRST VIDEO/EXTENSION (1/2/3/4/5)The 'NODES GUIDE' you help you easily find all you need to set up!Set your High and Low Loras if you plan to use thenSet the total lenght - in seconds - for each video.You can also set your Noise/SeedType your Positive and Negative Prompts!=====================================================VIDEO INTERPOLATIONI decided not to include video interpolation. Long videos makes it very common to users to run out of memory. If you really want to inerpolate video during the generations just add adn connect an interpolation node between 'Upscale Image By' and 'Video Combine'.There are several free tools that can be used to do the same. The videos on the Showcase used Aiarty Video Enhancer (Paid), Flowframes (free) and DaVinci Resolve (free). Just use your favorite tool for it! :)=====================================================Have fun!
WAN 2.2 I2V GGUF — My 8GB Daily Workflow | Upscale + RIFE
This is the ComfyUI workflow I use daily on my RTX 5060 8GB. I'm sharing it because getting WAN 2.2 to produce consistent quality at this VRAM level took quite a bit of trial and error, and I figure some of that research might save others time. These settings work well for me — your results may vary depending on your GPU, drivers and system setup, but this is what I keep coming back to.Also available as a 1-Click Pack — includes auto-installer, exclusive custom nodes, all models, and all dependencies ready to run. No downloads, no terminal, no debugging. Extract → Run → Generate. Available on my Ko-fiFree workflow: 1-Click Pack: ✓ Workflow JSON ✓ Everything included ✗ 7 standard nodes ✓ Exclusive custom nodes ✗ Standard nodes ✓ Auto-installed ✗ Download 5 models ✓ Auto-downloaded ✗ Configure paths ✓ Pre-configured ✗ Debug compatibility ✓ Tested & working ✗ ~2hrs setup ✓ 5 min extract & runWhat it doesTwo-pass generation using the WAN 2.2 Remix V2.1 Q3_K_M GGUF models, followed by a post-process pipeline that upscales and smooths the output. The final video comes out at around 5 seconds, 2x the native resolution, with RIFE frame interpolation for smoother motion.Honest about timing: on my RTX 5060 8GB with 32GB RAM the full pipeline takes around 10 minutes per video. The quality I get out of it is pretty decent for this class of hardware — good enough that I kept using it. If you want faster results and don't need the upscale or RIFE, skipping those brings generation time down to around 400 seconds.What you needSystem: 8GB VRAM minimum, 32GB RAM recommended (the model offloads to RAM between passes).Models:wan22RemixT2VI2V_i2vHighV21-Q3_K_M.ggufwan22RemixT2VI2V_i2vLowV21-Q3_K_M.ggufumt5-xxl-encoder-Q5_K_M.ggufwan_2.1_vae.safetensors4x-UltraSharp.pthCustom nodes: ComfyUI-GGUF, KJNodes, ComfyUI-WanVideoWrapper, VideoHelperSuite, ComfyUI_Fill-Nodes, Comfy-WaveSpeed, rgthree-comfyCustom nodes can be installed via ComfyUI Manager → Install Missing Nodes after loading the workflow.How to useDrag the JSON into ComfyUI or use LoadIn node 106 load your input imageIn node 6 write your animation promptQueue and waitAny image orientation works — the workflow auto-adapts to portrait, landscape or square. Very dark images or images with busy backgrounds tend to produce less consistent results.Why these settingseuler on HIGH, heun on LOW. This specific sampler pairing handles Q3_K_M quantization significantly better than other combinations I tested — most multi-step samplers accumulate precision errors that show as visible pixelation by step 4-5. Finding this took extensive testing across most available options.CFG is split: 1.5 on HIGH, 1.0 on LOW. The split prevents shadow artifacts that appear with uniform CFG on Q3 models while maintaining facial structure consistency. More steps go to LOW (4) than HIGH (2) because of how WAN 2.2's architecture handles facial identity.Post-process pipeline:VAEDecode → FastUnsharpSharpen (0.4) → 4x-UltraSharp → ×0.5 scale → RIFE ×2 → H264 CRF17 @ 32fpsNet 2x upscale plus doubled frames. If you want even smoother output, change the RIFE multiplier in node 310 from 2 to 4 — no extra VRAM needed since RIFE runs on already-decoded frames.NAG at scale 11, alpha 0.25, tau 2.5 — works through attention normalization so it doesn't trigger the shadow artifacts you'd get from pushing CFG higher. FBCache at threshold 0.12 for speed with minimal quality impact.RTX 5000 series (Blackwell) — read thisSageAttention is patched on both models in auto mode. Don't change this to an explicit backend. On RTX 5060, 5070, 5080 and 5090 (sm_120 compute capability) the sageattn_qk_int8_pv_fp16_cuda backend crashes natively — those CUDA kernels haven't been compiled for Blackwell yet. auto detects the right implementation at runtime and works correctly.If you're on an RTX 5000 series card, also use PyTorch cu130 (CUDA 13.0, compiled for sm_120) and launch ComfyUI with --disable-async-offload. The cu128 build underperforms on Blackwell and async offload has some instability on sm_120.NVFP4 quantized WAN models are not available yet but when they are, Blackwell's FP4 tensor cores will handle them natively — expect a significant quality and speed uplift for this GPU family when that happens.Variants+ LightX2V — if you want faster generation at the cost of some quality, add the LightX2V LoRAs on top of this workflow:HIGH: wan2.2_i2v_A14b_high_noise_lora_rank64_lightx2v_4step_1022.safetensors at strength 1.5LOW: wan2.2_i2v_A14b_low_noise_lora_rank64_lightx2v_4step_1022.safetensors at strength 1.0I find the base workflow without LoRAs gives better quality at the same step count, but LightX2V is useful when you want faster iteration.+ SLG Face Lock — I've also written a custom node (SkipLayerGuidanceWAN) that adds zero-cost face lock on the LOW pass. With heun the difference is subtle since the corrector already stabilizes identity reasonably well, but it's there if you want it. I'll publish it as a separate post.Want this workflow without the setup? The 1-Click Pack includes everything — auto-installer, models, nodes, optimized for 8GB. → Ko-fiWhat didn't workNoting these because they come up a lot and I spent time on all of them: res_2m and res_3s both pixelate from quantization error accumulation, uniform CFG 3.0 creates heavy shadow artifacts with Q3, MagCache throws a division by zero with heun and beta scheduler, karras scheduler is designed for noise-prediction architectures and doesn't fit WAN's flow matching, and the explicit SageAttention CUDA backend crashes on Blackwell.Note on the negative promptPlease don't remove the Chinese-language terms in the negative prompt. They're part of WAN's official negative conditioning and work at the model level, not just as text guidance. Removing them noticeably affects output quality.v2.0 — 8 LoRA slots (rgthree), FastUnsharpSharpen, auto-orientation, fixed negative prompt + NAG conditioning, resolution corrected to 480×832v1.0 — initial releaseIf something doesn't work for you or you get better results with different settings, drop it in the comments. Always curious what others are finding on different hardware.

1Of1 Tokyo_sage Wam 2.2
Tokyo_sage
Wan2.2 Animate (GGUF) workflows
Important NoticeThe latest version of ComfyUI_frontend contains a critical error related to SubGraph. Please use version 1.39.19. You can either set the ComfyUI launch option to --front-end-version Comfy-Org/[email protected], or downgrade by running pip install comfyui_frontend_package==1.39.19.OverviewA simple workflow based on the Comfy native workflow for Wan2.2 Animate, with a few minor improvements.It allows you to load a video, trace its motion, and generate a new video.Core FeaturesMotion Trace – Recreates the motion while keeping the prepared character and background.Swap – Keeps the background of the original video while replacing only the character.
SVI extend video
Added v2.0Updated the workflow to support the latest nightly build of the Wan22FMLF node (commit 7140cd2). In my testing, the node now improves the momentum carried over from the previous latent, resulting in much smoother transitions now. You should update the node to use v2 workflow.__________________________________________________________________________________________________Added v1.0.1Display stitched result on each segment.Added single extend version,It lets you extend the video infinitely (one segment at a time) by feeding the last output back in. Max 81 frames or 5 seconds extend--I’ve been using Stable Video Infinity (SVI) to extend existing videos for couple of days, and honestly it’s pretty impressive for what it’s trying to do. Instead of generating a whole video from scratch, my workflow approach focuses on taking an already existing clip and continuing it forward in a more coherent way and It can be used with loras and different prompt on each segment. All download links for required Models is on the workflow.1. Load your video you want to extend2. Input the steps (minimum 4 steps using lightx2v speed loras) and resolution3. Input the length (max 81 frames)4. Input the prompt and loras5. ProfitUse CFG > 1 and 20 steps if you are not using speed loras,Euler Simple is fine most of the timeRequired Custom Nodes for the workflow, you can install through Comfyui Manager :ComfyUI-Wan22FMLF (SVI implementation) (nightly) (commit 7140cd2) : https://github.com/wallen0322/ComfyUI-Wan22FMLFComfyUI-GGUF (if you're not using FP16/FP8 model) : https://github.com/city96/ComfyUI-GGUFComfyUI-VideoHelperSuite (v1.7.9): https://github.com/Kosinkadink/ComfyUI-VideoHelperSuiteComfyUI-KJNodes (nightly v1.2.3) : https://github.com/kijai/ComfyUI-KJNodesComfyUI-Easy-Use (nightly v1.3.5): https://github.com/yolain/ComfyUI-Easy-UseComfyUI-MediaMixer (nightly) : https://github.com/DoctorDiffusion/ComfyUI-MediaMixerrgthree-comfy (1.0.2512112053) : https://github.com/rgthree/rgthree-comfyOptional Custom Node :mikey_nodes (1.0.5) (organize output folder) : https://github.com/bash-j/mikey_nodes

SVI 2 PRO with First/Last Frame (Keyframes) // Video Continuation // 3-Stage Loop Automation
SVI2Pro+FLFVideoExtensionAllows you to extend existing videos using keyframes.SVI2PRO FLF V1.1Added a switch to enable/disable end_samples (Last Frame) directly, without manually connecting/disconnecting inputs. This toggles the First/Last Frame functionality: if disabled, the node reverts to the base SVI 2 PRO behavior. (Requires updating the Wan-SVI2Pro-FLF nodes to the latest version)Added contrast adjustment widget, useful if your output looks washed out.SVI2PRO FLF V1Workflow for ComfyUI that combines SVI 2 Pro motion continuity with Wan 2.2 First/Last Frame (FLF) style control over the end of a clip, enabling smooth video generation from a sequence of frames.SVI2PRO VideoExtensionThis workflow uses SVI 2 PRO to extend existing videos: just load your video, add a prompt, and watch it seamlessly generate the continuation.3-Stage Loop AutomationExperimental: 3-Part Loop ModeUses 3 images (Start / Loop / End) and 3 prompts to automate sequences:Start → Loop entryRepeating loop action (varies per cycle if increment is enabled)Loop exit → Final frameEnsure prompts match their corresponding image transitions.If you like these workflows, I’d love to see your results, please share your videos in the Gallery or link them in the comments.Repository:https://github.com/Well-Made/ComfyUI-Wan-SVI2Pro-FLFRecommended models for these workflows:SFW:• https://civitai.com/models/2053259?modelVersionId=2376074• https://civitai.com/models/2053259?modelVersionId=2376133NSFW:• https://civitai.com/models/2053259?modelVersionId=2540892• https://civitai.com/models/2053259?modelVersionId=2540896

Wan2.2 Start–End Frame Video Workflow (GGUF / I2V / ComfyUI)
Wan2.2 Start–End Frame Video Workflow (GGUF / I2V / ComfyUI)This workflow generates a video using Wan2.2 I2V by specifying a start image and an end image.The model interpolates between the two frames and produces a smooth animation sequence.Designed for ComfyUI with GGUF loaders.
Wan2.2 + SVI2.0Pro Long Video Generation (GGUF) workflows
Important NoticeOptimized to work with the latest version of ComfyUI (v0.18.1 + Frontend 1.42.8).OverviewThis workflow uses Wan2.2 I2V together with SVI 2.0 PRO LoRA to generate long-form videos of 81 frames or more.Instead of generating 81+ frames in a single pass, the video is created in multiple segments and then merged.Compared to traditional extend/long workflows, this approach preserves motion information from the previous segment, resulting in much smoother transitions without noticeable seams.Latest News (v1.7)3-pass mode has been removed due to improved motion range achieved through updated recommended Lightx2v LoRA settings.In the Extend group, you can now specify the Length for each chunk.Please normally output at 24 FPS. If the result looks like fast-forward in some cases, try using 16 FPS instead.(1.6) End Frame feature is now available!You can specify an end frame for each chunk. This allows much finer control, especially over camera work.Special thanks to Well-Made for updating the SVI node into a more powerful version.Newly Implemented FeaturePrompt Enhancement via OllamaPrompts are enhanced using an LLM, allowing for more detailed and structured motion descriptions.You can also input prompts in Japanese (other languages are possible by adjusting the persona settings).To use this feature, Ollama and an LLM model must be installed on your local PC.Please note that I do not provide support for installing or configuring Ollama or LLM models.Optional FeaturesResume ModeAllows you to continue generation not only from the first frame, but also from a previously generated video.If something goes wrong partway through the process, you can save the generated segment and resume from that point without starting over.NotesThis workflow is configured for the GGUF version, but fp8 and Distill versions can also be used by switching the model loader.Designed with 480p output in mind.There are many variations of Lightx2v LoRA, and their suitability depends on the type of video you want to generate.AcknowledgementsSpecial thanks to Kijai for providing the excellent LoRA models and custom nodes.
Wan 2.2 extended i2v SVI Lightx triple sampler using latent files
Another Wan 2.2 SVI I2V workflow. I tried to keep this relatively basic with no subgraphs and only a few set/get nodes, hopefully it is digestible for beginners.There are three separate workflows used to create extended videos:i2L start - create first clip, save to latent fileOnce you're happy with the clip, copy the latent file to the input folderi2L extend - create subsequent clips loading previous latent file and saving to new latent fileSelect previous clip latent file, generate subsequent clip, once happy copy it to the input folderL2V combine - combine all latent clips and convert to videoOnce you have all the clip latent files, load them into the combine workflow and generate the final videoThe 3-workflow system is nice in that you can easily re-roll clips, managing the latent files externally as needed, allowing you to curate to your liking. You can keep extending as long as you like then output to video when you're happy with it. I've found many advantages to working with clips as latent files. However it also means you have to babysit each clip, manually moving the latent file over after each gen - this system isn't designed for "set-and-forget" type of work.Custom nodesKJWanMOEScheduler (technically optional)Impact (for wildcard encoder, technically optional)VHS (for combine stage, optional, just replace with save-to-video technique of choice)VFI (for combine stage, optional)Adding lorasKeep the additional lora weight on low noise to 1.0 or less. I've found that too much lora on low noise causes very noticeable degradation.DiscussionThis is basically a "classic" triple-sampler setup inspired by one of KJ's workflows, but using WanMOEScheduler instead of shift. It is set up for 4/2/3 steps, 9 total. The goal was to ensure the sigma values aligned for the handoff between each sampler, and to have the high/low transition at 0.9 sigma as I've seen officially recommended.I do 480p for nearly everything and still sometimes get artifacts, particularly with realistic images where the character blinks the eyes can look weird for a frame which is off-putting.Feedback/tips/pointers always appreciated
Wan 2.2 SVI 2 Pro Long Video with 8 Steps Model Workflows (i2v, up to 1 minute) with SageAttention + GGUF + Audio
download my ComfyUI Build https://huggingface.co/datasets/StefanFalkok/ComfyUI_portable_torch_2.10.0_cu130_cp313_sageattention_triton/tree/main, also u need download and install CUDA 13.0 (https://developer.nvidia.com/cuda-13-0-0-download-archive) and VS Code (https://visualstudio.microsoft.com/downloads/)My TG Channel - https://t.me/StefanFalkokAIMy TG Chat - https://t.me/+y4R5JybDZcFjMjFiHi! I introduce my long video workflows with Wan 2.2 generation video for ComfyUI.I have included 2 workflows - SVI workflow and foleyRecomend resolutions: from 576p to 720pYou need to have Wan 2.2 10 steps i2v models (https://huggingface.co/datasets/StefanFalkok/Wan_2.2_I2V_10steps/tree/main), if you need - GGUF version (https://huggingface.co/datasets/StefanFalkok/Wan_2.2_I2V_10steps_GGUF/tree/main), clip (https://huggingface.co/Comfy-Org/Wan_2.2_ComfyUI_Repackaged/blob/main/split_files/text_encoders/umt5_xxl_fp16.safetensors) and vae (wan 2.1 vae)Also u need download SVI 2 PRO loras - https://huggingface.co/Kijai/WanVideo_comfy/tree/main/LoRAs/Stable-Video-Infinity/v2.0All the details described in my workflows. Good look with generation!Leave comments if you have trouble or you found the problem with workflows

Sprite sheet generator.
This workflow automates the conversion of a single sprite image into game-ready assets. It uses Wan 2.2 to generate a smooth, looping animation from a reference image, then extracts a specific number of frames to ensure a clean animation cycle. These frames are processed through a Nearest-Exact downscaler to reach a sharp 64x64 pixel resolution, preserving the chunky pixel art aesthetic without the usual AI blur. Finally, it automatically stitches the frames into a perfectly aligned horizontal sprite sheet ready for immediate use in any 2D game engine. Use a 480 X 480 input image.
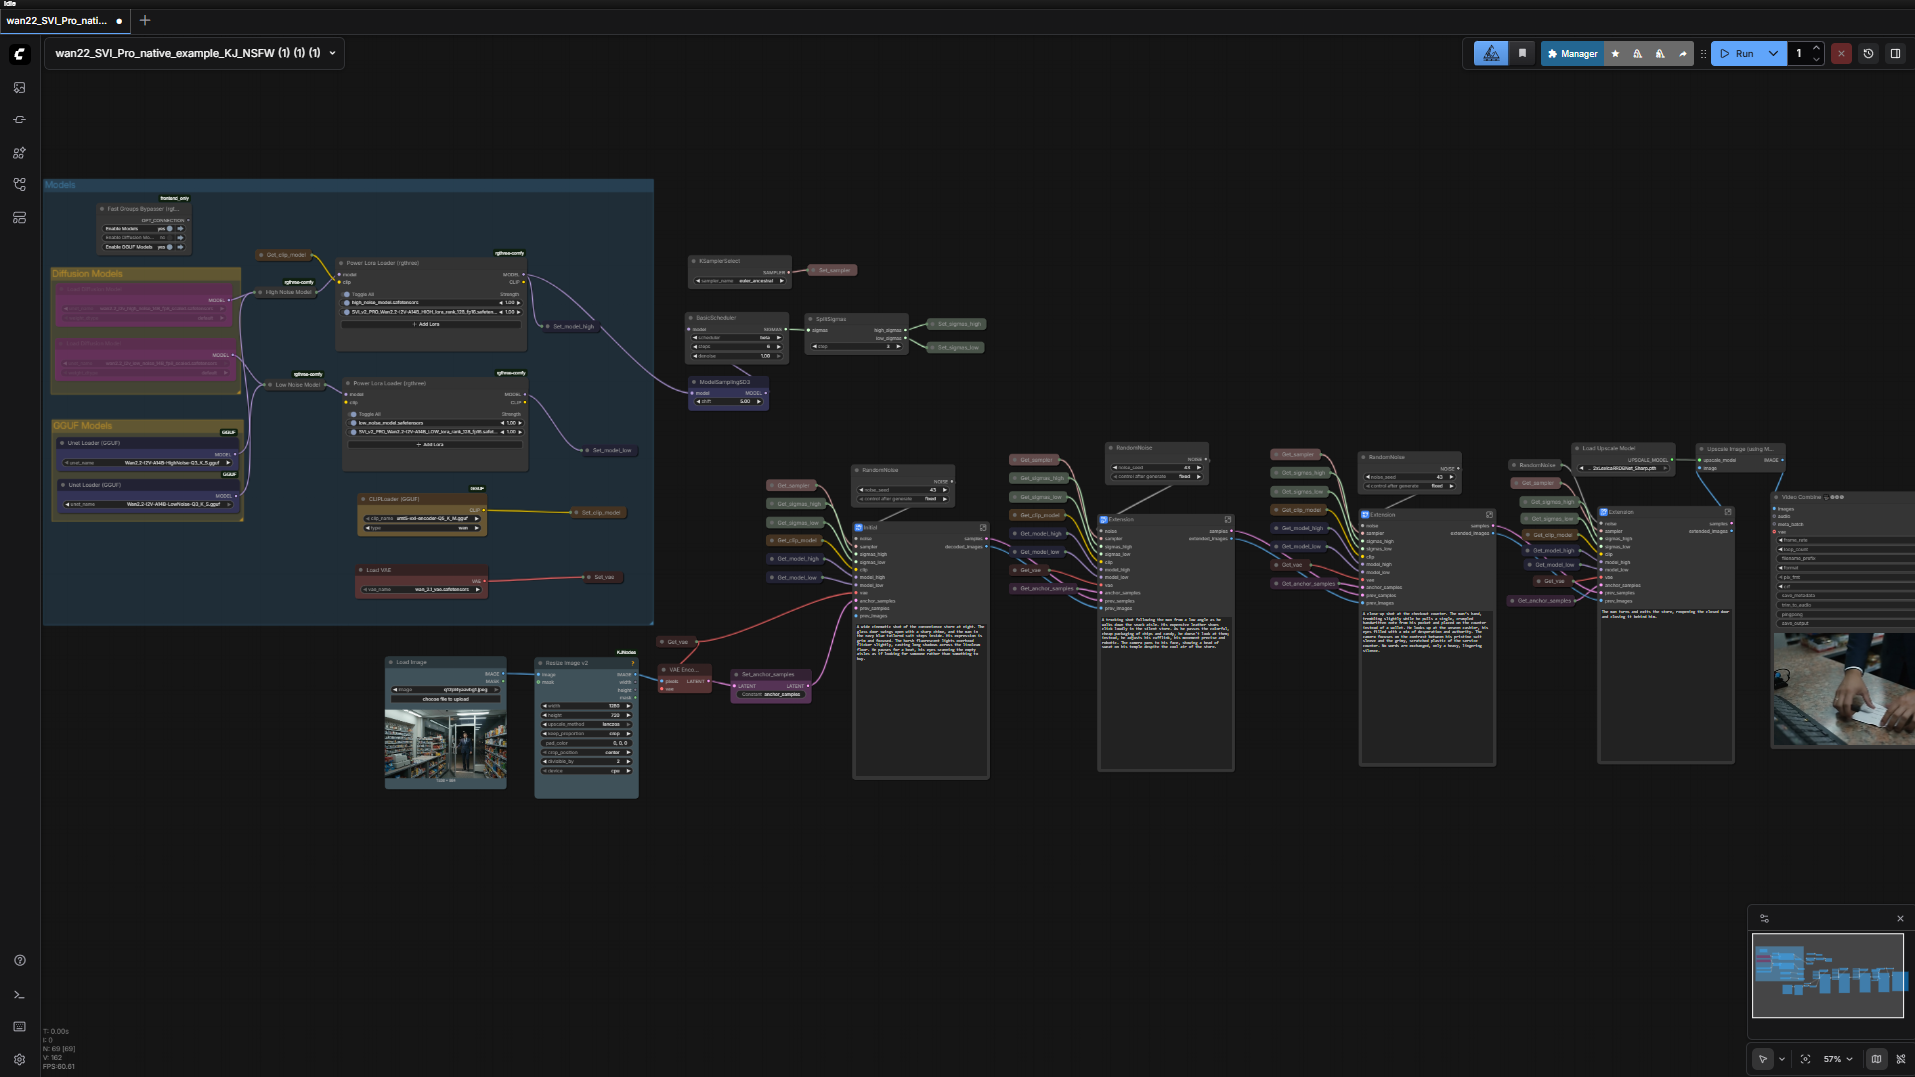
WAN 2.2 SVI Long Form Video Image to Video Diffusion/GGUF Workflow w/ Upscaling
Break the 5-second limit. This custom workflow unlocks the full potential of WAN 2.2 by integrating Stable Video Infinity (SVI) LoRAs with LightX2V lightning models.Instead of short, disconnected clips, this setup allows you to daisy-chain segments together to create long-form, seamless videos that maintain character identity and lighting consistency. I've also optimized it for speed and lower VRAM usage by incorporating GGUF support and a 4-8 step generation process.✨ Key Features♾️ Infinite Length: Uses SVI LoRAs to condition new clips on the previous frames, creating seamless transitions for as long as you want to generate.⚡ 4-Step Lightning Speed: Integrated LightX2V LoRAs reduce sampling steps from 20+ down to just 4-8, making iteration blazing fast.📉 Low VRAM Friendly: Native support for WAN 2.2 GGUF quantized models (works on 6GB+ VRAM).✨ Built-in Upscaling: Includes a dedicated upscaling chain to polish your final output.🔀 Easy Extension: Modular "sub-section" groups allow you to simply clone and connect nodes to extend the video length instantly.📺 Video TutorialI walk through the entire installation, model setup, and prompting strategy in my YouTube tutorial. Watch it here to get the best results:📦 Required ModelsTo avoid red nodes, make sure you have the following in your ComfyUI models folders:Checkpoint: WAN 2.2 I2V (GGUF recommended for this workflow).LoRAs:SVI v2.0 Pro (Image-to-Video).LightX2V (High/Low).Text Encoder: UMT5_fp8 Clip.VAE: WAN 2.2 VAE.(Detailed links to all models can be found in the YouTube video description!)🤝 Support & One-Click InstallerIf you want to skip the manual installation of ComfyUI, Python environments, and model management, I offer a fully automated One-Click Windows Installer for this exact workflow (and many others).Get the One-Click Installer here:https://www.patreon.com/posts/147707880Enjoy the workflow and share your generations in the gallery!

AIO WAN 2.2 (T2V, I2V, FLF2V, LOOP & Post-Prod)
Hello there,A workflow created to be used with WAN 2.2.It can do :T2VI2VFLF2VLOOPPost-Processing : Interpolation, Sharpening, add Grains, Color/Light Fixes, UpscalingQuite easy to use with groups bypasser and relay/repeater so you just have to do a few clicks to change the mode you want.There are "README" notes in the workflow for more informations on how to use it.But, for a quick start :1. TV2 / I2V Loader Groups :- Load your diffusion model, clip, VAE, LoRas- Load a speed LoRa or not (set the weight to 0 if not)- Enable Sageattention if you use it (in the diffusion model node)2. Load Start Image Group :- Load your image for I2V, FLFV2 and Loop3. Load Last Image Group :- Load your last image for FLF2V only4. Settings Group :- Choose the size of the video- Choose the lenght of the video- Choose the number of steps (depend of the model you use and if you have a speed lora)- Change the CFG value to 3.5 if don't use speed Lora/Model, otherwise, keep it to 15. Bypasser Nodes (above settings group) :- Choose if you want I2V or TV2 and with/without NAG (if you don't know what it is, let it disabled)- Choose if you want a basic I2V/T2V or FLF2V/Loop (For Loop, set also the "LOOP Mode" node above to TRUE)- Choose witch post process you want to enable6. Prompt Nodes :- Write a prompt or let Wan surprise you.7. RUN the workflow- Enjoy the resultIf you have any questions I will be glad to help you,Have a nice day !
📜 DaSiWa Wan2.2 Workflows | I2V | SVI 2.0 | FLF2V 📜
My ComfyUI workflows for using Wan 2.2This workflows are used by me to create my art.They are optimized for my checkpoints and created of my latest knowledge to enhance the outcome. "If this workflow leveled up your day, I'd purr-eciate a like! 😻"Versions & Information👇👇👇👇👇👇👇👇👉 Please read below and the file descriptions "About this version" for more info's.🎬🐈Click me! HowTo + Video💡Some WAN 2.2 versions use high+low checkpoints, other like S2V use only a single checkpoint - make sure to read the descriptions and use the correct checkpoints.⚠️ Do not use the workflows with the "Nodes 2.0 beta" from ComfyUi or it will mess up things.👇👇👇👇👇👇👇👇What you get from the comfy workflows:♨️ Easy controls✅ As less as possible dependencies🪧 Detailed documentation⛓️ Highly automatic logic✨ Optimized results🎬 Fully automated resolution logic🔖 Bookmark-Shortcuts with number keysTypes of workflowsFastFidelity C-AiO🖼️ I2V and FLF2V🧩 Automatic aspect‑ratio calculation and fitting✨ Multiple UpscalersTorchlanc (very fast, color correct, low VRAM)Upscale with Model (additional detail, high quality)RTX Super Resolution (ultra fast, very accurate)🤝 Video resolution matching - Fully automatic scaling and resolution calculations🕠 Length automation - Fully automatic calculation of frame count🫥 Watermark option🧮 Color match feature👾 MiniMeme feature - Create small gif's🎭 NAG - Negative prompting with CFG1🪄 Interpolation feature🌀 Perfect loop feature🃏 Last Frame Extraction🔖 Bookmark-Shortcuts - with number keysFastFidelity C-SVI🖼️ SVI (SVI 2.0 up to 10 samplers)🧩 Automatic aspect‑ratio calculation and fitting✨ Ultra‑fast, color‑correct upscaling (torchlanc) OR Upscale with Model🤝 Video resolution matching - Fully automatic scaling and resolution calculations🕠 Length automation - Fully automatic calculation of frame count🫥 Watermark support🪄 Interpolation feature🔖 Bookmark-Shortcuts - with number keysSwarm BasicAbsolute basic SwarmUI presetNot recommended over ComfyUI for video generationBackend TestIf this does not create the example video your ComfyUI backend is broken.If this works, but your other workflow not, the other workflow is broken or missing dependencies🩻 Known issues and advice's⚠️ Some workflows may set on webp av1 encoding (VHS node) - If your computer/setup missing drivers use any other like H265 or H264!Install ffmpeg!Update Comfyui and custom_nodes!Update pytorch 2.9+cu128 or higherMake sure to read where files/models should be placed inside the workflowCheck if the filepath for model/clip/vae match your system like Linux/WindowsThe plugin ComfyUI-DD-Translation can break node connection (avoid)All older Versions are available inside my GitHub Repo.Spacial thanks to @Abyss_Games for a really good idea and help with the "loop"!I got some really good ideas from @Gladas workflows!YOU are responsible for outputs as always! If you make ToS violating content and I get aware I WILL report this.
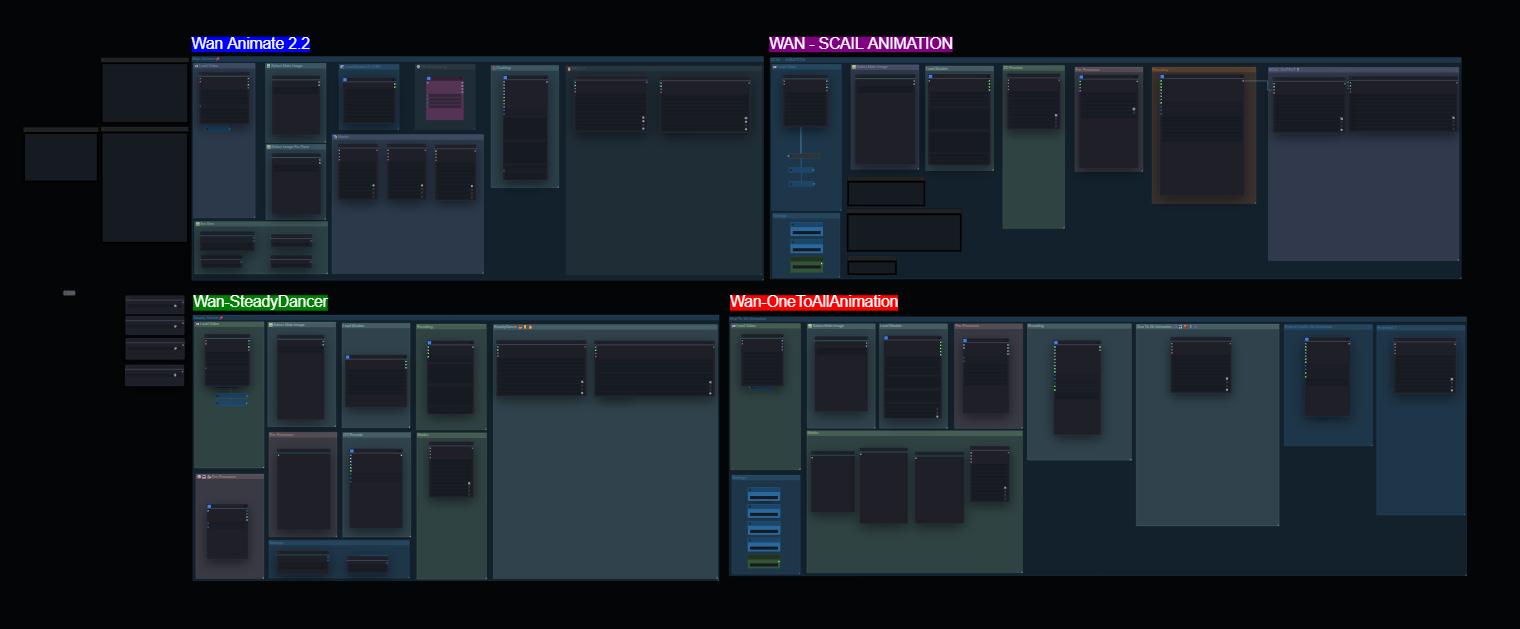
Wan Animate 2.2 + Steadydancer + one to all + SCAIL
Multi-Character | SteadyDancer | One-to-All | All Versions CombinedThis is a fully unified Wan Animate ecosystem workflow built inside ComfyUI.Instead of using multiple separate JSON files for different Wan versions, I merged everything into one clean, modular structure.Included in this workflow:Wan Animate 2.2Wan SCAILWan SteadyDancerWan One-to-AllStructured multi-character routingModular grouped node layoutEverything is organized so you can easily switch between animation styles without rebuilding pipelines.How To UseUpload your character image into the image input node.Upload your reference / driving video.Select the animation pipeline you want to use:2.2SCAILSteadyDancerOne-to-AllImportant:Enable only ONE animation section at a time.Disable the others before generating.Each module is clearly grouped so you can toggle easily.Who This Is ForAdvanced ComfyUI usersMulti-character animatorsAI short film creatorsUsers tired of switching between different Wan workflow filesGuide & UpdatesA full updated walkthrough guide will be posted on my YouTube channel explaining:Proper routingBest parameter settingsVRAM optimizationWhen to use SCAIL vs 2.2Multi-character handlingChannel:https://www.youtube.com/@VionexAIPlease wait for the guide if you are new to Wan pipelines.
Efficient first-last frame video generation workflow: 5 seconds per segment, and can generate continuously up to 15 seconds.
Instructions for Use1. This workflow is a first-last frame video workflow based on the remix2.1 (high noise) + Dasiwa (low noise) models. Each segment generates 5s (81 frames, 16fps). Videos up to 15s can be created in one run by connecting segments. Its key advantage: the high-noise model controls motion, the low-noise model controls details, delivering excellent overall results.2.To use, upload the first and last frame images, connect the nodes as needed, then start generation. If you only need one 5‑second first‑last frame segment, you can disable the others (there is a toggle switch).3. The high-noise model uses remix2.1 by Feihou (strong motion control). The low-noise model uses Dasiwa (specialized anime model, outstanding for detail refinement). Dasiwa effectively reduces the face inconsistency issue native to remix2.1.4. The acceleration feature requires a compatible environment and GPU version (limited by architecture; e.g., not supported on RTX 2060 Super). If errors occur during runtime, disable this feature — the speed impact is minimal.5. Resolution settings: use default for local runs; lower if you encounter out-of-memory errors. Can be increased slightly for online runs. A built-in image scaling node prevents lag from oversized input images.6. Inference steps (optimized for Wan2.2): - High-noise model: 2 steps (motion control) - Low-noise model: 4 steps (detail control) This gives the best balance of quality and speed. Example: 5s video takes ~6 minutes on an RTX 5060 Ti 16GB.7. Prompts: To use custom prompts, disconnect the corresponding node and enter text manually based on the image content.8. VRAM/ROM cleanup node: Enable when your device is under heavy load to reduce memory pressure.9. Frame interpolation: Automatically upsamples video from 16fps to 32fps, fast and high-quality.--- Model Links- Wan2.2-Remix: https://civitai.com/models/2003153/wan22-remix-t2vandi2v?modelVersionId=2567309- DaSiWa: https://civitai.com/models/1981116/dasiwa-wan-22-i2v-14b-or-lightspeed-or-safetensors?modelVersionId=2555640This workflow is available for free online testing; download it for local use if you find it useful:Use the workflow online: https://www.runninghub.ai/post/2016068464221364225/?inviteCode=rh-v1443Generate a group photo: https://www.runninghub.ai/ai-detail/2015758255749865474/?inviteCode=rh-v1443
Wan 2.2 – HuMo + SVI Pro
This workflow combines Wan 2.2 SVI Pro with HuMo. It allows you to create long speech sequences with non-repeating animations (Which, for example, is a problem with Infinite Talk). You can load an image and an audio file with voice and then animate them. It's also possible to continue an existing video or, for example, extend another video with an audio speech sequence, as in my example video.For anyone who, for whatever reason, can't find the link for the missing nodes in the workflow (the big red box), here's the link: https://github.com/drozbay/WanExperimentsYou'll need to install it yourself using "git clone"Installation is at your own risk. However, I had no problems with Linux.IMPORTANT:If you want to expand an video with an talking sequence!Let's assume you have an SVI video that you want to expand. The video lasts 20 seconds. After 20 seconds the character should speak. Now you have to load an audio file where there is no talking sound for the first 20 seconds (music is filtered out) and start your voice sequence after these 20 seconds. This workflow cannot synchronize existing videos. It can only expand the whole thing after.
Wan First Last Frame I2V 4090
if you want to directly use this workflow without any waisting of time for finding the Models and setting - just click on the link to join my free to use workflow for first-last frame image to video generation workflow, click hereWan 2.2 First Last Frame I2V

Infinite AI
Infinite Talk AI single image

Vid2Vid Batch Upscale and Interpolation
Super basic but effective workflow. Dump all the videos you want upscaled, interpolated, or both into a folder and then add the same number of prompts to the queue as you have files in that folder. That's it.GIMM-VFI in my experience has much better results than RIFE.

Stable Video Infinity 2 1080p 60 FPS ComfyUI Workflow for Wan 2.2 I2V by Smittie
Smittie's SVI2 1080p 60 FPS WorkflowDescriptionWith this workflow you can generate a longer video in 1080p and 60 FPS without color or motion mismatch between the video segments (or choose cross-fade or jump-cut as transition) and inject anchor images (not end images) as further detailed guidance. You can also continue videos of ANY length (series, movies, etc.) without running into RAM issues.If you just want to use I2V or continue videos that are only a few seconds long, then you can still use workflow v4. This one doesn't require the ComfyUI-Terminal node.At least 16 GB of VRAM recommended, but with more quantized versions of the Wan 2.2 I2V diffusion models you can go even lower. This workflow was tested with 24 GB of VRAM and 64 GB of RAM.Install InstructionsThose are specific to the workflow version. Download a workflow and do what the "Initial Setup" note says.Video InstructionsIf you don't know what to do, you can watch the Stable Video Infinity Tutorial by AI Search. He works with a different workflow, which I have built upon.AcknowledgementMost credits goes to the Stable Video Infinity, Lightning, Wan, ffmpeg, ComfyUI and CivitAI team, as well as kijai, AI Search, darksidewalker, Joviex, GACLove, jeankassio and Firetheft. Thank you guys!
Long videos with full control - Wan 2.2 I2V (SVI 2 Pro). Individual LoRa, multiple reference images and more
This workflow focused on ease of use and powerful features for creating segmented videos.Features:Create unlimited videos beyond Wan 2.2 capabilities, thanks to SVI 2.0 proSave/load generated videos in raw format to continue further generation. Start from where you're ended, or even use different base model for the rest of the video. No quality degradation. Presumably saves RAM on very long videosAdd individual LoRa for each new video segmentChose different reference images for each video segment. It can introduce model to hidden assets/characters, that aren't visible on the start image. No LoRa required!Precisely control every video segment: prompt, length, seed. Check for perfect stitch with previous generation only, no need to search through entire videoUpscale and interpolate final resultBased on kijai's SVI 2.0 workflow:https://github.com/user-attachments/files/24359648/wan22_SVI_Pro_native_example_KJ.jsonNew custom nodes were made for saving latents of a video (Save Wan Video Latent) and loading from "output" folder (Load Wan Video Latent). If you can't install them with comfy manager, you can get them manually:https://github.com/heresyCoder/ComfyUI-WanVideo-LatentIOVersion 2.0New features:Refined design. Much less visual clutterNow saving the last image of a section. For better navigation between outputsGreatly reduced excessive video encoding for unchanged segmentsAdded fast action buttons for easier activation/deactivation of groupsOthers:Fixed flow order: previews now showing immediately after generationFrieren with a mimic example was made using multiple input images. You can find them in the image gallery of v2.0
Wan 2.2 Video Subgraph [I2V, T2V, I2V2I, V2I]
Wan 2.2 Video Subgraph with all your video creation modes in one simple and easy tool!Image to Video (start image only)Text to Video (no input images)Image to Image Video (start and end images)Video to Image (end image only)Runs with Wan 2.2 14B GGUF models and easily runs on 12 GB GPU.BASIC USAGEThe Subgraph is designed to make your video generating easy. Basically connect an image to either the start image, the end image, both, or neither. Adjust parameters as needed (described below), enter your prompt and optional negative prompt, and run it.INPUTSstart_image, end_image: Connect your loaded or generated image(s) here. Make sure ones you want to use are enabled in Parameters.PARAMETERSstart_image_enable, end_image_enable: For an input image to be used its respective toggle must also be enabled (true). Any disconnected input image or one that sends a Null will automatically be treated as disabled (not enabled) regardless of the toggle. Disabled images will be ignored and not used at all in generations. These switches allow you to easily toggle generation modes without having to disconnect the image loaders.Mode start_image end_image I2V Enabled Disabled I2V2I Enabled Enabled V2I Disabled Enabled T2V Disabled Disabledduration_seconds: Output video length in seconds. No need to manually calculate total frames. That's what we have computers for.fps: Frames Per Second. Wan 2.2 generally outputs at 16 fps, though sometimes 24 fps. Changing this will not change how it generates the video, just how fast it looks. You can easily alter a saved video fps if needed.video_size: Video will be size x size, adjusted for aspect_ratio, keeping as close to size ^ 2 total pixels as it can. So a video_size of 512 would be 1/4 megapixel (MP).aspect_ratio: If you're using a start or end image you should select that here so the output matches your input. You can use a different aspect_ratio but it will crop the image to fit. For T2V you likely want to select a specific aspect_ratio. Though if you have a connected but disabled image you should be able to use it for aspect ratio still.video_steps: With the Lightning Loras enabled they are designed for 4 steps. That will give you okay quality in many cases and will be the fastest. I generally use 8 as a better quality that's not too slow. 10 or 12 may help with more complex/busy scenes.video_swap_%: This is where generation will switch from high noise (placement, motion) to low noise (details). 50% is a good default.cfg: Per the usual. 1.0 is the fastest but may ignore your negative prompt. Still works well.sigma_shift: 5.0 seems a safe setting when using the Lightning Loras.seed, control_after_generate: Standard seed settings.lightning_lora_enable: True to use the Lightning Loras, false to bypass them. If you disable them you will likely need to raise your video_steps to at least 20, cfg to 3.5, sigma_shift to 8.0, as starting points. However I haven't done well getting good results with them disabled.clip_vision_enable: This provides the model with additional info about your image(s). This was more needed in Wan 2.1 but still usable here. Any disabled/missing image will automatically be ignored for this (so it won't add noise) but you can force it off here if you wish. Disabling may also save you a little VRAM if trying to run on tighter resources.

Wan 2.2 Workflow
a little edit of huchukato's workflowadded muter to Qwen-VL nodes
WAN2.2 First Frame - Last Frame
User friendly with minimalism style, no useless nodes.Workflow use special nodes:- Wan Cache Optimizer- Frame Interpolation (RIFE VFI)1) Wan Cache Optimizer - Speeds up WAN2.2 generation almost twice (detailed instructions inside). 2) To install other missing nodes use (Manager -> Install missing Custom Nodes)3) other instructions inside workflow
Consistent SVI Auto-Prompt 12-Second Long Video Workflow
InstructionsThis workflow uses SVI to generate 12-second long videos. It adopts the remix+dasiwa model combination, boasting high consistency and dynamic effects. An end-frame restoration node is also added to support manual video extension, and it can automatically generate prompts.Before use, you can input your required content in the Overall Prompt Settings. It utilizes Qwen3VL inference, and you can select the model size based on your needs. For precise manual control of prompts, disable the auto-prompt function and disconnect the segmented prompt links to enter content manually.To continue extending the video, you can use the original end frame or the end frame after face restoration (with the initial image as the face reference). Note that face restoration may occasionally fail, and the Reactor node is used for this feature.If an acceleration error occurs during local runtime, disable the acceleration—this will have a limited impact.Blue boxes indicate adjustable sections; parameters of other parts have been verified. Test them on your own if necessary.This workflow is available for free online testing. Download it for local use only if it meets your needs.Access address: https://www.runninghub.ai/post/2017490578111467522/?inviteCode=rh-v1443Get 1000 points for free upon registration, plus 100 points daily for logging in! Each run consumes 50 points—enjoy free access to the 4090 GPU power!Credits & Model Download Links:DaSiWa WAN 2.2 I2V 14B:https://civitai.com/models/1981116/dasiwa-wan-22-i2v-14b-or-lightspeed-or-safetensors?modelVersionId=2555640Wan2.2-Remix:https://civitai.com/models/2003153/wan22-remix-t2vandi2v?modelVersionId=2567309
WAN 2.2 i2v workflow for LONG videos - SVI + GGUF + UPSCALING!
This is a clean and concise workflow for ComfyUI that allows you to generate longer videos by chaining together up to 4 separate clips.V3.0 now includes SVI for better consistency in longer videos!Note: Full instructions, advice, and links to models can be found in the note in the workflow itself.This workflow is based on my clean 2+2[+2] lightning workflow that can be found here:https://civitai.com/models/2194801/simple-wan-22-i2v-60-fps-comfyui-workflow-4-steps-2-or-3-ksamplers-last-frame-option-gguf-and-upscalerYou can use this workflow to generate a single WAN 2.2 video or you can have it chain up to 3 additional videos based on the final frame of the previous clip. In this way you can create longer videos, with distinct changes in action or framing without needing to generate the whole thing in one go. Simply fine tune the first clip with the others disabled until you are happy. Then don't change that clip and move on to clip 2. ComfyUI won't spend time regenerating the earlier clips each time you want to tune the next one!Please consider tagging this as a resource you used if you generate anything with it and upload it here. I'd love to see what you're making with the tool!

WAN 2.2 4-Stage SVI Promptorama for Nice Long Videos
See the bottom for issues with Lora Manager syntax issues and red CRT node(s).This is a 4 stage workflow for WAN 2.2 that uses SVI Pro nodes to seamlessly transition between each 81 frame generation. Each generation can use unique LoRAs. Prompts and associated LoRAs are saved in groups and switched together - once they are set, all that is needed to select the appropriate COLOR group and DIRECTIONAL subgroup. Set up your scenes and access them at your leisure, without the constant annoying and error-prone mix and match. The outgoing latent is saved so you can continue the generation indefinitely on subsequent runs. A 5th stage is included for FLF, to create an infinite loop. This stage isn’t as good as my other FLF workflows yet, not even close, but it is there.The workflow uses WRAPPER nodes only, and LoRA Manager is required- alternate LoRA loaders can be substituted in each stage if needed-all data up to that point is LoRA syntax switched as strings. Triple kSampler and full base model loader is included as alternate inference stage.v2 info:This here v2 is what v1 should have been. Apologies to anyone who tried to use the dumpster-fire that was v1. Major bugs zapped. Much cleaner and easier to follow. The stages now read from left to right: brown, red, yellow, cyan, with the optional green looping stage down below. This works, but not nearly as well as it can when completed. I haven’t added the cleanup and blending that is part of the dedicated SVI FLF workflow yet, so if you want to try it out, save the 4-stage merge as well in case it sucks.Here’s what is improved, anything referenced here supersedes information from v1 below:No more radio button toggles. Orientation is automatic, from the input and the input first frame selection is done from the dark blue FAST GROUP MUTER. Can be drag-drop image, last frame from video PATH, or the last frame of a folder (if you are saving your output as frames). This also uses a PATH but you only enter your master frame folder once in the purple string node- this will set the folder so saving as frames will go to a folder named automatically from your input image, you call this folder by entering just the folder name in the frame loader group.Continue from latent is fixed. It has its own switch. I didn’t link this with the last saved folder however (in case you want to do something out of order)- make sure to enter the folder name that was created by the last run so it grabs the appropriate previous frame for the anchor when you continue from latent. Don’t forget to specify a latent directory, you’ll get an error with my paths.LoRAs are now in ONE subgraph instead of TWO. That was stupid of me. Well, I did it because they were originally all loaders instead of string nodes, which made everything crawl, and it was a pain in the ass to join them after I fixed it. But they are together now as they should be. The slots are the same exact layout as the prompts on the main graph (four colors, four groups per color) and H/L are next to each other, with high on the left and low on the right. Use one of the loader nodes on either side for autocomplete and thumbnails, then copy the syntax into the appropriate slots.I’ve added a bunch of new prompt sets, I think maybe only five empty spots are left, not counting the temporary experimenting set on the bottom left. Don’t forget to check the syntax of the strings - I still have a bunch of renamed files on my end from before I started using the LoRA Manager.TRIPLE KSAMPLER nodes are now included, they have their own inference subgraphs, along with a BASE model loader in case you want to use it. It works great, but it’s slow, so I’ve bypassed them by default. Just swap out the subgraphs if you want to use them. Base model can be toggled on with a switch.Upscale and interpolation group is included. Currently it’s linked to the output of stage 4, not the loop. FYI. Make sure you know what you’re doing if you enable these. Without good memory management, this is a one-way ticket to OOM. Aside from a few RAM purges, that is up to you. There is a 4090 specific management node as well. Obviously don’t use that if you misplaced your 4090.NAG is now incorporated - using it necessitates using the cached text encode node, as its the only one that has the separate embed outputs that NAG needs.I probably mentioned this below, but make sure to go through all of the green string and concatenate nodes to align everything with your comfy directory setup. All of the string nodes at the top too. Anything with a string I guess. Or just run it and fix the errors as they pop up.——————————ORIGINAL v1 DESCRIPTION BELOW————Ok, I've finally got this somewhat presentable for sharing. There are plenty of SVI workflows posted by now. Most of them better than mine, I'm sure. I really like SVI though, so the more the merrier. The main idea here is to automate the switching of the prompts and LoRAs, so you can just pick a preset scenario and crank it out. No typing, no selecting from drop-downs, no oh shit look what I did they're all backwards type scenarios. You should definitely be proficient with comfy and WAN before trying SVI- do not jump straight into this stuff if you're getting started. You will lose hair. It's still pretty messy, and it sure as hell isn't one of these magnificent beasts. My starting point was this, which is great and a much easier intro to SVI if that is what you need. But it's now my main WF, and I'm really pleased with the way it came out. Switching four prompts and four LoRAs independently is seriously annoying.Here are the main features:Each stage gets it's own set of prompts- you can pick from one of 16 sets (I have only completed 7 of them so far, the rest are currently empty). You only need to use TWO switches to do this. You pick one of the colors- brown, red, yellow or cyan. These are the big blocks with four sets in each of them. Then you pick a number- you don't have to worry about the indices, I have labeled them Top Right, Top Left, Bot Right, Bot Left so it should be clear enough to pick a set within a color group. Selection is done with the two Fast Group Muter nodes. I'm sure that that if I add any updates to this WF it will have more slots filled in. It is annoying to get a group all set and locked in, but once it's done, it's done.You do NOT need to put image quality or SVI-specific motion prompts into the sets- I've already done that. It happens in the stages themselves. If you do need to change any of that, look at the two concats that take the GET nodes and go to the T5 encoder. Each stage has them. That's where you can put specific transition/picture quality stuff. So keep your prompts limited to actions and descriptions.Here's the nice part. Setting your prompt also sets your LoRAs. So you only need to do it once for every set you make. Take a journey down into the subgraph to configure these. The groups are laid out as exact copies of the promptage, so just throw the syntax into the appropriate nodes. All of the sub-subgraphs were initially Manager loaders, but this caused huge lag, so they are strings now. I did put in loaders on the side so if you need previews and auto-complete, do it in there and copy your string to the set. I took a snapshot of filtered 2.2 LoRAs and popped it into a load image node- I suggest you do the same, as it is very helpful when setting up your groups if you've got a bunch of thumbnails of exactly what you have. Of course you don't have to use the LManager- the data is strings until it gets to the stages, that's where you would change loaders.You can start with an image or a frame from a video with the INPUT radio button.To continue from the last saved latent in your latent directory, click the USE LAST LATENT radio button. Obviously you need to have one saved first, default directory is 'latents' in your comfy output folder. I'm still working on this stage- it might be buggy- if the output starts from the original frame instead of the last frame, just grab the frame you want and put it in the anchor spot of the first SVI node and make sure the latent gets to the 'prev_latent' input. This spot is normally empty in a first-run. I'll get this straightened out if it's not working right, and I'm going to add an option to embed frames from an already-encoded video like you can with my SVI FLF workflow, so you can continue straight from a video (and get motion data instead of just grabbing a frame, which is the point of SVI).The default model is https://civitai.com/models/2053259?modelVersionId=2477539 I really like this one, great camera prompting. Then there is SVI PRO of course. If you want to use full models with lightning LoRAs, there are loaders in there for them. Disabled by default. Strength for lightning and SVI is set at the top left with all the loaders. Oh, don't forget the T5 encoder that works with wrapper. It's a naughty encoder.I've got my own preferred resolutions pre-set with a switch and an aspect ratio flipper, you can ditch all this if it irks you. Resize input goes through Contrast Adaptive Sharpening. This is really important. I highly suggest you try it. I guarantee you that half of your generation faceplants are from garbage input. Ask me how I know. CAS won't fix garbage, but what it does fix is the weird blurring you get sometimes from resizing. I've put a comparison node in there so you can slide to the middle and have one hand free to slap your forehead.Uhh what else is there... oh filenames, check the string nodes and concats, set to your preferred filing, prefix, suffix etc. If you want to save straight to video you can, but I'd advise saving frames. This is default- makes a unique folder (iterated int suffix to avoid saving in a previous folder, the number doesn't mean anything). A video is set to save at the end, but it is tagged at as a preview, with a high crf.Unfortunately the demands of this setup necessitate the exclusion of an upscale and interpolation stage. You can add it, but it requires a lot of extra offloading and purges that can screw up your next generation. I've offloaded that stage to a different machine. Mac Studio with M2 Ultra actually handles it great, I was surprised. 4x upscale models can freak it out with huge batches, but for the most part it works great. But I digress. Point is, output is raw WAN.Stages 1, 2, 3 have their own previews, the last preview is concatenated. The 1+2, 1+2+3, etc. previews are there but hidden and minimized in their stage groups. Too many previews.Is that everything? Ah yes, bottom left prompt box has LoRA loaders next to it (will give you preview thumbs). That's there so you can do your experimental setups without going into the subgraph, play around, get it nailed down, then copy it to an open slot.Obviously, by now, this is using WRAPPER nodes and LoRA Manager, 13 custom node packs in all. That's not a lot. Get all of them. If an idiot like me has a node, there is no reason at all why a genius like you does not. Sometimes you can get away with substituting core nodes, sometimes you can't. Some people actually know what they are doing. I hope to be one of those people when I grow up.There are copious notes in the WF. Anything noteworthy has a note. Please do let me know if you use this and encounter bugs. I love being embarrassed. And it's hard to debug every permutation of every setting, so there are bound to be landmines in here.Oh did I mention that this workflow is a monster? It will spit out 309 frames. I run comfy on a Cray X-MP with a neural net processor, a learning computer. But it gets so hot when I run this that I can't even sit on the seats. You have been warned: do not sit on the computer - you will get burned.128GB of RAM will get you through safely. You'll probably have a few percent left over at the end, but unload what you can first. Definitely turn off defender, firewalls, and anti-virus stuff whenever using any of my workflows. They suck RAM like vacuums.Try VRAM too. You need some of that, but not as much as the RAM. If you are one of those GGUF pussies, I can't help you. Go away.If you have red CRT nodes, check to see if you have the latest version- it has a problem with updates so you may need to uninstall/reinstall. If CRT is up to date and the 'load last image' node shows up as red, it's because the association between the old version of the node and the new one is broken. That can be fixed by grabbing a fresh node of the same name (or any equivalent node from wherever you like) and replacing it manually. As a general note for anyone still learning the ropes, don't forget that when you open a new WF to a sea of red, many times it's just a matter of throwing in a node that you already have. Stuff like float/INT conversion, math expressions, resizing, batches and lists... most can be substituted with core nodes. I think KJ has a load from folder that may work as an alternative to the CRT one. Not that KJ is core, but a lot more people have it. Also CRT is one of those packs that loves to upgrade numpy, which will screw up stuff like nunchaku and reActor. I wrote a little .bat to quickly downgrade to numpy<2.0 after updates. That's handy if you have the same problem.On the recent update to Lora Manager - If you have the most recent update, you can no longer pass a string of syntax into the string input of the loader. As the WF is configured, this will result in nothing being loaded. However, the updated nodes accommodate the change with a new node called WanVideo Lora Select From Text (LoraManager). All you need to do is take the string of syntax that comes out of the GET nodes (L1H, L1L, L2H, etc.) and move it from the loader string input to the 'lora_syntax' input of the new node. Connect the 'lora' output of the new node to the 'prev_lora' input of the loader. Not a huge hassle, just bridge all the loaders and you're golden.*

AI Toolkit Wan LoRA Training Dataset Workflow (Painter I2V)
This workflow is designed to generate training video datasets for Wan LoRA training using AI Toolkit, not for showcase or cinematic video generation.It uses Painter I2V to add minimal, natural motion to still images, producing short video clips suitable for LoRA training.The workflow supports batch processing and automatically generates caption text files via LM Studio (local VLM).Caption generation requires LM Studio running locally with a compatible vision-language model.Model selection and LM Studio setup are outside the scope of this workflow.Images are resized in two stages: first to reduce VLM load during captioning, then fixed to 512×768, which is the recommended video resolution for AI Toolkit training.⚠️ VRAM usage is very high. Due to Wan2.2 I2V, Painter I2V, and dual noise sampling, even 4Q GGUF models can push an RTX 5090 close to its VRAM limits.

My Simple NSFW WAN2.2 I2V Workflow + Upscale + Upframe
Very simple, easy to see, easy to use, the design is very humanUNET: https://huggingface.co/QuantStack/Wan2.2-I2V-A14B-GGUF/tree/mainCLIP: https://huggingface.co/Comfy-Org/Wan_2.1_ComfyUI_repackaged/blob/main/split_files/text_encoders/umt5_xxl_fp8_e4m3fn_scaled.safetensorsVAE: https://huggingface.co/Comfy-Org/Wan_2.2_ComfyUI_Repackaged/blob/main/split_files/vae/wan_2.1_vae.safetensorsLIGHTNING LORAS: https://civitai.com/models/1585622/lightning-lora-massive-speed-up-for-wan21-wan22-made-by-lightx2v-kijaiBLINK LORAS: https://civarchive.com/search?q=Blink&rating=allUPSCALE MODEL: https://huggingface.co/dtarnow/UPscaler/blob/main/RealESRGAN_x2plus.pth
WAN 2.2 SVI Pro 2.0 I2V for 12GB VRAM Multi_anchor
Modified version of [SVI Pro 2.0 for Low VRAM (12GB)](https://civitai.com/models/2305587/wan-22-svi-pro-20-i2v-for-12gb-vram-different-loras-per-stageoptimized-for-speed)This workflow allowed to set multi anchor image for each clip.By using a different image as the anchor, you can visually indicate elements initially hidden from view (such as a person's back or beneath clothing) without relying on prompts.Additionally, you can enhance the prompt's effectiveness by anchoring appropriate images to each scene. However, as these are not keyframes, they will not be identical to the anchor images; unlike FLF2V, this method allows for rapid creation.(For example with RTX3060-12GB, 480x832 5sec. video was made within 5 min.)Extend version : use video instead of first image, and convine.(Small modification : "DRAFT" switch added. This is for creating draft videos at high speed by scaling down to half size.)Anchor images can be treated like simple loras.The frame does not perfectly match the image, but this allows for smooth screen transitions.However, as it is merely a reference image, it is necessary to guide it using prompts.アンカー画像は簡易なローラのように扱えます。フレームは画像と完全に一致しませんが、逆にこれにより滑らかな画面遷移が可能になります。ただし、単なる参照画像であるため、プロンプトを用いて誘導する必要があります。V1.01 : some japanese text were replaced to english.V1.1 : I have modified the process to cut and save the first frame of the video, as anchor images may occasionally be included at the beginning of the video.(This problemis not occer in extend version.)V1.2 : I have changed the first image to converting 6-frame video clip. This addresses the issue where the beginning of the generated video appeared strange. (This issue is not for the extended version)V1.3 : Experimental: I have enabled the option that can input of anchor images as multiple frames (1–4 max). This allows adjustment of the anchor's influence.V 1.3.1 : The abobe option was deleted, because it is no effect.
Dasiwa+V9+Painter I2V Image-to-Video Auto Prompt Workflow V1 (Anime Enhanced Edition)
You can click on the link below and try it out directly. If the effect is good, you can deploy it locally https://www.runninghub.cn/post/2011778743831896065/?inviteCode=rh-v1121Fan benefits, register to get 1000 points, daily login 100 points, play 4090! Experience the super power of 48G!B-site video: https://www.bilibili.com/video/BV1NzkwBXECG/Knowledge Planet: https://t.zsxq.com/7F90AGraphic tutorial: https://t.zsxq.com/lNK8vThe workflow is very simple to use, and I have uploaded a tutorial on how to use it on YouTube. You can try it out and follow the tutorial and Civitai's workflow to easily reproduce the results. Thank you. If you have any other questions, please leave a comment in the comment sectionThis tutorial is very important, not watching it will surely lead to a lot of problems! Watch the video tutorial before trying !!!! Very important! Especially a key point at the end!

(Loop - Anime Edition) SVI+2+Pro+Dasiwa+V9 Long Video Manual Prompt Dynamic Enhancement Edition V1+
You can click on the link below and try it out directly. If the effect is good, you can deploy it locally https://www.runninghub.cn/post/2011772862205534209/?inviteCode=rh-v1121Fan benefits, register to get 1000 points, daily login 100 points, play 4090! Experience the super power of 48G!B-site video: https://www.bilibili.com/video/BV1NzkwBXECG/Knowledge Planet: https://t.zsxq.com/7F90AGraphic tutorial: https://t.zsxq.com/lNK8vThe workflow is very simple to use, and I have uploaded a tutorial on how to use it on YouTube. You can try it out and follow the tutorial and Civitai's workflow to easily reproduce the results. Thank you. If you have any other questions, please leave a comment in the comment sectionThis tutorial is very important, not watching it will surely lead to a lot of problems! Watch the video tutorial before trying !!!! Very important! Especially a key point at the end!

Wan2.2 - Anime Unlimited + 5B Uncensored Videos
You can click on the link below and try it out directly. If the effect is good, you can deploy it locally https://www.runninghub.cn/post/2011418883764260865/?inviteCode=rh-v1121Fan benefits, register to get 1000 points, daily login 100 points, play 4090! Experience the super power of 48G!B-site video: https://www.bilibili.com/video/BV1NzkwBXECG/Knowledge Planet: https://t.zsxq.com/7F90AGraphic tutorial: https://t.zsxq.com/lNK8vThe workflow is very simple to use, and I have uploaded a tutorial on how to use it on YouTube. You can try it out and follow the tutorial and Civitai's workflow to easily reproduce the results. Thank you. If you have any other questions, please leave a comment in the comment sectionThis tutorial is very important, not watching it will surely lead to a lot of problems! Watch the video tutorial before trying !!!! Very important! Especially a key point at the end!
Individual GGUF SVI2 PRO I2V workflow
v3.0There were quite a few modifications. I found a way to improve the stability of the video and applied it. I organized it in a good way, and I added a watermark function that will be needed for policy in the future.Maybe this is the last big update. It can be modified little by little. I think I'll focus more on LTX2 next time.GGUF_v2This version is an SVI based on a native workflow using GGUF.Latent save loading is no longer used. Simply load the video.Use the video and the original starting image used to create it.You need to force update or reinstall kjnode to the latest version.v2 How to UseWhen creating your first video, turn off "Continue" in "Working Mode.""Scene" is independent of the order of video creation.You can select the prompt and Lora you'll create from the pre-configured scenes.Things marked as (optional) are not required.Including a description of the photo in the Description section will help create a more consistent video.+Lora allows you to set and select a Lora that will affect the created video separately from the scene (e.g., character Lora, breasts Lora, etc.).Entering a prompt in Overwrite (option) will force the prompt to be changed to match the Scene and Lora settings. If left blank, it will be ignored.With this workflow, you don't have to specify a new prompt and Lora for each video; you can just select a pre-made one.v1Each video can be generated individually with different Lora and prompts.The Latent of each generated video is saved separately and loaded when generating the next video.★When creating your first video, disable the Next group by bypassing it.★When creating the second video, activate the Next group, load the previously created video, move the latent file created in the "output/latent" folder to the "input" folder, and refresh the workflow to load the latent file.The advantage of this workflow is that it cleanly organizes each video and starts anew. This allows for incredibly reliable video creation, step by step, and the ability to re-create any unsatisfactory results.By default, Sage Attention is disabled, so if you use it, please modify attention_mode.Set blocks_to_sawp according to your Vram situation.I'm Korean, so my English isn't very good. This is also a translation machine. No matter what you ask, they won't be able to answer.